Ultimate Guide: How to Care for Nepenthes

Nepenthes are tropical pitcher plants native to Southeast Asia. These plants are carnivorous and mainly feed on insects. They trap insects using highly modified leaves known as pitfall traps. The leaves are vase-shaped and filled with nectar, the primary digestive fluid. These plants also form great houseplants because they produce beautiful flowers and are relatively easy to care for. As long as you provide your pitcher plant with the right growing conditions, it can survive in a home environment for many years.

So, how do you care for nepenthes? In their natural environment, nepenthes usually grow in wetlands. If you plant them at home, you need to try as much as possible to mimic these conditions. Use highly nutritious potting mix and keep the soil moist all the time. Place your pitcher plant in direct light and maintain the temperature between 50oF and 70oF for better results. If you are feeding your plant with enough insects, there is no need for fertilization.

Today, we discuss everything you need to know about growing nepenthes at home and taking good care of it. Read on to find out everything you need to know. 

What Types of Nepenthes Plants Are There?

Before discussing some of the things you need to do to keep nepenthes healthy and happy, it is crucial to understand the different types of nepenthes plants.

Generally, there are highland and lowland pitcher plants. These plants grow in different settings. The highland nepenthes are primarily found in areas at least 3000 feet above sea level. This is mainly in the mountains.

Lowland nepenthes are the opposite since they mostly thrive in areas below 3000 feet above sea level. You will mostly find them in forests and open fields.

However, most nepenthes species belong to the highland type. We also have a wide range of hybrids produced artificially or naturally through crossing different nepenthes species.

Some examples of highland nepenthes include Fusca, Maxima, Alata, Sanguinea, Spathulata, and Ventricosa. Examples of lowland nepenthes include truncate, Veitchii, Gracilis, Northiana, and Bicalcarata.

Taking Care of Nepenthes

Now that you are ready to add nepenthes to your plant collection, you need to know how to care for it. Below are some guidelines to help you get started.

1. Soil and Potting

Pitcher plants usually enjoy soils with a relatively low mineral content that stay moist (not wet) for a long time. The soil must have good drainage capabilities. The simplest potting mix that works well with this plant is a mixture of equal parts of perlite and long-fibered sphagnum moss. Both of them should be readily available in your local plant nursery.

You can also grow nepenthes in a potting mix consisting of equal coconut coir and coconut fiber parts. Keep in mind that coconut products sold in many parts of the world for horticulture are often salty since they are harvested from beaches.

Therefore, it is essential to soak the coconut products in pure non-salty water a few times to eliminate the risk of salt buildup.

A potting mix.
These plants also do well in a well-draining potting mix.

Most small and medium-sized nepenthes plants will grow well in a 3”-4” diameter pot. However, larger plants will thrive in 6”-8” diameter pots. Ensure the pot you choose has plenty of drainage holes.

Repotting will only be necessary after two or three years, depending on the plant size and soil quality. The use of hard water may cause your potting mix to break down faster and turn mushy.

2. Temperature Requirements

Nepenthes are predominantly native to parts of Southeast Asia and the surrounding area. These areas are generally cool and humid, although some nepenthes species thrive in hot jungles.

These plants generally appreciate warm temperatures and relatively high humidity. Highland nepenthes grow in high altitudes and enjoy day temperatures between 75oF and 83oF with a 15oF -20oF temperature drop at night.

A nephentes plant.
These plants generally appreciate warm temperatures and relatively high humidity.

Highland nepenthes can handle a few months of relatively high temperatures but night temperatures must remain consistent for the plant’s robust growth and overall health.

For lowland nepenthes, they tend to thrive in relatively warm and humid jungle temperatures. So, if you are growing lowland nepenthes at home, you need to ensure the temperature never falls below 70oF during the day.

The ideal temperature for lowland nepenthes is between 85oF and 90oF during the day and 60oF -65oF during the night.

It means that lowland nepenthes are great candidates for terrariums and shaded porches in the relatively warm and humid tropical climates and steamy greenhouses.

Hybrid species are cozy between the lowland and highland species. Most hybrid species will do well in day temperatures ranging between 80oF to 85oF and a night temperature ranging between 50oF and 60oF.

Many hybrid species are considered intermediate and can handle a wide range of temperatures quite well.

3. Watering Requirements

Nepenthes love to remain moist, not wet. Therefore, your primary objective should be to keep the potting mix moist. These plants also do well in a well-draining potting mix and don’t like being waterlogged for too long.

You should never allow your pitcher plant to dry out completely because the results can be catastrophic. You are free to keep them in water saucers indoors but allow the excess water to evaporate completely in between watering sessions.

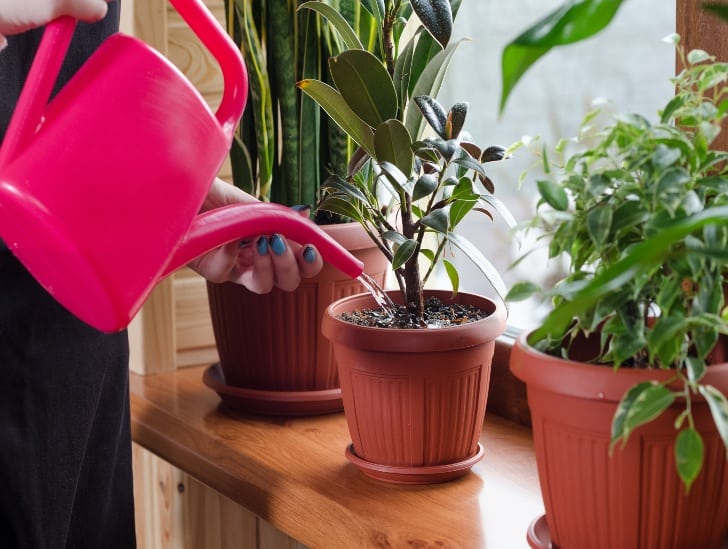
Watering the plant.
Nepenthes cannot handle low quality water.

One of the crucial factors you need to pay attention to when it comes to watering nepenthes is the water quality. Unlike other carnivorous plants, nepenthes cannot handle low quality water.

Therefore, you will want to ensure that you use rainwater for watering. If you cannot access rainwater throughout the year, use distilled or reverse osmosis water.

Try to avoid using tap water because it contains a lot of impurities that can harm your plant. Although these plants can still do fine with salty water, you need to ensure there is a minimum amount of contaminants in the water you use.

Testing your water is critical. During testing, pay close attention to the Total Dissolved Solids (TDS), which measures the amount of minerals, metals, and salts in the water. TDS is usually measured by the parts per million (PPM).

You can purchase a cheap TDS reader from your local plant store. Use the device to check the TDS score of the water you want to use in watering your nepenthes. These plants love a TDS score of between 0-10. The lower the figure, the better.

If you have pure water, you can even use it to grow sphagnum moss which is a necessity when you have pitcher plants. Nepenthes love growing in sphagnum moss, and it is so beautiful to the eyes.

4. Light Requirements

Pitcher plants will do well with a few hours of direct sunlight and the rest of the day in relatively bright indirect light. A sunny east or south-facing window will be the perfect spot if you are growing them indoors.

Plant placed near the window.
Pitcher plants will do well with a few hours of direct sunlight and the rest of the day in relatively bright indirect light.

Shade cloth from 50% to about 70% is the best option for greenhouses. These plants also do well under artificial grow lights. The only thing you need to do is ensure your artificial lights remain on for at least 12 hours a day.

The plant should also receive at least eight hours of total darkness to allow it enough time to rest.

5. Fertilizer and Feeding

The safest and most recommended way to provide nutrients to your pitcher plant is to feed it through its pitchers. The good thing is that its pitchers will accept almost all types of insects that fit inside it.

However, you need to avoid feeding it with non-insect organisms and slugs because they can cause the pitcher to die. Consider purchasing dried crickets from your local plant store. These insects make a perfect food source.

As long as your plant is getting enough food, there is no need to fertilize it but feel free to place a small amount of half-strength fertilizer in the pitcher once in a while. The fertilizer can be a single osmocote pellet.

6. Growing Location

You can successfully grow nepenthes both indoors and outdoors. You can also grow them in a greenhouse, windowsill, or terrarium.

But you need to remember that each growing spot poses different challenges. Therefore, you need to ensure the light, humidity, and temperature requirements are met at all times.

Choose lowlanders or highlanders because each set requires unique growing conditions. If you want to mix and match, then go for the hybrid species which can survive in a wide range of growing conditions.

A nephentes plant.
You can successfully grow nepenthes both indoors and outdoors.

If you are growing lowlanders and highlanders together in a greenhouse, ensure the temperatures are slightly higher to accommodate both sets of plants.

For instance, temperatures during the day should be maintained at 75oF to 85oF to help lowlanders thrive. Nighttime temperatures should be maintained at around 65oF.

7. Pruning

The pitcher plant can sometimes become too crowded when provided with the right growing conditions. When your plant becomes bushy, you need to prune it to allow new growth.

Pruning should only be down in winter when the pitchers and leaves of the plant start to brown and wither. Feel free to trim them down to the rosette.

Bottom Line

Caring for nepenthes isn’t a difficult task if you are careful and patient. In fact, these plants only take a few months to adapt and settle in. However, they still require a certain amount of attention to thrive and be happy. If you follow the tips outlined above, you will be on your way to growing happy and healthy pitcher plants in no time.
How To Make A Beautiful Tropical Terrarium?

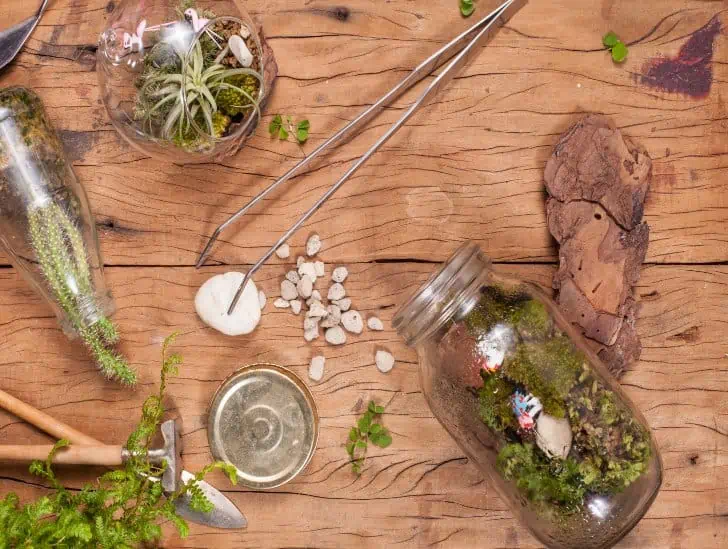
Terrarium material set.

What do you think of when you hear the word “Tropical“? Palm trees, bright flowers, exotic animals? A Tropical Terrarium is a miniature version of all these things. This is a great way to bring the tropics to your home. They are easy to make and look beautiful in any home or office space. Not only are they beautiful, but they also serve as perfect decorative pieces for any room.

So, how can you create a tropical terrarium at home? It’s important that you have all of the necessary supplies and materials on hand. Start by gathering any containers you may have, such as glass jars or bowls. Then gather some moss and pebbles for the base of your terrarium. After adding the right potting soil to your container, find a decorative tropical plant suitable for an indoor setting like tropical plants like ferns, bromeliads dracaena or anthuriums. Remove any excess soil from around their roots before planting them in your new terrarium. Mist lightly and watch your tropical paradise thrive.

Steps to creating a tropical terrarium

Creating a tropical terrarium is easier said than done. However, by following these simple steps, you will be able to create your very own tropical terrarium in no time.

1.      Gathering necessary supplies and materials

The first step is to gather all of the necessary supplies and materials that you will need for your project. These items include:

Tools needed for making your own terrarium.
Gather all of the necessary supplies and materials that you will need.
  • Terrarium container
  • Pebbles or gravel
  • Activated charcoal
  • Moss
  • Potting soil
  • Tropical indoor plants
  • Decorative rocks
  • Fertilizer
  • Misting spray bottle
  • Top dressing soil

2.      Tools needed:

  • Scissors – A pair of scissors is needed to cut through the plant’s leaves and also remove excess dirt.
  • Gloves – Gloves are vital because some chemicals can be harmful to your hands if you do not wear them. Also, sometimes plants may have thorns that could prick your fingers.
  • Water spray bottle – This tool is used to mist the plants in order to keep them moist and thriving in a closed environment.
  • Long-handled spoon – A long-handled spoon is vital to help mix the soil without getting it on yourself or spilling it everywhere.
  • Tweezers – If any plants need to be moved or removed from the terrarium, tweezers will come in handy to do so without damaging the other plants.

Now that you have all of the necessary supplies, it is time to begin constructing your terrarium.

3.      Selecting ideal Terrarium container

Selecting a good terrarium container cannot be underrated when creating a tropical terrarium. The best containers are ones that have a wide opening at the top and bottom so you can easily reach in and tend to your plants. Look for sturdy containers made from glass, plastic or metal.

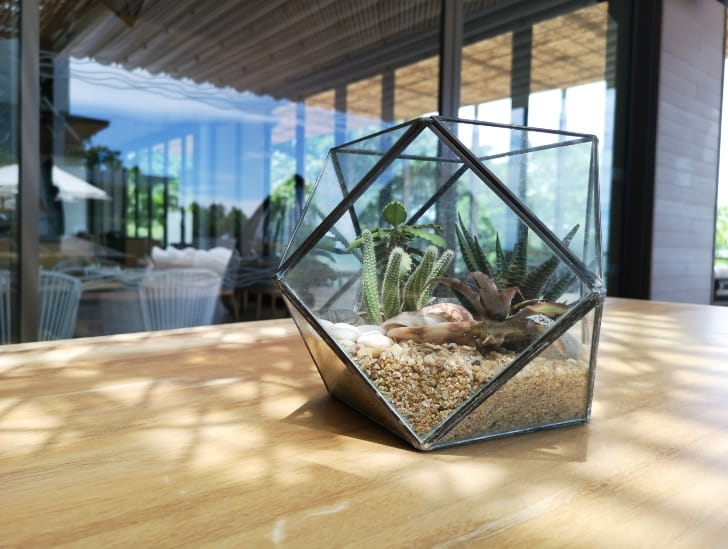
Glass hexagon shaped terrarium.
The best containers are ones that have a wide opening at the top and bottom.

Avoid thin materials like paper or cardboard as they will not hold up against the moisture of the terrarium. Remember, the terrarium will be creating its own mini-climate, so make sure the container can handle the humidity.

4.      Cleaning your Terrarium container

Before adding any potting soil or plants to your terrarium, it is important to clean and sterilize the container. This can be done by using a bleach solution (one part bleach to nine parts water) or by using a commercial cleaner. Be sure to rinse the container well afterwards to remove any traces of bleach or cleaner.

This step is necessary to avoid any residue or dirt that could possibly affect the health of your plants later on down the road. Remember, you are creating a mini-climate within the container, so everything that is put into it will affect its overall function.

5.      Identify the right location

Before you create your tropical terrarium, you need to identify the best location for the same. You will want to place your container someplace where the terrarium can receive some indirect sunlight, but not be in direct sunlight because this could lead to overheating and plant damage.

A terrarium near the window.
Place your container someplace where the terrarium can receive some indirect sunlight.

It is recommended that a spot near a window with eastern or western exposure is ideal. If you live in a hot and humid climate, you will also want to place your terrarium someplace where it will get good air circulation.

6.      Adding Pebbles or gravel to Terrarium container

The next step is adding pebbles or small rocks to your terrarium. This material helps with drainage and makes sure there are no pockets of water sitting at the bottom of the container.

Pebbles or gravel can be found at most garden supply stores and should cost very little, if anything at all. Alternatively, you can use small rocks found outdoors.

7.      Adding Activated charcoal to Terrarium container

Activated charcoal is an important material that helps remove toxins from the soil and prevents mold growth in your terrarium. This product will be placed directly on top of the pebbles or gravel layer at the bottom of your container, so make sure it is large enough to cover the pebbles or rocks.

When adding your activated charcoal, make sure it is in a layer that is thin enough for the plants roots to grow through. This

8.      Adding moss to Terrarium container

Depending on where you are planning on placing your terrarium, having moss growing inside of it can help give off an overall natural look. Moss grows naturally indoors or outdoors and should be able to thrive with little-to-no care.

There are many different types of moss that can be used in a terrarium and all can be found at most garden supply stores. Just make sure to avoid any moss that requires a lot of water or direct sunlight to grow.

9.      Prepare the soil

Once you have selected the right container and identified the best location for your terrarium, added gravel and activated charcoal, it is time to start preparing the soil. The potting soil that you select should be peat-based, as it is ideal for promoting the health of carnivorous plants.

A potting mix.
The potting soil that you select should be peat-based.

You can also add in a small amount of fertilizer to the soil mixture at this time. This will help spur plant growth and development in your terrarium. Once you have prepared the potting mix, it is time to add it into the container.

10. Stage your design

Now that the container is ready and you have added the potting soil, it is time to start staging your design. This can be done in any way that you please, but there are a few things to keep in mind.

First and foremost, make sure there is enough room for the plants to grow. You will not want to overcrowd your terrarium with too many plants at once.

If you are planting more than one plant in your terrarium, you will want to place them someplace where they can be easily seen. This is especially important for carnivorous plants because it allows people to see the unique characteristics of each plant while creating an overall natural-looking design.

11. Adding plants to Terrarium container

Now it is time to add the plants to your terrarium. When selecting plants, try to choose a variety of different types that will thrive in the same environment. You can find a list of suitable plants for terrariums online or at most garden supply stores.

Plant being transferred.
When selecting plants, try to choose a variety of different types that will thrive in the same environment.

When adding the plants, be sure to mix them up. Do not create an island of one type of plant, as this will make it difficult for the plants to flourish or grow. Remember, you are trying to create a natural-looking terrarium, not a garden.

12. Watering your  Terrarium

Since terrariums are self-contained ecosystems, the amount of watering the plants in them requires is not much at all. Just like with any plant, you will want to water them when the soil feels dry to the touch. However, you will not want to over-water your plants, as this can lead to root rot and plant death.

13. Misting Terrarium

In order for your terrarium to be a healthy and thriving environment, it is important to mist it regularly. This will help keep the humidity levels up, which is essential for allowing your plants to grow.

14. Top dressing your  Terrarium

To make sure your terrarium has an overall finished look, you should top dress it. Top dressing is the act of putting small rocks or pebbles over the soil surface of each plant in your container. This will help each plant stand out and look more natural.

Your terrarium is now ready to sit in a location that will not receive direct sunlight or much attention at all. If you are interested in adding other plants into your terrarium, you can do so by just planting them directly into the potting soil that is already inside of it.

Common Tropical Terrarium Mistakes and How to Avoid Them

Creating a tropical paradise at home is a walk in the park if you understand what it takes and the process involved. However, a slight mistake can prove detrimental to your plants. Let’s look at the most common mistakes and how to avoid them:

1. Too Much Light

Light is essential for photosynthesis, but too much of it can result in sunburn and burns in sensitive plants like anthuriums and orchids. Your tropical plant should be in a location that does not receive direct sunlight, but is instead bathed in diffused light or light from an open window.

Effects of too much sunlight.
Too much Sunlight can result in sunburn and burns in sensitive plants like anthuriums and orchids.

2. Too Little Light

If your plant does not get enough light, it will become leggy and stretched as it reaches for the sun. In addition, leaves will start to yellow and drop off. Most plants need between 6-8 hours of light per day. To ensure your plant is getting enough light, place it in a location where it will receive indirect sunlight for most of the day.

3. Overgrown Plants

In closed terrariums, plants can grow too large and will need to be cut back or pruned. Such action prevents them from falling over and taking other plants with it. This is a common issue that leads people to kill their plants because they do not know how to properly care for them.

4. Too Close to Heat Sources

Another common mistake is placing terrariums too close to heat sources, like televisions or fireplaces. This can cause the plants to dry out and die. In addition, heated air can create a convection current that disturbs the balance of moisture and humidity in the terrarium, also leading to plant death. To avoid this issue, place your plant in a location away from any heat sources.

5. Overgrown Plants

If the roots of your plants become too large for the pot over time, they will need to be transplanted into a larger container. This is not necessarily bad news as such “overgrown” plants will produce new growth and once again flourish in your terrarium.

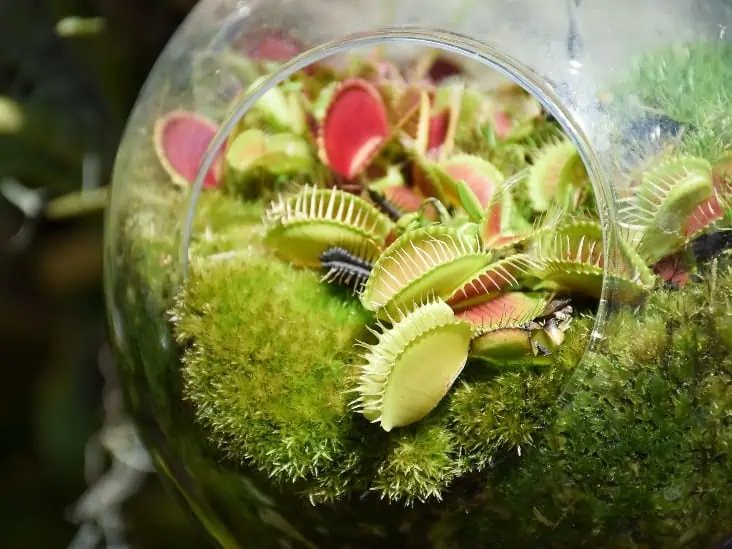
flytrap terrarium
Most plants need to be cut back and pruned to keep them from growing too large for their containers.

Most plants need to be cut back and pruned to keep them from growing too large for their containers, but cutting the plant off at the soil level will kill it. To avoid this issue, always prune off branches or leaves with a sharp knife or pruning clippers so as not to damage the stem.

6. Failure to Remove Dying Plants

If a plant in your terrarium starts to die, it is important to remove it from the pot and discard it. Leaving dying plants in your terrarium will only contaminate the soil and make it difficult for other plants to thrive.

7. Dirty Glass

If your terrarium’s glass becomes dirty, it will be difficult for you to see your plants and determine their health. To clean the glass, use a soft cloth and water to wipe away any dirt or grime.

8. Over Fertilizing

Fertilizing your plants is important for their health and growth, but over fertilizing can actually be harmful. Excessive fertilization will cause the soil to become too wet and can lead to root rot and plant death.

In addition, fertilizing your plants too often can lead to the growth of algae and moss, which can actually kill your plants. To avoid this issue, do not fertilize your plants more than three times a year.

9. Over Watering

Water is essential for the survival and happiness of all tropical and subtropical plants, but it is easy to overdo it and flood your terrarium with too much water. Over watering will cause the soil to become wet and can lead to root rot, plant death, and the growth of algae and moss.

Plant being watered.
Over watering will cause the soil to become wet and can lead to root rot, plant death, and the growth of algae and moss.

To avoid over watering your plants, wait until the top inch of soil is dry before watering again. Make sure not to splash water onto the glass as it will only make it difficult for you to see how your plants are doing.

10. Planting Succulents in Closed Terrariums

There are certain plants that do not do well in closed terrariums, like succulents. Succulents need to be exposed to air and sunlight to absorb water and grow properly, making them difficult for you to care for in a closed terrarium. If you want to include succulents in your terrarium, make sure to place it in an area where it will get plenty of sunlight.

11. Choosing the Wrong Plants

The key to a healthy, thriving tropical terrarium is choosing the right plants. It is important that you understand what type of conditions and care your plants need before purchasing them. A little research goes a long way in ensuring your plants thrive and do not die an untimely death.

Ideal plants to consider for your tropical terrarium

A tropical terrarium is not complete without a collection of tropical plants. There are many plants out there to choose from, but not all tropical plants will thrive in your terrarium.  Some notable plants you can consider for your terrarium are:

  • Biophytum sensitivum – This hardy epiphyte is ideal for tropical terrarium thanks to its low light and moisture needs. It makes a great hanging plant for your terrarium and is not likely to die or get overgrown in your small environment.
  • Asplenium nidus ‘Crispy Wave’ – While many ferns require bright, indirect sunlight, this variety thrives in areas with low lighting conditions. Asplenium nidus ‘Crispy Wave’ is ideal for your terrarium because it does not require much light to grow.
  • Neoregelia ‘Fireball’ – This bromeliad is a colorful, tropical plant that will add beauty to your terrarium. It is easy to care for and requires bright sunlight to thrive.
  • Humata heterophylla – This unusual plant is a great addition to any tropical terrarium. It does well in moist environments and does not require much light to grow.
  • Microsorum musifolium (Crocodile Fern) – This fern is perfect for your terrarium as it thrives in shaded areas with moist, but not wet soil. It does best in a humid environment and will add beauty to any terrarium.
  • Syngonium podophyllum ‘Pixie’ – As this plant does well in low light conditions, it is the perfect addition for your terrarium. If you live in a room with bright lights or direct sunlight, this plant will do well in an area where it can get some indirect light.
  • Macodes petola – This beautiful, shade-loving orchid is another great addition to your terrarium. It does best in shady areas with moisture rich soil, making it the perfect candidate for your terrarium.

Conclusion

Let’s face it; tropical terrariums area a beauty to behold. They offer a glimpse into a lush, green world where things are not as they seem. Whether you want to create a terrarium for yourself or give it as a gift, mastering the right techniques will ensure success. With a little bit of know-how, anyone can create a beautiful tropical terrarium. Just remember to choose the right plants, provide the right conditions, and be patient as your terrarium establishes itself. In no time at all, you will have a lush, green oasis to enjoy.

14 Amazing Facts You Didn’t Know About Venus Flytraps

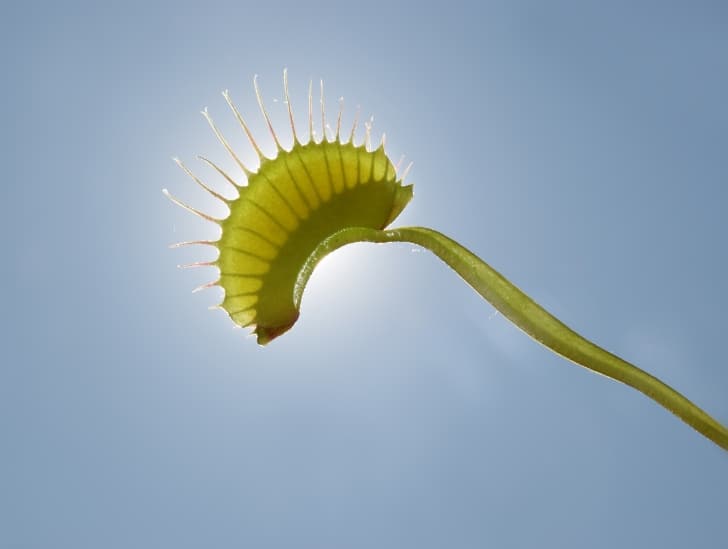
A venus flytrap under the sun.

Do you know the meaning of the word “Venus”? It means beautiful. This name is appropriate because Venus Flytraps are one of the most beautiful plants in existence! There are more than 200 types of flytraps, but only three species that are native to North America – Dionaea muscipula, Dionaea vernalis, and Dionaea ampullaria.

What are some of the most amazing facts about the venus flytrap? They can grow up to 24 inches tall and have leaves that look like a little octopus or starfish with “teeth” on them. These teeth lure insects into its mouth-like trap, where they get digested by enzymes and then absorbed as nutrients for the plant. Venus Flytraps are the only plants on earth to have a stomach and they can eat animals up to three times their size.

The flytrap stands out when it comes to its defense mechanism. This article takes a look at 10 of the most interesting facts about Venus Flytraps:

1.     Prey is Lured in With Nectar And Bright Colors

The venus flytrap  has a trap that closes quickly when triggered by prey. This plant can close its traps in half a second and the leaf will snap shut when an insect or spider crawls along its trigger hairs.

 A sweet secretion covers the leaves of this plant which lures in prey and attracts them to the flytrap. Insects are attracted to the nectar and color of the flytrap’s leaves, which makes them easy targets for their next meal.

2.     Scientists Have Created Robot Flytraps!

Did you know that scientists are working on creating robots that mimic how a flower is pollinated? They use this technology to create robots that can pollinate other plants. It sounds like something out of a science fiction movie, but it is actually happening right now.

The scientists took the principles of how a Venus flytrap works and applied it to the robot. The robot can sense when an insect is near, just like the plant does, and then it traps and eats the bug.

3.     It Takes Longer Than A Week For Larger Insects To Digest.

Insects are small enough when they get trapped inside the trap and they do not take long to digest because they are small and easy to eat for this plant.

It takes longer than a week for larger insects to digest. It can take up to two weeks for large bugs such as crickets or moths, which is why it is important not to feed your flytrap any bug that you would like back alive!

4.     Hamburgers Cause Flytraps to Rot

This plant is unique because it can go weeks without eating any food, but if you feed your plants hamburgers or other types of meat they will not be healthy and may even die.

A dying venus flytrap.
If you feed your plants hamburgers or other types of meat they will not be healthy

The digestive enzymes produced during the process of digesting an animal cannot handle fatty foods like meats so this will cause the plant to rot. This is why it is important not to feed your venus flytrap anything that you would like back alive – or else they will end up dying.

5.     It Evolved From an Early Sundew Relative

This plant may look similar to a sundew, but it is actually a relative of the early sundew. The venus flytrap evolved from the early sundew and it shares some similarities with this plant. This includes the trapping process and how they both consume insects for food.

6.     Venus Flytraps Also Glow Blue

This plant has a unique defense mechanism that not many plants have – it can glow! When under stress, such as if an insect bites the leaves of the plant when trying to digest them. This will cause venus flytraps to emit a blue light.

7.     Traps Even Catch The Occasional Frog

This plant has adapted over time and learned how to catch more than just insects. The Occasional Frog is the smallest frog in North America and they can be found near Venus flytraps.

These plants can eat up to three frogs at a time and it is not uncommon for them to catch one. 

8.     The Most Common Meal For Venus Flytraps is Not Flies

Venus Flytrap’s are Carnivorous Plants that trap and consume insects, spiders, and other small animals for food. The most common meals for these plants are bugs such as flies, but they can also catch and eat frogs, lizards and even small rodents.

Venus Flytrap with fly.
Venus Flytrap’s are Carnivorous Plants that trap and consume insects and other small animals for food.

9.     It Is The Official “State Carnivorous Plant” Of North Carolina

The venus flytrap is the official carnivorous plant of North Carolina! It has been designated as an important part of our state’s natural heritage. In fact, it is illegal to collect wild flytraps in the North Carolina because of how endangered they have become.

10.Venus Flytraps Produce Flowers

Since venus flytrap’s catch and eat animals for food, this plant has adapted over time so that it can reproduce without attracting prey. The flower looks similar to a snapdragon or other flowering plants that attract insects for pollination.

A Venus Flytrap white flower.
The flower looks similar to a snapdragon or other flowering plants that attract insects for pollination.

11.Venus Flytrap Do Not Consume Bug Pollinators

One of the most interesting facts about venus flytraps is that it uses a smart mechanism to avoid eating its pollinators. It does this by closing its trap when it detects that the insect is landing for pollination. This way, it can continue to get food without harming the insects that help it reproduce.

12.Venus Flytraps Are an Endangered Species

Venus flytraps are an endangered species and it is estimated that around 33,000 flytraps are lost each year due to urban development. This means that it takes the plant an average of three years to produce enough seeds for one new adult flytrap.

Over the years, they have become less common because of how people have been taking them from the wild. As a result, conservationists have made it illegal to take any of these plants from the wild.


13.Tap Water Is Poison for Venus Flytraps

Venus flytraps consume insects for food, and like all living things, they need water to survive. However, the water that comes out of our taps is not good for these little wonder plant.

The chlorine and fluoride that are in tap water can kill venus flytraps. As such, it is important to use distilled water for these plants.

14.Fertilizers Weaken Venus Flytraps

Since most succulent fertilizers contain high levels of nitrogen, this will actually harm venus flytraps because the plant requires low amounts of this element in order to survive. As such, you should avoid using any fertilizer that contains excess nitrogen.

Can Flytraps Be Grown At Home?

Yes, even if you do not live in North Carolina, it is possible to grow venus flytraps at home. They can be kept as potted plants and they need soil that contains plenty of peat moss or sphagnum moss.

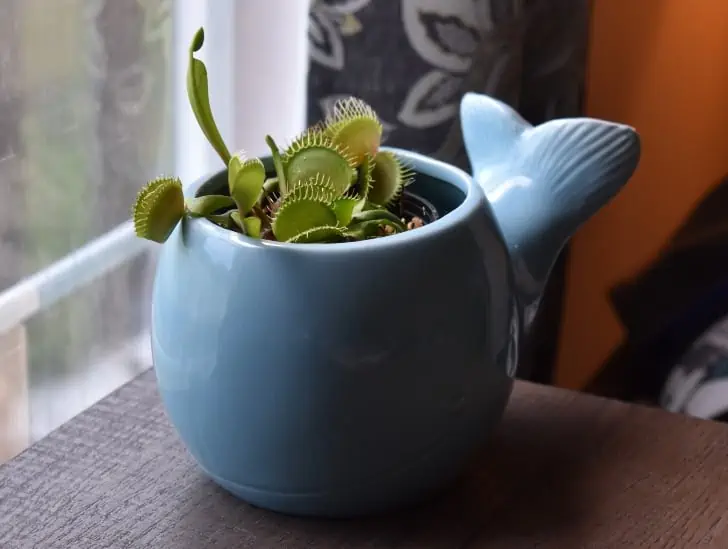
Venus Flytrap in a Whale pot.
It is possible to grow venus flytraps at home.

How big do Venus Fly Traps get?

The size a venus flytrap will get depends on how much food it has access to. Normally, they will reach a size of around six inches in width but if they are well fed, they can grow up to 12 inches wide.

Do Venus flytraps need sunlight?

Venus fly traps do need sunlight in order to photosynthesize and produce energy. However, they are very sensitive to direct sunlight. As such, it is recommended that you place these plants in an area where there is plenty of indirect light each day.

How do flytraps reproduce?

Each venus flytrap produces small white flowers during the spring and summer months. These flowers then produce seed pods that contain up to 400 seeds. The seeds will germinate once they are exposed to wet conditions for a period of two weeks.

Do Venus fly traps need soil?

Venus fly traps do not need soil to live but they do need a pot with good drainage so that they do not get waterlogged. You can use a soil-less planting mix for these plants since it will contain the peat moss and sphagnum that venus fly traps need to survive.

Can Venus Fly Traps eat humans?

Venus fly traps are carnivorous, but they cannot consume humans because of how large we are. They can only eat insects, frogs and other small prey that they find in their natural habitat.

What do Venus Fly Traps smell like?

The traps of the venus flytrap produce a sweet, fruity smell that is very attractive to insects. This scent is caused by the same chemicals that are found in bananas and strawberries. 

How big do Venus Fly Traps get?

The size a venus flytrap will get depends on how much food it has access to. Normally, they will reach a size of around six inches in width but if they are well fed, they can grow up to 12 inches wide.

How long does the Venus Flytrap wait before eating its prey?

A venus flytrap eating its prey.
It can take up to ten days for the plant to fully digest an insect.

The venus flytrap has a very slow reaction to its prey, and it can take up to ten days for the plant to fully digest an insect.

Conclusion

A venus flytrap is, no doubt, a wonder of nature. While they are not extremely common, it is possible to have them as pets or in your garden if you live in the right climate zone.

As a result, understanding how these plants work and what kind of environment they need can help keep them healthy for years to come. By avoiding things that will kill the plant, such as tap water and fertilizers, you can ensure that your Venus flytrap will thrive. Remember, these plants are carnivorous and they require a specific environment in order to survive. As such, you should do quite a bit of research before adding one as a potted plant or as part of your garden.

Ultimate Guide: How to Care for Madagascar Palm

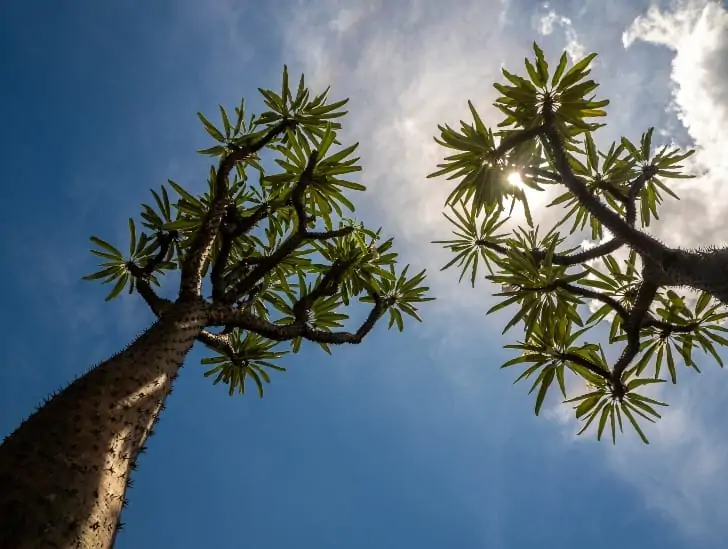
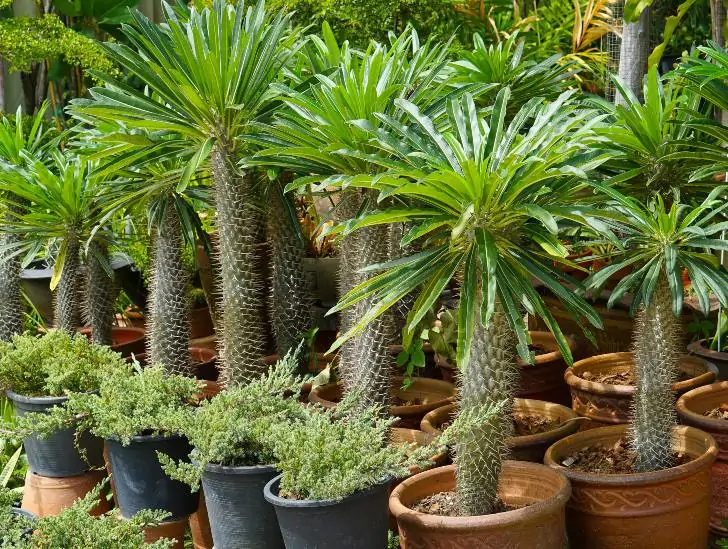
Native to Southern parts of Madagascar, the Madagascar palm is a member of the succulent family and not a “palm” tree as its name suggests. Madagascar palm is adapted to surviving in relatively warmer areas as an outdoor plant and cooler regions as an indoor plant. It grows to about six feet indoors and up to 16 feet outdoors. Its trunk is covered with thick spines that appear as shiny thorns. Madagascar palm is a low-maintenance succulent that can be an incredible addition to your home.

So, how do you care for Madagascar palm? To keep your Madagascar palm happy, have it on the dry side and only water it when the potting mix is completely dry. Like other succulents, you need to ensure the soil you use is highly porous and well-draining. For fertilizer, only feed your plant with a balanced houseplant fertilizer at the beginning of spring or summer. If possible, grow your plant in full light and relatively warm temperatures to achieve the best results. For indoor plants, position them on a west or south-facing window.

Are you planning to add Madagascar palm to your plant collection? If so, read on to find out what you need to do to keep your plant healthy and happy.

Basic Facts about the Madagascar Palm

The scientific name of Madagascar palm is Pancypodium lamerei, and it belongs to the Apocynaceae family. The succulent has a very distinct appearance, with its trunk filled with spines. It can grow to a height of up to 16 feet and 2 feet wide when provided with the right growing conditions.

When the time comes, this succulent tree will bloom throughout summer, putting on a spectacular show. Its flowers are usually white and quite large.

If you are growing the succulent indoors, position it near a west or south-facing window where it can get maximum light exposure. However, you need to remember that the plant can become tall with time. So, ensure you provide it with enough space to develop correctly. 

Madagascar Palm white flower.
Its flowers are usually white and quite large.

When planting them outdoors, it is recommended to plant them in a group but ensure they are well spaced. You should also ensure you plant them in areas far away from children since they are poisonous. Ensure no other high-maintenance plants are growing next to the Madagascar palm.

How to Care for the Madagascar Palm

Now that you have some background information about the Madagascar palm, let us highlight some things you need to do as part of the daily routine care to keep your plant happy.

1. Watering Needs

The Madagascar palm doesn’t require frequent watering because it is adapted to surviving in a relatively warmer climate. The plant is highly resistant to climatic changes and harsh weather conditions. In fact, they love the heat.

If you live in an area that experiences extreme winters, you don’t need to water your plant as often during the cold months; otherwise, you will cause root rot which is more dangerous than underwatering.

Full grown, Madagascar palm.
It grows to about six feet indoors and up to 16 feet outdoors.

Before watering a Madagascar palm, ensure the potting mix is completely dry. So, it is crucial to ensure you have a well-draining potting mix that allows water to drain out of the growing pot without damaging the plant roots.

Water your plant thoroughly during the hot summer months but stop watering completely when the leaves fall off.  When leaves fall, it means that the plant has enough water storage in its stem, and it is only looking for a way of minimizing water loss through transpiration.

In fact, one of the biggest threats to the overall health of your Madagascar palm is overwatering because it may result in root rot. It is easy to think that your plant requires watering when its trunk still contains plenty of it.

One of the physical signs of overwatering is breakage. If a long spindly trunk of your plant suddenly snaps in half and tips over, it could be a sign of overwatering. This may also happen if you keep your plant in a spot with too much cold and not enough light.

2. Growing Location

Since the Madagascar palm is a sun-loving plant, it can take the full sun without any issues. The succulent is highly drought-resistant and ideal for xeriscaping in warm climates. So, if you are growing it indoors, choose a spot that receives plenty of bright light (whether natural or artificial).

Small Madagascar Palm plant.
It can take the full sun without any issues.

If you are growing it outdoors, ensure it is far away from tall plants that may provide unnecessary shade. Keep your plant slightly moist so that it doesn’t shed its leaves. The succulent will only shed its leaves when it is too dry. Make use of a humidity tray to keep the humidity levels high.Humidity trays are shallow trays filled with small stones and water at the bottom. Ensure the water in the tray doesn’t reach the bottom of the bonsai pot. As the water evaporates, it creates a relatively moist environment that keeps your plant moist.

3. Soil Requirements

The succulent can adapt relatively well in porous soils with good soil-drainage properties. It can grow in the conventional sandy soil of old dunes near the ocean or sea, in schist, limestone, and so on.  For better results, plant it in cactus compost but maintain a mildly acidic to a mildly alkaline pH of between 6.0 and 7.7.    

For potting, go for clay pots with plenty of drainage holes over plastic pots to keep the succulent on the dry side. The pot size should be slightly larger than the root ball of your Madagascar palm. 

4. Temperature and Light Requirements

Madagascar palm is a sun-loving succulent. So, it prefers a relatively warmer and bright-lit location. When positioning your plant indoors, place it on a west or south-facing window where it can receive lots of full sunlight.

If you live in an area that doesn’t receive plenty of natural sunlight, consider using artificial grow lights to keep your plant happy. If you are using artificial grow lights, keep them on for at least 16 hours a day and let the plant rest in total darkness for the remaining eight hours.

Plant Exposed to a sunlight.
It prefers a relatively warmer and bright-lit location.

Indoor Madagascar palm plants should also be kept near a heating vent or register to ensure it stays warm during the cold winter months. During winter, make sure the temperature doesn’t fall below 55oF.

If you maintain relatively warm temperatures and keep your plant moist, it will never shade its leaves.  The leaves add beauty and serenity to your indoor spaces.

5. Fertilizer

Feed your Madagascar palm with a general-purpose liquid houseplant fertilizer at the beginning of spring. The fertilizer must be diluted to half-strength. You can also use low nitrogen liquid fertilizer but you will be forced to feed your plant every four to five weeks.

Whether you are growing your plants indoors or outdoors, don’t fertilize it in winter or fall because it is a period of dormancy and doesn’t require nutrients. You should only start watering and feeding it when you spot new growth.

With proper watering and fertilization, a Madagascar palm succulent will grow approximately 12 inches per year.

6. Disease and Pest Control

Extremely cold weather can affect a Madagascar palm quite significantly. Your plant may rot and put on a soft, mushy, and withered appearance. If you notice such signs, remove the damaged part and let your plant rest easy.

This succulent is also prone to mealybug infestation. These insects feed on the leaves of the plant. When you notice appearance of black spots on the leaves, it could be a sign of mealybug infestation.

Mealybug on the leaf.
These insects feed on the leaves of the plant.

To deal with the infestation, simply pull off the affected leaves and you are good to go. In some cases, there might be an infestation of white fly larvae or mites that attach themselves at the base of the plant. This can easily be cleared out with insecticides and fungicides in the form of systemic poisons, soapy rinses, and gentle sprays.

7. Pruning

Pruning is not an essential task for a Madagascar palm. The plant will shed its leaves naturally to preserve the absorbed water. Shedding of leaves mostly happens during the hot summer months, but you can stop it by keeping your plant moist.

While the plant typically grows on a single trunk, sometimes it will branch out after blooming or if the main stem is injured.

To maintain a relatively small size plant or induce branching, consider pruning the tree with a lot of care. Snap portions of its top with a sterile knife or pair of scissors to prevent infection. Monitor it closely after pruning to see if it shows any signs of infection for you to act quickly.

Summary

The Madagascar palm is one of the best succulents to have at home. The plant does well both indoors and outdoors. It can be placed around other succulents growing in full sunlight, and it will still thrive with minimal care.

The most important thing you need to do is ensure you provide your plant with the right conditions for it to stay healthy and happy. So, if you have decided to add the Madagascar palm to your plant collection, your time is now!

Ultimate Guide: How to Care for Venus Flytrap

What makes the Venus Flytrap such an intriguing plant? First, it’s exciting eating habits. The plant’s knack for luring prey into its trap and suddenly snapping shut is fascinating. Venus Flytraps use sweet nectar to attract their game. An electric charge will close the trap once an insect touches the trigger hairs two consecutive times.

 As the insect continues struggling, the trap seals and produces enzymes that dissolve the prey’s tissues. After re-absorbing the nutritious soup, the Venus Flytrap uses the carcass to draw new victims. Unfortunately, this single species plant native to North and South Carolina is threatened by extinction because of habitat destruction. 

The Venus Flytrap is a relatively easy plant to look after despite popular belief that the plant is complicated. Once you understand the best environment for your plant to thrive, you will realize that this is one of the most rewarding houseplants. Let’s get started.

Venus Flytrap Cultivars

The Venus Flytrap has only one species, Dionaea muscipula; however, many varieties have been bred for their desired traits. Most forms feature petioles that end in a trap. The traps of mature plants can go up to 5cm in length.

Cultivars are selected for their color, size, or mutation. The most popular are the all-green like ‘Justina Davis’ and all-red forms, including the Red Dragon. Similarly, larger varieties include the ‘South West Giant,’ which originated in the UK. Lastly, we have the mutants which result from tissue culture mishaps.

The Best Places to Get Your Venus Flytrap Plant

Carnivorous plant nurseries are the best places to buy Venus Flytraps. You can also order from various US Retailers. Additionally, you can take a trip to your local nursery though the plants here might not be of the best quality due to light deprivation and watering with impure water. Large retailers like Walmart are not a bad idea if you don’t mind plants that have been on the shelf for some time.

Light Requirements

Venus Flytraps require bright and indirect sunlight for optimum growth. Go for a south-facing sunny windowsill. We recommend 12 hours of adequate sunlight supply. Insufficient sunlight may lead to weak and floppy leaves plus a lack of red coloration inside the trap. Grow Lights can come in handy if you feel that your plant is not getting enough light; place it at least 6 inches above it. 

A Venus flytrap outside.
Insufficient sunlight may lead to weak and floppy leaves plus a lack of red coloration inside the trap.

Temperature Levels

The Venus Flytrap can briefly tolerate extreme temperature changes. This hardy plant can take temperatures as high as 86°F to as low as 20 degrees Fahrenheit as long as it is sheltered from the elements. Indoor temperatures that are warmer than average are ideal.

Water Requirements

Carnivorous plants need pure water; the Venus Flytrap is no exception. Getting pure water can be challenging, especially for new growers. Be warned that bottled, filtered, or tap water will increase dissolved salts and minerals, ultimately killing your plant. We recommend using rainwater, distilled or demineralized water. Alternatively, use water that has been purified through reverse osmosis. So how do you get pure water?

  • Buy purified water

You can buy distilled and deionized water from hardware shops. Local aquarium specialists may also have purified water.

  • Collect rainwater

Place some trays outside and accumulate the rainwater in plastic bottles. Once your plant collection has grown, you can use rain barrels.

  • Fix up a Reverse Osmosis System

Mount a reverse osmosis system under your sink to remove contaminants. Though pricey, this investment will pay off in the long run.

To water your plant:

  1. Stand your container in 1-2cm of water and refrain from flooding from the top.
  2. Keep the soil moist throughout the growth period but make sure your plant is not waterlogged. The pot should have drainage holes because excess moisture leads to root rot.
  3. Reduce the frequency of watering during winter.

Soil

Carnivorous plants receive their nutrients from their prey, so they don’t need nutrient-rich soils; they instead prefer acidic soils. A word of caution, do not use standard potting soil. Instead, use sphagnum peat moss blended with lime-free coarse sand or perlite. The ratio should be 2:1. Alternatively, use one part peat moss with one part perlite. Both options offer superior aeration and drainage for your plant in addition to increasing acidity. Venus Flytraps also do well in pure sphagnum.

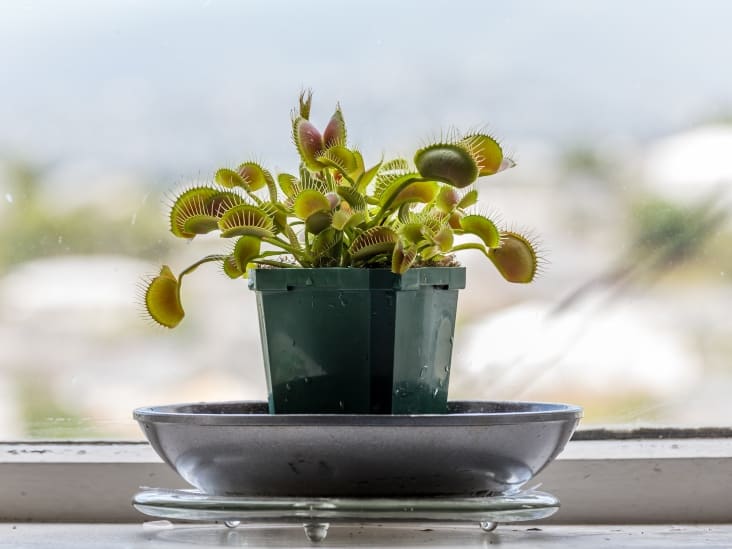
Venus flytraps in a pot.
They don’t need nutrient-rich soils but they instead prefer acidic soils.

Dormancy

The dormancy period is necessary for carnivorous plants and happens from fall when sunlight levels are lower. Provide a cold resting period for your Venus Flytrap by moving your plants to a more relaxed place in your garage or shed. The leaves start turning black as temperatures drop. Do not panic; this is normal. Weed out any dead growth. After the end of the dormancy period, it’s time to repot your plant. If the weather warms up and your plant does not brighten up, the plant could be sickly. 

Repotting

Regular repotting of the Venus Flytrap gives your plant enough room to grow. We suggest repotting once a year for your Venus Flytrap to develop strong roots. The best time to repot your plant is in spring or early summer. Do not repot the plants during the active flowering stage. When you purchase your plant, repot it if there are any impurities. Follow these basic steps for the best outcome when repotting:

  1. Choose the right potting mix

Standard potting mix will kill your Venus Flytrap. Instead, use carnivorous plant soil mix when repotting your plant. You can either buy it or come up with something. A 1:1 mixture of peat moss and perlite is recommended. Peat moss provides acidity while perlite retains moisture.

2. Choose the right pot.

Venus Flytraps have a deep root system, so choose a pot with a bit of depth; a minimum of 4 inches is okay. We recommend plastic pots for Venus Flytraps because the plants need proper insulation.

Venus Flytraps in pot.
Choose a pot with a bit of depth; a minimum of 4 inches is okay.

Tools needed

You will need:

  • A garden spade
  • Small plastic pot
  • Recommended potting soil

Instructions

  • Fill the pot with the recommended mixture
  • Water the potting mixture
  • Create a hole in the center where you will place your Venus Flytrap
  • Gently lift the Venus Flytrap from its parent pot, being careful not to disturb the roots
  • Place your plant in the new potting mixture
  • Lastly, water the plant and let the excess water drain out through the drainage holes

Aftercare

If done correctly, your plant will require no extra care after repotting. There might be a stall in growth but give your plant time.

Pruning

Pruning is not essential for the Venus Flytrap’s survival. However, it can provide health and aesthetic benefits. Some of the benefits include better aesthetics, growth promotion, and prevention of pests and mold. You will need sharp and thin scissors. Next, cut the dead leaves starting from the base and carefully prepare the bulb and healthy leaves.

Venus flytrap in white pot.
Cut the dead leaves starting from the base and carefully prepare the bulb and healthy leaves.

Only trim your plant when the traps have completely dried. Do not pull the dead leaves for proper trimming, which can damage your plant. Instead, use scissors to cut them out. Altogether remove the dead leaves. Be careful not to activate the traps because this will waste your plant’s energy. Do not prune too often; only do it when you see some black leaves.

Flowering

Mature Venus Flytraps bloom in spring and thrive during summer. Flowering diverts energy from trap-making. If you let your plant bloom regularly, it might exhibit signs of exhaustion such as sluggishness and droopiness. If your flytrap is small, pinch off the flowers before they grow too tall. 

Feeding

Once you have met the growing needs of your Venus Flytrap, feed it on arachnids and insects, either live or dead. We recommend Mealworms, Spiders, Blood Worms, or Crickets. Feed your flytrap once a week. Remember, the trigger hairs have to be stimulated once the trap closes. Here are some things to remember when you are feeding your plant;

  • Feed your Venus Flytrap on bugs only.
  • Venus Flytrap prefers nutrient-free soil, so do not fertilize it.
  • Prey that is too large will make your plant rot.
  • Tickle the hairs if using dead bugs using a toothpick for digestion to start. If you skip this part, your plant will pop open after a few hours, hardly absorbing any nutrients.
A Venus flytrap with a fly trapped,
Tickle the hairs if using dead bugs using a toothpick for digestion to start.

The Propagation Process

The best way to propagate the Venus Flytrap is to let them grow through division. A mature plant sends offshoots in early spring, replanted as new plants. Make sure the shoots include roots so that the new plant will grow. You can also use seed or leaf cuttings to propagate. 

Pests

Venus Flytraps do not just feed on bugs, as some can be harmful. These include mites, aphids, and mealybugs and mostly attack in spring. To keep pests and diseases at bay, ensure your plant gets enough sunlight and not waterlogged soil.

Bottom Line

The Venus Flytrap can be difficult to care for if you are not well prepared. Give your plant the attention it requires, and you will enjoy having the flytrap as an indoor plant.

How to Easily Propagate Venus Flytrap?

Venus flytrap

The Venus flytrap is quite an interesting plant. It is one of the very few carnivorous plants in the world that is easily recognizable. The plant mainly gathers nutrients from the soil and gases in the air. Native to South and North Carolina, the plant’s mouth is always open, making its short hairs, commonly referred to as trigger hairs, visible. If anything touches these hairs, the lobes close, trapping whatever landed on the plant. One good thing about this plant is that it is relatively easy to propagate, and you don’t need special tools or knowledge to multiply your venus flytrap collection.

So, how can you propagate the venus flytrap plant? The plant is relatively easy to grow and can be propagated by leaf cuttings, seed germination, or division. For division, it should be divided in late winter or early summer. Carefully cut off the offshoots from the mother plant but ensure the part you want to cut off has its own root system. The best time to propagate leaf cuttings is early summer. Seed germination can be done any time of the year because seeds aren’t too sensitive to climatic conditions like leaf cuttings and offshoots.

This blog post discusses the different ways of propagating the Venus flytrap plant and how you can take care of your newly propagated plant. Read on to find out everything you need to know.

Propagation through Stem/Stalk Cuttings

Propagating venus flytrap through leaf or stalk cuttings is relatively easy. First, you need to identify a healthy part of the stem and carefully cut the flower stalks when they reach 2-4 inches long.

Once you have the stalks or stem cuttings, plant them in carnivorous soil. Water lightly and provide sufficient light for the cuttings to start growing.

What Materials Do You Need to Propagate Venus Flytrap through Cuttings?

Typically, you will need the following materials for your cuttings propagation:

  • Pure water: Ensure you are not using tap water or bottled water. Instead, you need distilled water, rainwater, or reverse osmosis water.
  • Carnivorous plant soil: It is crucial to use the right soil type. If you cannot make your own carnivorous soil, be sure to purchase it from your local plant nursery.
  • Pot with plenty of drainage holes: You need to ensure the pot you will use to grow your venus flytrap has plenty of drainage holes because this plant hates sitting in water for prolonged hours.
  • Mature Venus flytrap: Ideally, you should have a venus flytrap plant that is already flowering. Most of these plants start flowering in spring, a few weeks after the winter dormancy.
  • You will also need a pair of sharp scissors and a water tray.

The Process

To successfully propagate your venus flytrap plant through stem/stalk cutting, make sure you follow the steps outlined below. If you do everything right, you will have another set of plants in no time.

1. Fill the Pot with Appropriate Soil

The first thing you need to do is prepare the growing pot for stem or stalk cutting. Add the soil to the container and moisten it with distilled water until it is completely saturated.

Use your fingers to press the soil slightly while moistening it. Continue adding soil to the pot until it is almost full. Just leave one or two inches of space from the top of the pot.

2. Cut the Stems or Flower Stalks within the Right Time

Venus flytrap plants usually produce flower stalks in spring. The stalks can take a few weeks or one month to grow and flower.

Venus Flytrap White flower.
Most of these plants start flowering in spring.

To increase your chances of success with stalk propagation, consider obtaining the stalks before they start flowering. Typically, you should obtain the stalks when the flower stalks are approximately three or four inches long.

To separate the flower stalk from the mother plant, use a sharp pair of scissors and make a clean cut as close to the base of the plant as possible. Be careful not to harm any bulb or leaf.

3. Divide the Stalks into Smaller Pieces

Once you have obtained your three or four inch-long stalks, consider subdividing them into relatively smaller pieces that are approximately two inches long. The number of pieces you obtain from each stalk will depend on the original length of the stalk.

Use the same pair of sharp scissors you used to obtain the initial cutting from the mother plant for subdivision. When cutting the stalk into smaller pieces, cut at an angle instead of making a straight cut.

Venus Flytrap in a pot.
Cut at an angle instead of making a straight cut, This will increase you chances in propagating.

This will increase your chances of successfully propagating the venus flytrap. Cutting at an angle produces a relatively larger surface area for root growth and water intake.

4. Plant the Flower Stalks

Now it is time to set your flower stalks into the potting mix and watch them turn into new plants. Carefully stick the stalk into the potting mix vertically. The flower cuttings should remain out of the soil.

Generally, only half an inch of the stalk cutting should go into the soil. If you made your cut at an angle, ensure the side cut at an angle goes into the soil.

Venus flytrap white flower.
Set your flower stalks into the potting mix and watch them turn into new plants.

Once you have planted all the flower stalks you managed to obtain; everything is set. The only thing you need to do is provide the cuttings with proper care and observe them carefully. Venus flytrap cuttings usually start turning into new growth within two to five weeks.

Propagation through Division

If your venus flytrap plant is healthy and has enough space in the pot, it will automatically start to multiply by itself every year. You can still leave the plant in the same pot until it gets too tight before you get it out and separate the rhizomes from the mother plant.

The best way to know if your plant is already producing rhizomes is to count its leaves. If it has more than seven leaves, it means the plant is already producing rhizomes that can be separated and turned into new plants.

Carefully remove the plant from its growing pot and divide its root ball. If you are lucky enough, the parts will separate themselves once you pull the plant out.

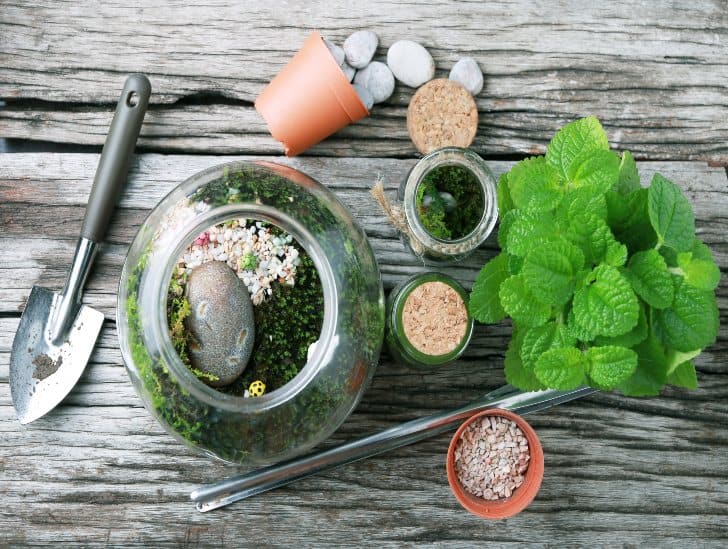
Venus flytrap and tools top view.
Pot them in separate growing containers to continue cultivating them as new plants.

If they don’t, use a sharp knife or pair of scissors to separate the root ball. Make sure each section of the root ball has its own rhizomes and leaves.

Take the divided sections and pot them in separate growing containers to continue cultivating them as new plants. In the first two or three weeks, ensure the pots are in a strategic spot that receives plenty of bright indirect light but don’t expose them to direct sunlight.

Propagation through Seed Germination

Lastly, you can also propagate venus flytrap through germination. To accomplish this, you need to pollinate flowers during the flowering season. You can pollinate the flowers using a brush and wait for the seeds to form after flowering.

If you cannot pollinate the flowers of your plant and harvest the seeds yourself, you have the option of buying the seeds from your local plant nursery.

Carefully harvest the seeds into a bag and keep them in a cool and protected area away from light until you are ready to sow them.

Venus flytrap seeds.
You can pollinate the flowers of your plant and harvest the seeds yourself.

The best time to sow the seeds is at the beginning of spring. Carefully sprinkle the seeds on the carnivorous potting mix. Make sure you use the right potting mix to achieve the desired results.

Consider using 80% shredded sphagnum moss and 20% perlite or vermiculite if you are making your own potting mix. You can also use peat pellets that you can purchase online.

Sow your venus flytrap seeds so thinly on the soil so that once they germinate, they can go for an entire season without the need of transplanting them due to overcrowding.

Another reason why you should sow the seeds thinly is that you are looking for larger plants and not smaller plants that will sprout out due to overcrowding.

Taking Care of Newly Propagated Venus Flytrap Plants

After sowing your seeds, expose the pot or planting tray that contains your seeds to as much light as possible. In the case of germinating seeds, more light is always better than less light. Feel free to use either natural or artificial light.

Artificial light in the form of fluorescent bulbs has a slight advantage because it provides you with an incredible opportunity to expose your seeds to light for prolonged hours. Ideally, you should leave them turned on for 16 hours a day.

For watering, ensure the potting mix is moist to the touch but not soggy. The seedlings will also germinate better in a relatively humid environment. One of the easiest ways to increase humidity is by placing a saran wrap style plastic wrap over the planting tray or pot holding the seeds.

Maintain the temperature between 80-85oF to achieve better results. Typically, seeds and seedlings tend to do better in a relatively warm environment which is why many gardeners use heat pads and heat coils while germinating seeds.

Should I Fertilize Newly Propagated Venus Flytrap?

If you use a high-quality potting mix containing all the essential nutrients, you shouldn’t fertilize your newly propagated venus flytrap plants.

If you want to give them a little boost, consider using a very dilute solution of liquid fertilizer meant for carnivorous plants. Once every two weeks should be more than enough.

Use fertilizer high in nitrogen, such as 30-10-10 or 20-10-20, because these nutrients are essential for the growth of new leaves.

Avoid using chemical fertilizers because they can damage the delicate roots of your newly propagated plants. Organic fertilizer is always a better option.

How Do I Transplant My Venus Flytrap?

When it comes to transplanting, the best time to do it is in early spring or late fall. The plant is dormant during these times and will have an easier time adjusting to a new pot or location.

Start by preparing the new pot or location. If you are transplanting to a new pot, make sure it is big enough to accommodate the roots of your plant. The pot should also have drainage holes at the bottom to allow excess water to drain out.

Fill the pot with carnivorous plant potting mix and gently remove your plant from its current pot. Be very careful not to damage the roots in the process.

Carefully place the plant in the new pot and fill in any empty space around the roots with more potting mix. Water the plant well and ensure the potting mix is moist but not soggy.

Place the pot in a location that receives plenty of light. Ideally, you should use artificial light, such as fluorescent bulbs, for 14-16 hours daily.

When Is the Best Time to Transplant Newly Propagated Venus Flytrap Plants?

The best time to transplant newly propagated venus flytrap plants is in early spring or late fall. The plant is dormant during these times and will have an easier time adjusting to a new pot or location.

Start by preparing the new pot or location. If you are transplanting to a new pot, make sure it is big enough to accommodate the roots of your plant. The pot should also have drainage holes at the bottom to allow excess water to drain out.

The plant is highly susceptible to transplant shock, so it is important to take your time and be careful not to damage the roots.

Summary

That is it about propagating the venus flytrap plant, and we hope we have covered everything you need to know to start multiplying your plant collection. As long as you do everything right and be a little bit patient with the entire process, you will have a huge venus flytrap plant collection in no time.

11 Amazing Facts You Didn’t Know About Air Plants

Top view of different air plants.

Air plants (Tillandsia) are fascinating and one of the most popular houseplants. But did you know that they can survive in a variety of conditions? If you are new to air plants or have been growing them for years, there is always something new to learn. These unique plants are perfect for indoor gardening, and they are low-maintenance. Here we will share ten amazing facts that you did not know about air plants.

So, what are some of the amazing facts about the air plant? You probably already know that air plants can survive with soil, but did you know that air plants can be grown upside-down? Air plants have been known for their ability to purify the air around them by removing toxins such as formaldehyde from the furniture. They can change color and even release oxygen at night.

 There are so many different types of air plants, and they can be found in such a variety of colors that it is hard not to want one. We will share 11 facts about these little wonders that most people don’t know in this post post.

1.     They can grow without soil

While most plants depend on soil for their nutrients, air plants can grow without soil. Air plants absorb moisture and nutrients from the atmosphere through their leaves as well as humidity in the environment around them. This feat is possible thanks to the natural structure of their roots. Air plants are more than happy to absorb nutrients from sea sponges, driftwood pieces, and even some rocks.

2.     They use CAM photosynthesis

Air plants use a special type of photosynthesis called crassulacean acid metabolism (CAM). CAM photosynthesis is a process where the plant only opens its stomata at night when temperatures are lower, allowing for more efficient water usage.

Most plants use C-CAM, which means they open their stomata both day and night. Most succulents, including air plants, use P-CAM or PEPC (Phosphoenolpyruvate Carboxylase), which means they only open their stomata during the night. This allows air plants to get more oxygen at night.

3.     Grows in a variety of climate

While most plants are very particular about the conditions they need to grow, air plants do not have special requirements for temperature or humidity. Air plants can grow in different climates, such as humid rainforest habitats and even in desert-like conditions.

Air plant in a glass terrarium outside.
Growing air plants is very easy, and they can be found just about anywhere throughout the world.

Some notable places to find air plants include South Africa, Australia and Mexico. However, air plants can also survive in various climates such as the Mediterranean, Europe and Central America. This means that growing air plants is very easy, and they can be found just about anywhere throughout the world.


4.     Air plants grow offsets (pups) after blooming

If you have ever bought an air plant, then there is a good chance it had already started growing pups or “offsets,” as they are more commonly called. This makes them incredibly easy to propagate since all you have to do is allow the pups to grow and then cut them off. This way, as long as one plant survives, then there will always be more plants.

Air plant plantlets hanging.
You can cut them off and place them in various areas of your home or office where they can thrive on their own.

This feature also allows air plants to be incredibly useful for those trying to fill up a large space quickly. All you need is one plant, and as soon as it starts growing pups, you can cut them off and place them in various areas of your home or office where they can thrive on their own.

5.     Air Plants are Closely Related to Pineapples

You might not think so at first glance, but air plants belong in a family of pineapple. The bromeliad family includes both air plants and pineapples. They look so different because of how each plant uses the bromeliads in its unique way.

The pineapple plant absorbs water through its leaves while air plants absorb moisture from humidity in the environment around them rather than drinking it up as a normal plant would do.

6.     Air plants are not toxic to pets or children

One of the great features of air plants is that they are completely safe for humans and animals. Air plants contain no known toxins, so there is nothing to worry about when your little ones play with them or even chew on their leaves. This makes them a great option if you have any children or pets interested in the plants around your home.

Since air plants absorb water and nutrients from the surrounding environment rather than drinking it up like other types of plants, they eliminate any need to worry about toxic fertilizer entering their system.

7.     Air Plants can Change Colors

Air plants change color depending on the type of environment that they are in. If you have an air plant at home, then there is a chance that it might begin turning into slightly different colors over time as conditions around them change. They can be found growing with many different colors, including orange, pink and even light green or yellow tints.

An air plant with a wood.
They can be found growing with many different colors, including orange, pink and even light green or yellow tints.

The reason why they can change colors so easily has to do with how air plants use photosynthesis in their leaves and petals. As these parts absorb sunlight, they begin transforming it into energy that the plant itself will use. This process can lead to changes in the color of certain parts depending on how much exposure they have had.

8.     They Blossom Near the End of their Life

 One of the biggest signs that an air plant is about to die is when it begins blooming. Once this process starts, most plants will begin getting smaller and eventually die off completely

Air plant pink flower.
Air plants only bloom in their final stages.

Air plants only bloom in their final stages, so if you see them opening up, there is a chance that they are not going to live for much longer. However, if they are healthy, then you might be able to save them by moving their container into a shadier area of your home or office.

9.     Air Plants are epiphytes and can also be lithophytes

When air plants grow in the wild, they tend to do so on trees or other large pieces of non-living things. However, if you wanted to recreate the same effect at home, you could place them between stones or other pieces of material.

As long as the air plant receives some sunlight and has access to moisture, it will continue growing just fine no matter what surface underneath it. This feat is also one of the reasons why air plants are great for those who want to keep a low-maintenance plant around their home.

10. Air Plants can Give ANYONE a “Green Thumb”

Do you dread growing houseplants just because you believe you do not have a green thumb? Well, an air plant will prove you wrong as they are incredibly easy to grow and maintain. You do not need to water them or fertilize them at all, and they will continue growing just fine in any home.

One of the reasons air plants are so easy is that they do not need much light to survive. As long as you put it in a place where it can receive some indirect sunlight, that should be enough for your plant to grow happily.

A person holding an air plant with a drizzle of water.
Place it where it can receive some indirect sunlight, that should be enough for your plant to grow happily.

All you need is one air plant and a glass container with some water in it for the plant to absorb from. Then, place your air plants next to any window where they will receive sunlight every day and watch them thrive on their own over time.

11. A Failing Air plant can be Easily Revived

Unlike most other plants, an air plant that is starting to die does not need to be thrown away completely. If you begin noticing that your plant is wilting or turning brown, try placing your dying air plant inside another container of water and then place that container inside a larger bowl or jar. Make sure to cover up the opening at the top.   This will allow your plant to drink from all of the extra humidity in there instead.

You can do this process for about ten days and if you notice it working, try moving your growing air plants to a smaller container with some soil in it. This way, they can begin growing new roots, and once they are large enough, you should be able to separate them into their air plant containers!

Conclusion

Air plants are not just tiny plants that you can use to decorate your home or office. They have some incredible properties that make them stand out from other plants. These amazing facts will help you learn more about what makes these plants so different and why they are growing in popularity.

Many people who start growing air plants find it hard to stop since there is nothing more satisfying than receiving pups of your own after the original plant begins dying off. Once you have one plant, it is very common for people to want more of them all over their homes. These plants may seem like an unlikely gift for anyone, but there is no denying that having one around your home or office will help bring more color and life to the room.

14 Amazing Facts You Didn’t Know About Agave

The Agave plant is a slow-growing succulent that has broad leaves with spiky tips. Although it’s referred to as the “Century Plant,” this species can only live to a maximum of three decades. The Agave Genus features numerous varieties, with the larger species achieving up to ten feet in height and breadth. Numerous other small-sized Agave species feature spineless soft leaves. Hardier varieties of the Agave plant have bluish-green leaves, while those in warmer climates feature greyish-green leaves. Others might have golden or white markings, which enhances their beauty.

So what makes the Agave plant unique and extraordinary? Unlike most garden plants, Agaves are raised for their attractive foliage and not for their flowers. Agave plants manufacture Tequila, can be used as natural sweeteners, and carry symbolic meaning. Surprisingly, these drought-resistant plants that grow from a basal rosette are not Cactus and have a monocarpic lifecycle. They also reproduce asexually and take up to a decade to reach full maturity. Their spiny leaves offer an excellent defense mechanism.

Agave plants can form a unique addition to your home or garden. In this post, we take a look at some of the most amazing facts you dint know about the Agave plant, its benefits, reproduction, and why you should make it part and parcel of your home garden.

Agave is Used for Manufacturing Tequila and Mezcal Spirits

Natively, you will find Agave plants in South America and Mexico. Their sweet sap can be tapped from their stems and used to make Aquamiel. This substance is then fermented into Tequila, or Mezcal spirits loved by many people who constantly imbibe liquor for fun or special events. It can also be distilled into alcohol or used to manufacture baking ingredients.

A tequila shot with lime and sea salt.
The substance from the Agave plants fermented into Tequila, or Mezcal spirits loved by many people.

Blue Agave Reproduces Asexually

The agave plant has conventional sexual parts, including seeds and flowers. However, reproduction through these methods takes a long time. For this reason, most people consider asexual reproduction as an ideal method to reproduce Agave plants faster. When the parent plant begins flowering, it produces saplings, natively known in Mexico as Hijuelas, after 4-6 years of growth. These saplings are then removed and transferred and propagated into newer Agave plants.

Agave Plants Make Excellent Sugar Substitutes

The Agave plants are also known to make excellent sugar substitutes for cooking recipes, such as syrups, candies, and cream toppings. Their saps produce a sweet taste with great flavors without the need for additional calories or fats. Medically, Agave is an excellent option for people who have diabetes who must keep their blood sugar levels to the minimum while enjoying occasional treats.

A Liquid sweetener.
The Agave plants are also known to make excellent sugar substitutes for cooking recipes.

Blue Agave Plants are Cultivated by Hand

Agaves are typically cultivated by hand, and the only motorized part of their growth involves transportation to the growing field. When harvesting time arrives, farmers remove the leaves using specialized tools known as Jima. The Agave core, or Pina in Spanish, means pineapple since it resembles the popular pineapple fruit you know and love. The Pinas can weigh up to 90 kilograms when fully grown.

Agave Plants are not Cactus.

The Agave plant features numerous species. Contrary to popular belief, Agave plants do not fall in the cactus family. While both are succulents, with some featuring spines on their leaves, their similarity ends there. Another plant that closely resembles Agave is the Aloe Vera. However, these two are far from relatives. We could, however, say Agaves are closely related to the lily plants.

A healthy aloe Vera plant
A plant that closely resembles Agave is the Aloe Vera.

Blue Agave Tequila has Numerous Beneficial Uses

Past research and studies have revealed that blue Agave tequila can be used in many beneficial ways, including:

  • Boosting proper bone development and health.
  •  Boosting digestion when taken before or after meals.
  • Controlling blood sugar levels and assists in weight loss.
  • Curbing insomnia; it can calm your nerves, relax your body and mind.
  • Numbing bodily pain because it dilates blood vessels to facilitate proper blood flow.
  • Highly concentrated Tequila is used as a disinfectant or cleaning agent.

Agave Plants Grow from a Basal Rosette

The Agave plant is a monocot genus from the Asparagaceae family. You probably didn’t know that it grows from a basal rosette, with most species featuring linear leaves. Additionally, its blooming head usually grows from the rosette with either dioecious or hermaphroditic flower featuring a set of male or female parts necessary for reproduction.

Agave Plants Can Take Up to a Decade to Mature

The Agave plant is a drought-resistant plant that can thrive in desert conditions. But did you know that it takes up to a decade for the Agave plant to reach full maturity? That is the time it requires to start flowering and produce fruit. Most people will confuse an Agave plant as a member of the cactus family since it produces spines on its leaves growing from the base. People harvest these plants for sap, but they offer numerous benefits than just ingredients for drinks after maturing.

An agave cactus.
The Agave plant is a drought-resistant plant that can thrive in desert conditions.

Roots and Flowers Produced by Agave Plants Carry Symbolic Meanings

The Agave plant is one of the many plants that carry more profound symbolic meanings to the Mexicans. Blooms on the top of stalks on this plant symbolize love and fidelity. Its roots, on the other hand, symbolize a stable marriage. Flowers from this plant can be used for decorative purposes during specific occasions, including weddings, anniversaries, or birthdays. Also, people use them during solemn events like funerals.

Aztec Warriors Used the Agave Plant to Extract Sap

Did you know that warriors from the Aztec tribe used the Agave plant to extract sap to make Aguamiel (honey water)? They then fermented this substance into pulque, which typically was an alcoholic drink. Both warriors and the general population loved this beverage long before the Spanish conquest. Native people used poles with sharp edges to cut down Agave leaves. They then scaped out the sap and mixed it with various other juices to make Aguamiel.

Agave Plants Store Water in the “Caudex” of Their Stems

The Agave plants can flourish well in drought conditions since they store water in their stems. These come in handy when propagating newer roots and shoots. The caudex is the central section of their stems that is responsible for water storage. This water is usually stored as sap and moves from the roots to the leaves. Once it reaches the leaves, it aids in photosynthesis, a process that keeps the plant alive. Thanks to its thicker fleshy leaves, it can collect and store more water than any other succulents. This may need to take a little longer time before watering an agave.

The majority of Agave Species Have a Monocarpic Life Cycle

Most Agave species are monocarpic. That means that they die as soon as they have flowered. Their life cycles begin with a shoot, which emerges from the middle of the rosette. This shoot develops gradually for two to four years before forming a stalk that flowers to produce many seeds. After flowering and seed production, its life ends, but not before sending out offsets that continue growing to preserve its lineage.

Frost is Lethal to All Agave Species

Did you know that frost can damage Agave plants? When subjected to frost or extreme cold, the plant’s leaves turn brown from their primary color. Ultimately, this causes the plant to die, especially during winter before new offsets emerge in spring. Usually, frost impacts the Agave plant’s root system, affecting its ability to recover and thrive after the summer rains arrive. Technically, freezing temperatures can destroy an Agave plant when exposed for an extended period.

Agave’s Spiny Leaves Offer Protection from Predators

Most Agave varieties have spiny leaves, which are necessary for protecting them from predators. They have sharp pity edges that pierce through the skin of predators. This makes it difficult for animals to devour them. Such a defense mechanism deters animals like deer, rodents, and coyotes from eating the plant.

A close up of agave plant with spiny leaves.
They have sharp pity edges that pierce through the skin of predators.

Conclusion

There is so much you can learn about the Agave plant. This unique succulent features more than 200 varieties. Besides being a unique addition to your garden plants, it has numerous advantages. It’s drought-tolerant and perennial, making it a great addition to an arid garden. Remember, you only require one Agave plant to achieve a stunning sculptural focal point in your space or garden.

 When grouped, these plants offer more excellent textural contrast in your garden. When paired with ornamental grasses, their rough edges can be softened. Additionally, smaller species of this plant can be ideal for your outdoor or indoor space. The uniqueness of the Agave makes it a great addition to your assortment of garden plants.

Ultimate Guide: How to Care for Crown of Thorns Plant

The Crown of Thorns Plant, popularly known as the Christ Plant, is one of the most liked ornamental indoor succulent plants. Native to Madagascar, this bushy and slow-growing plant flourishes above 55°F, the average temperature for most homes. These fascinating plant flowers almost all year round. The Christ Plant is a highly sought-after indoor plant because it is super easy to care for, and all that is required is adequate light and water.

The woody stem serves as an adequate water reservoir. The sharp thorns, bright green leaves, and the bright leaf-like structures below the flower make this unique plant stand out in your home. We recommend wearing gloves when handling the plant because it is poisonous, and the sap can be toxic not only to you but also to your pets. However, the crown of the thorns plant can last for a long time with proper care. Read on to learn how to take good care of your crown of thorns plant.

How much sun do crown of thorns need?

This indoor plant is a sucker for bright light. We suggest placing your plant in indirect light because direct sunlight can damage your leaves. Choose the most illuminated spot in your home for this ornamental, preferably near a sunny window for at least 3 to 4 hours of direct sun. After a week, give your potted plant a quarter turn for even growth.

If your plant can not get enough light in your house, take it outside for the required amount of sunlight. Remember, your plant cannot bloom without enough light. During winter, the light levels are low, and you can move the plant to a cooler spot with sunlight or supplement using artificial sources. 

How often should you Water your crown of thorns plant?

The Crown of Thorns plant might be the plant for you if you have a busy lifestyle as it thrives on neglect. You can water your plant less frequently because it stores water in its thick stems and prefers slightly dry soil. The Christ Plant has different watering needs depending on the season. Your plant will require very little water during winter, but during late spring and early fall, you should water your Crown of Thorns plant when the soil is halfway dried out. 

A crown of thorns plant that has just been watered.
It stores water in its thick stems and prefers slightly dry soil.

To confirm whether your plant needs water, use your finger. In the winter, the soil should dry to a depth of 2 to 3 inches before watering. An inch’s depth of dry soil should get you watering your plant during spring and late fall. Fill the pot until flooded, wait for the excess water to drain, and empty the saucer below the pot. You can also spray your crown thorns with a weak saline solution as the plant thrives in the seaside. Allow the soil to dry because excess moisture can lead to root rot. If the leaves turn yellow, reduce the watering.

Humidity & Temperature Tolerance

Succulent plants store water, so average to low humidity is enough; the crown of thorns plant is no exception. The plant does well in warm temperatures starting from 55° F. Do not worry about taking your plant outdoors during the summer as it can withstand temperatures of up to 90°F/32°C.

A plant  having indirect sun light.
The plant does well in warm temperatures starting from 55° F.

Your plant leaves will start falling off, and your plant might have difficulty flowering if the temperature is lower than required. The plant thrives in low humidity and high temperatures.

Pruning

Fast-growing or bushier Crown of Thorns will benefit from pruning and trimming. The preferred time to prune and shape your plant is right after blooming. Preferably during autumn and in time for spring when new growths start showing. A few branches appear at every pruned branch leading to a bushier and fuller plant. 

Before pruning, sterilize your shears or scissors to avoid passing on diseases from one plant to another. Then, cut the stem tip at its point of origin to stop stubby and unattractive branches. 

Remove the aged leaves and stems and get rid of them for good. The main reason for trimming is to keep your plant in shape. If the branches lean towards a direction you would not want, trim them. 

Cutting a branch of a plant.
Sterilize your shears or scissors to avoid passing on diseases from one plant to another

Remember to wear gloves as the poisonous white milky sap can irritate the skin, eyes, and mouth. We recommend cutting back your crown of thorns when your children and pets are not around because even small ingested amounts can irritate the mouth and cause stomach upsets. In addition, the sticky sap can stain your clothes, so wear old clothing when pruning.

Pests & Diseases

Infestation is not significant for this tough plant because a crown of thorns is very pest-resistant. Problematic pests include Scale, Mealybugs, and Aphids. Be observant and look out for these harmful organisms around the growing tips because pests are drawn to new growth. 

If the pests are a few, manually scrape them off by using a pump-up water sprayer. Another good option you could try is to wipe the foliage with diluted soap or dishwashing liquid using a cotton ball or swab. Running water is an equally good option. 

Alternatively, swab with cotton dubbed in alcohol or get rid of the infected part altogether. Pests multiply quickly and may infect your other house plants, so make sure you treat any infestation straight away.

Flowering

A Crown of Thorns Plant produces colorful bracts in the early spring and through late summer. Under the right set of conditions, the crown of thorns can produce flowers all year. The flowers are in clusters of red and yellow and shades of pink, salmon, red, and bicolor. 

The flower buds are located in the leaf axils of each leaf. If you want your plant to bloom all year round, choose a sunny location, use good potting soil, water as needed and use a fertilizer high in phosphorus content during the flowering stage.

Soil & Fertilizer

Crown of Thorns requires stable soil as they tend to grow top-heavy. Layer with gravel at the bottom for excellent drainage. Avoid light-weight mixes, instead use a potting mix amended with sandy, quick-draining soil. 

The mix should be two-thirds cactus or succulent soil mix and third perlite or coarse sand. Well-drained soil will prevent root rot. However, poor drainage can also lead to a sudden decline in leaves.

A top view of a plant, shovel and a soil.
It requires stable soil as they tend to grow top-heavy.

The plant requires little nourishment. Therefore, we recommend adding the fertilizer as a solution containing 150-275 ppm fertilizer at the planting stage. You can also add slow-release fertilizer. Never feed your Crown of Thorns plant with fertilizers containing boron, as your plant can react sensitively to the micronutrient.

For regular feeding, dilute the water-soluble fertilizer to half the recommended strength and feed every month. The plant food should be low in nitrogen and high in phosphorus. Do not add fertilizer in winter when the flowering period is over. Too much fertilizer can lead to leaf tip burning because of excess salt build-up in the soil.

Repotting

The Crown of Thorns plant only requires repotting every 2-3 years because it is a slow grower. Shift your plant to a larger pot with a drainage hole to avoid a mushy medium and root rot. We recommend just a few inches larger, nothing bigger. 

You can replace a few top inches of the potting mix with a fresh mix for larger plants. If you prune the extra stems and only water your plant as required, you might not need to report your plant after a short time.

Repot your mature plant that no longer fits in its container to keep it in good health. We suggest doing this during summer because this is the time when the plant is at its hardiest. How do you report your plant?

  • Gently remove the Crown of Thorns plant from its current container. 
  • Loosen the soil
  • Prune old and dead roots
  • Make ready an inch thick of sandy well-draining pot mix
  • Place the plant slightly lower than its initial placement 
  • Fill spaces with the rest of the mix
  • Relocate your pot to a sunny window with at least 3 hours of direct sunlight.

Propagation

Propagating your Crown of Thorns Plant from stem cuttings is relatively easy. First, take cuttings from the younger branches in the spring and early summer. You can use any sharp blade, such as a simple razor, to cut at the point where the branch meets the trunk.

Immediately after cutting, dip the end of the stem tip cutting in warm water and spray the original plant with cold water on the trimmed areas to avoid the sap from oozing out. Dry your cuttings on a paper towel for a few days. Then, immerse the hardened ends of the cuttings in a rooting hormone product and poke them into the moist soil.

A top view of a red Crown of thorn plants.
Immerse the hardened ends of the cuttings in a rooting hormone product and poke them into the moist soil.

Move the pot to a warm location with bright and indirect light for some time. Do not water the plant for a few weeks. Your cutting should develop roots after about six weeks. If you tug gently on the cutting and there is some resistance, the roots have already formed. Begin watering lightly after about a month when new signs of growth appear.

Crown of thorns problems & How to Avoid them

No Flowering

Lack of blooming is a common issue with indoor plant growers. Give your plant at least a year if it is still young. You might want to check on the amount of light your plant is getting if your plant is not flowering. Do not place your plants in a dark room. Lack of nutrients is another factor. Apply fertilizer with a high phosphorus content to encourage flowering.

Yellow Leaves

The most probable reason for your plant leaves turning yellow is too much watering. Reduce the amount of water, especially in the winter. Overwatering will cause the roots to rot; when their function is impaired, the entire plant will lack the required nutrients leading to signs of dying, such as yellow leaves. Once you notice yellowing, stop adding water and place the pot under sunlight for faster evapotranspiration.

Toxicity to Pets

The crown plant is mildly toxic to pets. If your pets ingest the milky sap, they will exhibit symptoms such as stomach upsets and mouth irritation. Consult your Vet immediately in case of ingestion. 

Indoor planting is not as complicated and time-consuming as it appears. Instead, try out a low-maintenance plant that can fit perfectly into your schedule, like the Crown of Thorns Plant.

Amazing Facts You Didn’t Know About Lithops (Living Stone)

Lithops are small, stemless, succulent plants in the Aizoaceae family, indigenous to southern Africa. These strange-looking plants grow in two joined leaves resembling a pebble or craggy stone lying on its side. They can vary in color according to the species. This may range from yellowish-brown to gray, but all have the same general body plan due to convergent evolution.

So what are some interesting facts you may not know about Lithops? Instead of developing conventional flat leaves, lithops make small knobby and stone-like leaves (hence the name living stone). These plants look so much like stones that they wouldn’t look out of place in a gravel pit. They come in different colors and shapes. While some Lithops look like a pebble, others have the shape of a jelly bean. Its resemblance to stones helps Lithops blend in their surroundings. This edible succulent can live up to 50 years.

There are so many fun facts about this strange plant that will surprise you. This article will focus on some of these facts that make lithops so interesting.

1.    It is the world’s most camouflaged plant.

 The Lithops flower comes in all colors, but they are all tan to brown in direct sunlight. Their bodies are perfectly shaped for blending into rocks. The light color helps them blend in better in direct sunlight. If it’s too dark, they will close up their leaves to prevent water loss. They are mostly perfect for surviving in deserts because of this unique ability.

Lithops on the ground.
Their bodies are perfectly shaped for blending into rocks.

In their natural habitats in South Africa and Namibia, lithops blend in so well with the desert environment that they can be challenging to locate even for people with years of experience.

2.    They survive with little or no water

If you ask anyone who has tried to cultivate lithops, the worst mistake you can make is over-watering them (or watering them at all.) Lithops thrive in the desert conditions of Namibia, Botswana, South Africa, and some bordering regions of Angola.

The one thing these places have in common is the rocky ground and dry conditions. While a few lithops species require up to 600mm of rainfall to survive, most of them require near zero and survive on morning dew.

They also favor extreme temperatures and grow in areas where the summers are hot, and winters are freezing, except for one species located at the coast with moderate temperatures throughout the year.

3. Lithops were discovered in 1811

In 1811, John Burchell, an English explorer, naturalist, traveler, artist, and author, picked up a strange-looking pebble from the stony ground in South Africa. He quickly discovered that the “pebble” was a plant after all.  He initially named it Mesembryanthemum turbiniforme, and unfortunately, he didn’t document a detailed physical description to help us know what type of lithops it was.

Nowadays, the name Lithops turbiniformis is rarely used, although, for many years, it was used to describe what we now know as Lithops hookeri.

A colored brown lithops with stones.
The one thing these places have in common is the rocky ground and dry conditions.

Several more lithops discoveries were documented as Mesembryanthemum species until 1922, when Nicholas Edward Brown split up the genus based on capsules. Lithops was then conceived and had numerous species that continued to be discovered in the decades that followed. However, the findings between different researchers were so diverse that they could not agree on the relationships between them and what clusters could be named as species. Thus, by the 1950s, little was still known about lithops taxonomically.

This changed when Naureen and Desmond Cone began to study Lithops. They discovered almost all their natural habitats and collected more than 400 samples from different lithops populations. Then, they documented them, assigning them individual identities known as the Cole number, which is still used today. Their studies culminated in a definitive book (Lithops: Flowering Stones) in 1988, which details all the species, subspecies, and varieties of the plant.

There are at least 38 species of lithops and 145 varieties. They all mostly look similar, only differing in color, markings, and texture of the body. They come in various colors, including pink, rust, brown, green, and gray. They also have a vast variation in lines, patches, and dots on the upper surface, which help them with camouflage by hiding most of the leaf surface. They could also be dimples or indentations where these markings appear.

Because of their amazing camouflage abilities, new Lithops species continue to be discovered, with the latest discovery being as recent as 2006.

4. Lithops can live up to a 50 years

Lithops grow very sluggishly and can take up to 3 years to flower. However, because of their ability to store water for months and little need for maintenance, lithops can live for up to 50 years in their natural habitat.

As a matter of fact, you can keep healthy lithops in the same pot for more than 15 years with little water and 4 to 5 hours of direct sunlight every day. Lithops are unlike most succulents in that they don’t have stems. However, their flowers bloom with a short stem.

A blooming flower of lithops.
Their flowers bloom with a short stem.

They flower mainly from March to May in the Southern Hemisphere. All lithops are noonday flowering plants, which means that they flower at noon when the sun is shining the brightest.

5. Lithops are edible

Lithops are nonharmful to humans and pets. As a result, they are popular house plants. What most people don’t know, however, is that lithops are used as a source of food and herbal medicine in some parts of Southern Africa. There are also stories of children in the Namib desert chewing lithops to hydrate in the desert heat.

However, just because they’re safe doesn’t mean you should eat them. They aren’t too tasty anyway.

6. The name lithops comes from a Greek word

These plants belong to the plant family Mesembryanthemaceae (Aizoaceae). Nicholas Edward Brown named Lithops from two Greek words, lithos (stone) and opsis (like), for their deep resemblance to stones. The word lithops is used to describe the plants in both singular and plural forms. Local African names where lithops are found include skaappootjie and beeskloutjie, which mean cattle and horse’s hoof, respectively, for their resemblance to hoof-prints.

7.   Lithops are self-sterile

This fact means that they must be pollinated to produce seeds. The seeds are contained in a hydrochastic 4-8 chambered fruiting capsule. The capsules only open when exposed to moisture, revealing tiny seeds.

In their natural habitat, rain opens the capsules and splashes the seeds up to an inch from the mother plant. Once they dry, the capsules close to protect any remaining seeds for the next rain.

How to take care of lithops

As we’ve already established, lithops are popular plants to cultivate at home. While they are naturally found in Namibia and parts of Southern Africa, their seeds are found in many stores and even online.

Lithops are relatively easy to maintain. However, there are a few mistakes you can make in their care and kill them. Here are a few things you should do when growing them.

Light exposure

Lithops are desert plants, so you can bet they require some sunlight to survive. There is nothing like “harsh sunlight” with these plants, so feel free to place them where there is no shade. A South or East window with lots of sunlight is the best place to have them, but remember that insufficient sunlight might cause lost patterns and elongated leaves.

Lithops exposed in the light.
Too much heat can cause sunburn and damage your lithops’ foliage.

Although too much sunlight is not an issue, too much heat can cause sunburn and damage your lithops’ foliage. Ensure you place them in less sunny pots or cover them up if you realize that the pots absorb too much heat in the summer.

Best temperatures

Lithops can tolerate temperatures of 90 to 100 degrees Fahrenheit. However, they are likely to be most healthy in temperatures between 65 to 80 degrees Fahrenheit.

Since the plant may develop rot, it is essential to protect it from extremely low temperatures. Therefore, carry it indoors when the temperatures drop to less than 40 degrees Fahrenheit.

Soil requirements

Lithops require to be planted in fast-draining potting soil. They grow even better when they are planted in a cactus mix. Pebbles, sand, and anything gritty can be added to the soil to enhance drainage.

Watering lithops

Because these plants can store water in their leaves for months, using the wrong watering cycle can lead to their death.

To avoid this, you should water them once a fortnight at most from the end of summer, when the plants are actively growing. During winter, it’s best to leave them without water as it is their dormant season when they are reserving the water in their leaves. Watering them in this period will harm their growth.

A lithops freshly watered.
One way to determine if it’s time to water your lithops is by observing their physical conditions.

Apart from the watering schedules above, another way to determine if it’s time to water your lithops is by observing their physical conditions. For example, if you notice that they have started to pucker, wrinkle or appear to be sunken in the pot, it might be time to water them.

To wrap it up

Lithops are arguably the most intriguing succulent plants. They look like stones but bloom the most colorful flowers. They also survive in harsh conditions and live up to half a century.