How to Easily Propagate Agave?

Agave in a pot.

Agaves are luscious plants well known for their spectacular leaves. There are two varieties of agave: the spiky succulent, which produces juice used as a sweetener, and the aloe vera succulent, which is used for medicinal and cosmetic purposes.

Also known as the Century Plant, agaves can grow as high as 20 feet to as wide as 10 feet, so make sure there is plenty of space to walk around the plant if you grow the large variety.

Agave requires little attention as it requires occasional watering and well-draining soil. Propagating agaves is very simple. Before you get down to business, wear heavy gloves and goggles. Use sharp, clean tools to avoid disease transmission.

Methods of Propagation

The main propagating methods are:

Vegetative Propagation

This approach depends on the plant’s ability to regenerate roots and stems from stems or leaves. The period of the year strongly influences the result of plant propagation. First, find out which species will thrive in warm weather. If the cuttings are taken during unsuitable months, rooting may not occur.

Agave plants are slightly toxic because they have oxalate crystals in their leaves that can result in severe irritation. Avoid skin irritation by wearing gloves or direct contact with plants. Collect cuttings from sound plants. Do not breed spotted, shriveled, or diseased cuttings.

Agave plant.
They have oxalate crystals in their leaves that can result in severe irritation.

 The cuttings might be significantly small or several feet long, depending on the species and size of the mother plant. Rooting hormones are not necessary but can help with boosting root growth. All cuttings must be air-dried until the wounded soft tissue closes.

Seed Propagation

Seed propagation is the most economical way to multiply plants. As seeds multiply, the chances of developing seedlings that are unique or have unusual parent plant characteristics are high.

Agave seedlings are easy to handle and less susceptible to seedling diseases than most cacti.

Always use fresh and clean seeds. Plant seeds in shallow, wide containers and use a soil mixture with good drainage, ventilation, and organic matter.

Agave seeds on hand.
Seed propagation is the most economical way to multiply plants.

 For excellent blends, combine equal parts of inorganic matter like perlite and composted organic matter like sphagnum peat. Do not use animal manure as it may interfere with the establishment of seedlings. The best temperatures for good germination and growth are between 18 and 21 degrees Celsius.

How to Propagate Agave From Stem Cuttings

Cut the stem and let the wounded pieces dry for about a week. Once the cut end has become callous, replace the crown. Do not water until new growth occurs; new growth indicates root development.

Agave stem
New growth indicates root development.

How to Propagate Agave From Pups

Agaves can be easily propagated by extracting the pups, also known as offsets from the mother plant. Pups are outgrowths that appear at the mother plant’s base and can be used in propagation.

During transplanting, remove the young pups only because they have a high chance of surviving propagation. On the other hand, Bigger pups will not have sufficient roots to support their large and fleshy leaves.
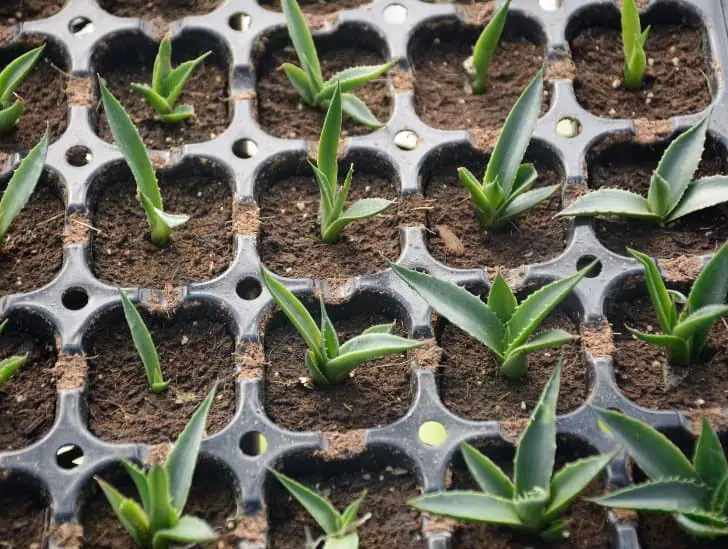
Agave pups on hand.
Pups are outgrowths that appear at the mother plant’s base and can be used in propagation.

Agaves have shallow roots that extend, so make sure the hole is wide when digging. Some species of agave that produce plantlets on the flower stalk. These may be taken out and potted individually. The roots should appear in a few weeks.

Steps for spreading agave from offsets

  1. Use a sharp trowel to detach the offset of the mother plant, leaving a small part of the stem that connected the pup to its parent. Cutting too close to the base may result in the roots not forming.

2. Take out the damaged roots and leave only a quarter of an inch of the roots on the pup. To remove the offsets, stir them one at a time until they are free of the mother plant and soil.

3. Place the pup in a shaded, airy area for a few days for the root to form a callus.

4. Prepare a rooting mix that drains quickly. For example, you can mix equal parts of potting mix and coarse sand. Or use equal mixtures of succulent mixture and soil.

5. Gently put the agave pup into the rooting medium

6. Place the container in a bright, hot place and lightly moisten the soil.

7. After the offsets take root; they will begin to grow. You can add soluble fertilizers regularly at this stage.

8. Agave offsets can be planted directly in 3.8 L containers and remain in them for as long as a year without being transplanted. Water the plant when the topsoil is dry and be careful not to saturate it.

How to Propagate Agave From Seeds

You can easily propagate your agave from seeds by following these steps:

  1. Spread the agave seeds evenly across the surface of a shallow container and lightly coat them with coarse sand. The container should have discharge holes in the bottom. If the agave seeds are larger, use pumice or perlite. Try not to cover the seeds too deep. The growth medium can be sterilized to prevent dampening during germination. Place it in a 176.7°C oven for approximately 30 minutes to sterilize your medium.

2. Place the container in an airtight container and fill it with water up to half the height of the container. Let the water dampen the medium from the bottom of the container. You can also use aerial irrigation because the agave seeds are significantly big. However, do not flood or soak seedlings, as this can lead to disease.

3. Move the pot into a bright, warm spot with plenty of indirect sunlight. We recommend a minimum temperature of 70 degrees Fahrenheit. Cover the container with plastic wrap for moisture retention during the germination period.

4. Seed germination will take two to three weeks, according to the species. Reduce moisture after germination by raising the sides of the plastic wrap; remove the wrap entirely after a few days and monitor soil moisture.

5. After germination, maintain the correct humidity levels. To accomplish this, attach a spray nozzle to a garden hose. Do not allow the soil to dry up completely. Waterlogged soil is just as harmful.

6. Transfer agave plants into flat or individual pots when two to three true leaves are grown. We recommend 5.7 cm containers for this purpose.

7. Fertilise the plants when they reach a height of at least 1.3cm. Use a low solution of soluble fertilizer each week. We suggest using a 20-20-20 (N-P-K) fertilizer for general use.

8. Increase the light intensity as seedlings mature. Check that your plants have access to the morning sun or filtered light. A plant deprived of light will be lengthened and grow irregularly. On the other hand, yellowing on one side of the plant may mean too much light or too much water.

9. Water your plant every week when night temperatures are above 16°C. Check for humidity in the root area before watering. Ensure that the upper inch is dry before watering.

How to Propagate Agave in Water

Put your Agave Plant into a large pot of water. Ensure that the plant enjoys indirect sunshine and fills the water after a few weeks. Your agave plant will develop roots and massive growth.

How to Propagate Agave Through Bulbils

Bulbils are small bulb-like structures found at the axil of leaves or at the base of stalks that can form a new plant. Choose bulbils that are shifted instead of those in large bunches.

 If you opt for clumps, divide them up. Also, opt for bulbs that have already developed roots so that your roots grow faster. Then, let’s move on to the necessary steps for successful propagation through the bulbs.

  1. Gently twist off the bulbils using your fingers. If you use tools, you might cause more damage to the plant. Take care not to damage the base, which can lead to water loss and fungal rot.

2. Use a rooting hormone to reinforce the roots and speed up plant growth. First, soak the bulb’s base in water, then the rooting hormone so that the powder adheres to the plant.

3. Dry the bulbils for approximately 48 hours until the wounded areas harden and reduce the risk of fungal attacks.

4. Use rapidly draining soil such as cactus or a succulent blend.

5. It is possible to increase moisture by placing plants in a greenhouse. Heat and moisture play a vital role in root formation. Or use plastic wrap.

6. Place the bulbs in larger containers after three months when the roots form.

More Propagation Tips

To remove an enormous agave:

  1. Dig around the plant using a shovel at least 8 inches in depth.
  2. Keep digging towards the middle of the agave.
  3. Pull up the root ball when it is loose.

It is also possible to divide the block into manageable sections to make it easier to lift out of the ground.

 Water your agave plant more frequently during the early months, at least every four to five days. Once the plant has been established, it is sufficient to water it twice to three times a month in warmer periods or more in very hot conditions.

A freshly watered plant.
 Water your agave plant more frequently during the early months, at least every four to five days.

 Put your agave plant in a sunny window; we recommend a west or south side for a lot of sunlight. Water your plant thoroughly and ensure that the soil is half dry before you start watering again.

Bottom Line

Propagation of agave is not a unique process, but a personalized care plan can guarantee a 100% success rate.
How to Make a Beautiful Desert Terrarium?

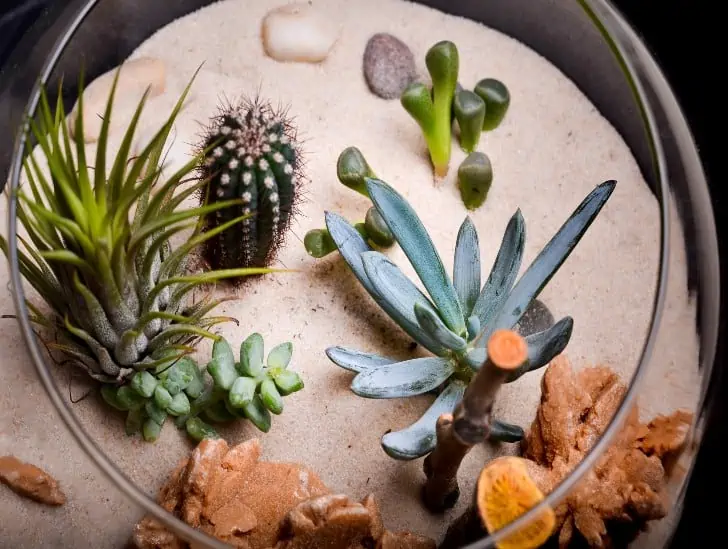
A round sand terrarium.

Indoor plants play a much bigger role in the design and feel of your interior spaces. For those without a backyard where they can create an outdoor garden, indoor plants help them stay connected to nature. If you are a big fan of succulents, nothing beats the joy and delight of having your own desert terrarium.  When done right, desert terrariums can be stunning and a great addition to your indoor space.

So, how can you make a desert terrarium?  The most important thing you need to keep in mind is that desert terrariums require a lot of bright light, a well-draining potting mix, and a good container to thrive.  For the container, you can use a transparent glass cylinder or cube. Don’t seal the top of the container to allow moisture to escape. The overall design of your terrarium can either be sparse or barren. A sparse design features only one succulent and a bit of tumbleweed, while a barren design goes all out and includes all sorts of succulents such as Echeveria, Sempervivum, and Sedum.

This guide highlights a step-by-step process you can follow to create your own desert terrarium in no time. Read on to learn more.

Why Should You Make a Desert Terrarium?

When planted and taken good care of, succulents, including cacti, can be a magnificent addition to your indoor spaces.

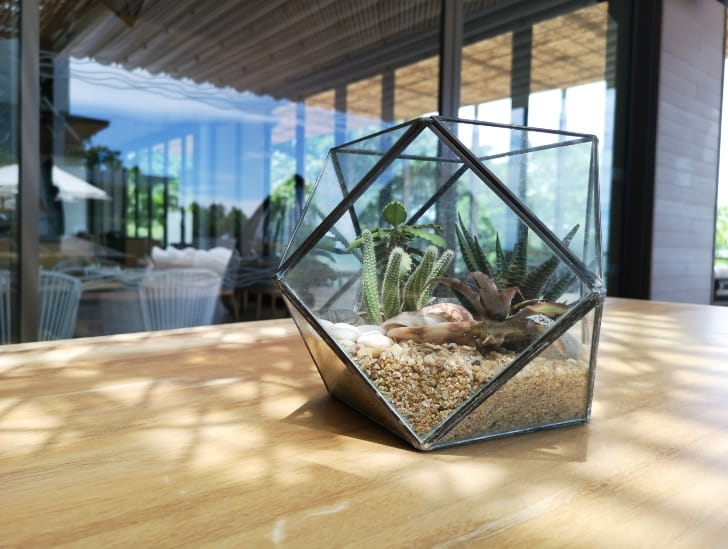
The open and transparent containers used in the process provide you with an incredible opportunity to create some beautiful layering and an eye-catching design.

A glass Hexagon desert terrarium.
an incredible and beautiful layering and an eye-catching design.

Although handling some succulents such as cacti can be pretty troublesome, your ability to maintain an open planter is greatly enhanced by the open space.

Furthermore, there are many types of succulents you can add to your desert terrarium to give it an even more exciting edge.

How to Make Desert Terrarium

Before you start the process of making your own desert terrarium, keep in mind that most succulents appreciate a relatively dry, arid environment that mimics the desert environment.

These plants don’t need frequent watering, and the containers don’t require sealing. If you strive to do everything right, you will end up with an exciting design that will transform into a fabulous feature of your home décor.

With proper maintenance, your desert terrarium will be a source of joy for many years to come. So, let us jump straight in and find out what you need to do to accomplish the mission:

Step 1: Choosing the Right Container

Typically, cacti and other succulents are known to tolerate a little bit of neglect. It is relatively easy for one to maintain these plants, and that is partly because of the fact they require smaller containers.

We suggest you use a clear glass cylinder or cube. The container should be 4 to 6 inches tall with an opening of at least 2 to 3 inches wide.

However, there is one major issue with using a glass container; it lacks a drainage hole at the bottom. Water can easily build up, soaking the soil and causing severe root rot.

You must be creative and think outside the box to address this challenge.

First, the ideal glass container for your terrarium must be of decent depth to achieve good drainage. You must also ensure it is not enclosed because cacti plants are not big fans of humidity.

The container must be completely open because even a semi-enclosed one can still cause a damp environment.

Finally, you will have to add a layer of gravel at the bottom of your container to ensure proper drainage.

Step 2: Assembling the Materials

To make a desert terrarium, you will need a wide range of materials. They include a clear open glass bowl, at least five cacti or other succulents plants of your choice, special succulent potting mix, pebbles for drainage, decorative glass pebbles, paper towels, a small stick, and decorative sand.

A person creating a terrarium.
Be careful when buying the potting mix.

Most of these materials can be obtained from your local plant store and won’t cost a lot of money. Be careful when buying the potting mix because that is the most critical thing in your entire setup.

Step 3: Drainage Is Everything

To make a stunning desert terrarium, you need to ensure you achieve the required drainage standards.  To do this, carefully place a layer of pebbles at the bottom of your glass bowl. Make sure the pebbles are approximately 3cm deep.

The primary purpose of the pebbles is to capture excess water runoff and prevent the roots of your succulents from sitting in water for too long.  If you allow the roots to stay in water for too long, it could lead to severe root rot that will eventually kill your plant.

Step 4: The Potting Mix

Make sure you are using a potting mix that is specifically formulated for cacti and other succulents. Ideally, the mix should contain a relatively high amount of sand, loam, and grit to allow for better drainage.

A group of terrarium.
Make sure you are using a potting mix that is specifically formulated for cacti and other succulents.

Now fill your glass bowl two-thirds of the way with your preferred potting mix. Water it slightly to compress it, then top up with a little more potting mix until the level is about 2cm from the top edge of the bowl.

Some of the best potting mixes to use in a desert terrarium include:

  • Commercially produced potting mix: Many manufacturers produce good quality potting mix comprising smooth grains. This is critical in preventing compaction problems, improving drainage, and retaining water more effectively.
  • Organic potting mix: This type of potting mix is made from organic sources like manure, mosses, and other natural materials. It is important to note that organic mixes retain moisture better than commercial products as they have larger particles. 
  • Clay-based potting mix: This type of potting mix is made from clay, pumice, sand, and other natural materials. It has a high water-holding capacity and is ideal for dry climates as it drains very quickly.

Step 5: Choosing Your Hardscape Materials

Open planters provide you with the perfect opportunity to show off a sleek piece of hardscape. It may be a variegated and complex maple leaf stone or a simple chunk of driftwood. One thing to remember when choosing your hardscape material is to ensure you will not harm your succulents.

For instance, wood could end up soaking up so much moisture that it will keep your plants moist above the soil, which is not good at all.

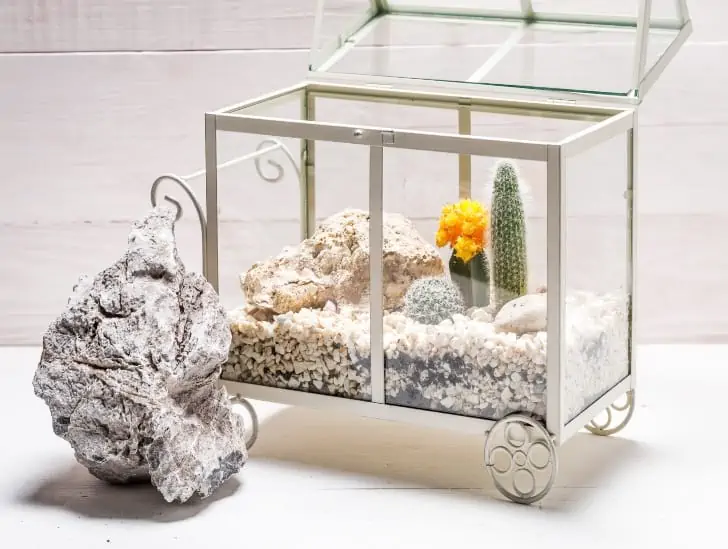
A terrarium with cactus.
Remember when choosing your hardscape material is to ensure you will not harm your succulents.

So, if you must use wood, you should consider sealing it with some sort of sealant or vanish, which can be found in any garden store or hardware.

Step 6: Get Creative

Now that you have done enough preparation and everything is in order, it is time to get creative and start creating your desert terrarium.

Carefully arrange the succulents the way you would like to display them while they are still in the pots that they came with from the plant nursery.

Everything at this stage is down to your personal preference. You can have anything from a 1-plant terrarium to a diverse arrangement of succulents.

If you want a diverse terrarium, consider adding succulents with different textures, colors, and heights. Relatively tall plants should go at the back of the terrarium, while the shorter ones should be at the front.

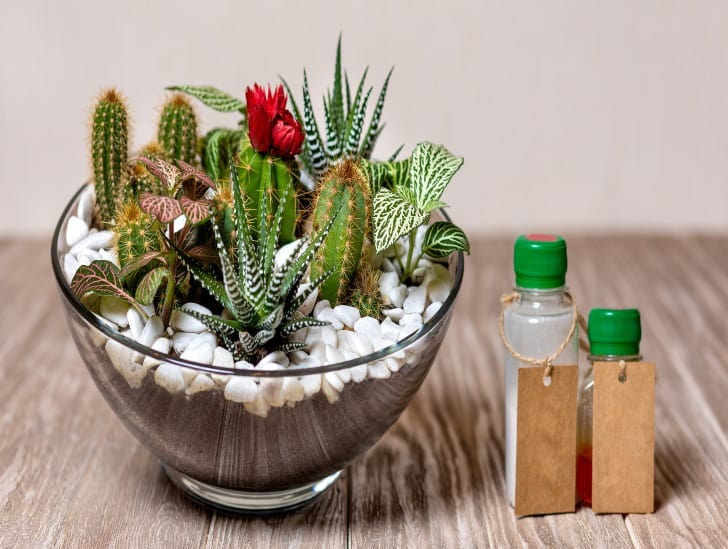
A group  cactus and plants on a glass bowl.
You can have anything from a 1-plant terrarium to a diverse arrangement of succulents.

Space the plants at least 5cm apart to avoid overcrowding.  You can alter the arrangement if you want to achieve a specific pattern. It is up to you to decide what you want.

Step 7: Plant Your Succulents

Carefully take out the first plant by turning the pot upside down and gently squeezing or tapping its bottom. Brush off the old potting mix and tease out the roots. Be cautious to avoid damaging the root ball.

If you are dealing with cacti plants, be sure to use a paper towel to hold the cacti when popping them out of the pot. Their tiny spines can easily lodge into your skin and cause injuries.

Make sizeable holes in the potting mix you had prepared earlier to mark where each plant will go. Carefully position each plant in its respective glass bowl and firm the soil around it. Repeat this step until you are done with all plants you have.

Once you are fully satisfied with your plant arrangement, clean the edge of your glass bowl using a paper towel to get rid of any soil residue.

Step 8: Add Sand

Now is the right time to add a thin layer of sand over your succulent soil. To accomplish this, gently angle the plants away from where you are spreading the sand.  Make sure you use a paper towel to avoid sustaining injuries.

Don’t worry if some of the sand gets lodged in your succulents because you can easily get rid of it using an old brush.

Step 9: Decorating

It is essential to add some vibe to your desert terrarium to make it look beautiful. To decorate it, consider adding small rocks, glass pebbles, or any other miniature decorations you have in mind.  The ultimate goal is to make it more stunning.

Step 10: Mist Your Terrarium

Since you had already watered your potting mix and compost, the final thing you need to do once you are fully satisfied that everything is in order is to mist the terrarium over the top using a spray bottle.

Your terrarium will be fully set up after the misting, and it is your time to start enjoying your hard work.

Care and Maintenance of Your Terrarium

All the above efforts will go to waste if you don’t give your new desert terrarium proper care and maintenance.

The most significant danger to your newly created desert ecosystem is overwatering.  Cacti and other succulents can still survive and thrive with minimal care. So, it is essential to understand the water requirements for the succulents in your terrarium and only water when necessary.

Typically, you should allow the potting mix to dry out completely before watering again. During watering, consider soaking the roots and allowing excess water to drain away.

Your primary objective should be to ensure that your succulents drink enough without sitting in the water for too long.

Preferably, you should use rainwater but if you don’t have rainwater, go for distilled water. Avoid using tap water unless you don’t have any other option.

Position your desert terrarium in a good spot that receives plenty of bright light because succulents love light. If you struggle to find a perfect location in your house, feel free to use grow lights set on a 12-hour cycle.

These plants can survive without fertilization but consider adding some special succulent fertilizer occasionally.

It is critical to inspect your terrarium regularly for any pests or diseases and take corrective action immediately. To enjoy your desert terrarium, pay close attention to its health.

Lastly, consider trimming the roots once they start growing outwards. Trimming can be done once or twice per year, depending on how fast the roots grow.

To trim the roots, gently remove the succulent from the potting mix and use a sharp pair of scissors to snip the damaged or excess roots. Replant your succulents following the correct procedure.

Final Thoughts

That is it about making a desert terrarium, and we hope you are now fully charged to give it a try. Follow the guidelines outlined above, and you will have a stunning desert terrarium in no time.

This is How to Propagate Ice Plant

Ice plants are among the easiest succulents to propagate at home. In fact, if you leave them on their own, they will naturally start spreading across the ground to form new clumps. With time, these clumps develop into new plants with a fully developed root system and branches. But you don’t want to let them propagate untamed. You want to be in charge and keep everything in control.

So, how can you propagate Ice plants? You can propagate ice plants through cuttings or seeds. Propagation through cuttings is the most popular method because all you need to do is cut off a piece of the plant’s stem, allow it time to callous and insert it in a well-draining potting mix. For seeds, you will be required to sprinkle them on well-draining succulent soil, then expose them to plenty of light to allow for germination. Do not cover the seeds with soil because they will not germinate.

This blog post discusses everything you need to know about propagating ice plants and how to take care of newly propagated plants. Keep reading to learn more.

Propagating Ice Plants from Cuttings

One of the easiest and most effective ways of propagating ice plants is by taking cuttings from an existing plant and rooting them to form new plants. The process is incredibly simple and doesn’t consume much time.

Once you have the cuttings in the right soil, they will form roots easily without even the aid of rooting hormone or powder. The cuttings should be placed directly in their final position because there will be no need to repot them after rooting.

What Tools Do You Need to Collect Cuttings?

To collect cuttings from an existing ice plant, you will need the following tools:

  • Pruners: Find good-quality pruners from your local plant store. Make sure the pruners you purchase come with a warranty for the sake of your peace of mind.
  • Trowel: Like pruners, take time to find a good trowel that is at least bend-proof and rust-resistant. That way, you get value for money spent.
A blue pruner.
The best time to take cuttings from your existing ice plant is during the relatively warmer months.

The best time to take cuttings from your existing ice plant is during the relatively warmer months. So, any time from the start of spring through to fall will be fine. However, if you live in a region that experiences extremely cold weather during winter, you should wait until summer before you start collecting cuttings.

Where Should You Plant Ice Plant Cuttings?

Just like full-grown ice plants, cuttings love full sun and tend to thrive in relatively dry conditions. You also need to ensure that your succulent soil is free draining so that the cutting isn’t waterlogged. For temperatures, your cuttings should root comfortably at temperatures of at least 20oF.

Follow the steps outlined below to collect and root ice plant cuttings:

Step 1: Prepare Your Planting Site

Take time to prepare the new location for the cutting. If you want to root the cuttings in a container, find a good container with plenty of drainage holes at the bottom.

If you want to root the cuttings in your outdoor garden, find a good spot with good drainage soil and not heavy clay soil that will hinder drainage.

A yellow ice plants on pots.
Find a good spot with good drainage soil and not heavy clay soil that will hinder drainage.

Prepare your potting mix or ground well and make a hole in it with a trowel for your new cutting.

Step 2: Take the Cuttings

Using a sharp pair of pruners, carefully cut a section of your existing plant’s stem that is at least 10cm long.

Most likely, you will see segments along the stem. If you don’t see any segments, find another part with visible segments and cut it because roots will generally form along the segments.

Once you have a good cutting with visible segments, carefully remove the leaves from the bottom two or three segments.

Alternatively, water the ground or potting mix around your existing ice plant and carefully pull out a section that has already been rooted. Trim back the section you pull out to two or three stems, and you are good to go.

Step 3: Rooting Your Cuttings

Immediately you finish preparing your cutting, plant it in the hole you had prepared in your container or ground. Make sure at least 2cm of the cutting is inside the potting mix or ground, then firm the soil around it.

Keep the cutting moist but avoid waterlogging it for the first two weeks because it may fail to root. You don’t need to fertilize the cutting at this stage, neither do you need any special compost to facilitate root growth.

Typically, your cuttings should start forming roots after one or two weeks depending on the climate of the place where you live. You will know the cutting has successfully rooted when you start seeing signs of new growth on it.

Propagating Ice Plants from Seeds

If you choose to propagate ice plants through seed germination, then you need to be a little bit patient because it takes time for the seeds to germinate into seedlings.

Go around your plant after the flowering season and collect as many seeds as possible. Dry the seeds in preparation for planting. If your plant doesn’t produce seeds, consider purchasing some from your local nursery store.

Once you have well-dried seeds, the next thing you need to do is prepare your potting mix. Water the mix adequately because you won’t water it again until your seeds germinate.

A farmer hands planting seeds.
You need to be a little bit patient because it takes time for the seeds to germinate into seedlings.

Now take the seeds and sprinkle them on your potting mix but don’t cover them. Take the container and position it in a bright spot that receives plenty of sunlight. Don’t cover the seeds with even an inch of soil because they won’t germinate.

You can keep the container inside or outside depending on the climate of the place where you stay. If the climate is relatively warm and sunny, feel free to keep your container outdoors.

However, if the climate is colder, you should keep your seeds indoors and take care of them from them. Feel free to use grow lights to supplement the natural light.

It is highly recommended to use a relatively smaller container and a seed-starting potting mix formula to achieve better results. Sow the seeds at least four weeks before the last frost so that they are ready for transplanting when the warm weather kicks in.

It takes between 15 to 20 days for the seeds to start germinating.

Taking Care of Newly Propagated Ice Plants

Once your seeds or cuttings sprout into new plants, you can keep them in the containers or transplant them into your outdoor garden. If you want to transplant them, do so during spring or summer when the threat of frost has passed.

As soon as you notice new growth on your cuttings or seed germination, position the growing container on a sunny windowsill.

If you cannot find a good spot that receives plenty of sunlight throughout the day, consider using grow lights set on a 12-hour cycle. Keep your seedlings approximately three inches under the artificial grow lights and leave them turned on for at least 12 hours a day.

You can even keep the lights on for 16 hours a day because young ice plants only require eight hours of rest. After 16 hours, switch off the lights completely and keep the plants in total darkness.

As your seedlings grow taller, raise the lights slightly up to maintain the distance at approximately three inches. Avoid using incandescent bulbs since they can get too hot and burn your young plants.

Feed your seedlings only once when they are at least four weeks old with a simple starter solution. A starter solution is formulated at half strength to what is given to mature ice plants.

A flower blooming.
You should harden your seedlings by gradually exposing them to outdoor conditions.

Before transferring them to your garden, you should harden your seedlings by gradually exposing them to outdoor conditions. This exposure helps to harden their plant cell structure hence reducing the chances of transplant shock.

Bonus Tip

Did you know that ice plants make a wonderful groundcover that plays a critical role in suppressing weeds? When they bloom, they look like a solid carpet of pink or red blooms. These succulents will still do well in rocky areas and can trail down a wall.

A purple flower of an ice plant.
Ice plants make a wonderful groundcover

To get the best out of your ice plant collection, consider planting a few of them in a hanging container to provide you with that stunning beauty. Find a ten-inch hanging pot that can be used both indoors and outdoors and try it out.

Summary

That is it about propagating ice plants, and we hope you are now ready to start multiplying your ice plant collection. As long as you take good care of your newly propagated ice plants, they will quickly grow into beautiful succulent-like foliage that flowers throughout summer.

You can also propagate as many ice plants as you want and transplant them into your outdoor garden to help control soil erosion and strengthen the soil structure. 

Reduced soil erosion and a strong soil structure will not only benefit the ice plants but other succulents and non-succulents you may have in your garden. We now wish you successful ice plant propagation!

This is How to Propagate Bear’s Claws Plant

The Bear Claw is a beautiful and rare succulent with soft and fluffy leaves. The edges of the leaves appear to have tiny teeth, from where this cute plant got its name. While easy to grow, the propagation could be a bit difficult, particularly for a beginner.

In this review, we will discuss propagation methods and how you can ensure a high success rate.

 Methods of Propagation

There are three primary ways to propagate your bear claw plant:

  1. Stem Cuttings
  2. Leaf Propagation
  3. Seed Propagation

Before we begin, there are a few basic rules we need to know before taking succulent cuttings.

How to take and grow succulent cuttings

The Best Time For Succulent Cuttings

If you take the cutting when the plant is dormant, the plant will not show any progress until the growing season starts, but it can also die entirely.

Unfortunately, different cuttings have different growing seasons. Some grow during the hottest months, others in fall and winter. In addition, a few cuttings may have problems in the cold season because they do not tolerate freezing. 

A bear claw leaves.
Different cuttings have different growing seasons

However, most succulent plants are dormant in winter and grow in spring, summer, and even early autumn if the weather is still warm enough. The perfect time to take cuttings in the middle of spring. This statement also applies to succulents that are dormant in summer.

The Finest Plants for Cuttings

We recommend taking cuttings from plants that are already mature, although succulent plants may develop from small segments. To increase your chances of success, choose big cuttings.

Make sure that at least a few pairs of leaves and a stem are present.

Cutting Tools Sterilization

Clean the cutting tools you will use if scissors, garden shears, or knives prevent the wound from becoming infected either on the mother plant or the cut. You can soak or wipe the tools using a disinfectant which can kill the plant pathogens.

Time Necessary for Cuttings to Heal

Once you take the cuttings, dry them for at least 24 hours. Drying the cuttings will give the wound ample time to dry and form a scab. If the wound is not sealed, fungi and other diseases might enter the cutting and damage your plant.

Choosing a Good Planter

A suitable planter can be many things, from decorative jars to hollow logs and old mugs. Everything goes as long as you get a planter size ideal for the cutting and repot when the roots grow. Make sure you clear the pot first because it can carry pests that can damage your plants.

Three plants in three different pots.
A suitable planter can be many things, from decorative jars to hollow logs and old mugs.

Quality Succulent MIX

An excellent growing medium is essential for the well-being of your succulent plants. You can experiment with different mediums to determine which one suits you best. However, we recommend a succulent potting blend because it encourages root growth.

Succulent plants are resilient, meaning they can send roots even though they are not planted. So it should not be difficult to propagate them in alternative mediums such as water or sand. Nonetheless, use a high-quality potting mix for guaranteed results.

Find an Appropriate Spot

Place planted cuttings in a sunny location if the propagation was carried out in spring and mild weather. But when temperatures exceed 25C/77F, move the cuttings to an area that does not get much sunlight in the afternoon.

Succulent cuttings can quickly burn if the weather is too hot. For this reason, expose them only in the morning sunlight or in the afternoon shade. Filter the light using a shade cloth if the sun is scorching. You may expose the cuttings to the sun gradually so that they become accustomed to it.

Different plants receiving a sunlight.
Expose them only in the morning sunlight or in the afternoon shade.

Plants that do not get enough light to grow large and fine leaves that are scattered and lack color. Finding the right balance between sun and shadow is not easy; you may need to move the plant to different places to see how the plants react.

Water Requirements for the Cuttings

There are differing views on whether to water your fresh cuttings or give them a bit of time. Some argue that new cuttings do not require watering as they have enough moisture to keep them going until they root.

Others recommend watering to increase the probability of your cuttings taking and sending roots. Our suggestion is to experiment with what works best for you. Then, let the soil dry until the next watering session.

Rooting Time

It takes between two weeks and a month for the first roots to appear during the growing season. The speed at which the roots grow will depend on the specific succulent, and some may take much more time than others.

To determine whether the cuttings have roots, gently pull the cuttings. If you find the slightest resistance, then most likely there are roots. You may let the cuttings be until the roots have grown slightly longer. Repot when a large root ball approximately 5 cm long has formed.

Cuttings’ Challenges

During the rooting phase, some plants may have yellowish leaves and appear faded. Most succulent plants react this way because of the loss of water when they are cut from the parent plant. Do not worry because they will improve once they have developed roots and will nourish the plant.

Some leaves may fall off when put into the succulent blend due to the cutting or the potting mix. Move your plant to a more shaded area if the leaves drop too much.

Transplanting

Once your succulent plants have rooted, you are most likely excited and can’t wait to move them to their vessel. However, you may wish to give it a certain amount of time. If you remove the plant too soon, you risk damaging the leaves and roots. Wait until the new succulent has approximately an inch in diameter before transplanting.

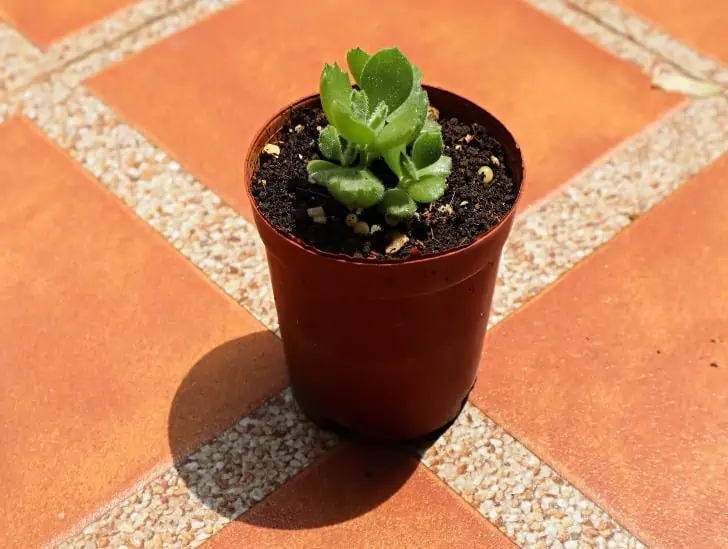
A bear claw in a pot.
Wait until the new succulent has approximately an inch in diameter before transplanting.

Let us now examine the propagation methods in detail.

Propagating by Stem Cuttings.

Propagating the bear’s paw with cuttings is one of the best ways to achieve successful outcomes. First, you’re going to need a pair of scissors or a sharp kitchen knife. Cutters should be clean to prevent the spread of any infection that may cause decay. Irregular edges may prolong wound healing, so always make a clean break.

Remove the last 4 inches and incorporate the growth tip. Get rid of the lower leaves because the area will eventually become submerged. When you plant cuttings in a pot, use a pot with drainage holes and well-drained soil.

Remove the stalk from your Bear Paw plant. Once the stem has been cut, allow the cuttings to dry for several days before replanting. The drying of cuttings helps heal the injured tips. Next, place the cuttings in a pot.

Leaf Propagation

Leaf Propagation has a lower success rate; therefore, you must be careful. First, select a mature, healthy leaf without any scarring. The best leaves are located at the base of the plant; in addition, the gathering of a lower leaf prevents you from disturbing the plant’s symmetry.

Begin by bending or twisting the leaf, then pull it out of the main plant of the bear’s claw. Make sure the leaf is completely removed from the stem without rupture for a successful spread. Let the leaf dry for a day or so and plant it in well-drained soil.

Seed Propagation

Propagating through seeds is the most extended way to spread your bear claw, as it can take months to grow. Sow the seeds into well-draining soil and plant them in a pot with drain holes. The best time to plant the seed is during its growing season. Avoid planting them in winter while they are dormant.

How to Take Care of a Bear Claw

After a successful propagation, you need to consider a few things if your plant grows healthy and beautiful.

Watering Needs

Use the soak and dry method to water your Bear’s Claw. In this method, you dip your fingertip into the soil to confirm if the soil is dry before watering. Be careful not to overwater or underwater your plant.

Sunlight Requirements

Give your Bear’s Claw two to four hours of bright and direct sunlight every day. You can buy grow lights if you live in an area where sunlight is an issue. However, too much exposure to the direct sun may damage your plant.

A bear claw outside.
Too much exposure to the direct sun may damage your plant.

Well-draining Soil

The Bear’s Claw does not like waterlogged soil because this can lead to root rot. Instead, use quality and well-draining soil to hold the right amount of water. For a healthy plant, use a pot that has drainage holes at the base.

Fertilization

Fertilization provides your Bear’s Paw with essential nutrients which the soil is unable to provide. Therefore, only fertilize the plant during their growing seasons just before winter.

Bottom Line

There are numerous ways of propagating the bear claw plant. Before choosing any method of propagation, choose one which is easy and will not take too long. Keep in mind; you might lose a few cuttings along the way. The more you do this, the better the outcome.

Where Is the Best Place to Buy Cactus?

The truth is that many people love cactus for numerous reasons.  While some have been in the love affair for quite a long time, others are just starting and are still newbies in the cactus world.  Newbie or not, we can all agree that cacti are easy-to-love succulents because they are hardy and relatively low maintenance. But with so many different options available on the market today and so many online succulent stores, choosing the perfect place to buy cactus can be pretty challenging.

So, where is the best place to buy cactus? You can easily purchase your cactus from a wide range of different retailers, both online and offline.  Some of the major online succulent stores that sell cactus include succulent box, fairy blooms, the succulent source, planet desert, bloomscape, succulent market, harddy, and so on.

This blog post discusses the different places where you can buy the best cactus to start growing your collection. Read on to learn more.

1. Leaf and Clay

Leaf and Clay is an online succulent shop that opened in early 2016. It offers a wide range of succulents, including but not limited to cacti, air plants, Echeveria, Aloe Vera, and so on.

Besides the succulents, they also sell crafty succulent pots and containers, subscription boxes, and potting mix.  The cost of cacti plants from this online shop starts at $4, while cacti boxes start at $36. The box usually contains six pieces.

For other types of succulents, a box starts at $45 but contains at least six rare pieces of succulent plants. During shipping, the plants are packaged individually.

4 different types of succulent
Different types of succulent perfect for your home

They are only shipped with bare rooting, but the packaging is so good to help them withstand transportation.  Leaf and Clay only ship their succulents within the United States and its territories.

The shipping fee starts at $30, while free shipping is offered for orders above $75.  If you receive your order and are unhappy with it, you can’t return it unless it is non-perishable items such as potting mix or containers.

The product you want to return must be intact and unopened for up to 30 days after the delivery date. With returns, it is the buyer who shoulders the postage cost.

2. Planet Desert

Planet Desert boasts a remarkable collection of succulents, including different cacti species that you can purchase. Generally, the online retailer has approximately 280 different types of succulents and over 300 different cacti species. Therefore, it is relatively safe to say that they have everything for everyone.

Other than plants, they also have gift cards, a rewards program for their loyal customers, cuttings, succulent soil, top dressing, amendments, DIY projects, and so much more.

The website is a paradise for every avid gardener who wants to expand their plant collection. They have almost everything you need in different varieties.

Each plant sold on their website has a detailed description, and you will find all the valuable information you need on growing and caring for the plant. The plant’s description will include everything from its watering requirements, sunlight requirements, temperature, fertilization, and what its flowers look like.

three cactus with a pink background
Check out plant desert for their wide variety of cacti species

Before visiting their website, ensure you have plenty of time because you will easily drown in the descriptions provided to learn more about the succulents on sale.

One of the best things about Planet Desert is that it doesn’t matter whether you are a seasoned gardener or a newbie; you will always find something that suits your needs.

Right from low-maintenance cacti to slow-growing Kanachoe, this online succulent shop appeals to almost everyone.

The business offers excellent customer service since it is a family-run business, and you will find great reviews from past customers. Most customers rave about the prompt response time, useful assistance, and the overall great purchase experience.

3. Bloomscape

Bloomscape is another excellent place to buy cactus online. This direct-to-consumer company focuses on making the plant parent process as easy and seamless as possible.

For each mature and ready-to-go plant they sell, they ensure it comes with a bunch of tips for success. So, you will receive credible tips on how to water your plant, the amount of light exposure required, and when to fertilize it.

Many people trust them, considering that they have been managing greenhouse-grown plants for more than five decades. They know a thing or two about what it takes to make succulents, especially cactus, thrive.

When it comes to cactus selection, they have an entire catalog of unique and beautiful-looking cacti plants that will appeal to your indoor or outdoor environment. For instance, their prickly pear cactus looks like what a retro cactus should look like.

4. Succulent Market

Succulent Market describes itself as a “third-generation cactus and succulent farm.” They have been in the business of propagating, growing, and selling succulents for more than five decades.

The family behind the online business primarily sells cacti and other succulents in wholesale. It was not until a few years ago that they started selling their succulents online.

Something unique about this company is that they are the only online succulent retailer that sells larger 4-inch succulents by variety. Their collection boost over 100 different types of cactus and other succulents for sale.

different types of succulents
Visit Succulent Market if you are keen to own 4-inch succulents for they are the only online succulent seller for that

They also have succulent cuttings available for sale, and the various cactus species on sale are offered in varying packs.

They offer free shipping on all orders above $65, and all orders are usually shipped on Mondays, Tuesdays, and Wednesdays.  However, shipping is only within the United States, and all plants are shipped in pots and appropriate soil.

They offer premium quality succulents at reasonable and affordable prices. They also have a superb selection of cacti cuttings and friendly customer service.

5. Mountain Crest Garden

One of the most popular and reliable online succulent retailer shops is Mountain Crest Gardens. The family-owned and run plant nursery is located in Scott Valley, California, and has been in operation since 1995. The business has been an online catalog of succulents since 2001.

The business now boasts over 700 varieties of succulents you can choose from and continues to add new types to its online catalog every month.

They have an average rating of 4.8/5 with more than 31,000 reviews, showing how popular it is among gardeners. They ship products to all U.S states and territories. Free shipping is available except to Alaska, Hawaii, Guam, and other U.S territories.

Does Cactus Need Direct Sunlight?
Looking for a shop that has 700 varieties of succulents? Head on to Mountain Crest Garden’s website

All orders are usually shipped between Monday and Wednesday and delivered from Thursday to Saturday. The company packs all shipments by hand in highly recyclable crinkle paper, boxes, and biodegradable packing peanuts.

The succulents are shipped when they are fully rooted in two-inch plastic containers. The company offers a 14-day quality guarantee that covers all plants without roots, diseases, root rot, pest infestation, broken stems, missing leaves, visible damage to pots/containers, and incorrect or missing plant products.

If you are not satisfied with what was delivered, you can choose to receive a store credit plus an additional 10% refund or a replacement plant if it is available. 

6. Harddy

Harddy is a chain of plant nurseries located in California, but all orders and shipments are usually facilitated by their registered and licensed online store known as Harddy.

Harddy is listed as one of the largest online plant nurseries in the United States, with superb customer service and a reasonable price range. You will find more than 300 different varieties of succulents here, growing pots, potting mix, succulent boxes, gift cards, and uprooted succulent cuttings.

The price for their various succulents is reasonable, with five healthy cuttings selling at $8 only. Gift boxes are priced between $30 and $70, while Rosette succulents range between $14 and $20 for four pieces.

Shipping of purchased products is done every Monday, Wednesday, and Friday, but expedited shipping can be considered upon request. Keep in mind that expedited shipping may attract additional costs. However, the shipping fee is usually waived for bulk orders.

one of the important things when potting -- potting mix
For potting mix and other gardening essentials, Harddy is the way to go

Products are only shipped within the United States, and all returns must be filed to the USPS within 24 hours of delivery.  Every package they ship is insured with $50. Refund policies don’t apply to broken or damaged packages in transit and those that were not fully wrapped in heat packs.

Their succulents are greenhouse-grown, and all of their common varieties adhere to the national standard prices. Succulents are shipped in pots and soil, and customers enjoy up to a 10% discount on all bulk orders.

One of the reasons you should consider buying cactus from Hardy is that they offer a wide selection of cactus collections and have one of the best customer services. Most importantly, they help local nurseries to thrive by sourcing some of their products from there.

7. The Succulent Source

The Succulent Source is one of the best places to buy multiple succulents at the same time. This family-owned online shop sells succulents, cacti, and other exotic plants. They are based in San Diego, California and have been in business since 2004.

The Succulent Source has a wide variety of succulents for sale, such as Echeveria, Agave, Haworthias, Aloe Vera and more.

Prices range from $6 to $40 depending on the size and type of succulent. They offer free shipping for orders over $75, and every order comes with detailed care instructions.

The Succulent Source also provides excellent customer service, ensuring customers have a positive experience when shopping. They have a 100% satisfaction guarantee and offer refunds or replacements if you are unsatisfied with your purchase.

They also have great discounts and deals, so it’s worth checking out their website for the best offers before purchasing.

8. Local Nurseries

If you would like to shop locally, we’d advise you to find a local plant nursery and see if they stock succulents. Luckily, many local nurseries specialize in succulents, cacti and other exotic plants.

Shopping locally ensures you get fresh plants without signs of pests or disease. The prices at local nurseries are usually slightly higher than those found online, but you can be sure that the plants have been personally selected by someone who knows what they’re doing.

Many nurseries also offer expert advice and tips on how to properly care for the succulents you purchase.

9. Amazon

Although the live succulent assortment on Amazon is not so extensive, you can still find a variety of succulent options for sale. There are even artificial succulents in case you want a plant that does not require any care.

The prices on Amazon range from $7 to $35 depending on the type and size of the succulent. Shipping is mostly free if you’re an Amazon Prime member but may incur additional charges for large or heavy items.

All orders come with detailed instructions on the best way to care for your succulent, and Amazon has a generous return policy in case you are not satisfied with your purchase.

However, it’s important to note that live plants cannot be returned due to health and safety regulations.

Summary

All of the cactus stores mentioned in this guide have several things in common; they have a wide range of cactus species, sell much more than just cacti plants, have good customer service, reputable shipping, and prices are reasonable.

Most of them are also community rooted and strive to provide gardeners with valuable tips that set them up for success. They know what to do to make their customers happy. So, feel free to purchase your cactus plant from any of the mentioned stores.

Ultimate Guide: How to Care for Schlumbergera truncata Plant

The Schlumbergera truncata or Thanksgiving cactus is one of the most well-known houseplants, and for a good reason. They produce brilliant, tubular blooms in lilac or pink colors when they bloom. 

Their lovely flowers, long blooming period, and low maintenance requirements make them a great plant to have at home. I’m guessing that someone in your family has a Thanksgiving plant!

This Schlumbergera plant has three main varieties: 

  • Thanksgiving cactus
  • Christmas cactus
  • Easter cactus 

Magically, all of them bloom nearing their respective holidays. 

How Do You Look After the Schlumbergera truncata Plant?

The Schlumbergera truncata is a lovely, winter-flowering houseplant with gorgeous flowers that flourish for a long time.

Pro Tip: Unlike other cacti, Schlumbergera truncata and its relatives do not grow in hot, dry places such as deserts or plains. These epiphytic succulents are native to Brazil’s tropical rainforests, where they thrive on other trees’ branches and absorb the high humidity, indirect sunlight, and warm temperatures.

The plant is easy to maintain and look after. Read on to find out some care tips for growing Schlumbergera truncata:

Planting Schlumbergera truncata: Potting

Select a pot with a drainage hole in the bottom when choosing one for a Thanksgiving cactus. This prevents the soil from becoming too wet when watering.

For the soil type, Thanksgiving cactus thrive in soil mixes designed for succulents or cacti. However, the essential thing is that your potting soil drains well.

When your Thanksgiving cactus thrives, keep the plants in a location with bright, indirect light. A well-lit bathroom or an east-facing window are both ideal places. When you expose the plant to direct sunlight, it might damage its delicate leaves.

Schlumbergera truncata in a pot.
Select a pot with a drainage hole in the bottom.

For temperature conditions, the plant prefers a daytime temperature of up to 70°F and an evening temperature of 60-65°F mimicking the tropical conditions.

Thanksgiving cactus prefer high humidity levels; because of this, your kitchen or bathroom creates an ideal spot for the plant. If you live in a high humid environment, you can have it anywhere in your home. Likewise, if you keep it in a dry atmosphere, you may put a tray of pebbles with water inside the planter to increase humidity levels.

During summer, place Thanksgiving cactus in an unheated porch or garden with a shade until the temperature falls below 50°F. Always remember to keep them away from direct sunlight.

How to Water Schlumbergera truncata

Because they are native to tropical and subtropical forests, Schlumbergera truncata are more thirsty than other cacti and other succulents. Make sure to give this plant enough water when the top inch of soil becomes dry. This plant cannot withstand low moisture or dry soil; it will die.

Take into account the season, weather, and environment when watering your Thanksgiving cactus. Water it every two to three days if you keep it outside in a hot, dry environment.

A irrigation system.
Water it every two to three days if you keep it outside in a hot, dry environment.

In a cool and humid climate, such as indoors, the Schlumbergera thrives on a once-weekly watering. During the fall and early winter months, reduce your watering to encourage bloom.

The Thanksgiving cactus is very susceptible to over-watering. The plant can get fungal rot disease if the soil is too wet, causing its leaves to fall off.

To prevent overwatering while still ensuring that the plant gets enough moisture, set up a tray of water near it or use a spray bottle to mist your cactus regularly.

What is The Right Soil for Schlumbergera truncata?

Remember, you need to prepare and have the soil that represents Schlumbergera’s natural environment, and Schlumbergera grows in tree crevices with decaying matter all around it. Hence it prefers acidic soil.

A soil being transferred on the container.
Schlumbergera prefers acidic soil.

Schlumbergera truncata prefers rich, porous soil mixed with plenty of organic matter. A good option is soil designed for citrus trees and cacti.

How to Fertilize Schlumbergera truncata?

When the flower buds start to form, use a succulent plant food according to the directions on the label to promote robust growth and produce many flowers.

Fertilize twice a month during the bloom season, then wait to add fertilizer again until the plant starts actively growing in the spring.

How to Get Your Schlumbergera truncata to Bloom

Thanksgiving cactus blooms in cooler temperatures and extended darkness periods. If your schlumbergera is not blooming, it might be in a high temperature surrounding or receiving too much light. 

A flower pot.
It blooms in cooler temperatures.

Here are some pro tips to have your Thanksgiving cacti bloom:

  • To trigger blooming, expose it to prolonged darkness of at least 14 hours and less exposure to light between 8 to 10 hours for at least five weeks. If you have solid interior lighting at night, you’ll need to cover your cactus or relocate it to a location with less or no light.
  • When the flower buds develop, they are most likely to flourish at 50 and 60°F.
  • You may start the budding process earlier by exposing the plant to temperatures of around 45°F for several nights in a row.
  • Ensure to water the plant regularly throughout its blooming process. If the plant becomes overly dry, it may drop its buds.

Don’t worry if the cactus sheds its buds one winter: it should flourish the next season!

How to Propagate Schlumbergera truncata

Thanksgiving cactus is easy to grow, and the best part is that you may give them to your family as Christmas or Thanksgiving presents. You can propagate Schlumbergera cactus from cuttings or seeds.

To begin the propagation process from cuttings, use a pruning shear to make a small Y-shaped cutting from the mother plant stem. Ensure you take two to four joint Schlumbergera pieces and are healthy.

To prevent excessive moisture build-up and root rot, allow the cuttings to rest and dry for at most 12 hours. Once the cuttings are completely dry, place them in a container with well-draining soil (cactus and succulent soil mix).

Place the freshly potted cuttings in a well-lit place with indirect light, and they will start rooting. You should water the potting sparingly until the plant has grown and acclimated to the new environment. 

A plant in the pot is wrapped in a paper.
It can survive in the same pot for several years without repotting.

The first indication that the cuttings have settled in their new environment is when new growth emerges at the tips of their leaves.

Don’t worry if your plant droops a bit in the beginning. This condition is entirely normal, and the plant will usually look better as it adapts to its new surroundings.

Pro Tip: Thanksgiving cactus does not require as much repotting over time as other cacti, and it can survive in the same pot for several years without repotting. Although, you should repot it every year or once in two years to offer more nutrients promoting healthy growth.

Common Pests and Disease Affecting Schlumbergera truncata

Mealybugs: this plant may be susceptible to pests, especially mealybugs, and, if over-watered, root rot. If you notice any diseases on its leaves, prune the damaged leaves and repot the plant onto clean soil.

Blossom drop: If your Thanksgiving cactus is under any type of stress, it will most likely shed its blooms. This may be due to the amount of light or a rapid temperature change. Also, make sure your soil isn’t overly dry while the buds are developing.

Shriveling: The stems can shrill as a result of the plant being subjected to extreme heat and direct sunshine. However, root deterioration owing to over or under watering is the leading cause.

Non-flowering: Non-flowering might be due to the day length not shortening or/and temperatures not dropping below 60°F, as in the case of fall. For example, if a plant is near an artificial light source after dark and the temperature does not drop below 60°F.

Things to Note About Thanksgiving Cactus

Toxicity of Schlumbergera truncata: The plant is considered a low-toxicity option. Vomiting and diarrhea have been reported in dogs who consume significant amounts of the plant. When ingested in small amounts, there are usually low levels of toxicity.

Is Schlumbergera truncata a house plant? The Thanksgiving cactus is typically kept as a houseplant. In the hotter climates, such as those with temperatures more than 70°F, you can grow it outside in partial shade year-round. 

Where to buy Schlumbergera truncata plant: The Thanksgiving plant is available in many gardening stores and nurseries starting in the fall. This plant makes an ideal present to gardeners, and hence during holidays, it might be the right time to make a purchase.

Bottom Line

The Schlumbergera truncata is a low-maintenance plant with lovely blooms. When situated correctly in an area with plenty of indirect light, extended hours of darkness, and enough moisture, this versatile plant will amaze you with new blooming cycles throughout the year.

You may take cuttings from a healthy, robust Schlumbergera truncata and transplant them into attractive pots to offer as gifts. Everyone will be pleasantly surprised, especially when they learn that you grew the plants yourself.