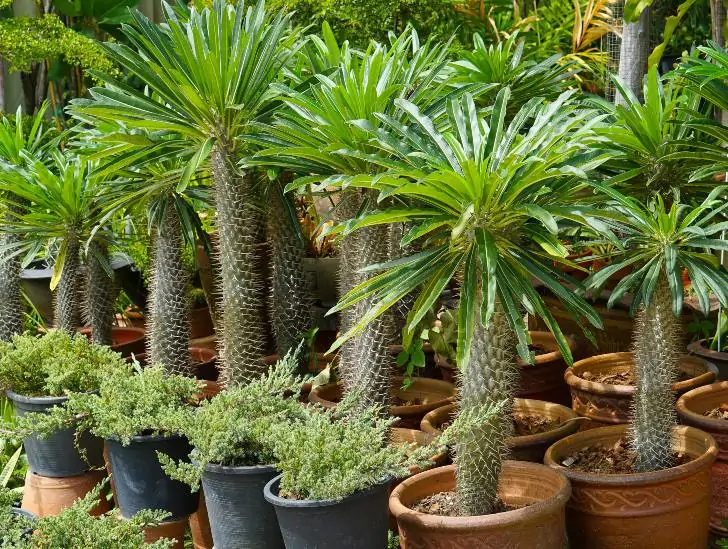
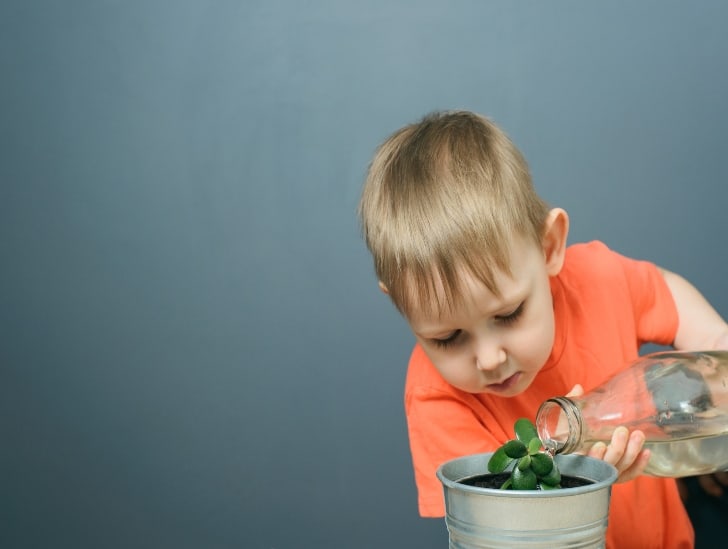
12 Tips On How To Water Portulacaria Afra (Elephant Bush)

Portulacaria Afra Elephant Bush is one of the most popular houseplants thanks to its ease of growth. This desert plant requires very little attention. They do, however, need regular watering to survive. If the soil around a jade is allowed to dry out completely and then is flooded with water suddenly, it can cause roots to rot and eventually kill the plant. One of the most frequent questions about Portulacaria Afra Elephant Bush is how often they need watering. Portulacaria Afra Elephant Bush is sensitive to overwatering, but they also don’t like to dry out completely, so it is important not to water them too infrequently.

Here are 13 golden rules for watering Portulacaria Afra Elephant Bush.

1. WATER EARLY IN THE MORNING

Water should only be applied in the morning so that the leaves have time to dry out before nightfall. If Portulacaria Afra Elephant Bush are watered at night, the water sits on their leaves and can cause them to rot.

Watering in the morning also allows the leaves to dry out during the day, which means there is less chance of spider mites or other pests getting into your Portulacaria Afra Elephant Bush. However, exceptions can be made for plants kept in a greenhouse or other environment where they never get direct sunlight. In this case, it is okay to water them at night because the moisture will not sit on their leaves.

2. PROPERLY CHECK MOISTURE LEVELS

It is important to regularly check the moisture levels of your Portulacaria Afra Elephant Bush’s soil. Although they like to dry out between waterings, it is possible to overwater them and cause root rot.

Check moisture levels with a finger stick into the soil. If it feels dry, give it some water. In general, you should only need to water your Portulacaria Afra Elephant Bush every 2-3 weeks in the summer and once a month or less during other times of the year.

3. BE WARY OF THE POTTING MIX YOU’RE USING

Your potting mix says a lot about how often you need to water your Portulacaria Afra Elephant Bush. When selecting a potting mix, always choose one designed for cacti and succulents, such as 50% coconut coir, 25% peat moss, and 25% sand or perlite.
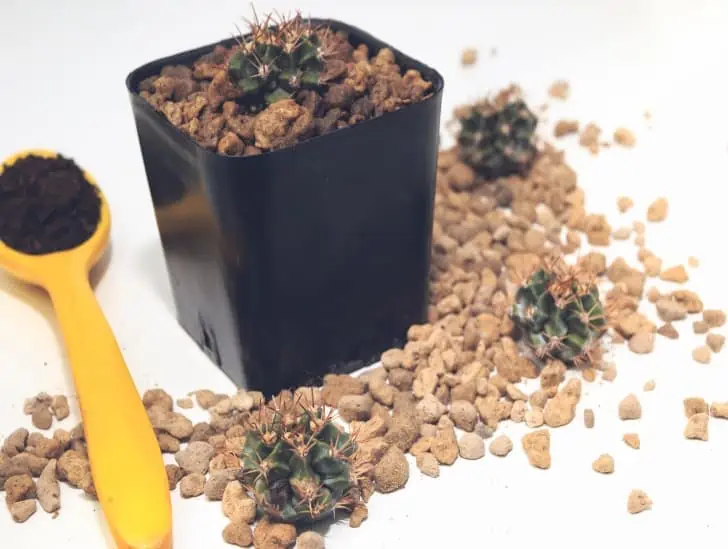
Cactus soil ane equipments.
If you’re using a loose or heavy potting mix, it will need watering more often.

This mix will wick away moisture from the leaves, which reduces the amount of water the plant needs. If you’re using a loose or heavy potting mix, your Portulacaria Afra Elephant Bush will need watering more often.

4. WATER LESS IN THE WINTER AND MORE IN THE SPRING

For most people, the winter months are when their Portulacaria Afra Elephant Bush needs the least water. It is still important to properly check moisture levels in the soil and use a potting mix that wicks away water, but a little less water can be given during the winter months when the plant isn’t growing as much.

In contrast, increase your watering schedule when summer arrives, and your Portulacaria Afra Elephant Bush is actively growing. Not only does the soil need to be checked more frequently, but an increased amount of water will also be needed by the roots as they develop.

5. DO NOT OVERWATER

One of the biggest mistakes people make with their Portulacaria Afra Elephant Bush is watering them too often. If there are no proper drainage holes in the pot, water will pool at the bottom and cause rot. If you’re unsure if there are proper drainage holes in your Portulacaria Afra Elephant Bush’s pot, stick a finger into the soil and ensure that it is damp but not soaked in water.

Plant being over water.
It is also sensitive to being overwatered.

Portulacaria Afra Elephant Bush is also sensitive to being overwatered because the water sits on the leaves. If you’re unsure whether your Portulacaria Afra Elephant Bush needs to be watered, just wait a day or two before watering it again.

6. DO NOT UNDERWATER

Just like overwatering, underwatering can also be detrimental to your Portulacaria Afra Elephant Bush. Portulacaria Afra Elephant Bush need watering until the moisture soaks through their entire root system.

When watering, stop when you see water draining out of the bottom of the pot. If there are no drainage holes in your Portulacaria Afra Elephant Bush’s pot, turn it upside down and allow all the excess water to run out of the bottom. Then, set the plant aside and let it drain for a few minutes before returning it to its normal position.

7. POTS NEED A DRAINAGE HOLE

One of the most important aspects of watering your Portulacaria Afra Elephant Bush is making sure they have proper drainage holes in their pots. This will help ensure that excess water can drain out before any problems occur.
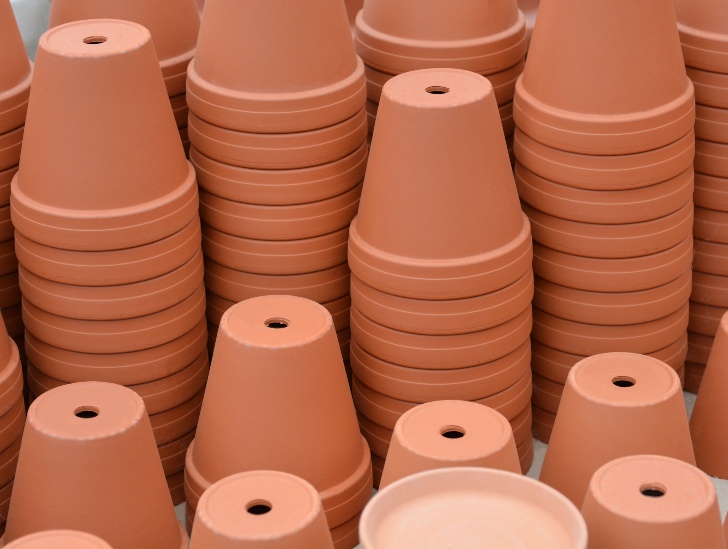
Pots with hole.
Make sure they have proper drainage holes in their pots.

Although it is tempting to leave the plant in its pot when watering, this can cause water to pool at the bottom and possibly rot the roots. Always use a tray or bowl when watering your Portulacaria Afra Elephant Bush to avoid this problem.

8. INSPECT THE SOIL BEFORE WATERING

Before you water your Portulacaria Afra Elephant Bush, it is important to inspect the soil and ensure there are no insects, bugs, or other unnecessary matter in the soil. Take the time to carefully remove anything that doesn’t belong and clean off any insects.

Portulacaria Afra Elephant Bush are sensitive and can easily die from bug infestations or diseases that take root because you didn’t properly inspect the soil before watering it. Even if you use a potting mix specially designed for succulents when propagating, always double-check the soil before adding water.

9. AVOID WATERING THE LEAVES

Watering the leaves can cause spotting and other unsightly blemishes that reduce the visual appeal of your plant. It can also lead to fungal infections that kill your Portulacaria Afra Elephant Bush.
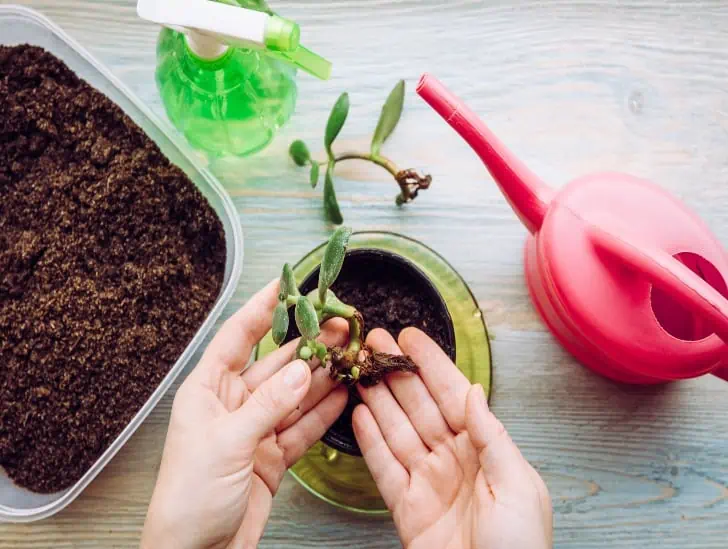
plant being repotted.
It can also lead to fungal infections that kill your plant.

Instead, always water the soil directly after inspecting it for unwanted visitors. If there are no insects or matter in the soil, you can water your Portulacaria Afra Elephant Bush by focusing on the base around the stem and the roots and the soil around those roots.

10. USE THE RIGHT WATER TYPE

The best type of water to use on your Portulacaria Afra Elephant Bush is distilled water. It does not contain any salts or minerals that can harm the plant and draws out the moisture from the soil and into the pot before evaporating. If you cannot find distilled water in your local grocery store, filtered water is a suitable alternative. Rainwater also works well and is a very natural solution.

However, never use tap water or other types of water that contain chemicals or salts because this can be very harmful to your Portulacaria Afra Elephant Bush. Tap water also contains chlorine, damaging the roots if allowed to sit in the soil for too long. Avoid using hot water as it can cause leaf spotting.

11. USE THE RIGHT TOOLS

Watering your Portulacaria Afra Elephant Bush is a task that should never be completed by hand. Although you might think this will save time and effort, this may work against you. Some bacteria from your hands can transfer to the plant and cause disease.

A woman watering the plant.
Ensure that your tools are always clean before using them.

Suppose you have a potted Portulacaria Afra Elephant Bush. In that case, it is best to use a watering can with a long spout so you can easily reach the soil without bending over continuously. Ensure that your tools are always clean before using them on your Portulacaria Afra Elephant Bush.

12. DO NOT WATER WHEN IT IS TOO HUMID OR TOO HOT

Avoid watering your Portulacaria Afra Elephant Bush when the weather is extremely hot or humid because this puts a great deal of stress on the plant. If you must water, try to do so in the early morning or evening when it is cooler outside to reduce the risk of harming your Portulacaria Afra Elephant Bush.

High humidity levels can cause rot or mildew to develop on your Portulacaria Afra Elephant Bush, so avoid watering during this time.

Signs that your Portulacaria Afra Elephant Bush needs water

A good gardener knows how to recognize the signs that their plants need water. Here are a few signs that your Portulacaria Afra Elephant Bush needs a little drink:

The soil is completely dry and has a powdery appearance – this means you probably haven’t watered for several weeks or months

The leaves have brown tips – If the edges of your leaves have started to turn brown, this is a sign that your plant needs water. Another way to tell if the leaves need water is to lift the leaf from the soil. If there are signs of browning on the underside of the leaf, it’s time for watering.

The lower leaves are falling off – If you notice your Portulacaria Afra Elephant Bush’s leaves are dying and falling off, this is a sign that your Portulacaria Afra Elephant Bush isn’t getting enough water.

Final Word

Watering a Portulacaria Afra Elephant Bush need not be complicated. However, this does not mean you can be lackadaisical in maintaining a healthy watering regime.

While you might not think this is a big deal, if your Portulacaria Afra Elephant Bush dies, the only way to replace it would be with another one at the store. Replacing or reviving a Portulacaria Afra Elephant Bush that has been neglected isn’t worth the time, effort, and money. With these watering tips, your Portulacaria Afra Elephant Bush will be healthier and happier than ever before.
How Much Sunlight Does a Lithops (Living Stone) Need?

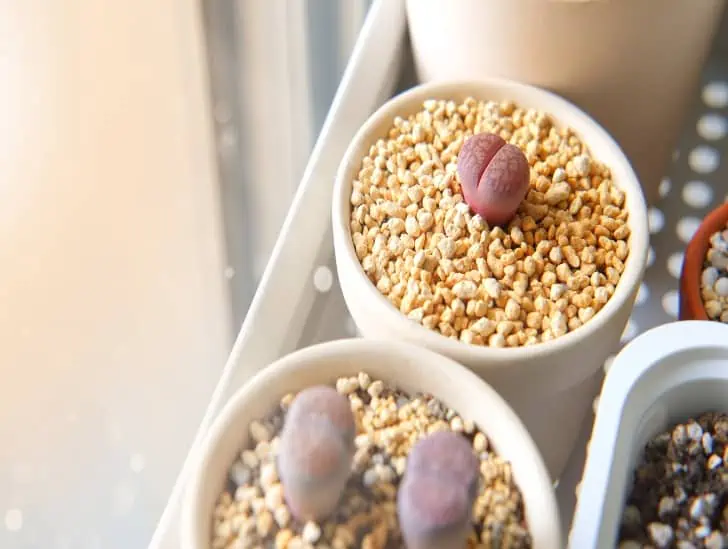
Lithops in windowsill.

The lithops is a succulent plant native to the southern parts of Africa. It’s also called living stone because it can look so much like a rock. The lithops is one of the most popular plants in the world, and for a good reason! They have some really interesting features that make them desirable as houseplants – they’re easy to grow, don’t need soil, and are very low maintenance. But what about sunlight? Do they need direct sunlight? If not, how long should you put your lithops outside each day?

 So, does a lithops (Living Stone) need direct sunlight? Lithops are succulents, so they do best with indirect or filtered light. You can achieve this by placing them outside in the shade of taller plants, under a tree, or near an open window. Direct sunlight will cause their leaves to turn brown and crispy.

 Lithops is an interesting plant; it mimics the rocks in its natural environment and can go long periods without water. We take a look at this succulent’s light requirements and how you can provide them with the right type of light to keep your lithops healthy.

Best light locations for lithops at home

Since lithops thrive best under indirect sunlight, choosing an ideal spot in your home is vital. You want to find a place where they will receive some light but not direct sunlight. These locations can vary depending on your home, but some good options include:

1.      Near an east- or west-facing window

This is by far the best spot for lithops in your home. They’ll get plenty of indirect light throughout the day, and you won’t have to worry about moving them around to follow the sun. It works best if the window has a sheer curtain or blinds, so the direct sun doesn’t hit the plants directly. 

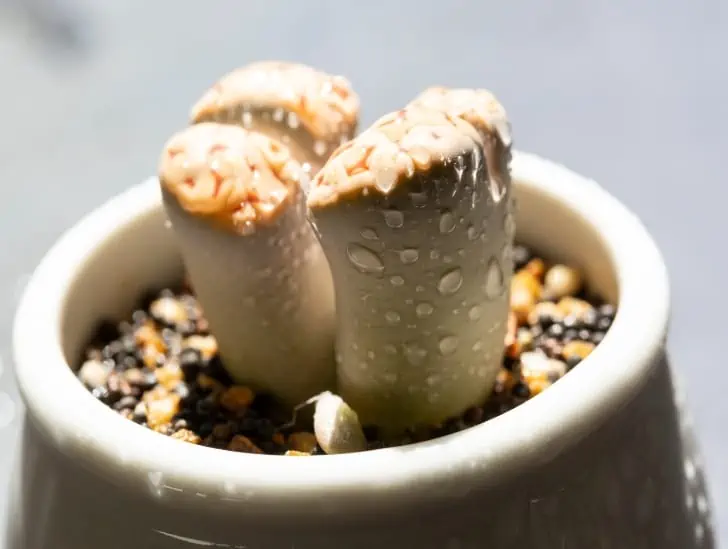
A freshly watered lithop and exposed to sunlight.
It works best if the window has a sheer curtain or blinds.

Alternatively, you can place them in front of a north-facing window, though they won’t get as much light this way. Nevertheless, it’s still a better option than placing them in direct sunlight.

2.      Outdoors in the shade

If you don’t have a spot near an east- or west-facing window, placing your lithops outdoors in the shade is another great option. Just make sure to move them back indoors before the temperature drops at night.

If you live in a warm climate or mild winters, placing your lithops outdoors in the shade can be a great option. This gives you plants a chance to get some natural sunlight, and they’ll stay cool during the hotter months.

3.      Under a tree

Placing your lithops under a tree is another great option if you have an outdoor space with some trees. The trees will provide filtered light and keep the plants from getting too much direct sun. Just make sure to water them regularly since they’ll be in direct contact with the soil.

4.      On a patio or deck

If you have a patio or deck, placing your lithops is another great option. The plants will get some filtered light, and you’ll be able to enjoy them while spending time outdoors. Just make sure they’re in a shaded location during the hottest part of the day.

Lithop exposed to sunlight.
The plants will get some filtered light.

5.      In a pot with other plants

If you’re short on space, placing your lithops in a pot with other plants is a great option. You can put them in a spot that gets some indirect sunlight, and they’ll share the water and nutrients from the soil. Just make sure to water them regularly.

6.      In an Open Bright Window

If you do not have an east- or west-facing window, an open, bright window is the next best thing. This spot will give your lithops some direct sunlight, but it won’t be as harsh as if they were in direct sun all day long. Just make sure to rotate them every few days to get an even amount of light.

Lithop exposed to sunlight.
It won’t be as harsh as if they were in direct sun all day long.

7.      Indoors in a bright, sunny room

Lithops does pretty well as long as it gets access to some form of light. As such, if you don’t have a spot outside where your lithops can get indirect light, placing them indoors in a bright, sunny room is the next best thing. The source of your light can be natural or artificial, as long as it’s bright. For instance, using grow lights can be a great way to give your lithops the light they need. 

How long to leave lithops outside each day

Having settled on taking your lithops outdoors in the shade, you still have to deal with the question of how long to leave lithops outside each day. The answer depends on your latitude and the time of year.

In winter, when days are shorter, it’s best to leave lithops outside for just a few hours in the morning so they can get some indirect sunlight. As the days grow longer and the weather warms up, you can leave them outside for longer periods.

Lithops on the pot.
It’s best to leave lithops outside all day long so they can get some direct sunlight.

In summer, when the days are longest, it’s best to leave lithops outside all day long so they can get some direct sunlight. Just make sure to bring them inside at night before the temperature drops too much.

Signs that your lithops is light-deficient

Light deficiency in lithops manifests in several ways. While some of the signs can be subtle, others are more obvious. If your lithops is light deficient, you may notice that:

  • The leaves are smaller than normal – Lithops leaves are usually small, but if they start to get smaller than normal, it may be a sign that the plant is not getting enough light.
  • The plant is elongated and stretched out – Lithops will often stretch out if it’s not getting enough light. This is especially noticeable in young plants.
  • The stem turns red or purple – A healthy lithops stem is green, but if it starts to turn red or purple, it may be a sign that the plant is not getting enough light.
  • The leaf tips turn brown and crispy – This is especially noticeable on the tips of older leaves. This also happens as a result of too much light exposure.
  • The plant isn’t growing or flowering – Lithops usually grows and flowers during the spring and summer, but if it’s not doing either of those things, it may be a sign that it’s not getting enough light.
  • The edges of the leaves are curled – Usually, the edges of lithops leaves are straight, but if they start to curl, it’s time to take action and give the plant more light.

Do Lithops thrive best indoors or outdoors?


Lithops can thrive either indoors or outdoors as long as they get access to some form of light. However, they do best outdoors when they have access to direct and indirect sunlight. If you live in a place where the winters are cold and the summers are hot, it’s best to keep your lithops inside during the winter and move them outdoors during the summer.

Lithops on the pot.
They do best outdoors when they have access to direct and indirect sunlight.

Light requirements play a critical role in Lithops, and this explains why outdoor succulents during winter and indoor succulents during summer is the general rule. Lithops are from Africa, a continent with high-intensity sunlight most of the year.

Other care requirements for Lithops

Watering

Lithops may be adapted to desert conditions, but that doesn’t mean they don’t need water. Lithops need water just like any other plant. However, you don’t want to water them too much, as that can be harmful. The best way to water your lithops is to wait until the top of the soil feels dry to the touch and then give it a good watering.

Fertilizing

Lithops don’t need a lot of fertilizer, but you can give them a little bit every few months to help them grow healthy and strong. Just be careful not to over-fertilize, as that can also be harmful. The best fertilizer for lithops is a balanced, all-purpose fertilizer.

Soil

Lithops like soil that is light and sandy with good drainage. You can buy a special soil mix for succulents, or you can make your own by mixing potting soil with some sand or perlite. A good soil mix for lithops should be about 60% potting soil, 20% sand, and 20% perlite.

Temperatures

Lithops prefer temperatures that are cool to moderate. They can handle temperatures down to about 50 degrees Fahrenheit, but they don’t do well in hot weather. Make sure to keep your lithops out of direct sunlight during the summer months, or they may overheat.

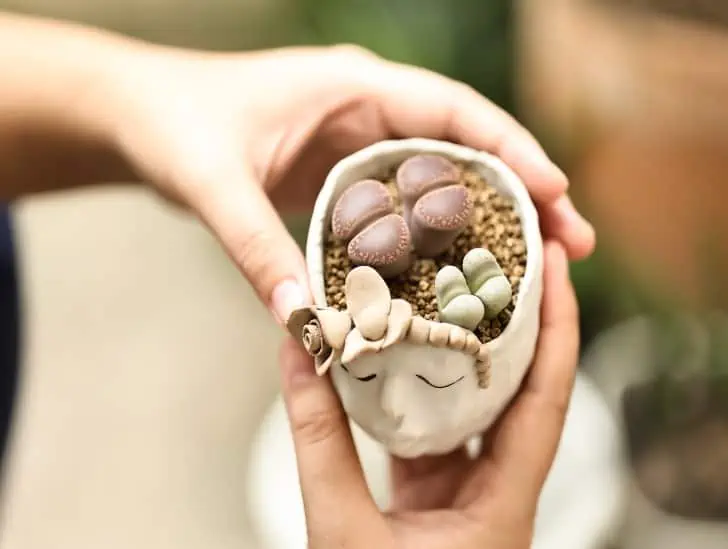
Lithops on a heart shaped pot.
Make sure to keep your lithops out of direct sunlight during the summer months.

Propagation

Lithops can be propagated by dividing the plants or by taking leaf cuttings. Division is the easiest way to propagate lithops, and it’s best to do it when the plants are dormant (during the winter months). To take a leaf cutting, simply remove healthy leaves from the plant and place them in the soil. You should see new roots and leaves sprouting from the cutting within a few weeks.

Final Word

Ultimately, it’s important to monitor your lithops and make sure they’re getting the right type of light. Adjust their location accordingly if they start to show signs of distress, like wilting leaves or browning. This practice will ensure that your lithops thrive for years to come. You do not necessarily need to be an expert to take care of lithops. With a bit of knowledge, some trial and error, and sometimes luck, you can keep your lithops healthy and looking great.

How to choose the right pot for your air plants?

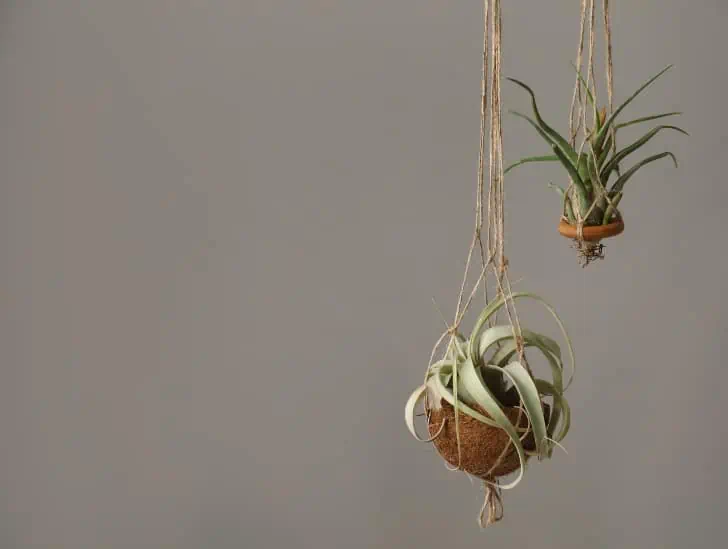
Air plant hanging.

Air plants are a unique type of plant that can thrive in just about any environment. They survive in deserts, underwater, and even on the side of a volcano. But what pot should you choose for them? Getting the right pot for your air plant can be challenging, considering no pot is made with the air plant in mind. While there are many different pots that you can use for your air plant, we have compiled a list to help make the decision easier.

So how do you choose the right pot for your air plant? When picking out the perfect pot for an air plant, consider the size of the pot. To choose the right size of the pot, figure out how much space it will take up on your desk/shelf/countertop. The best approach to choosing the right pot for your air plant is to find a pot that is not much bigger than the air plant itself. This will ensure your air plant has enough space to grow and won’t overcrowd in its pot.

Getting that perfect pot for your air plant can be tricky, but with a little bit of research, you are sure to find the right one for your needs. This post will discuss the different types of pots available and how they work with air plants so you can find the perfect one.

Considerations when choosing the right pot for your air plant

While there are many different pot types that you can use for your air plant, getting the right one is all about picking one that works for your specific conditions. The following are a few things you should consider when choosing the right pot for your air plant:

The size of the pot compared to the size of your air plant

The size of your pot plays a vital role in the health of your air plant. When choosing a pot for an air plant, make sure that it is not much bigger than the size of your air plant itself. The best option when deciding whether to use a larger pot is if you plan on getting multiple plants and want them to be close together (such as in a terrarium). If you are only using one air plant, it is best to stick with a pot no bigger than your air plant’s size. 

Air plant in a wood.
The size of your pot plays a vital role in the health of your air plant.

How much space will the pot take up on your desk/shelf/countertop

Another thing to consider when choosing a pot for your air plant is how much space it will take up on your desk, shelf, or countertop. Pots come in all shapes and sizes, so make sure you pick one that doesn’t take up too much room. Some pots are specifically designed to be kept on your desk if you are limited on space. These pots have a flat or slanted surface, so they will easily fit onto any countertop, shelf, or table. This factor largely depends on your personal preference and how much space you have to work with.

What type of pot you are looking for (ceramic, metal, glass)

There are many different containers that you can use as an air plant pot. Some of the most popular include ceramic, metal, and glass containers. While there are pros and cons to each type of pot, it all depends on your personal preference when choosing which one you want to use. This also includes the conditions you are trying to create for your air plant.

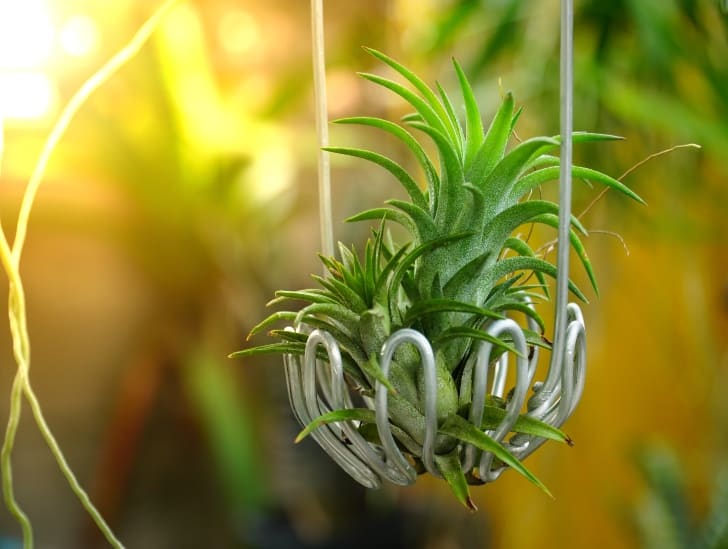
Air plantg hangging.
There are many different containers that you can use as an air plant pot.

Types of pots suitable for air plants

Ceramic pots

Ceramic pots are a popular choice because they come in many different shapes and sizes, making it easy to find one that fits your needs. Your air plant will love being surrounded by a ceramic pot as it is smooth and neutral, which makes it easy for the air plant to attach itself to. 

Advantages:

-They come in many different colors, so you can match your decor perfectly

-They are made of smooth, neutral material that is suitable for air plants

-They are durable and will last you a long time

Disadvantages:

-Not every ceramic pot comes with drainage holes, so water can get trapped inside the plant’s roots. This makes it more difficult to keep your soil moist while ensuring there isn’t too much water build-up.

-Ceramic pots can be quite heavy, so they might not be ideal if you are looking for a pot that is easy to move around.

-They break easily if dropped or knocked over

Metal pots

Metal pots make a great choice for air plants because they come in many different shapes and sizes, just like ceramic pots. They have been popular with air plant enthusiasts for a while now because they are easy to care for.

Advantages:

-They are made of sturdy, durable material that is suitable for air plants

-They have a modern look that will fit in with any decor

-They are easy to keep clean as all you need to do is wipe them down with a damp cloth

Disadvantages:

-Some metal pots can get very hot in direct sunlight, so make sure you watch your plant if you are using this type of pot.

-They can get quite heavy, so they might not be ideal if you are looking for a pot that is easy to move around. 

-Some people find the metallic sheen on some metal pots too shiny or flashy. 

Glass pots

Glass pots are popular for air plants because they come in different shapes and sizes, just like ceramic and metal pots. They have a sleek and modern look that most people find appealing.

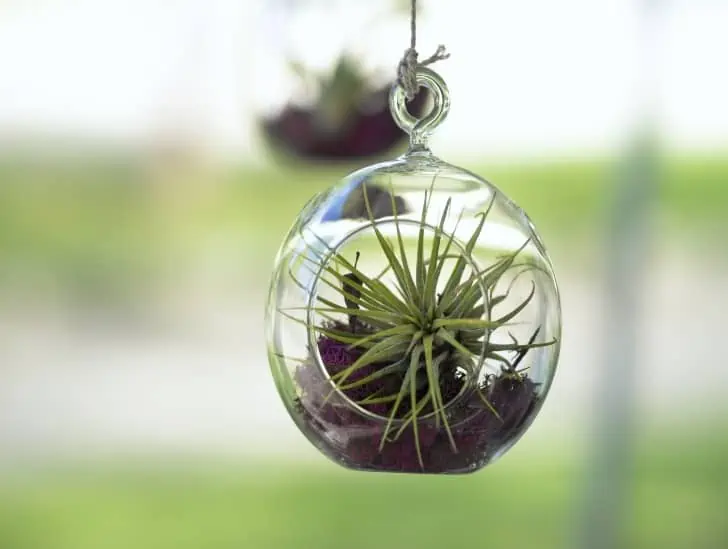
Air plant in glass container.
They have a sleek and modern look that most people find appealing.

Advantages:

-They come in many different colors, so you can match your decor perfectly

-They are made of smooth, transparent material that is suitable for air plants

-They are durable and will last you a long time

Disadvantages:

-Not every glass pot comes with drainage holes, so water can get trapped inside the plant’s roots. This makes it more difficult to keep your soil moist while ensuring there isn’t too much water build-up.

-The glass material scratches easily, which means your plant won’t have as long a lifespan compared to other types of pots.

-They break easily if dropped or knocked over.

What is unique about air plant pots?

Shape

Air plant pots stand out from other pots because they come in various shapes and sizes. They also make it easier to create your unique look for decorating your home or office space, whether you are looking for something modern, natural, or rustic. This is especially so considering air plants do not require soil to grow in, so you can use any type of pot that catches your eye.

Positioning

Unlike other plants where you have to worry about the pot taking up too much space or being in the way, air plants can thrive almost anywhere. This includes hanging them upside down or using a pot with a special opening that allows you to hang your plant on the wall. You can also place them in areas where other plants wouldn’t be able to grow, such as on top of your kitchen cabinets.

Air plant near the window.
You can also place them in areas where other plants wouldn’t be able to grow.

Sturdiness

Pots meant for air plants do not necessarily have to be sturdy since there is no soil to be held in place. This means that air plant pots can be made from a variety of materials, including plastic, metal or ceramic. This also means that if you are looking for a pot that is easy to move around, an air plant pot would be a perfect choice.

Water drainage

Since there is no soil with air plants, the pot must have some sort of drainage hole at the bottom to allow water to escape. This makes it easier for you because your plant won’t be sitting in too much moisture. This can lead to root rot or other similar problems that are challenging to treat.

What about soil?

While some varieties of air plants can grow in soil, many other types do not require any growing medium whatsoever. This makes them very easy to care for, and you don’t have to worry about the pot becoming too heavy from the soil. Most people find that air plants look their best when displayed in a pot without any soil at all.

Air plant in dish.
Many other types of air plant do not require any growing medium whatsoever.

Soil can also be difficult to keep moist, which you do not want to deal with if you have an air plant. This is especially true if you have a pot with no drainage holes, which can lead to water build-up and rot in your roots.

You may not need a pot after all

Think about it; you don’t necessarily need a pot to grow an air plant. All you need is something that can hold the plant and give it some space to hang or sit. This means you could use just about anything as a pot for your air plant, including old jars, cups or glasses, seashells, or even a piece of driftwood.

Conclusion

Getting an ideal pot for your air plant boils down to specifically what you are looking for. If you want something easy to move around, has drainage holes, and comes in various shapes and sizes, then an air plant pot would be perfect for you. However, if you don’t mind using something else as a pot or your air plant doesn’t require soil, then there are plenty of other options to choose from. Go get yourself a good air plant pot so you can grow your plants in style.

How To Water Your Madagascar Palm Correctly?

Growing a Madagascar palm can be quite an adventure. This leafy tropical beauty is not only striking to look at, but it also comes with an interesting story. Its native home is Madagascar, an island off the coast of Africa. It was brought to the United States in the early 1900s as a landscape specimen. Today, the Madagascar palm is one of the most popular palms for indoor gardens because it does not require a lot of sunlight, and it is relatively easy to grow. These plants are not only beautiful but also require well-timed watering to thrive.

So what are the golden rules for watering the Madagascar palm? Never let it dry out completely. Ensure that the roots are always getting enough water. Ensure that all containers have drainage holes so the plant does not sit in water. It is best to water the plant in the morning. Avoid getting the leaves and trunk wet, leading to fungal problems. Use a rain gauge or some other measuring device to track how much water you are giving the plant.

Madagascar palm stands out from your home garden, but how best can you tap this beauty for much longer? It all boils down to proper watering. Here are 10 golden rules that will help you keep your plant healthy and happy.

1.      Never let it dry out completely

A Madagascar palm may not need much water, but this doesn’t mean you let it dry out completely. Take note that the plant will need water as soon as the soil feels dry to the touch. The best way to tell is to stick your finger in the soil up to your knuckle. If it’s wet, don’t water it; if it’s dry, give it a drink.

2.  Make sure that all containers have drainage holes so the plant does not sit in water

Every pot must always have a hole at the bottom for excess water to escape. This prevents your plants from drowning and getting root rot you need to ensure ventilation points on every container.

A madagascar palm on a pot.
This prevents your plants from drowning and getting root rot.

While some containers come complete with drainage holes, others may not. If there isn’t a hole, you can always drill one yourself or just use it as an opportunity to up-cycle those old containers that are no longer useful.

3.  Water the plant in the morning.

If your daily schedule makes watering difficult for you, water early in the day so moisture can have time to dry up before night falls. This is especially important for plants that are kept outdoors where humidity levels increase at night and the moisture will be trapped inside if you water it later in the day.

Watering your Madagascar palm in the morning also helps prevent fungal problems. While water works as a moisturizer for your plant, it can also harbor fungi that will cause disease if you overwater the plant at night time or when humidity levels are high.

4.  Avoid getting leaves and trunk wet.

The bark on the tree looks beautiful but avoid getting this part of the plant wet to prevent any fungal problems. Water the leaves and the soil instead. Not only will this help keep your plant healthy, but it will also make sure that it stays attractive.

Madagascar palm leaf.
Avaoid watering the bark of the tree, water the leaves and the soil instead.

In case you accidentally get these areas wet, dry them off as soon as possible. A soft cloth or a paper towel will do the trick. You can also use a hair dryer to speed up the process.

5.  Monitor the amount of water you are giving your plant

It’s important to be mindful of how much water you’re giving your plant so that it doesn’t get too much or too little. There is no point in wasting time guessing if your plants need watering or not. Instead, invest on a simple tool that will help you measure exactly how many cups of water

A boy watering the plant.
It’s important to be mindful of how much water you’re giving your plant.

For the cause, you can use a rain gauge, a moisture meter, or a simple measuring device like a ruler or cup to measure how much water you’re giving your plant. Use the same tool every time so that over time, you will be able to monitor exactly how much water is getting into your pot and know if it needs more or less.

Alternatively, you can also opt for automated watering systems that are convenient to use and save you time and effort.

6.  Watering deeply and less often is better than watering a little bit every day

This helps prevent the soil from becoming saturated and allows air pockets to form, which helps with drainage. When you do water, give it enough to wet the entire root system. If you’re using a rain gauge or something similar, make sure that the plant gets an inch of water at least every time you water it.

7.  Be careful not to over-water your plant

When caring for your Madagascar palm, you may be tempted to water it more often, especially if you’re living in a place with high humidity levels. However, over-watering can be just as harmful to your plant as not watering it enough. The best way to avoid this is to wait until the soil feels dry before watering and stick to the recommended amount of water given above. For better results, water your plants once a week.

watering the plant.
Over-watering can be just as harmful to your plant as not watering it enough.

8.  Watering often encourages shallow root systems 

Shallow roots cause the plant to be more susceptible to strong winds, making it easier for them to break off and causing other problems like rot in moist soil. It’s best if you can encourage deep rooting by avoiding frequent watering.

9.  Water at the base of the plant

Watering at the base helps get the water to where it is needed most-the roots. If you’re using a watering can make sure that you are spraying the water directly onto the soil and not on the leaves. You can also pour some water into the potting mix before watering to help wet everything evenly. While at it, ensure the water spreads all around the pot and not just at the base.

10.  Watering your Madagascar palm in a container is different from watering plants in the ground

It is worth noting that watering a potted Madagascar palm is different from watering plants in the ground. You will need to keep an eye on how much water you’re giving it and adjust your schedule accordingly. Notably, watering containers require more attention than those planted directly into the soil. This means that if you grow Madagascar palms inside, there’s a higher chance of overwatering since these pots can’t drain the water.

Madagascar palm tree on a white pot.
Watering containers require more attention than those planted directly into the soil.

11.  Fertilize the plant every other month with a balanced palm fertilizer

Your watering a fertilizing regime should be adjusted according to the plant’s needs. Planting within a container requires additional care and attention to detail which you will need to follow if you want your Madagascar palm tree to thrive. With this in mind, make sure that you pay close attention when watering and fertilizing it so as not to cause any damage or other problems for your plant down the line.

Fertilizing your palm helps it grow healthy and strong. A balanced palm fertilizer has the right mix of nitrogen, phosphorous, and potassium essential for plant growth. Be careful not to use a too strong fertilizer as this can damage the plant. Follow the instructions on the package carefully and stop fertilizing if you see any signs of distress or leaf yellowing.

Signs of overwatering in a Madagascar palm

Overwatering is a common problem with Madagascar palms and can cause several issues. Some of the most obvious signs that you’re overwatering your plant include:

·         The soil around it becomes wet for more than two days in a row

·         Brown, scorched leaves at their base or tips

·         Fungal infections on the roots cause the plant to rot

·         Wilting even when the soil is moist

If you notice any of these signs, it’s time to cut back on the watering and take a closer look at your care routine. It may also be necessary to repot the palm if the potting mix has become too wet. Other notable remedies for overwatering include increasing air circulation around the plant and reducing humidity levels.

Conclusion

Watering a Madagascar palm correctly requires more than just following a set schedule. There are several things to consider, such as the plant’s location (in- or outdoor), potting mix, and fertilizer schedule. With a little bit of attention, you can help your palm thrive and look beautiful for years to come. With these guidelines, you are in a better position to water your palm the right way and avoid any common problems.