11 Types of Monkey Tail Cactus You Can Grow At Home

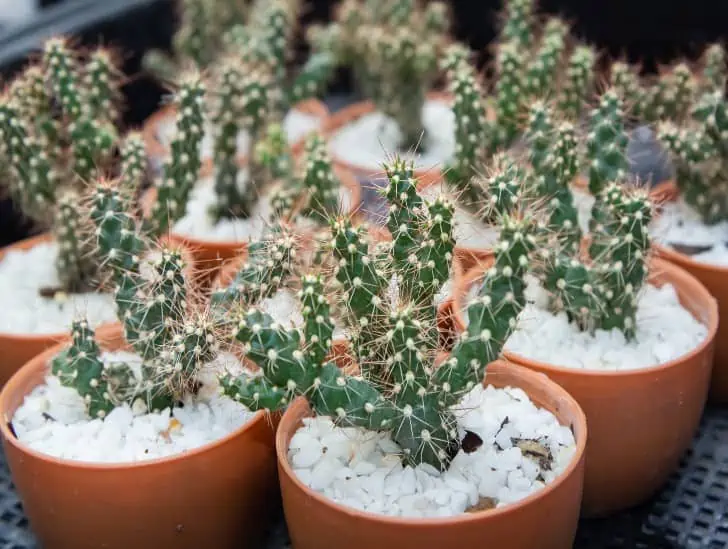
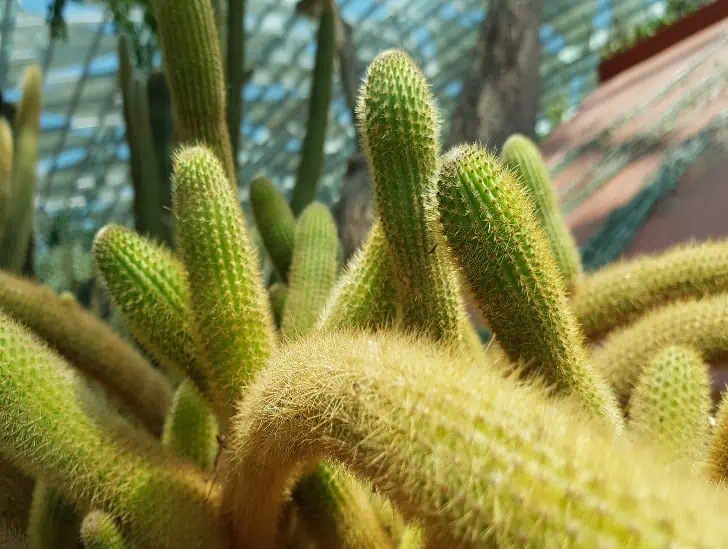
The monkey tail cactus is a succulent found in the deserts of North America. It gets its name from the long, thin tail that protrudes from the top of the plant. The cactus has a round, globe-like body covered in short, spiny bristles. It ranges in color from light green to dark green, and it may have a reddish tinge. The monkey tail cactus thrives in warm, dry climates, and it does not require a lot of water or care. It is a popular choice for gardeners who want to add a bit of color and texture to their landscape.

So, what are some of the common types of monkey tail cactus? If you are looking to add a monkey tail cactus to your succulent collection, you need to know that there are over 30 different types of this cactus. Some of them include fringed money tail cactus, ghost monkey tail cactus, tuberous monkey tail cactus, fountain monkey tail cactus, and the globular monkey tail cactus. Others include ribbon monkey tail cactus, Aconcagua monkey tail cactus, prickly pear monkey tail cactus, and the San Pedro monkey tail cactus.

This blog post discusses the different types of monkey tail cactus, their native habitat, and other features that make each one of them unique from the rest. Read on to learn more.

Monkey Tail Cactus Overview

Before we take a closer look at the different types of monkey tail cactus, let’s take a quick overview of the plant.

The monkey tail cactus is a succulent found in the deserts of North America. It gets its name from the long, thin tail that protrudes from the top of the plant. The monkey tail cactus has a round, globe-like body covered in short, spiny bristles. It ranges in color from light green to dark green, and it may have a reddish tinge.

This cactus is a hardy plant that can survive in harsh conditions. It thrives in warm, dry climates, and only requires minimal care to thrive. The monkey tail cactus is a popular choice for gardeners who want to add a bit of color and texture to their landscape.

Monkey tail cactus in huge pot.
The monkey tail cactus has a round, globe-like body covered in short, spiny bristles.

The succulent produces beautiful flowers that can be red, orange, yellow, or white. The flowers are relatively small and bloom in clusters.

Now that we have a general overview of the monkey tail cactus, let’s take a closer look at the different types of the cactus.

Types of Monkey Tail Cactus

There are several different types of monkey tail cactus, and each one has its own unique characteristics. Here are a few of the most common types of monkey tail cactus:

1. Globular Monkey Tail Cactus

The globular monkey tail cactus has a round body covered in short spines. It is mostly green but a few of its species have a reddish tinge.

It is mainly found in the southwestern United States since it thrives in hot, dry climates. The globular monkey tail has a short, stubby tail that protrudes from the top of the plant. Its stem is thick and sturdy, and it can grow up to 12 inches in height.

2. Fringed Monkey Tail Cactus

The fringed monkey tail cactus has a long, thin tail that protrudes from the top. It has a round, globe-like body that is covered in short spines. Its stem is mainly green and plays a critical role in photosynthesis.

It is mainly found in the southwestern United States since it thrives in hot, dry climates.

The fringed monkey tail cactus can grow up to 18 inches in height and has a slender stem. It is named for the fringe of long, thin spines that run along the length of its tail.

3. Prickly Pear Monkey Tail Cactus

The prickly pear monkey tail cactus is a hybrid of the globular monkey tail cactus and the prickly pear cactus. It has a round body that is covered in short spines. It ranges in color from light green to dark green.

A prickly pear cactus.
It has a round body that is covered in short spines.

It is mainly found in the southwestern United States since it thrives in relatively hot climates. The prickly pear monkey tail cactus has a short, stubby tail that protrudes from its top. Its stem is thick and sturdy, and it can grow up to 12 inches in height.

4. Ribbon Monkey Tail Cactus

The ribbon monkey tail cactus has long, thin stems covered in spines. It is mainly found in parts of North America that experience relatively hot and dry climates.

The ribbon monkey tail cactus can grow up to 24 inches in height and has a slender stem. It is named for the long, thin ribbons of spines that run along the length of its tail.

5. Fountain Monkey Tail Cactus

The mountain monkey tail cactus is a taller plant that can grow up to two feet tall. It has a thin, long tail that protrudes from the top of the plant. This type of monkey tail cactus is mostly found in the mountainous regions of the southwestern United States.

6. Aconcagua monkey tail cactus

The Aconcagua monkey tail cactus is a succulent that is native to parts of Argentina. It is found in the Andes Mountains at elevations of up to 10,000 feet. This cactus requires well-drained soil and full sun.

Monkey tail flower.
Known for its bright red flowers and the long, tail-like protrusion.

This type of monkey tail cactus is known for its bright red flowers and the long, tail-like protrusion. The Aconcagua monkey tail cactus can reach heights of up to four feet tall.

To cultivate the Aconcagua monkey tail cactus at home, you need to pay attention to the soil and watering needs. This cactus likes dry, well-drained soil and does not like to be over-watered.

7. Ghost Monkey Tail Cactus

Ghost monkey tail cactus is a succulent native to the Western Cape region of South Africa. It is found in the Cedarberg region. This cactus requires well-drained soil and exposure to full sun.

The cactus is known for its white flowers and the long, tail-like protrusion that gives it its name. The Ghost monkey tail cactus can reach heights of up to four feet tall.

To cultivate the Ghost monkey tail cactus at home, you need to pay attention to the light and watering needs. This cactus generally likes dry, well-drained soil that doesn’t hold water for too long.

8. Tuberous Monkey Tail Cactus

The tuberous monkey tail cactus has a large, globular body covered in short spines. Its stem is mainly green with faded shades of reddish color.

Small monkey tail cactus.
It can grow up to 12 inches in height.

Tuberous monkey tail cactus thrives in the tropical climates of Central and South America. It has a thick stem that is covered in short spines and can grow up to 12 inches in height.

9. Hooiberg monkey tail cactus

Hooiberg monkey tail cactus is a succulent native to parts of the Island of Aruba It is mostly found on the slopes of the Hooiberg Mountain. This cactus requires well-drained soil and exposure to full sun for it to thrive.

It is mostly known for its purple flowers and the long, tail-like protrusion at the top of the plant. The Hooiberg monkey tail cactus can reach heights of up to 3 feet tall.

To cultivate the Hooiberg monkey tail cactus at home, you need to pay attention to soil, water, light, and temperature requirements. It generally does well in dry, well-drained soil and slightly higher temperatures.

10. San Pedro Monkey Tail Cactus

The San Pedro monkey tail cactus is a succulent native to Peru. It is found in the Andes Mountains at elevations of up to 10,000 feet.

The San Pedro monkey tail cactus is known for its bright red flowers. It grows relatively fast reaching heights of up to four feet tall.

Monkey tail cactus with red flower.
The San Pedro monkey tail cactus is known for its bright red flowers.

The cactus does well in well-draining cactus soil that doesn’t hold water for too long. It also likes exposure to full sunlight and slightly higher temperatures.

So, if you are growing the cactus indoors, be sure to find the sunniest spot on a south-facing or west-facing windowsill.

11. Hedgehog Monkey Tail Cactus

Lastly, the hedgehog monkey tail cactus is native to parts of South Africa. It is found in the Langeberg Mountains. It requires relatively cool temperatures and moist soil to thrive in a home environment.

It produces yellow flowers and has a long, tail-like protrusion at its top. The Hedgehog monkey tail cactus can reach heights of up to four feet tall.

To cultivate the Hedgehog monkey tail cactus at home, you need to pay attention to the soil and watering needs. This cactus likes dry, well-drained soil and doesn’t like to be waterlogged.

Conclusion

There are different types of monkey tail cactus, and each one has its own unique characteristics.

The most common types of monkey tail cactus include the globular monkey tail cactus, the fringed monkey tail cactus, the prickly pear monkey tail cactus, and the ribbon monkey tail cactus.

The mountain monkey tail cactus is a relatively taller succulent that can grow up to 2 feet tall, while the tuberous monkey tail cactus has a large, spherical body.

Each type of monkey tail cactus thrives in different climates, so choosing the right one for your area is important.

Madagascar Palm: 5 Steps To Successfully Propagate

Pachypodium lamerei is a branch of the Apocynaceae family. Also known as the Madagascar palm, this is the most beautiful known Pachypodium. Also, it is the only plant in its genus used as an indoor plant. The Madagascar Palm is a tall shrub or small tree, depending on its size.

Madagascar’s palms do well indoors. They all have very swollen irregular bases with thick and incredibly sharp spines. These plants have simple, narrow leaves. It produces delicate and fragrant flowers in summer.

It may survive outdoors in mild winter areas, such as Phoenix, or cultivated indoors as a container plant. If grown outdoors, it will blossom a white flower from spring to late summer and may reach a height of 15 feet.  

Propagating Requirements For Madagascar Palm

The below tips will be helpful before you start propagating your Pachypodium lamerei:

Use a Clay Vessel

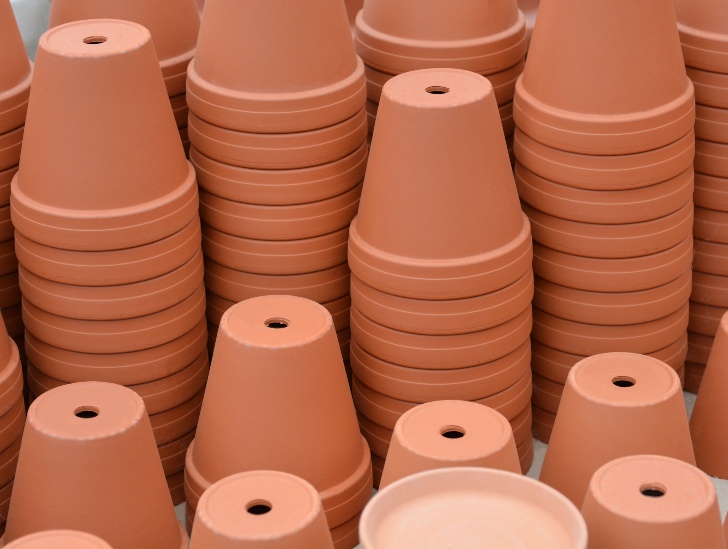
Pachypodium lamerei can get big and large, and it also needs lots of soil to help them conserve water. Hence, you have to use a clay jar instead of a plastic one. The clay jar holds the plant better and prevents it from falling onto the ground. Ensure the clay container has drainage holes in it to avoid root rot.

A clay pot.
The clay jar holds the plant better and prevents it from falling onto the ground.

Give It the Right Location

The perfect place means that the plant could receive plenty of sunlight. While the plant does not necessarily make regular photosynthesis, sunlight keeps it healthy and closer to the climate in its natural habitat. Place in a room that receives a lot of the sun, like next to a south-facing window.

There Is No Need for Additional Food

Pachypodium lamerei does not require fertilizer regularly. One of the main reasons many planters or hobbyists consider the plant easy to grow.

Of course, if you want to provide additional nutrition, an organic fertilizer diluted with medium-strength water can help the plant grow in spring and summer. In addition, all you need to take care of is the frequency of watering and exposure to sunlight.

Choose the Correct Potting Mixture

Use a quick-drain potting mix, such as a cactus mixture, and a pot in a container with drain holes to prevent root decay. Use a combination of succulent soil/cactus, which contains plenty of gravel and drains freely.

A soil in the pot.
Use a quick-drain potting mix, such as a cactus mixture.

Things worth noting When You Are Taking Cuttings

For faster rooting, remove cuttings as plants grow, usually in spring. Wipe prunes, sharp knives, or scissors with an alcohol-soaked cloth to prevent the spread of diseases.

Madagascar palm has a highly toxic sap with toxic glycosides. If swallowed, they can cause vomiting, diarrhea, lack of appetite, lethargy, irregular heartbeat, and even death if consumed in large quantities.

They also have prominent, pointed, three-pointed spines. Therefore, wear protective clothing with closed shoes, waterproof gloves, long pants, and long sleeves before cutting. Wash the milky sap by plunging the cut end in a bowl of clean water.

Madagascar palm in a white pot.
You can tell that your plant has established roots when the plant is secure.

Cut approximately 3-5 inches from the tip of a stem. Break the lower leaves so that there is a bare area on the stem’s bottom around 1 to 2 inches long. Place the cut in the shade for two to seven days, depending on the size of the cut stalk, until it forms a hard coat on the wounds.

Insert the end of the bare stem into a 3″ wide pot with drain holes. The potting mix should have equal peat moss and perlite parts. Water it until the water flows through the drain holes. Place the pot in a shaded area until you notice new roots. You can tell that your plant has established roots when the plant is secure, and you feel some resistance when you pull the plant.

Propagation Of The Madagascan Palm

Madagascar Palm has become one of the best-known pachypodiums in cultivation, being comparatively easy to spread and grow. There are two main ways of propagating a Madagascar palm.

You can grow the palm from seeds, even though this may be more difficult and longer. You can also cut a stem of a mother plant which is far more manageable. But, first, let’s look at different methods of propagation.

Propagation by Seed

The best way of spreading Pachypodiums is through seed. Seed is the sole means of breeding plants in nature. Sow seeds in the spring at a temperature of 66-75°F (19-24°C). Glue the pair of horn-shaped pods as they turn light brown with strips of masking tape or cotton thread. Gluing prevents the fruit from breaking down when ripe and releasing the seed.

The seeds quickly lose their viability. Gather the fresh seeds from the glued pods. Dip the seeds for a minimum of 24 hours in hot water. Next, sow in a sandy medium. Keep humid and at a temperature of 27°C to 35°C for quick sprouting. All seeds that failed to germinate after six weeks may be considered non-viable.

Plant seeds on hand.
Seed is the sole means of breeding plants in nature.

If you live in a colder area, you can start planting indoors under a grow light or on a seedbed.

Place the seeds in trays or pots 3 inches deep, with well-drained soil. Bury the seeds approximately 1/8 inch in depth. Keep moist till germinating. Give it time because the Madagascar palm grows relatively slowly, between three weeks and six months.

Is It Necessary to Soak the Seeds First?

By soaking seeds before planting, you can significantly reduce seed germination time. You rapidly raise the moisture content around the seeds, which tells them that it is now safe to grow.

If you soak too much in the water, the seeds will drown. Therefore, it is advisable to soak only most seeds for 12 to 24 hours and no longer than 48 hours. The advantage of soaking the seeds before planting is that your germination time will be less, which means you can have happy, quicker plant growth.

Propagation Through Stem Cuttings

Madagascar palms quickly propagate through the stem and root cuttings. Use a pair of sterilized scissors to collect 100 to 220 mm long cuttings from the youngest branches at the end of spring. Seal the ends and plunge into the rooting hormone to accelerate propagation.

The stem cuttings of your Madagascar palm will take three to seven weeks to develop, depending on the quality of the cuttings and the environmental conditions. Use a specially formulated potting blend and a pot with large drainage holes to prevent fungal diseases.

The soil should be moderately damp, and the temperature should be around 66 degrees Fahrenheit. A warm, semi-shaded, and moist environment will ensure those root cuttings are successful.

Let the upper layer of soil dry up before watering again. If the leaves are solid and green, as the roots grow, these are signs that the propagation of your cuttings is successful. After about four weeks, you may transplant the succulents into a larger pot and care for them as mature succulents.

Propagating by Offsets

Offsets are small branches that sometimes appear at the base of the plant, which you can remove to create a new plant. For growing “Madagascar Palm” from offsets, use a sterile and pointed knife or a pair of scissors. The Madagascar Palm” has a poisonous sap and sharp thorns along the stem.

Small madagascar palm exposed to sunlight.
Ensure you provide adequate water and light and monitor soil humidity.

Checkout for offsets at the base of the trunk of Madagascar Palm for small plant offsets. Then cut the offshoots from the bottom of the trunk and remove one of the circular offsets from the trunk of the primary plant. Let it harden for several days before placing it in well-drained soil. Then plant the offsets in a pot. Ensure you provide adequate water and light and monitor soil humidity.

Repotting Of Newly Propagated Madagascar Palms

The Madagascar palm is dense with a thick stem and relatively small roots. When choosing a new home for your plant, consider a clay pot, which not only soaks up excess water but also balances a heavy plant better than a plastic pot.

Be careful with sharp thorns when transporting your newly propagated Madagascar palm into a big pot. Wrap your plant if it is small enough in the cardboard or newspapers around it and pull it up through the paper edges.

However, the use of heavy gloves will give you greater control over the plant. Take care that the thorns do not pierce your gloves; when scraped or cut, the plant releases a toxic white sap that irritates the skin. After removal, put the plant in a slightly larger pot with cactus soil. During the preparation of your potting blend, add perlite or sand for additional drainage.

Bottom Line

Although the Madagascar Palm is easy to take care of, you may need to know more if you want to propagate Pachypodium lamerei. Reproducing this attractive succulent requires patience because the plant only develops offsets after a couple of years, while seeds can take a few months to sprout. However, the result is worth the wait because this attractive indoor succulent is lush and eye-catching once you have successfully propagated it.

Cholla Cactus: How Dangerous Are They?

The cholla cactus is a spiny plant found in the southwestern United States. It is often called the “jumping cactus.” Cholla cactus are not dangerous plants but can cause irritation and discomfort. We will discuss their truth and dispel some myths about this spiky succulent.

So, are Cholla Cactus Dangerous? Not really. As much as their spines can cause irritation and discomfort, this can only happen if you come into contact with them. If you do happen to get poked by one of these cacti, just make sure to clean the wound and seek medical attention if necessary. It is always best to avoid getting too close to these spiny plants to be safe. But overall, Cholla Cactus are not considered dangerous plants.

Cholla cactus are often feared because of their spines, but are they that dangerous? This blog post will explore the truth about these spiny plants. We will discuss what makes them so dangerous and how to avoid getting hurt by them. 

Fun Facts About the Cholla Cactus

  •  Cholla cactus is a spiny succulent found in the southwestern United States
  • The name “cholla” comes from the Spanish word for “thorny”
  • Cholla cactus have sharp spines that can easily detach from the plant and attach themselves to passersby
  • Cholla cactus can also produce a small, spiny, edible fruit
  • This succulent can grow up to 12 feet tall and has a thick, woody stem
  • Its fruits hang down from the stem a like chain of grapes

Potential  Dangers When Handling Cholla Cactus

Sharp spines

Cholla cactus have sharp spines that can easily detach from the plant and attach themselves to passersby. These spines can cause irritation and discomfort if you come into contact with them. Usually, the spines will detach from the plant and fall to the ground, but there is always a chance that they will stick in your skin. When this happens, it is important to clean the wound and seek medical attention if necessary.

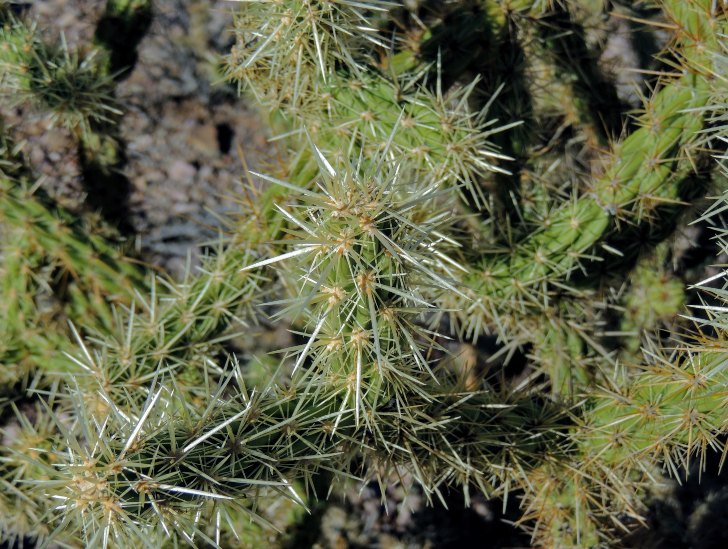
Close up image of cholla cactus with spines.
These spines can cause irritation and discomfort if you come into contact with them.

However, you can easily avoid getting hurt by these spiny plants by staying away from them. If you find yourself close to a cholla cactus, be sure to take caution and avoid getting too close.

Irritating Glochids

Cholla cactus are also known for their irritating glochids. Glochids are tiny, spiny bristles that can easily detach from the plant and attach themselves to your skin. These bristles are very difficult to remove and can cause a great deal of irritation.

Avoid cholla cactus altogether. If you come into contact with them, the best thing to do is remove them as quickly as possible. You can use a pair of tweezers or needle-nose pliers to remove the bristles. Be careful not to get poked by the spines.

Why do Cholla cactus ‘jump’ on passersby?

The cholla cactus is often referred to as the “jumping cactus” because of the way its spines can easily detach from the plant and attach themselves to passersby. This is a unique mechanism that the plant uses to spread its seeds. 

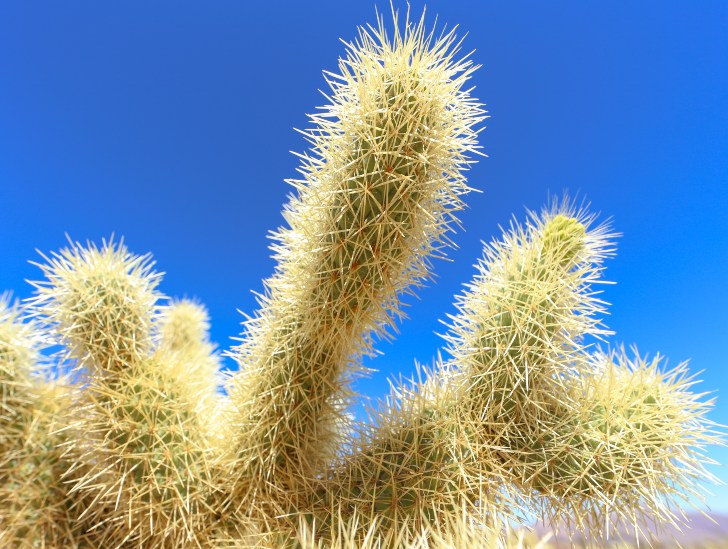
Cholla cactus.
It is a unique mechanism that the plant uses to spread its seeds. 

As soon as the plant’s spines come into contact with something, they will detach from the plant and attach themselves to the new surface. This is made possible by the plant’s sticky sap and the sharpness of its spines. It is a very effective way to spread its seeds, and the plant has evolved to take advantage of this.

Do Cholla Cactus Cause Wounds

When cholla cactus spines or glochids get in contact with the skin, the effects are majorly some irritation and discomfort. However, some extreme cases have been reported where the spines and bristles of cholla cactus have caused wounds that take weeks to heal. In some cases, medical attention is inevitable to remove the spines or bristles from the skin.

In case of serious injury from the cholla spines or glochids, the best course of action is to clean the wound and seek medical attention. Do not try to remove the spines or bristles stuck on the skin by yourself, as you might end up making the injury worse.

How to treat cholla cactus wounds at home

If you happen to get poked by a cholla cactus spine, the best way to treat the wound is to clean it and apply some antibiotic ointment. You may then cover it with a bandage to keep the area clean and protected.  If the wound starts to show signs of infection, such as redness or swelling, then you might need to seek medical attention.

The best way to prevent any injuries while dealing with cholla cacti is by wearing gloves and long sleeves when handling them. This will help to protect your skin from the spines and bristles of the plant. If you are going to be in an area where cholla cacti are present, it is always a good idea to take the necessary precautions. 

Are cholla cactus edible?

Yes, the fruits and buds of the cholla cactus are edible. They are not very palatable, but they are safe to eat. You can use the fruits and buds to make jams, jellies, and syrups.

A cholla cactus plant with fruits.
Chollas Cactus fruits can be eaten fresh or dried for long-term storage.

The best way to harvest the fruit or bud of the cholla cactus is to use a pair of scissors or clippers. Avoid getting your hands too close to the plant’s spines. Chollas Cactus fruits can be eaten fresh or dried for long-term storage.

How to harvest cholla cactus fruits and buds

  • Harvesting a cholla cactus fruit or bud can be tricky, but it is doable. The following steps will help you to harvest the fruit or bud safely and without getting injured:
  • Wear gloves and long sleeves to protect your skin from the spines.
  • Using a pair of scissors or clippers, cut the fruit or bud from the plant
  • Be sure to avoid getting your hands too close to the spines of the plant
  • Remove any spines or bristles that might be sticking to the fruit or bud
  • Wash the fruit or bud before eating it
  • For buds, you may want to hydrate them before eating them

How to care for jumping cholla cactus at home

Cholla cactus has recently gained popularity as a houseplant. This is because they are very low maintenance and easy to care for.

Propagation

Either stem cuttings or seedlings can do the propagation of the cholla cactus. The best time to propagate the cholla cactus is spring or summer. This is when the plant is most active and will grow new roots quickly.

How to propagate jumping cholla cactus

Stem Cuttings

-Take a stem cutting from an actively growing cholla cactus plant

-Cut the stem at a 45-degree angle

-Remove the leaves from the bottom of the stem

-Place the stem cutting in a pot of moist soil

-Keep the soil moist but not wet

-The stem cutting will root and grow new plants in a few weeks

Seedlings

-Collect cholla cactus seeds from a ripe fruit

-Sow the seeds in a pot of soil

-Keep the soil moist but not wet

-The seeds will germinate and grow new plants in a few weeks

Watering

Cholla cactus does not need a lot of water, but it does need regular watering. The best way to water cholla cactus is by using a gentle spray from a garden hose. Be sure to avoid getting the leaves wet as this can cause them to rot.

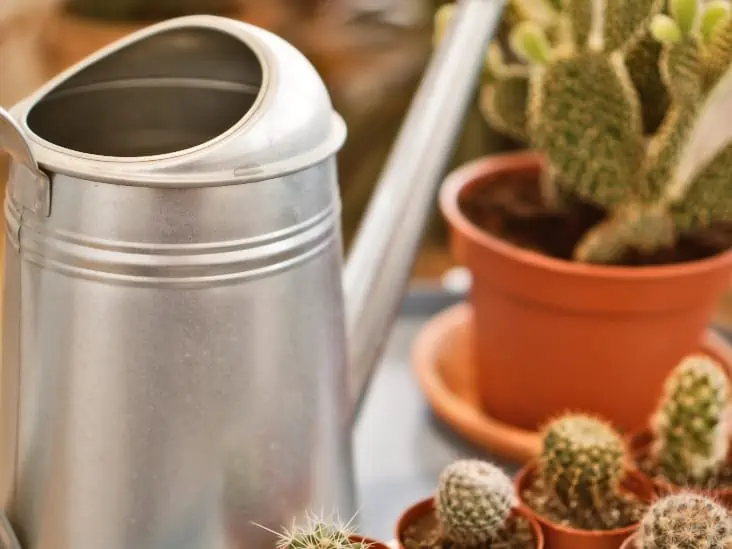
Water Can and cactus.
Be sure to avoid getting the leaves wet as this can cause them to rot.

Fertilization

Cholla cactus does not need a lot of fertilizer, but a little will help the plant grow healthy and strong. Fertilize cholla cactus once every month with a balanced fertilizer.

Flowering and harvesting

Jumping cholla cactus can flower at any time of the year, but they are more likely to flower during the spring or summer. The flowers will last for a few days and then will wither away. Once the flowers have died, the fruits will begin to form. The fruit of the jumping cholla cactus is edible and can be used in recipes. You can harvest both the fruit and the buds of the cholla cactus. 

Cholla cactus with flowers.
Once the flowers have died, the fruits will begin to form.

Conclusion

The jumping cholla cactus is a unique desert plant that uses ingenious methods to propagate. This plant is easy to care for and can be grown in a variety of climates. As much as it may be perceived as dangerous, jumping cholla cactus is harmless to humans if handled correctly. You can eat the fruit of this cactus and use it in You can also eat the buds be eaten, but they are best hydrated first. Cholla cactus is a great addition to any garden or landscape. 

Proper Haworthia Watering – 11 Things You Should Know

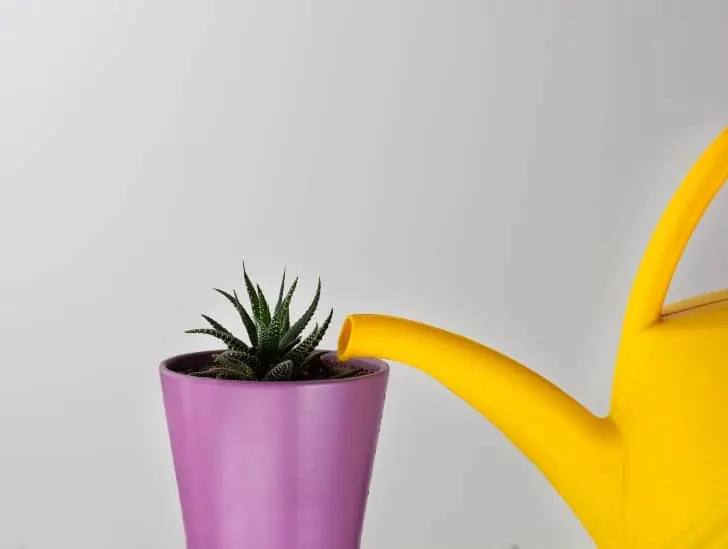
Watering a haworthia.

Haworthia is a versatile plant that grows in various climates and locations. While this may be true, you must get it right regarding its watering regime. If you are looking to keep your haworthia looking happy and healthy, you need to follow a few golden rules for watering. 

So, what are the golden rules for watering haworthia? Always water your plants when the top 2-5mm of soil is dry as a rule of thumb. Avoid watering during the coldest winter months, and only water your plants when exposed to full sunlight. Mind your growing mediums and make sure they drain well. Don’t water your haworthias from above, but let the pot empty before re-watering again. 

Haworthia may be a resistant plant, but this doesn’t mean it won’t need watering. Even so, it all boils down to using the right strategies while at it. We take a look at 11 golden rules for watering the haworthia.

1. Do not overwater

Watering haworthias is not as simple as sticking them in a saucer of water and forgetting about them. They need very little water and will suffer if you overwater them. If you’re new to growing succulents, your haworthia may be the first that you grow, and you may likely be tempted to water a little too much.

Haworthias hate having wet feet, and that means you should never stand your plant in a saucerful of water. If you do, the plant will succumb to root rot and die. To experiment to see if your haworthia has too much water in the potting mix, give it a good thorough watering (but not so that water comes out of the drainage holes). 

Haworthia plant with tools.
You can allow it to dry sufficiently before watering again.

You can then wait until the excess drips out of the bottom. This should take between half an hour to two hours, depending on the size of your pot. However, don’t just guess – place a container underneath to check. You can allow it to dry sufficiently before watering again.

2. Watering Strategies

Water your haworthias early in the day so that they can dry out before nightfall. Never water them during the evenings as this moisture will remain trapped within the leaves and cause rot. Nevertheless, don’t water them early in the morning, particularly if it is still dark. There will be less light for your plant to dry out fully, and you may get wet leaf bases that rot.

Remember, some haworthias are winter growers, so defer your watering until autumn if you see new growth developing in the spring and summer months.

3. Monitor your terrarium closely

If you are growing haworthia in a terrarium, ensure you empty any water from the bottom tray after watering and before you put it back together. This will prevent any rot from setting into the soil and killing your plant. Terrarium plants are synonymous with rot because people are always tempted to leave the water in the tray rather than pouring it away. If you believe you aren’t watering enough, try giving your plant a serious soaking. It should then last for about one week before needing another good drink.

4. Reduce watering before propagation

If you want to propagate haworthias, reduce watering to a minimum once the new growth has appeared. Remember, the soil needs to be dry before removing the offsets from the parent plant.

Haworthia plant offset.
Wait until the offsets are at least half as big as the parent plant.

 The best method is to wait until the offsets are at least half as big as the parent plant and then remove them with a sharp pair of secateurs. If you try to cut or break them away before they reach this size, you risk damaging the existing plant and preventing it from flowering and setting seeds.

5. Mind the Frequency

How often your haworthia needs to be watered depends on several factors. These include:

a) The size of the plant – Larger plants take longer to dry out than smaller ones.

b) The time of year – Plants that stay outside all year round will need much less water than those undercover during cool weather.  The weather conditions may also affect how much your plant needs to drink. If it’s very hot, plants will need more water than they would if it were cooler.

c) Potting Mix – The potting mix you use may also affect how much your haworthia needs to drink. For example, a 80% inorganic material mix will need more frequent watering than 60% organic.

 It’s important to note that some haworthias such as H. binata and H. cymbiformis will suffer if you overwater them. Still, others such as H. fasciata can take quite a lot of water without showing signs of distress. 

6.  The seasons matter

Your watering regime changes depending on the season. For example, haworthias grown in the winter or spring need less water than those grown during the summer months. The good news is that most haworthias only need watering every few weeks – often, once a month will be fine unless it’s particularly humid where you live. If your haworthia is looking droopy and not at its best, you could try giving it a thorough watering.

Haworthia plant in a pot with offset.
You may want to place a tray of gravel underneath your pot.

Try to avoid watering your plants if the weather is very cold or frosty, as the water could freeze and cause damage to your plant. You may want to place a tray of gravel underneath your pot so that any excess water can drain out, but this isn’t essential for all species.

7. Humidity Affects watering frequency

Humid conditions can affect how often you water haworthias. A greenhouse is a good example – if grasses are growing in your greenhouse, haworthias will need watering more often to prevent them from drying out too quickly. On the other hand, if your plant is not doing very well, high humidity plays a part in this, and it may be worth reducing watering frequency as a first step towards reviving your plant.

8. Watering needs vary based on varieties

For better watering, you may want to determine the variety of your haworthia. For example, H. cymbiformis is a winter-growing succulent. Most people water it sparingly during the cooler months and stop watering altogether when the air gets warmer in spring and summer. However, if you have an H. cymbiformis with red leaf margins, they prefer high humidity, so you may need to water more often or use a tray of gravel under the pot to improve drainage.

Haworthia cooperi plant.
For better watering, you may want to determine the variety of your haworthia.

9. Allow time for the soil to dry between waterings

When watering your plants, make sure they are completely dry before adding any water. If you water too soon, salts in the soil (caused by excess fertilizer) can build up and leave your plant weak and sickly. If this happens, flush the soil with a dilute solution of NFT or No-Salt to remove the salts.

 It’s best to allow the excess water to drain out and then stand the pot upright for a while so that there is no danger of it dripping onto the leaves. If you want to be 100 percent certain that your plant is completely dry, wait until the top 2 inches of soil has dried out before watering again. 

10. Never water your haworthia from above  

Watering the leaves will promote the rotting of the tender new leaves on the plant. Instead, pour water into the pot slowly and drain out of the drainage holes. This will ensure that the leaves and stems of your plants remain dry and crispy.

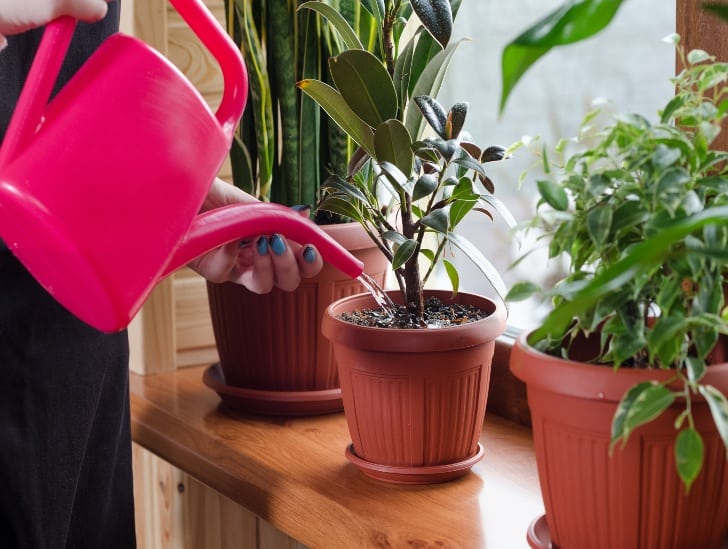
A person watering the plant.
This will ensure that the leaves and stems of your plants remain dry and crispy.

In case you accidentally get the tender leaves wet, you can try wiping them with a soft cloth to remove the moisture, and then stand the plant upright and allow it to dry out before putting it back in your living room. Alternatively, you can wipe the leaves with a damp cloth moistened with NFT or No-Salt to remove salts.

11. Never water when the air is extremely cold or hot

Don’t ever let the roots of your haworthias freeze, as they won’t recover. Likewise, don’t water them if the air temperature is colder than 5˚C/40˚F or hotter than 40˚C/104˚F. Here’s why;

Frost damage

In winter, haworthias can be exposed to frost. If you have an outdoor haworthia and it’s cold overnight, ensure you protect the plant with fleece or cover it before nightfall. Don’t water your ice plants when exposed to frost because this will cause them to rot.

Hot temperatures 

In summer, hot temperatures can kill off your plants. In the wild, haworthias grow in very rocky environments exposed to high temperatures and little rainfall. If you have a greenhouse with many ice plants inside it, make sure there is plenty of ventilation so air can circulate them. It’s also a good idea to keep an eye on the temperature of any plants in your living room or conservatory and water them more often if necessary.

Conclusion

Haworthias are wonderful plants, no doubt, and you don’t want to gamble on its watering. Getting its watering regime right shouldn’t be complicated and should help keep them healthy and happy. Just like any other succulent, haworthias require a limited amount of water, and it’s always better to err on the side of caution. In other words, don’t be too generous with its watering, as this can kill them off. 

12 Tips On How To Water Portulacaria Afra (Elephant Bush)

Portulacaria Afra Elephant Bush is one of the most popular houseplants thanks to its ease of growth. This desert plant requires very little attention. They do, however, need regular watering to survive. If the soil around a jade is allowed to dry out completely and then is flooded with water suddenly, it can cause roots to rot and eventually kill the plant. One of the most frequent questions about Portulacaria Afra Elephant Bush is how often they need watering. Portulacaria Afra Elephant Bush is sensitive to overwatering, but they also don’t like to dry out completely, so it is important not to water them too infrequently.

Here are 13 golden rules for watering Portulacaria Afra Elephant Bush.

1. WATER EARLY IN THE MORNING

Water should only be applied in the morning so that the leaves have time to dry out before nightfall. If Portulacaria Afra Elephant Bush are watered at night, the water sits on their leaves and can cause them to rot.

Watering in the morning also allows the leaves to dry out during the day, which means there is less chance of spider mites or other pests getting into your Portulacaria Afra Elephant Bush. However, exceptions can be made for plants kept in a greenhouse or other environment where they never get direct sunlight. In this case, it is okay to water them at night because the moisture will not sit on their leaves.

2. PROPERLY CHECK MOISTURE LEVELS

It is important to regularly check the moisture levels of your Portulacaria Afra Elephant Bush’s soil. Although they like to dry out between waterings, it is possible to overwater them and cause root rot.

Check moisture levels with a finger stick into the soil. If it feels dry, give it some water. In general, you should only need to water your Portulacaria Afra Elephant Bush every 2-3 weeks in the summer and once a month or less during other times of the year.

3. BE WARY OF THE POTTING MIX YOU’RE USING

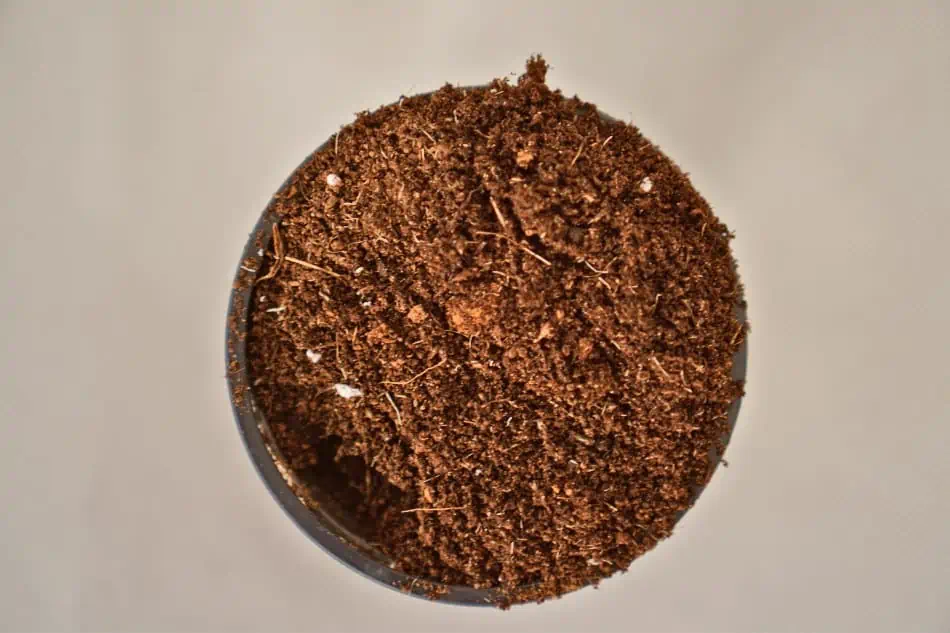
Your potting mix says a lot about how often you need to water your Portulacaria Afra Elephant Bush. When selecting a potting mix, always choose one designed for cacti and succulents, such as 50% coconut coir, 25% peat moss, and 25% sand or perlite.

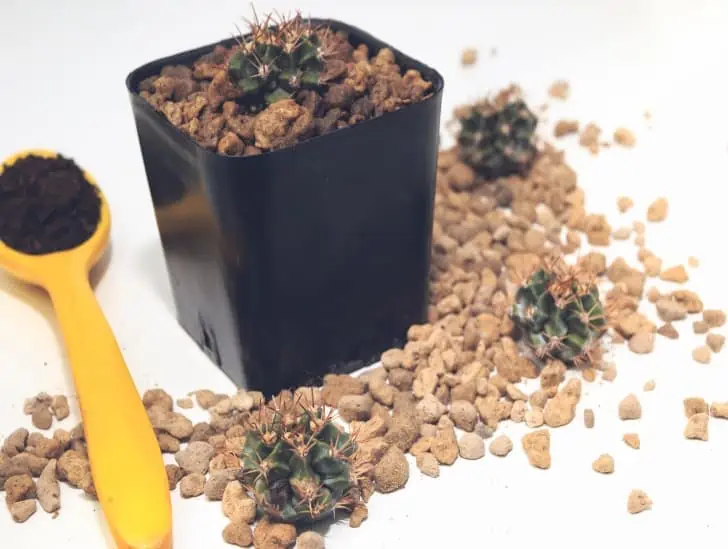
Cactus soil ane equipments.
If you’re using a loose or heavy potting mix, it will need watering more often.

This mix will wick away moisture from the leaves, which reduces the amount of water the plant needs. If you’re using a loose or heavy potting mix, your Portulacaria Afra Elephant Bush will need watering more often.

4. WATER LESS IN THE WINTER AND MORE IN THE SPRING

For most people, the winter months are when their Portulacaria Afra Elephant Bush needs the least water. It is still important to properly check moisture levels in the soil and use a potting mix that wicks away water, but a little less water can be given during the winter months when the plant isn’t growing as much.

In contrast, increase your watering schedule when summer arrives, and your Portulacaria Afra Elephant Bush is actively growing. Not only does the soil need to be checked more frequently, but an increased amount of water will also be needed by the roots as they develop.

5. DO NOT OVERWATER

One of the biggest mistakes people make with their Portulacaria Afra Elephant Bush is watering them too often. If there are no proper drainage holes in the pot, water will pool at the bottom and cause rot. If you’re unsure if there are proper drainage holes in your Portulacaria Afra Elephant Bush’s pot, stick a finger into the soil and ensure that it is damp but not soaked in water.

Plant being over water.
It is also sensitive to being overwatered.

Portulacaria Afra Elephant Bush is also sensitive to being overwatered because the water sits on the leaves. If you’re unsure whether your Portulacaria Afra Elephant Bush needs to be watered, just wait a day or two before watering it again.

6. DO NOT UNDERWATER

Just like overwatering, underwatering can also be detrimental to your Portulacaria Afra Elephant Bush. Portulacaria Afra Elephant Bush need watering until the moisture soaks through their entire root system.

When watering, stop when you see water draining out of the bottom of the pot. If there are no drainage holes in your Portulacaria Afra Elephant Bush’s pot, turn it upside down and allow all the excess water to run out of the bottom. Then, set the plant aside and let it drain for a few minutes before returning it to its normal position.

7. POTS NEED A DRAINAGE HOLE

One of the most important aspects of watering your Portulacaria Afra Elephant Bush is making sure they have proper drainage holes in their pots. This will help ensure that excess water can drain out before any problems occur.

Pots with hole.
Make sure they have proper drainage holes in their pots.

Although it is tempting to leave the plant in its pot when watering, this can cause water to pool at the bottom and possibly rot the roots. Always use a tray or bowl when watering your Portulacaria Afra Elephant Bush to avoid this problem.

8. INSPECT THE SOIL BEFORE WATERING

Before you water your Portulacaria Afra Elephant Bush, it is important to inspect the soil and ensure there are no insects, bugs, or other unnecessary matter in the soil. Take the time to carefully remove anything that doesn’t belong and clean off any insects.

Portulacaria Afra Elephant Bush are sensitive and can easily die from bug infestations or diseases that take root because you didn’t properly inspect the soil before watering it. Even if you use a potting mix specially designed for succulents when propagating, always double-check the soil before adding water.

9. AVOID WATERING THE LEAVES

Watering the leaves can cause spotting and other unsightly blemishes that reduce the visual appeal of your plant. It can also lead to fungal infections that kill your Portulacaria Afra Elephant Bush.

plant being repotted.
It can also lead to fungal infections that kill your plant.

Instead, always water the soil directly after inspecting it for unwanted visitors. If there are no insects or matter in the soil, you can water your Portulacaria Afra Elephant Bush by focusing on the base around the stem and the roots and the soil around those roots.

10. USE THE RIGHT WATER TYPE

The best type of water to use on your Portulacaria Afra Elephant Bush is distilled water. It does not contain any salts or minerals that can harm the plant and draws out the moisture from the soil and into the pot before evaporating. If you cannot find distilled water in your local grocery store, filtered water is a suitable alternative. Rainwater also works well and is a very natural solution.

However, never use tap water or other types of water that contain chemicals or salts because this can be very harmful to your Portulacaria Afra Elephant Bush. Tap water also contains chlorine, damaging the roots if allowed to sit in the soil for too long. Avoid using hot water as it can cause leaf spotting.

11. USE THE RIGHT TOOLS

Watering your Portulacaria Afra Elephant Bush is a task that should never be completed by hand. Although you might think this will save time and effort, this may work against you. Some bacteria from your hands can transfer to the plant and cause disease.

A woman watering the plant.
Ensure that your tools are always clean before using them.

Suppose you have a potted Portulacaria Afra Elephant Bush. In that case, it is best to use a watering can with a long spout so you can easily reach the soil without bending over continuously. Ensure that your tools are always clean before using them on your Portulacaria Afra Elephant Bush.

12. DO NOT WATER WHEN IT IS TOO HUMID OR TOO HOT

Avoid watering your Portulacaria Afra Elephant Bush when the weather is extremely hot or humid because this puts a great deal of stress on the plant. If you must water, try to do so in the early morning or evening when it is cooler outside to reduce the risk of harming your Portulacaria Afra Elephant Bush.

High humidity levels can cause rot or mildew to develop on your Portulacaria Afra Elephant Bush, so avoid watering during this time.

Signs that your Portulacaria Afra Elephant Bush needs water

A good gardener knows how to recognize the signs that their plants need water. Here are a few signs that your Portulacaria Afra Elephant Bush needs a little drink:

The soil is completely dry and has a powdery appearance – this means you probably haven’t watered for several weeks or months

The leaves have brown tips – If the edges of your leaves have started to turn brown, this is a sign that your plant needs water. Another way to tell if the leaves need water is to lift the leaf from the soil. If there are signs of browning on the underside of the leaf, it’s time for watering.

The lower leaves are falling off – If you notice your Portulacaria Afra Elephant Bush’s leaves are dying and falling off, this is a sign that your Portulacaria Afra Elephant Bush isn’t getting enough water.

Final Word

Watering a Portulacaria Afra Elephant Bush need not be complicated. However, this does not mean you can be lackadaisical in maintaining a healthy watering regime.

While you might not think this is a big deal, if your Portulacaria Afra Elephant Bush dies, the only way to replace it would be with another one at the store. Replacing or reviving a Portulacaria Afra Elephant Bush that has been neglected isn’t worth the time, effort, and money. With these watering tips, your Portulacaria Afra Elephant Bush will be healthier and happier than ever before.

How Much Sunlight Does a Lithops (Living Stone) Need?

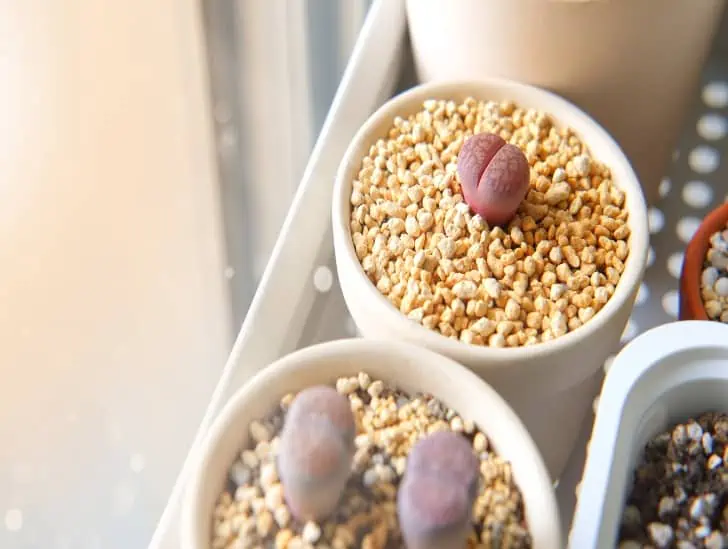
Lithops in windowsill.

The lithops is a succulent plant native to the southern parts of Africa. It’s also called living stone because it can look so much like a rock. The lithops is one of the most popular plants in the world, and for a good reason! They have some really interesting features that make them desirable as houseplants – they’re easy to grow, don’t need soil, and are very low maintenance. But what about sunlight? Do they need direct sunlight? If not, how long should you put your lithops outside each day?

 So, does a lithops (Living Stone) need direct sunlight? Lithops are succulents, so they do best with indirect or filtered light. You can achieve this by placing them outside in the shade of taller plants, under a tree, or near an open window. Direct sunlight will cause their leaves to turn brown and crispy.

 Lithops is an interesting plant; it mimics the rocks in its natural environment and can go long periods without water. We take a look at this succulent’s light requirements and how you can provide them with the right type of light to keep your lithops healthy.

Best light locations for lithops at home

Since lithops thrive best under indirect sunlight, choosing an ideal spot in your home is vital. You want to find a place where they will receive some light but not direct sunlight. These locations can vary depending on your home, but some good options include:

1.      Near an east- or west-facing window

This is by far the best spot for lithops in your home. They’ll get plenty of indirect light throughout the day, and you won’t have to worry about moving them around to follow the sun. It works best if the window has a sheer curtain or blinds, so the direct sun doesn’t hit the plants directly. 

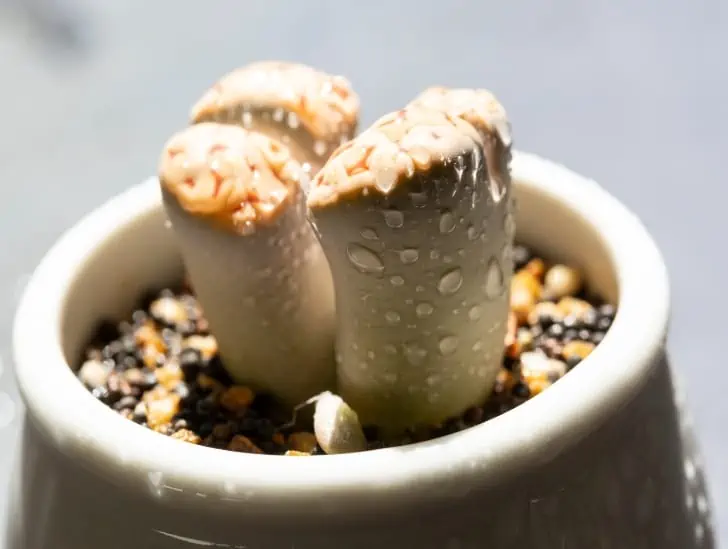
A freshly watered lithop and exposed to sunlight.
It works best if the window has a sheer curtain or blinds.

Alternatively, you can place them in front of a north-facing window, though they won’t get as much light this way. Nevertheless, it’s still a better option than placing them in direct sunlight.

2.      Outdoors in the shade

If you don’t have a spot near an east- or west-facing window, placing your lithops outdoors in the shade is another great option. Just make sure to move them back indoors before the temperature drops at night.

If you live in a warm climate or mild winters, placing your lithops outdoors in the shade can be a great option. This gives you plants a chance to get some natural sunlight, and they’ll stay cool during the hotter months.

3.      Under a tree

Placing your lithops under a tree is another great option if you have an outdoor space with some trees. The trees will provide filtered light and keep the plants from getting too much direct sun. Just make sure to water them regularly since they’ll be in direct contact with the soil.

4.      On a patio or deck

If you have a patio or deck, placing your lithops is another great option. The plants will get some filtered light, and you’ll be able to enjoy them while spending time outdoors. Just make sure they’re in a shaded location during the hottest part of the day.

Lithop exposed to sunlight.
The plants will get some filtered light.

5.      In a pot with other plants

If you’re short on space, placing your lithops in a pot with other plants is a great option. You can put them in a spot that gets some indirect sunlight, and they’ll share the water and nutrients from the soil. Just make sure to water them regularly.

6.      In an Open Bright Window

If you do not have an east- or west-facing window, an open, bright window is the next best thing. This spot will give your lithops some direct sunlight, but it won’t be as harsh as if they were in direct sun all day long. Just make sure to rotate them every few days to get an even amount of light.

Lithop exposed to sunlight.
It won’t be as harsh as if they were in direct sun all day long.

7.      Indoors in a bright, sunny room

Lithops does pretty well as long as it gets access to some form of light. As such, if you don’t have a spot outside where your lithops can get indirect light, placing them indoors in a bright, sunny room is the next best thing. The source of your light can be natural or artificial, as long as it’s bright. For instance, using grow lights can be a great way to give your lithops the light they need. 

How long to leave lithops outside each day

Having settled on taking your lithops outdoors in the shade, you still have to deal with the question of how long to leave lithops outside each day. The answer depends on your latitude and the time of year.

In winter, when days are shorter, it’s best to leave lithops outside for just a few hours in the morning so they can get some indirect sunlight. As the days grow longer and the weather warms up, you can leave them outside for longer periods.

Lithops on the pot.
It’s best to leave lithops outside all day long so they can get some direct sunlight.

In summer, when the days are longest, it’s best to leave lithops outside all day long so they can get some direct sunlight. Just make sure to bring them inside at night before the temperature drops too much.

Signs that your lithops is light-deficient

Light deficiency in lithops manifests in several ways. While some of the signs can be subtle, others are more obvious. If your lithops is light deficient, you may notice that:

  • The leaves are smaller than normal – Lithops leaves are usually small, but if they start to get smaller than normal, it may be a sign that the plant is not getting enough light.
  • The plant is elongated and stretched out – Lithops will often stretch out if it’s not getting enough light. This is especially noticeable in young plants.
  • The stem turns red or purple – A healthy lithops stem is green, but if it starts to turn red or purple, it may be a sign that the plant is not getting enough light.
  • The leaf tips turn brown and crispy – This is especially noticeable on the tips of older leaves. This also happens as a result of too much light exposure.
  • The plant isn’t growing or flowering – Lithops usually grows and flowers during the spring and summer, but if it’s not doing either of those things, it may be a sign that it’s not getting enough light.
  • The edges of the leaves are curled – Usually, the edges of lithops leaves are straight, but if they start to curl, it’s time to take action and give the plant more light.

Do Lithops thrive best indoors or outdoors?


Lithops can thrive either indoors or outdoors as long as they get access to some form of light. However, they do best outdoors when they have access to direct and indirect sunlight. If you live in a place where the winters are cold and the summers are hot, it’s best to keep your lithops inside during the winter and move them outdoors during the summer.

Lithops on the pot.
They do best outdoors when they have access to direct and indirect sunlight.

Light requirements play a critical role in Lithops, and this explains why outdoor succulents during winter and indoor succulents during summer is the general rule. Lithops are from Africa, a continent with high-intensity sunlight most of the year.

Other care requirements for Lithops

Watering

Lithops may be adapted to desert conditions, but that doesn’t mean they don’t need water. Lithops need water just like any other plant. However, you don’t want to water them too much, as that can be harmful. The best way to water your lithops is to wait until the top of the soil feels dry to the touch and then give it a good watering.

Fertilizing

Lithops don’t need a lot of fertilizer, but you can give them a little bit every few months to help them grow healthy and strong. Just be careful not to over-fertilize, as that can also be harmful. The best fertilizer for lithops is a balanced, all-purpose fertilizer.

Soil

Lithops like soil that is light and sandy with good drainage. You can buy a special soil mix for succulents, or you can make your own by mixing potting soil with some sand or perlite. A good soil mix for lithops should be about 60% potting soil, 20% sand, and 20% perlite.

Temperatures

Lithops prefer temperatures that are cool to moderate. They can handle temperatures down to about 50 degrees Fahrenheit, but they don’t do well in hot weather. Make sure to keep your lithops out of direct sunlight during the summer months, or they may overheat.

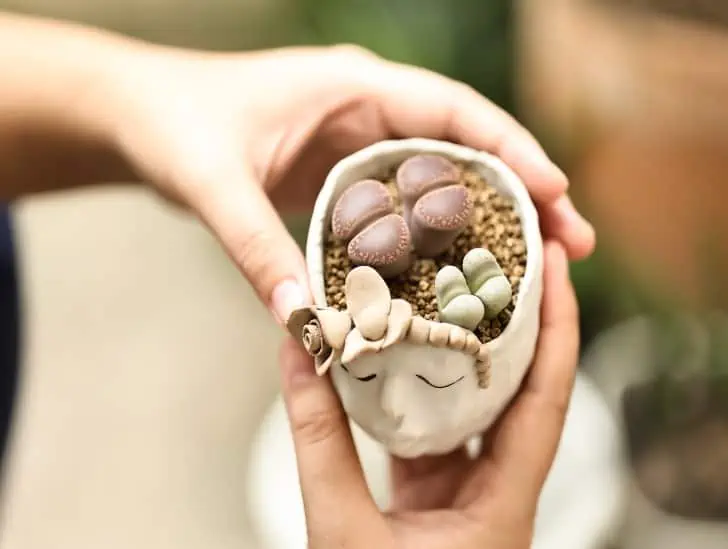
Lithops on a heart shaped pot.
Make sure to keep your lithops out of direct sunlight during the summer months.

Propagation

Lithops can be propagated by dividing the plants or by taking leaf cuttings. Division is the easiest way to propagate lithops, and it’s best to do it when the plants are dormant (during the winter months). To take a leaf cutting, simply remove healthy leaves from the plant and place them in the soil. You should see new roots and leaves sprouting from the cutting within a few weeks.

Final Word

Ultimately, it’s important to monitor your lithops and make sure they’re getting the right type of light. Adjust their location accordingly if they start to show signs of distress, like wilting leaves or browning. This practice will ensure that your lithops thrive for years to come. You do not necessarily need to be an expert to take care of lithops. With a bit of knowledge, some trial and error, and sometimes luck, you can keep your lithops healthy and looking great.

How to choose the right pot for your air plants?

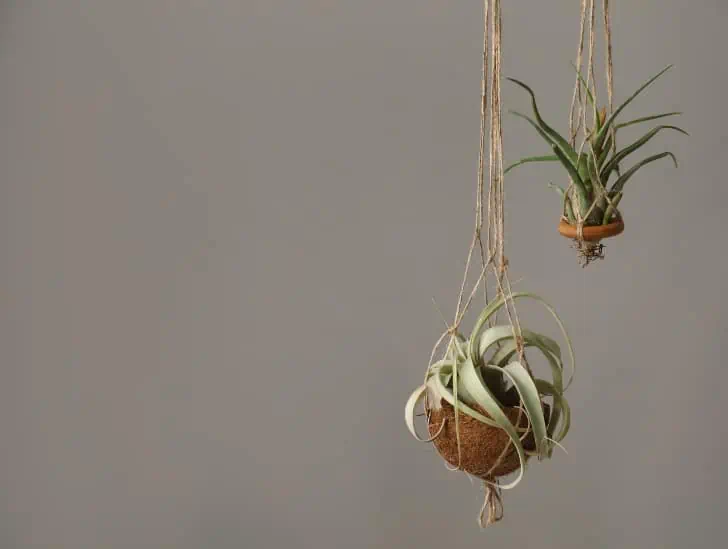
Air plant hanging.

Air plants are a unique type of plant that can thrive in just about any environment. They survive in deserts, underwater, and even on the side of a volcano. But what pot should you choose for them? Getting the right pot for your air plant can be challenging, considering no pot is made with the air plant in mind. While there are many different pots that you can use for your air plant, we have compiled a list to help make the decision easier.

So how do you choose the right pot for your air plant? When picking out the perfect pot for an air plant, consider the size of the pot. To choose the right size of the pot, figure out how much space it will take up on your desk/shelf/countertop. The best approach to choosing the right pot for your air plant is to find a pot that is not much bigger than the air plant itself. This will ensure your air plant has enough space to grow and won’t overcrowd in its pot.

Getting that perfect pot for your air plant can be tricky, but with a little bit of research, you are sure to find the right one for your needs. This post will discuss the different types of pots available and how they work with air plants so you can find the perfect one.

Considerations when choosing the right pot for your air plant

While there are many different pot types that you can use for your air plant, getting the right one is all about picking one that works for your specific conditions. The following are a few things you should consider when choosing the right pot for your air plant:

The size of the pot compared to the size of your air plant

The size of your pot plays a vital role in the health of your air plant. When choosing a pot for an air plant, make sure that it is not much bigger than the size of your air plant itself. The best option when deciding whether to use a larger pot is if you plan on getting multiple plants and want them to be close together (such as in a terrarium). If you are only using one air plant, it is best to stick with a pot no bigger than your air plant’s size. 

Air plant in a wood.
The size of your pot plays a vital role in the health of your air plant.

How much space will the pot take up on your desk/shelf/countertop

Another thing to consider when choosing a pot for your air plant is how much space it will take up on your desk, shelf, or countertop. Pots come in all shapes and sizes, so make sure you pick one that doesn’t take up too much room. Some pots are specifically designed to be kept on your desk if you are limited on space. These pots have a flat or slanted surface, so they will easily fit onto any countertop, shelf, or table. This factor largely depends on your personal preference and how much space you have to work with.

What type of pot you are looking for (ceramic, metal, glass)

There are many different containers that you can use as an air plant pot. Some of the most popular include ceramic, metal, and glass containers. While there are pros and cons to each type of pot, it all depends on your personal preference when choosing which one you want to use. This also includes the conditions you are trying to create for your air plant.

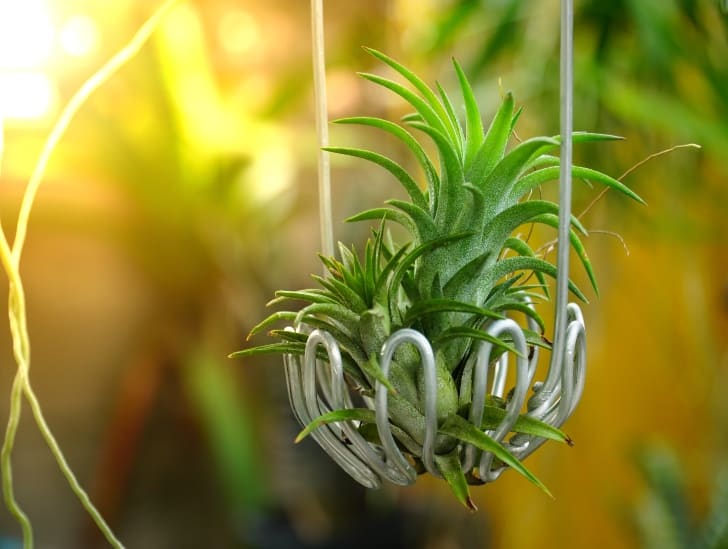
Air plantg hangging.
There are many different containers that you can use as an air plant pot.

Types of pots suitable for air plants

Ceramic pots

Ceramic pots are a popular choice because they come in many different shapes and sizes, making it easy to find one that fits your needs. Your air plant will love being surrounded by a ceramic pot as it is smooth and neutral, which makes it easy for the air plant to attach itself to. 

Advantages:

-They come in many different colors, so you can match your decor perfectly

-They are made of smooth, neutral material that is suitable for air plants

-They are durable and will last you a long time

Disadvantages:

-Not every ceramic pot comes with drainage holes, so water can get trapped inside the plant’s roots. This makes it more difficult to keep your soil moist while ensuring there isn’t too much water build-up.

-Ceramic pots can be quite heavy, so they might not be ideal if you are looking for a pot that is easy to move around.

-They break easily if dropped or knocked over

Metal pots

Metal pots make a great choice for air plants because they come in many different shapes and sizes, just like ceramic pots. They have been popular with air plant enthusiasts for a while now because they are easy to care for.

Advantages:

-They are made of sturdy, durable material that is suitable for air plants

-They have a modern look that will fit in with any decor

-They are easy to keep clean as all you need to do is wipe them down with a damp cloth

Disadvantages:

-Some metal pots can get very hot in direct sunlight, so make sure you watch your plant if you are using this type of pot.

-They can get quite heavy, so they might not be ideal if you are looking for a pot that is easy to move around. 

-Some people find the metallic sheen on some metal pots too shiny or flashy. 

Glass pots

Glass pots are popular for air plants because they come in different shapes and sizes, just like ceramic and metal pots. They have a sleek and modern look that most people find appealing.

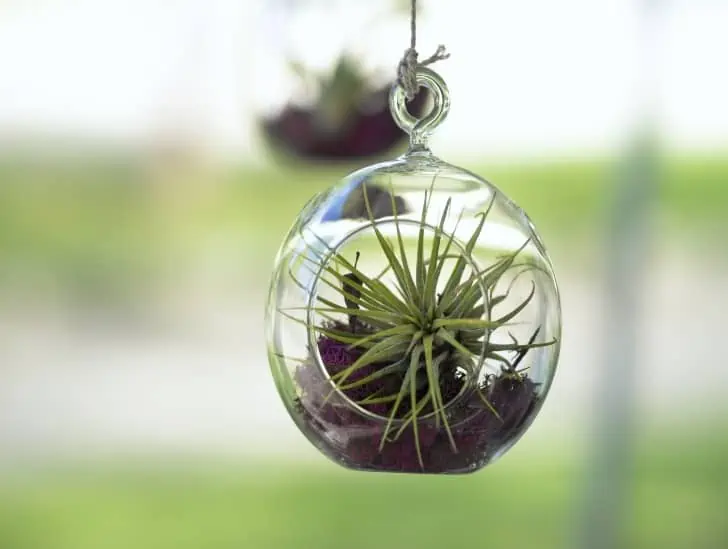
Air plant in glass container.
They have a sleek and modern look that most people find appealing.

Advantages:

-They come in many different colors, so you can match your decor perfectly

-They are made of smooth, transparent material that is suitable for air plants

-They are durable and will last you a long time

Disadvantages:

-Not every glass pot comes with drainage holes, so water can get trapped inside the plant’s roots. This makes it more difficult to keep your soil moist while ensuring there isn’t too much water build-up.

-The glass material scratches easily, which means your plant won’t have as long a lifespan compared to other types of pots.

-They break easily if dropped or knocked over.

What is unique about air plant pots?

Shape

Air plant pots stand out from other pots because they come in various shapes and sizes. They also make it easier to create your unique look for decorating your home or office space, whether you are looking for something modern, natural, or rustic. This is especially so considering air plants do not require soil to grow in, so you can use any type of pot that catches your eye.

Positioning

Unlike other plants where you have to worry about the pot taking up too much space or being in the way, air plants can thrive almost anywhere. This includes hanging them upside down or using a pot with a special opening that allows you to hang your plant on the wall. You can also place them in areas where other plants wouldn’t be able to grow, such as on top of your kitchen cabinets.

Air plant near the window.
You can also place them in areas where other plants wouldn’t be able to grow.

Sturdiness

Pots meant for air plants do not necessarily have to be sturdy since there is no soil to be held in place. This means that air plant pots can be made from a variety of materials, including plastic, metal or ceramic. This also means that if you are looking for a pot that is easy to move around, an air plant pot would be a perfect choice.

Water drainage

Since there is no soil with air plants, the pot must have some sort of drainage hole at the bottom to allow water to escape. This makes it easier for you because your plant won’t be sitting in too much moisture. This can lead to root rot or other similar problems that are challenging to treat.

What about soil?

While some varieties of air plants can grow in soil, many other types do not require any growing medium whatsoever. This makes them very easy to care for, and you don’t have to worry about the pot becoming too heavy from the soil. Most people find that air plants look their best when displayed in a pot without any soil at all.

Air plant in dish.
Many other types of air plant do not require any growing medium whatsoever.

Soil can also be difficult to keep moist, which you do not want to deal with if you have an air plant. This is especially true if you have a pot with no drainage holes, which can lead to water build-up and rot in your roots.

You may not need a pot after all

Think about it; you don’t necessarily need a pot to grow an air plant. All you need is something that can hold the plant and give it some space to hang or sit. This means you could use just about anything as a pot for your air plant, including old jars, cups or glasses, seashells, or even a piece of driftwood.

Conclusion

Getting an ideal pot for your air plant boils down to specifically what you are looking for. If you want something easy to move around, has drainage holes, and comes in various shapes and sizes, then an air plant pot would be perfect for you. However, if you don’t mind using something else as a pot or your air plant doesn’t require soil, then there are plenty of other options to choose from. Go get yourself a good air plant pot so you can grow your plants in style.

How To Water Your Madagascar Palm Correctly?

Growing a Madagascar palm can be quite an adventure. This leafy tropical beauty is not only striking to look at, but it also comes with an interesting story. Its native home is Madagascar, an island off the coast of Africa. It was brought to the United States in the early 1900s as a landscape specimen. Today, the Madagascar palm is one of the most popular palms for indoor gardens because it does not require a lot of sunlight, and it is relatively easy to grow. These plants are not only beautiful but also require well-timed watering to thrive.

So what are the golden rules for watering the Madagascar palm? Never let it dry out completely. Ensure that the roots are always getting enough water. Ensure that all containers have drainage holes so the plant does not sit in water. It is best to water the plant in the morning. Avoid getting the leaves and trunk wet, leading to fungal problems. Use a rain gauge or some other measuring device to track how much water you are giving the plant.

Madagascar palm stands out from your home garden, but how best can you tap this beauty for much longer? It all boils down to proper watering. Here are 10 golden rules that will help you keep your plant healthy and happy.

1.      Never let it dry out completely

A Madagascar palm may not need much water, but this doesn’t mean you let it dry out completely. Take note that the plant will need water as soon as the soil feels dry to the touch. The best way to tell is to stick your finger in the soil up to your knuckle. If it’s wet, don’t water it; if it’s dry, give it a drink.

2.  Make sure that all containers have drainage holes so the plant does not sit in water

Every pot must always have a hole at the bottom for excess water to escape. This prevents your plants from drowning and getting root rot you need to ensure ventilation points on every container.

A madagascar palm on a pot.
This prevents your plants from drowning and getting root rot.

While some containers come complete with drainage holes, others may not. If there isn’t a hole, you can always drill one yourself or just use it as an opportunity to up-cycle those old containers that are no longer useful.

3.  Water the plant in the morning.

If your daily schedule makes watering difficult for you, water early in the day so moisture can have time to dry up before night falls. This is especially important for plants that are kept outdoors where humidity levels increase at night and the moisture will be trapped inside if you water it later in the day.

Watering your Madagascar palm in the morning also helps prevent fungal problems. While water works as a moisturizer for your plant, it can also harbor fungi that will cause disease if you overwater the plant at night time or when humidity levels are high.

4.  Avoid getting leaves and trunk wet.

The bark on the tree looks beautiful but avoid getting this part of the plant wet to prevent any fungal problems. Water the leaves and the soil instead. Not only will this help keep your plant healthy, but it will also make sure that it stays attractive.

Madagascar palm leaf.
Avaoid watering the bark of the tree, water the leaves and the soil instead.

In case you accidentally get these areas wet, dry them off as soon as possible. A soft cloth or a paper towel will do the trick. You can also use a hair dryer to speed up the process.

5.  Monitor the amount of water you are giving your plant

It’s important to be mindful of how much water you’re giving your plant so that it doesn’t get too much or too little. There is no point in wasting time guessing if your plants need watering or not. Instead, invest on a simple tool that will help you measure exactly how many cups of water

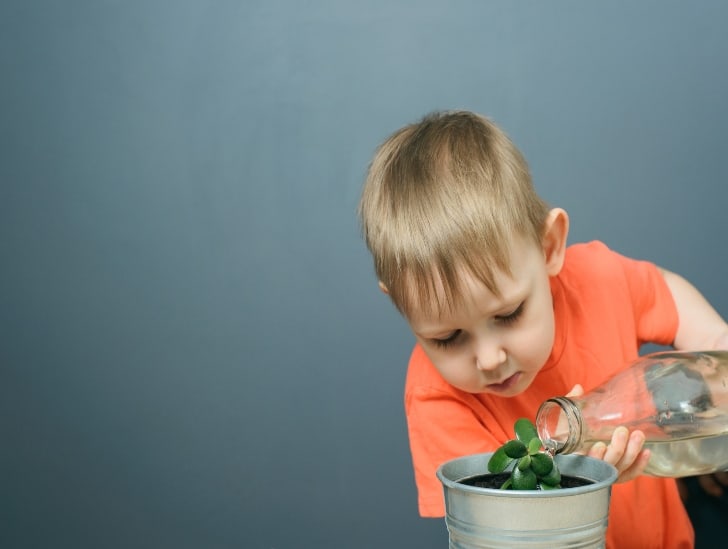
A boy watering the plant.
It’s important to be mindful of how much water you’re giving your plant.

For the cause, you can use a rain gauge, a moisture meter, or a simple measuring device like a ruler or cup to measure how much water you’re giving your plant. Use the same tool every time so that over time, you will be able to monitor exactly how much water is getting into your pot and know if it needs more or less.

Alternatively, you can also opt for automated watering systems that are convenient to use and save you time and effort.

6.  Watering deeply and less often is better than watering a little bit every day

This helps prevent the soil from becoming saturated and allows air pockets to form, which helps with drainage. When you do water, give it enough to wet the entire root system. If you’re using a rain gauge or something similar, make sure that the plant gets an inch of water at least every time you water it.

7.  Be careful not to over-water your plant

When caring for your Madagascar palm, you may be tempted to water it more often, especially if you’re living in a place with high humidity levels. However, over-watering can be just as harmful to your plant as not watering it enough. The best way to avoid this is to wait until the soil feels dry before watering and stick to the recommended amount of water given above. For better results, water your plants once a week.

watering the plant.
Over-watering can be just as harmful to your plant as not watering it enough.

8.  Watering often encourages shallow root systems 

Shallow roots cause the plant to be more susceptible to strong winds, making it easier for them to break off and causing other problems like rot in moist soil. It’s best if you can encourage deep rooting by avoiding frequent watering.

9.  Water at the base of the plant

Watering at the base helps get the water to where it is needed most-the roots. If you’re using a watering can make sure that you are spraying the water directly onto the soil and not on the leaves. You can also pour some water into the potting mix before watering to help wet everything evenly. While at it, ensure the water spreads all around the pot and not just at the base.

10.  Watering your Madagascar palm in a container is different from watering plants in the ground

It is worth noting that watering a potted Madagascar palm is different from watering plants in the ground. You will need to keep an eye on how much water you’re giving it and adjust your schedule accordingly. Notably, watering containers require more attention than those planted directly into the soil. This means that if you grow Madagascar palms inside, there’s a higher chance of overwatering since these pots can’t drain the water.

Madagascar palm tree on a white pot.
Watering containers require more attention than those planted directly into the soil.

11.  Fertilize the plant every other month with a balanced palm fertilizer

Your watering a fertilizing regime should be adjusted according to the plant’s needs. Planting within a container requires additional care and attention to detail which you will need to follow if you want your Madagascar palm tree to thrive. With this in mind, make sure that you pay close attention when watering and fertilizing it so as not to cause any damage or other problems for your plant down the line.

Fertilizing your palm helps it grow healthy and strong. A balanced palm fertilizer has the right mix of nitrogen, phosphorous, and potassium essential for plant growth. Be careful not to use a too strong fertilizer as this can damage the plant. Follow the instructions on the package carefully and stop fertilizing if you see any signs of distress or leaf yellowing.

Signs of overwatering in a Madagascar palm

Overwatering is a common problem with Madagascar palms and can cause several issues. Some of the most obvious signs that you’re overwatering your plant include:

·         The soil around it becomes wet for more than two days in a row

·         Brown, scorched leaves at their base or tips

·         Fungal infections on the roots cause the plant to rot

·         Wilting even when the soil is moist

If you notice any of these signs, it’s time to cut back on the watering and take a closer look at your care routine. It may also be necessary to repot the palm if the potting mix has become too wet. Other notable remedies for overwatering include increasing air circulation around the plant and reducing humidity levels.

Conclusion

Watering a Madagascar palm correctly requires more than just following a set schedule. There are several things to consider, such as the plant’s location (in- or outdoor), potting mix, and fertilizer schedule. With a little bit of attention, you can help your palm thrive and look beautiful for years to come. With these guidelines, you are in a better position to water your palm the right way and avoid any common problems.

Which Succulents Go Well Together in a Succulent Arrangement?

Do you want to create a perfect succulent arrangement that will add life to your garden or indoor spaces? If so, then there are a few things you need to know about pairing these sun-loving plants. Most succulents already look fabulous on their own, but they can look even better when they are arranged together. The primary goal is to know which succulents can be grown together to save your time and effort in caring for the plants.

So, what succulents go well together in a succulent arrangement? The truth is that there are many types of succulents, and if you want to arrange these plants, a general rule is to choose those with similar needs. If you pair succulents with similar needs, they will grow in harmony and maintain a beautiful appearance throughout their time together. Mixing plants with different needs will not do you any good. For instance, Graptosedum California Sunset is a wild summer grower, while Crassula is a winter grower. So, planting these two together wouldn’t be a good idea at all.

This article discusses critical things you need to evaluate when determining which succulents go well together to avoid losing some of the plants. Read on to learn more.

Which Succulents Can Be Paired Together?

Almost all kinds of succulents can be paired together, but you still need to consider a few things to ensure your pairing and arrangement will survive over the long term.

When choosing which succulents to plant together, the most critical considerations are the conditions for maintenance and the general growth period. Basically, you want to combine succulents with similar care requirements and grow the same season.

Their watering needs, temperatures requirements, light requirements, humidity requirements, and even fertilizer requirements should be similar.

You should also pay attention to other things such as their form, color, and texture, which are crucial to developing a visually-appealing succulent arrangement.

So, what criteria should you follow when determining which succulents can go well together in your succulent arrangement? Let us find out.

1. General Care Requirements

Most succulents are generally easy-care plants. They all can store water in different parts (roots, stems, and leaves) and are drought-resistant.

However, you need to remember that some succulent species require more water than others. Some prefer exposure to full sunlight, while others thrive under shade. Some succulents are winter-dormant, while others are summer-dormant.

Hardy succulents can easily withstand freezing temperatures and frost, but the tender species are less tolerant to extremely harsh weather conditions.

Succulents on hand.
Remember that some succulent species require more water than others.

Therefore, when planting succulents together, consider their general care needs such as water requirements, growth season, temperature, and light requirements.

Generally, succulents with thin leaves usually require more water than their thick-leaved counterparts. So, if you mix thin-leaved and thick-leaved succulents and supply them with the same amount of water, you risk losing one of them due to either underwatering or overwatering.

If you must plant them together, then you will be forced to give the thin-leaved succulents a “direct dose” of water while trying to leave the other succulents dry. This alone can turn out to be a lot of work which you can avoid if you choose your succulent pairings carefully.

2. Height

Besides the growth needs, it is also good to consider the height of your succulents while planting them together. Generally, your succulent arrangement should have a thriller, filler, and spiller.

Choose the tallest succulent you can lay your hands on as the thriller because its primary job is to make the entire arrangement look outstanding. Relatively shorter succulents can be used around the thriller as fillers.

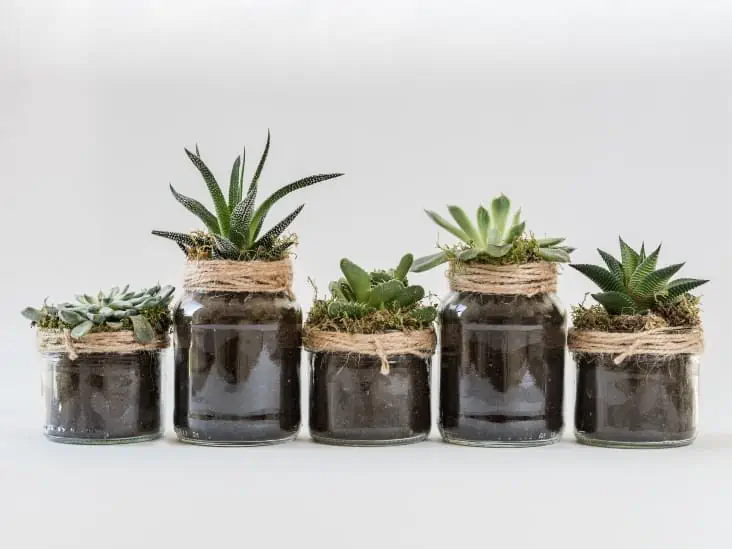
Succulents in a jar.
It is also good to consider the height of your succulents while planting them together.

You also need to find some trailing or cascading succulents to serve as spillers to make your succulent arrangement complete.

Some of the tall-growing succulents you can use as thrillers include Sansevieria and Aeonium. Short growing succulents that serve as great fillers include Sempervivum, and Echeveria while some examples of cascading/trailing varieties include String of Pearls, String of Hearts, Sedum, and Senecio.

Keep in mind that these are only a few examples, but there are numerous options for each category that you cannot exhaust. Feel free to apply your own ideas and go with something that looks good to your eyes.

3. Color

Generally, choosing a good theme for your succulent home arrangement is relatively easy. Whether you want it to be monochromatic or colorful, there are many different kinds of succulents that can make your combination look great.

There are three main ways to combine colors in your succulent arrangement; analogous, monochromatic, and complementary.

For a monochromatic arrangement, you need to combine succulents with the same colors but with different shades. For instance, the typical green succulents come in various hues. Therefore, you can easily make more textured succulent arrangements using different shades of the same color.

Different colors of kalanchoe.
You want it to be monochromatic or colorful?

In an analogous arrangement, your primary goal is to combine succulents with colors sitting next to each other in the primary color wheel. For instance, yellow, yellow-green, and green are excellent analogous arrangements that provide you with different options when picking succulents.

A complementary arrangement calls for the use of colors found on opposite sides of the color wheel. For instance, you can use green and red in your arrangement.

4. Shape and Texture

You can easily achieve an interesting succulent arrangement by using various plants with different shapes, textures, heights and other special features such as hairs.

You can always choose among the relatively tall and upward growing succulents such as Aeonium or Sansevieria or go with rosette-forming succulents such as Echeveria and Sempervivum.

Your options are truly endless when it comes to choosing succulent shapes and textures. As long as the plants you choose have similar care requirements, you are good to go.

You can also play with succulents with varying heights to achieve something more interesting. Some gardeners prefer to create a relatively uniform design using succulents of the same height but different colors and textures.

Different kinds of succulents.
Your options are truly endless when it comes to choosing succulent shapes and textures.

Some succulents such as Aloe Vera, Haworthia, and Gasteria usually provide a fantastic texture with their unique white markings. Any type of cacti will also add wonderful texture to your arrangement with their spines and unique stems.

Although most succulents are popular for their unique stems and chubby leaves, some of them produce stunning flowers during the flowering season.

So, if you include a flowering succulent in your arrangement, you can be sure of enjoying a beautiful floral display during the blooming season.

5. Pots and Containers

Pots and containers also play a critical role in determining which succulents can grow together in a succulent arrangement. Choosing the right container and experimenting with its shape, scale, texture, and even color can be as fun as arranging your succulents.
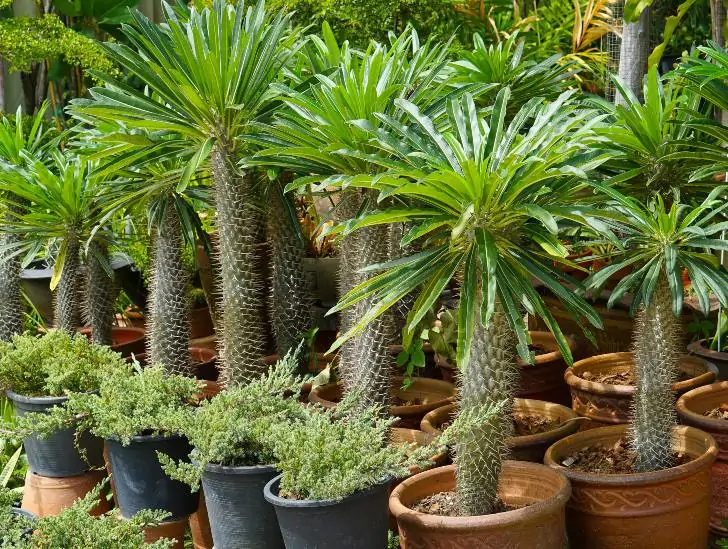
Terrariums
Go for one with color, texture, and shape that will either complement your succulents.

When choosing a growing pot to use in your succulent arrangement, go for one with color, texture, and shape that will either complement your succulents or offer a fascinating contrast. Don’t choose a growing pot just for the sake of it.

Gardening experts with plenty of experience in succulent arrangement say that choosing a pot carefully can make a significant difference since there are different forms of top dressing, such as broken blocks or pebbles, that will only look good in specific types of containers.

Can You Combine Succulents with Other Plants?

The simple answer is “yes.” Although we have been talking about succulent arrangements exclusively, it doesn’t mean that you cannot combine succulents with other types of plants to achieve a truly mesmerizing arrangement.

Combining succulents with herbs usually works best because most herbs are used to survive in the kitchen. It means they have developed some level of drought resistance and love bright light. Furthermore, they usually don’t require a lot of care and maintenance to thrive.

It means that herbs resemble most succulents in their growth and general care needs. Additionally, herbs tend to add a range of colors and textures to your succulent arrangement. They even have unique fragrances that give a new dimension to your succulent garden.

Some of the herbs that can be grown together with succulents include Oregano, Curry, Savory, Thyme, Rosemary, Marjoram, Sage, and Lavender.

The most important thing you need to pay close attention to when growing herbs and succulents together is how you water your plants. This is because most herbs are used to growing in-ground and are usually provided with slightly more moisture than succulents.

Therefore, if you combine herbs and succulents in your succulent arrangement, you need to give your herbs slightly more water than succulents. You can still use regular succulent soil in your container but find a way of watering the herbs slightly more than your succulents.

Final Thoughts

Combining several succulents in one pot helps to accentuate their beauty. You can even pair succulents with non-succulents and play around with your design to see what you can achieve.

However, if you decide to pair succulents and non-succulents, ensure the potting mix you use is specially formulated for succulent plants.

The truth is that there is no limit to your succulent arrangement possibilities, and everything is 100% possible. So, don’t be afraid to take your chances and experiment until you find something that works perfectly for you!

5 Golden Rules For Watering Hens And Chicks Plant

Sempervivum, or hens and chicks, is a unique and hardy succulent. Hens and chicks plants, by their nature, require less water than most common plants. This plant has fleshy leaf rosettes that tend to hold water. As a result, this low-maintenance plant may grow with significantly less water than other indoor or outdoor plants.

While hens and chicks can survive for long without water, they will not flourish in a prolonged dry environment. Again, keep in mind that it may not stay for long without water when it is still young. 

Read on as we delve into the golden tips to water your hens and chick succulent.

1. Watering Depends on the Type of Soil

Hens and chicks thrive in rocky, sandy soil, making them perfect for rock gardens. They will also do well in flower beds with fast well-draining soil when planted outdoors.

A Sempervivum on a rocky garden.
Hens and chicks thrive in rocky, sandy soil, making them perfect for rock gardens.

Here is how you can prepare a well-draining potting mix at home:

Step 1: Mix one portion of coarse sand with two potions of potting mix containing coconut coir, fir bark, or peat moss. The potting mix adds nutrients to the soil.

Step 2: Add an equal amount of perlite, pumice, or sand to the mixture. This portion will help in water drainage.

Step 3: Combine all the portions in a 1:1 ratio, and you can add a little bit of succulent fertilizer for additional soil nutrients. When mixing, ensure the soil does not form into balls but spreads well.

The type of soil it is growing on will determine your watering schedule. If Sempervivum grows in clay soil, you can water it at least once a month in the summer.  Clay soil takes a long time to dry up; first, the top layer dries while a crust forms preventing the lower layer from losing water.

In this type of soil, hens and chicks do not require watering at any time of year other than the summer months.

On the other hand, sandy soil drains water quickly, even when heavily watered if there is no rain, water hens, and chicks two times a week during summer.

In the second half of fall and throughout the winter, Sempervivum in sandy soil may not require watering; they will have enough moisture from rainfall. You can only water them when there is no precipitation at least once in two weeks.

2. Watering Hens and Chicks in Different Seasons

In the summer, water hens and chicks more often. During this period, the sun dries the soil quite fast. Therefore, you may have to water it two times a week when there is no precipitation or once a week with rainfall.

If the topsoil does not dry in one day, no additional watering is required. The succulent leaves and stem are sufficiently fleshy, holding much water in them, and this makes the plant able to endure the heat without water for 2-3 days. Furthermore, there is enough moisture content deep in the soil for the roots.

Sempervivum in a pink pot.
Constantly be checking on the ground moisture by digging your finger one inch into the ground to determine the ground dumbness.

If you water the plant more often, it will die from root rots. You only need to moisten the soil around the plant to grow.

Watering during autumn is almost not necessary. During this period, the plant tends to enter dormancy in preparation for winter. Furthermore, at this time of the year, the autumn rains start. But it doesn’t mean it doesn’t need water; at this time, water it once per week.

An only exception is at the start of autumn when there is still strong sunshine drying up the soil, in which case you have to water your Sempervivum.

During winter, hens and chicks do not require watering. At this time, they enter dormancy and may experience little to no growth at all. Moreover, winter sunshine isn’t strong enough to dry the soil. All this makes watering not necessary.

Watering during winter is more likely to end in the plant rotting.

Pro Tip: If planted in different climate regions where the soil dries up during winter, making the plant lack water ultimately, you may need to water it at least once every two weeks.

During spring, hens and chicks thrive; this time, the plant needs a proper watering schedule. Ensure to keep the soil moist enough for it to grow. You will need to water it once a week. If the plant has lots of rosettes, it’ll need more water.

Constantly be checking on the ground moisture by digging your finger one inch into the ground to determine the ground dumbness. If the soil is dry, water it.

However, when there is less rain with strong sunshine nearing the end of spring, which doesn’t happen often, you’ll have to water your plant.

Here is a table summary of watering your plant in different seasons.

SeasonClay SoilCactus Mix/Succulent Soil
Spring–Once a week
WinterOnce in four weeksOnce a week
AutumnOnce a weekOnce a week
SummerOnce a weekTwo times a week

3. Consider the Hens and Chicks Plant Size

Another golden rule to look at when watering your plant is its size. An adult Sempervivum will have a different watering schedule to a young hens and chicks plant.

Water newly transplanted plants every two days to help them thrive. However, immediately they are of age, reduce watering and proceed as you would for an adult Sempervivum.

Watered Simpervivum.
An adult Sempervivum will have a different watering schedule to a young hens and chicks plant.

The best you can do during propagation is to have the soil moist. Remember not to make it soggy, or the stem or leaf cuttings will rot.

On the other hand, grown Sempervivum has less surface area to volume ratio; hence, it experiences a low evaporation rate. However, the plant will still need watering but water them less often as they retain more moisture better than young plants. So water them at least once a week and during drought, at most two times a week.

4. Have a Look at the Type of Container You Use for Planting 

Hens and chicks are shallow-rooted plants, and this means you can grow them in miniature or shallow pots. While hens and chicks will look good in almost every pot: clay, plastic, or glass pots. Not every pot will let your plant thrive well when watering.

The size of the container also plays a role in how often you need to water it. A small container or shallow pot lets the soil dry pretty fast; therefore, you may need to water hens and chicks more often in such containers.

Sempervivum in a pot.
You can grow them in miniature or shallow pots.

In contrast, a larger container helps retain much soil moisture; hence might need watering less often.

When it comes to the container material, a clay pot works best. Clay pots help absorb moisture from the soil. In addition to having drainage holes, they let the soil lose water slowly and help prevent root rot.

Pots made from clay are terracotta and ceramic pots. Other pots other than clay are made of wood, plastic, metals, or fiberglass. Before using them, ensure they have drainage holes to prevent water from sitting at the bottom when watering.

5. Location of Your Plant

Whether growing outdoors or indoors, the watering schedule is bound to be different.

How to Water Hens and Chicks Outdoors

Watering outdoors Sempervivum depends on the seasons and type of soil. During the growing season, water once a week, and during winter, only water if the soil is dry. You can check the soil moisture content by digging an inch into the soil using your fingers, or you can purchase a moisture meter.

The right time to water your plant is early morning or late evening. Early morning watering helps the plant have enough moisture to help it survive the noon heat. 

Keep in mind to always water only when the soil is dry.

How to Water Hens and Chicks Indoors

Water your indoors hens and chicks until water sips through from the pot’s drainage holes during the growing periods. Water draining is also beneficial in removing excess plant fertilizer from saturating the soil at the bottom. Once the soil dries up, add more water.

It is best to leave your plant unwatered during dormancy, or you may water it once a month. The best you can do is prune dead leaves or lower leaves that look soft and squishy.

Sumpervivum on a basket with tools.
You can be watering the plant at least once the soil is dry.

In the winter, when you may use a heater to warm up your home, the heater will dry up the air, and your plant will drain the little available moisture in the soil fast enough. You can be watering the plant at least once the soil is dry. Another thing, place a tray with water next to the plant to humidify the surrounding air.

Final Thoughts

Suppose you are a gardening beginner or an expert looking for a plant that is easy to care for, then we recommend hens and chicks. This plant can go for long without water, and when it needs water, you will be able to tell from its signs.

We hope with these golden rules, you now know when and how often to water your hens and chicks plant in different seasons.