How To Make A Beautiful Tropical Terrarium?

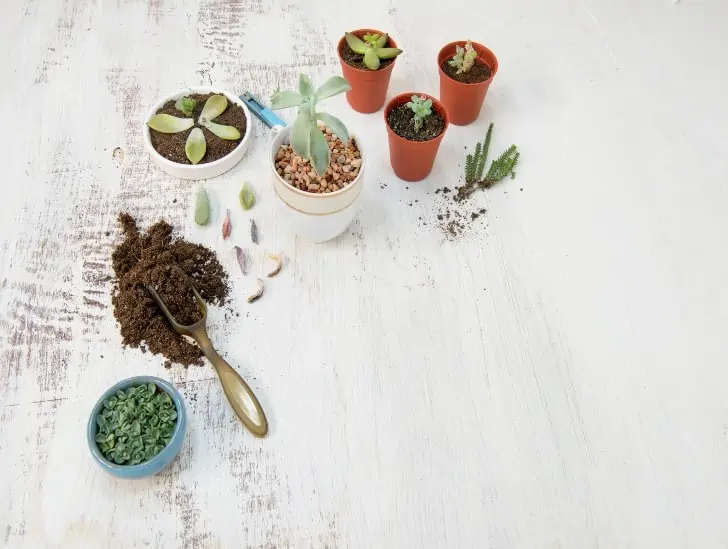
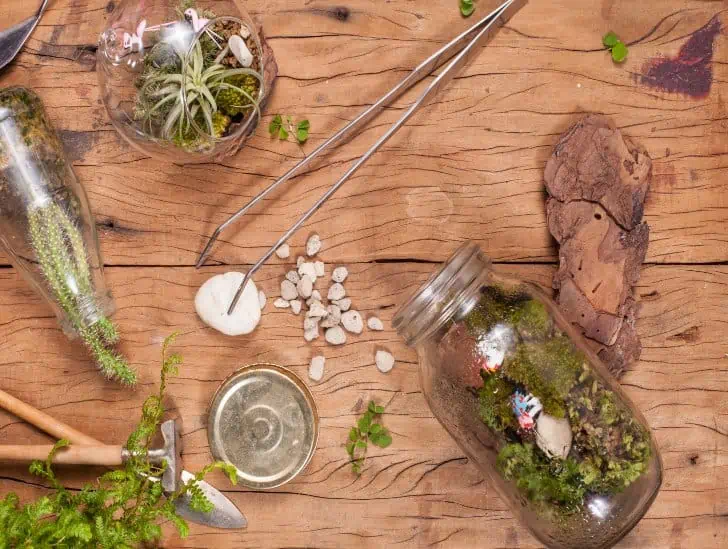
Terrarium material set.

What do you think of when you hear the word “Tropical“? Palm trees, bright flowers, exotic animals? A Tropical Terrarium is a miniature version of all these things. This is a great way to bring the tropics to your home. They are easy to make and look beautiful in any home or office space. Not only are they beautiful, but they also serve as perfect decorative pieces for any room.

So, how can you create a tropical terrarium at home? It’s important that you have all of the necessary supplies and materials on hand. Start by gathering any containers you may have, such as glass jars or bowls. Then gather some moss and pebbles for the base of your terrarium. After adding the right potting soil to your container, find a decorative tropical plant suitable for an indoor setting like tropical plants like ferns, bromeliads dracaena or anthuriums. Remove any excess soil from around their roots before planting them in your new terrarium. Mist lightly and watch your tropical paradise thrive.

Steps to creating a tropical terrarium

Creating a tropical terrarium is easier said than done. However, by following these simple steps, you will be able to create your very own tropical terrarium in no time.

1.      Gathering necessary supplies and materials

The first step is to gather all of the necessary supplies and materials that you will need for your project. These items include:
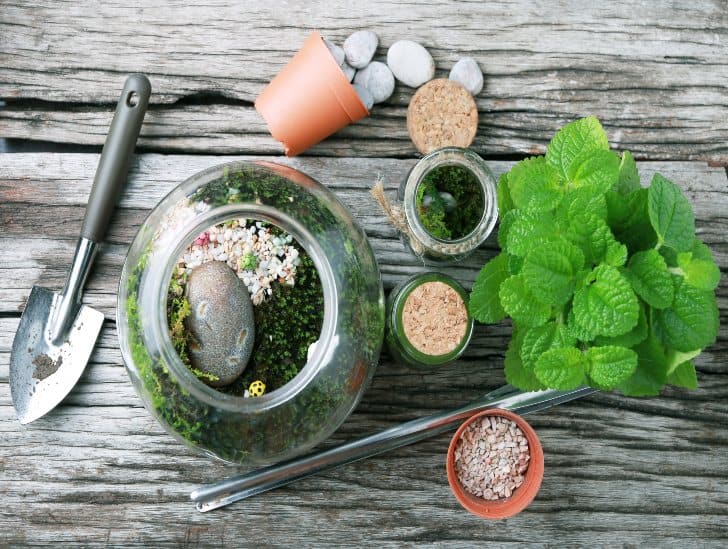
Tools needed for making your own terrarium.
Gather all of the necessary supplies and materials that you will need.
  • Terrarium container
  • Pebbles or gravel
  • Activated charcoal
  • Moss
  • Potting soil
  • Tropical indoor plants
  • Decorative rocks
  • Fertilizer
  • Misting spray bottle
  • Top dressing soil

2.      Tools needed:

  • Scissors – A pair of scissors is needed to cut through the plant’s leaves and also remove excess dirt.
  • Gloves – Gloves are vital because some chemicals can be harmful to your hands if you do not wear them. Also, sometimes plants may have thorns that could prick your fingers.
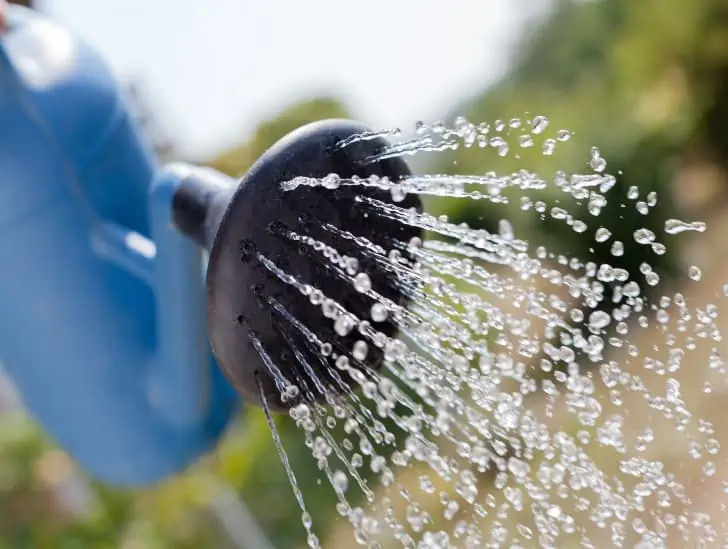
  • Water spray bottle – This tool is used to mist the plants in order to keep them moist and thriving in a closed environment.
  • Long-handled spoon – A long-handled spoon is vital to help mix the soil without getting it on yourself or spilling it everywhere.
  • Tweezers – If any plants need to be moved or removed from the terrarium, tweezers will come in handy to do so without damaging the other plants.

Now that you have all of the necessary supplies, it is time to begin constructing your terrarium.

3.      Selecting ideal Terrarium container

Selecting a good terrarium container cannot be underrated when creating a tropical terrarium. The best containers are ones that have a wide opening at the top and bottom so you can easily reach in and tend to your plants. Look for sturdy containers made from glass, plastic or metal.
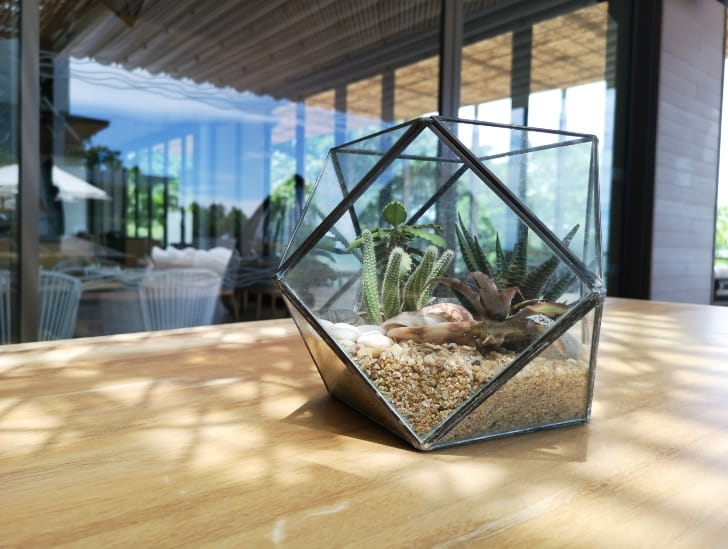
Glass hexagon shaped terrarium.
The best containers are ones that have a wide opening at the top and bottom.

Avoid thin materials like paper or cardboard as they will not hold up against the moisture of the terrarium. Remember, the terrarium will be creating its own mini-climate, so make sure the container can handle the humidity.

4.      Cleaning your Terrarium container

Before adding any potting soil or plants to your terrarium, it is important to clean and sterilize the container. This can be done by using a bleach solution (one part bleach to nine parts water) or by using a commercial cleaner. Be sure to rinse the container well afterwards to remove any traces of bleach or cleaner.

This step is necessary to avoid any residue or dirt that could possibly affect the health of your plants later on down the road. Remember, you are creating a mini-climate within the container, so everything that is put into it will affect its overall function.

5.      Identify the right location

Before you create your tropical terrarium, you need to identify the best location for the same. You will want to place your container someplace where the terrarium can receive some indirect sunlight, but not be in direct sunlight because this could lead to overheating and plant damage.

A terrarium near the window.
Place your container someplace where the terrarium can receive some indirect sunlight.

It is recommended that a spot near a window with eastern or western exposure is ideal. If you live in a hot and humid climate, you will also want to place your terrarium someplace where it will get good air circulation.

6.      Adding Pebbles or gravel to Terrarium container

The next step is adding pebbles or small rocks to your terrarium. This material helps with drainage and makes sure there are no pockets of water sitting at the bottom of the container.

Pebbles or gravel can be found at most garden supply stores and should cost very little, if anything at all. Alternatively, you can use small rocks found outdoors.

7.      Adding Activated charcoal to Terrarium container

Activated charcoal is an important material that helps remove toxins from the soil and prevents mold growth in your terrarium. This product will be placed directly on top of the pebbles or gravel layer at the bottom of your container, so make sure it is large enough to cover the pebbles or rocks.

When adding your activated charcoal, make sure it is in a layer that is thin enough for the plants roots to grow through. This

8.      Adding moss to Terrarium container

Depending on where you are planning on placing your terrarium, having moss growing inside of it can help give off an overall natural look. Moss grows naturally indoors or outdoors and should be able to thrive with little-to-no care.

There are many different types of moss that can be used in a terrarium and all can be found at most garden supply stores. Just make sure to avoid any moss that requires a lot of water or direct sunlight to grow.

9.      Prepare the soil

Once you have selected the right container and identified the best location for your terrarium, added gravel and activated charcoal, it is time to start preparing the soil. The potting soil that you select should be peat-based, as it is ideal for promoting the health of carnivorous plants.

A potting mix.
The potting soil that you select should be peat-based.

You can also add in a small amount of fertilizer to the soil mixture at this time. This will help spur plant growth and development in your terrarium. Once you have prepared the potting mix, it is time to add it into the container.

10. Stage your design

Now that the container is ready and you have added the potting soil, it is time to start staging your design. This can be done in any way that you please, but there are a few things to keep in mind.

First and foremost, make sure there is enough room for the plants to grow. You will not want to overcrowd your terrarium with too many plants at once.

If you are planting more than one plant in your terrarium, you will want to place them someplace where they can be easily seen. This is especially important for carnivorous plants because it allows people to see the unique characteristics of each plant while creating an overall natural-looking design.

11. Adding plants to Terrarium container

Now it is time to add the plants to your terrarium. When selecting plants, try to choose a variety of different types that will thrive in the same environment. You can find a list of suitable plants for terrariums online or at most garden supply stores.

Plant being transferred.
When selecting plants, try to choose a variety of different types that will thrive in the same environment.

When adding the plants, be sure to mix them up. Do not create an island of one type of plant, as this will make it difficult for the plants to flourish or grow. Remember, you are trying to create a natural-looking terrarium, not a garden.

12. Watering your  Terrarium

Since terrariums are self-contained ecosystems, the amount of watering the plants in them requires is not much at all. Just like with any plant, you will want to water them when the soil feels dry to the touch. However, you will not want to over-water your plants, as this can lead to root rot and plant death.

13. Misting Terrarium

In order for your terrarium to be a healthy and thriving environment, it is important to mist it regularly. This will help keep the humidity levels up, which is essential for allowing your plants to grow.

14. Top dressing your  Terrarium

To make sure your terrarium has an overall finished look, you should top dress it. Top dressing is the act of putting small rocks or pebbles over the soil surface of each plant in your container. This will help each plant stand out and look more natural.

Your terrarium is now ready to sit in a location that will not receive direct sunlight or much attention at all. If you are interested in adding other plants into your terrarium, you can do so by just planting them directly into the potting soil that is already inside of it.

Common Tropical Terrarium Mistakes and How to Avoid Them

Creating a tropical paradise at home is a walk in the park if you understand what it takes and the process involved. However, a slight mistake can prove detrimental to your plants. Let’s look at the most common mistakes and how to avoid them:

1. Too Much Light

Light is essential for photosynthesis, but too much of it can result in sunburn and burns in sensitive plants like anthuriums and orchids. Your tropical plant should be in a location that does not receive direct sunlight, but is instead bathed in diffused light or light from an open window.

Effects of too much sunlight.
Too much Sunlight can result in sunburn and burns in sensitive plants like anthuriums and orchids.

2. Too Little Light

If your plant does not get enough light, it will become leggy and stretched as it reaches for the sun. In addition, leaves will start to yellow and drop off. Most plants need between 6-8 hours of light per day. To ensure your plant is getting enough light, place it in a location where it will receive indirect sunlight for most of the day.

3. Overgrown Plants

In closed terrariums, plants can grow too large and will need to be cut back or pruned. Such action prevents them from falling over and taking other plants with it. This is a common issue that leads people to kill their plants because they do not know how to properly care for them.

4. Too Close to Heat Sources

Another common mistake is placing terrariums too close to heat sources, like televisions or fireplaces. This can cause the plants to dry out and die. In addition, heated air can create a convection current that disturbs the balance of moisture and humidity in the terrarium, also leading to plant death. To avoid this issue, place your plant in a location away from any heat sources.

5. Overgrown Plants

If the roots of your plants become too large for the pot over time, they will need to be transplanted into a larger container. This is not necessarily bad news as such “overgrown” plants will produce new growth and once again flourish in your terrarium.
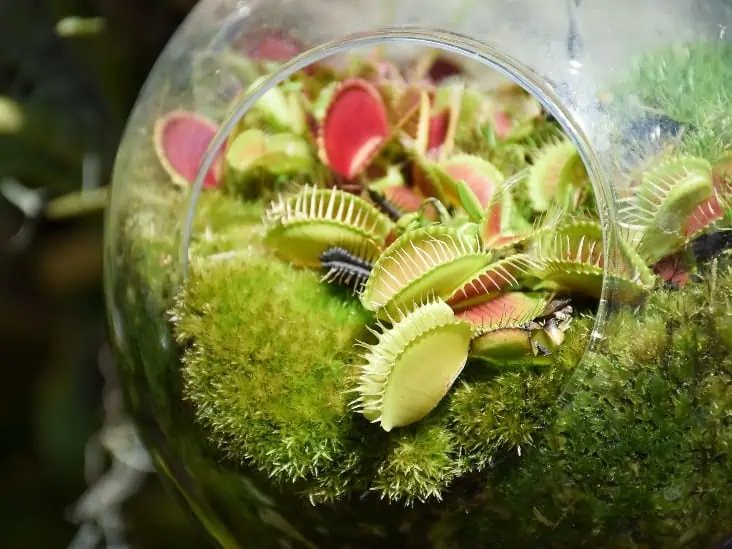
flytrap terrarium
Most plants need to be cut back and pruned to keep them from growing too large for their containers.

Most plants need to be cut back and pruned to keep them from growing too large for their containers, but cutting the plant off at the soil level will kill it. To avoid this issue, always prune off branches or leaves with a sharp knife or pruning clippers so as not to damage the stem.

6. Failure to Remove Dying Plants

If a plant in your terrarium starts to die, it is important to remove it from the pot and discard it. Leaving dying plants in your terrarium will only contaminate the soil and make it difficult for other plants to thrive.

7. Dirty Glass

If your terrarium’s glass becomes dirty, it will be difficult for you to see your plants and determine their health. To clean the glass, use a soft cloth and water to wipe away any dirt or grime.

8. Over Fertilizing

Fertilizing your plants is important for their health and growth, but over fertilizing can actually be harmful. Excessive fertilization will cause the soil to become too wet and can lead to root rot and plant death.

In addition, fertilizing your plants too often can lead to the growth of algae and moss, which can actually kill your plants. To avoid this issue, do not fertilize your plants more than three times a year.

9. Over Watering

Water is essential for the survival and happiness of all tropical and subtropical plants, but it is easy to overdo it and flood your terrarium with too much water. Over watering will cause the soil to become wet and can lead to root rot, plant death, and the growth of algae and moss.
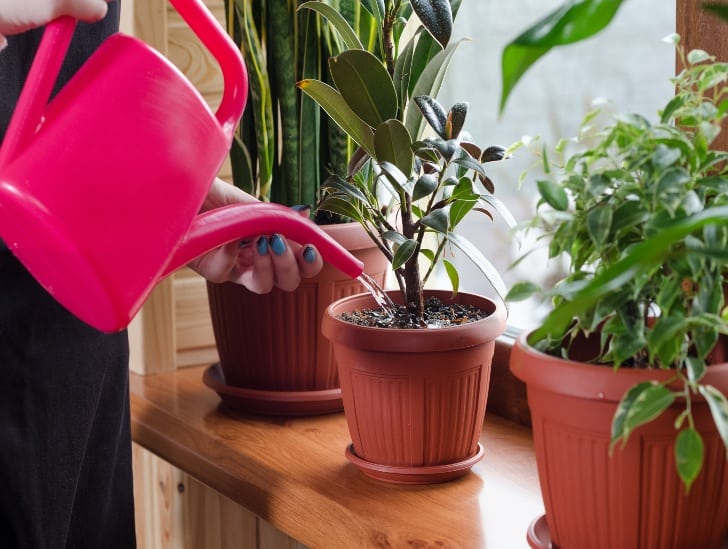
Plant being watered.
Over watering will cause the soil to become wet and can lead to root rot, plant death, and the growth of algae and moss.

To avoid over watering your plants, wait until the top inch of soil is dry before watering again. Make sure not to splash water onto the glass as it will only make it difficult for you to see how your plants are doing.

10. Planting Succulents in Closed Terrariums

There are certain plants that do not do well in closed terrariums, like succulents. Succulents need to be exposed to air and sunlight to absorb water and grow properly, making them difficult for you to care for in a closed terrarium. If you want to include succulents in your terrarium, make sure to place it in an area where it will get plenty of sunlight.

11. Choosing the Wrong Plants

The key to a healthy, thriving tropical terrarium is choosing the right plants. It is important that you understand what type of conditions and care your plants need before purchasing them. A little research goes a long way in ensuring your plants thrive and do not die an untimely death.

Ideal plants to consider for your tropical terrarium

A tropical terrarium is not complete without a collection of tropical plants. There are many plants out there to choose from, but not all tropical plants will thrive in your terrarium.  Some notable plants you can consider for your terrarium are:

  • Biophytum sensitivum – This hardy epiphyte is ideal for tropical terrarium thanks to its low light and moisture needs. It makes a great hanging plant for your terrarium and is not likely to die or get overgrown in your small environment.
  • Asplenium nidus ‘Crispy Wave’ – While many ferns require bright, indirect sunlight, this variety thrives in areas with low lighting conditions. Asplenium nidus ‘Crispy Wave’ is ideal for your terrarium because it does not require much light to grow.
  • Neoregelia ‘Fireball’ – This bromeliad is a colorful, tropical plant that will add beauty to your terrarium. It is easy to care for and requires bright sunlight to thrive.
  • Humata heterophylla – This unusual plant is a great addition to any tropical terrarium. It does well in moist environments and does not require much light to grow.
  • Microsorum musifolium (Crocodile Fern) – This fern is perfect for your terrarium as it thrives in shaded areas with moist, but not wet soil. It does best in a humid environment and will add beauty to any terrarium.
  • Syngonium podophyllum ‘Pixie’ – As this plant does well in low light conditions, it is the perfect addition for your terrarium. If you live in a room with bright lights or direct sunlight, this plant will do well in an area where it can get some indirect light.
  • Macodes petola – This beautiful, shade-loving orchid is another great addition to your terrarium. It does best in shady areas with moisture rich soil, making it the perfect candidate for your terrarium.

Conclusion

Let’s face it; tropical terrariums area a beauty to behold. They offer a glimpse into a lush, green world where things are not as they seem. Whether you want to create a terrarium for yourself or give it as a gift, mastering the right techniques will ensure success. With a little bit of know-how, anyone can create a beautiful tropical terrarium. Just remember to choose the right plants, provide the right conditions, and be patient as your terrarium establishes itself. In no time at all, you will have a lush, green oasis to enjoy.
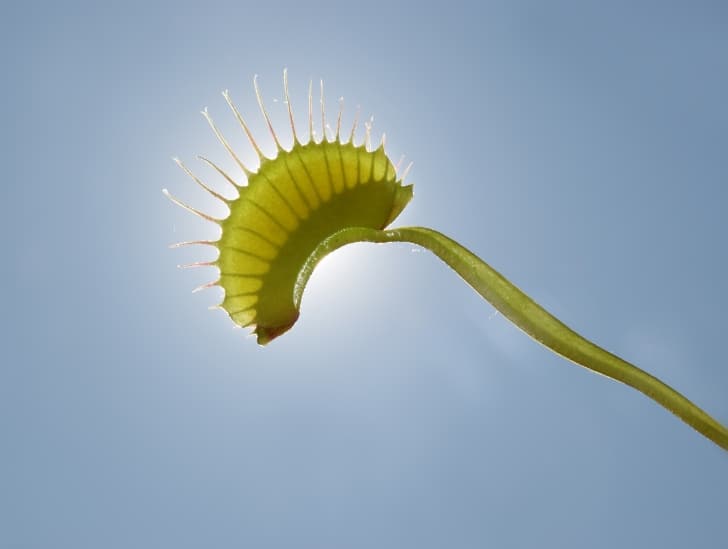
14 Amazing Facts You Didn’t Know About Venus Flytraps

A venus flytrap under the sun.

Do you know the meaning of the word “Venus”? It means beautiful. This name is appropriate because Venus Flytraps are one of the most beautiful plants in existence! There are more than 200 types of flytraps, but only three species that are native to North America – Dionaea muscipula, Dionaea vernalis, and Dionaea ampullaria.

What are some of the most amazing facts about the venus flytrap? They can grow up to 24 inches tall and have leaves that look like a little octopus or starfish with “teeth” on them. These teeth lure insects into its mouth-like trap, where they get digested by enzymes and then absorbed as nutrients for the plant. Venus Flytraps are the only plants on earth to have a stomach and they can eat animals up to three times their size.

The flytrap stands out when it comes to its defense mechanism. This article takes a look at 10 of the most interesting facts about Venus Flytraps:

1.     Prey is Lured in With Nectar And Bright Colors

The venus flytrap  has a trap that closes quickly when triggered by prey. This plant can close its traps in half a second and the leaf will snap shut when an insect or spider crawls along its trigger hairs.
 A sweet secretion covers the leaves of this plant which lures in prey and attracts them to the flytrap. Insects are attracted to the nectar and color of the flytrap’s leaves, which makes them easy targets for their next meal.

2.     Scientists Have Created Robot Flytraps!

Did you know that scientists are working on creating robots that mimic how a flower is pollinated? They use this technology to create robots that can pollinate other plants. It sounds like something out of a science fiction movie, but it is actually happening right now.

The scientists took the principles of how a Venus flytrap works and applied it to the robot. The robot can sense when an insect is near, just like the plant does, and then it traps and eats the bug.

3.     It Takes Longer Than A Week For Larger Insects To Digest.

Insects are small enough when they get trapped inside the trap and they do not take long to digest because they are small and easy to eat for this plant.

It takes longer than a week for larger insects to digest. It can take up to two weeks for large bugs such as crickets or moths, which is why it is important not to feed your flytrap any bug that you would like back alive!

4.     Hamburgers Cause Flytraps to Rot

This plant is unique because it can go weeks without eating any food, but if you feed your plants hamburgers or other types of meat they will not be healthy and may even die.

A dying venus flytrap.
If you feed your plants hamburgers or other types of meat they will not be healthy

The digestive enzymes produced during the process of digesting an animal cannot handle fatty foods like meats so this will cause the plant to rot. This is why it is important not to feed your venus flytrap anything that you would like back alive – or else they will end up dying.

5.     It Evolved From an Early Sundew Relative

This plant may look similar to a sundew, but it is actually a relative of the early sundew. The venus flytrap evolved from the early sundew and it shares some similarities with this plant. This includes the trapping process and how they both consume insects for food.

6.     Venus Flytraps Also Glow Blue

This plant has a unique defense mechanism that not many plants have – it can glow! When under stress, such as if an insect bites the leaves of the plant when trying to digest them. This will cause venus flytraps to emit a blue light.

7.     Traps Even Catch The Occasional Frog

This plant has adapted over time and learned how to catch more than just insects. The Occasional Frog is the smallest frog in North America and they can be found near Venus flytraps.

These plants can eat up to three frogs at a time and it is not uncommon for them to catch one. 

8.     The Most Common Meal For Venus Flytraps is Not Flies

Venus Flytrap’s are Carnivorous Plants that trap and consume insects, spiders, and other small animals for food. The most common meals for these plants are bugs such as flies, but they can also catch and eat frogs, lizards and even small rodents.

Venus Flytrap with fly.
Venus Flytrap’s are Carnivorous Plants that trap and consume insects and other small animals for food.

9.     It Is The Official “State Carnivorous Plant” Of North Carolina

The venus flytrap is the official carnivorous plant of North Carolina! It has been designated as an important part of our state’s natural heritage. In fact, it is illegal to collect wild flytraps in the North Carolina because of how endangered they have become.

10.Venus Flytraps Produce Flowers

Since venus flytrap’s catch and eat animals for food, this plant has adapted over time so that it can reproduce without attracting prey. The flower looks similar to a snapdragon or other flowering plants that attract insects for pollination.

A Venus Flytrap white flower.
The flower looks similar to a snapdragon or other flowering plants that attract insects for pollination.

11.Venus Flytrap Do Not Consume Bug Pollinators

One of the most interesting facts about venus flytraps is that it uses a smart mechanism to avoid eating its pollinators. It does this by closing its trap when it detects that the insect is landing for pollination. This way, it can continue to get food without harming the insects that help it reproduce.

12.Venus Flytraps Are an Endangered Species

Venus flytraps are an endangered species and it is estimated that around 33,000 flytraps are lost each year due to urban development. This means that it takes the plant an average of three years to produce enough seeds for one new adult flytrap.

Over the years, they have become less common because of how people have been taking them from the wild. As a result, conservationists have made it illegal to take any of these plants from the wild.


13.Tap Water Is Poison for Venus Flytraps

Venus flytraps consume insects for food, and like all living things, they need water to survive. However, the water that comes out of our taps is not good for these little wonder plant.

The chlorine and fluoride that are in tap water can kill venus flytraps. As such, it is important to use distilled water for these plants.

14.Fertilizers Weaken Venus Flytraps

Since most succulent fertilizers contain high levels of nitrogen, this will actually harm venus flytraps because the plant requires low amounts of this element in order to survive. As such, you should avoid using any fertilizer that contains excess nitrogen.

Can Flytraps Be Grown At Home?

Yes, even if you do not live in North Carolina, it is possible to grow venus flytraps at home. They can be kept as potted plants and they need soil that contains plenty of peat moss or sphagnum moss.

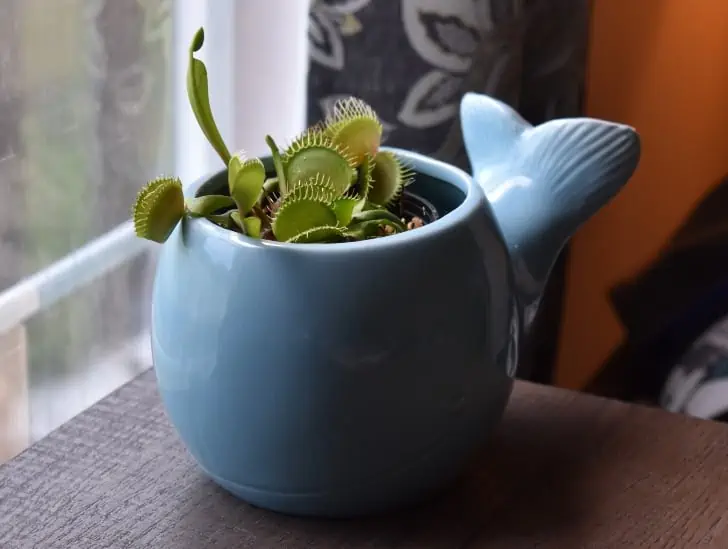
Venus Flytrap in a Whale pot.
It is possible to grow venus flytraps at home.

How big do Venus Fly Traps get?

The size a venus flytrap will get depends on how much food it has access to. Normally, they will reach a size of around six inches in width but if they are well fed, they can grow up to 12 inches wide.

Do Venus flytraps need sunlight?

Venus fly traps do need sunlight in order to photosynthesize and produce energy. However, they are very sensitive to direct sunlight. As such, it is recommended that you place these plants in an area where there is plenty of indirect light each day.

How do flytraps reproduce?

Each venus flytrap produces small white flowers during the spring and summer months. These flowers then produce seed pods that contain up to 400 seeds. The seeds will germinate once they are exposed to wet conditions for a period of two weeks.

Do Venus fly traps need soil?

Venus fly traps do not need soil to live but they do need a pot with good drainage so that they do not get waterlogged. You can use a soil-less planting mix for these plants since it will contain the peat moss and sphagnum that venus fly traps need to survive.

Can Venus Fly Traps eat humans?

Venus fly traps are carnivorous, but they cannot consume humans because of how large we are. They can only eat insects, frogs and other small prey that they find in their natural habitat.

What do Venus Fly Traps smell like?

The traps of the venus flytrap produce a sweet, fruity smell that is very attractive to insects. This scent is caused by the same chemicals that are found in bananas and strawberries. 

How big do Venus Fly Traps get?

The size a venus flytrap will get depends on how much food it has access to. Normally, they will reach a size of around six inches in width but if they are well fed, they can grow up to 12 inches wide.

How long does the Venus Flytrap wait before eating its prey?

A venus flytrap eating its prey.
It can take up to ten days for the plant to fully digest an insect.

The venus flytrap has a very slow reaction to its prey, and it can take up to ten days for the plant to fully digest an insect.

Conclusion

A venus flytrap is, no doubt, a wonder of nature. While they are not extremely common, it is possible to have them as pets or in your garden if you live in the right climate zone.

As a result, understanding how these plants work and what kind of environment they need can help keep them healthy for years to come. By avoiding things that will kill the plant, such as tap water and fertilizers, you can ensure that your Venus flytrap will thrive. Remember, these plants are carnivorous and they require a specific environment in order to survive. As such, you should do quite a bit of research before adding one as a potted plant or as part of your garden.

Does Jade Plant Need Direct Sunlight?

Jade plants are interesting succulent plants that are easy to maintain and have fleshy leaves and woody stems similar to small tree trunks. The hardy houseplants are also known as friendship trees or money plants, and they thrive in dry and sunny environments. In their native South Africa, where summers are stifling and the ground very dry, they may reach a height of 10 feet.

Like all other succulent plants, Jade plants need direct sunlight to grow. If your plant does not get the right amount of sun, photosynthesis will cease, and the plant will not grow. They may also become leggy or droopy if light conditions are poor.

These attractive succulents flower in winter, producing star-shaped blooms. Once you know the growing conditions of the natural habitat of the jade plant, you can replicate this environment in your house or office. The proper amount of sunlight will help your jade plant grow. The site is vital, mainly when growing your Money Plant indoors.

The Best Jade Plant Location

Direct sunlight is not appropriate for most indoor plants because it results in the burning of leaves. However, the Jade Plant is an exception and does well with direct sunlight. If you have a mature jade plant, place it in direct sunlight for at least 4 hours. For a young plant, use a bright but indirect light. However, Jade varieties with variegated leaves do not prefer the direct sun and thrive in shining and indirect sunlight.

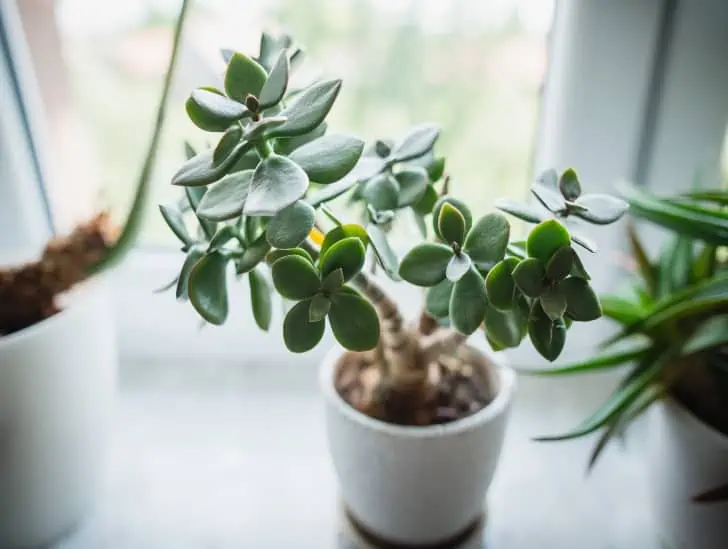
Jade plant on the window.
The best location for your Money Plant is next to a sunny window facing west or south.

The best location for your Money Plant is next to a sunny window facing west or south. If you can’t get a bright spot, or if it’s cloudy, place your plant near an artificial light source. If you choose fluorescent lighting, select one with two bulbs. Label a bulb for use and use it to deliver a full spectrum of light for your plant. The second bulb should be a cool white bulb. The disadvantage of using artificial growth lights is that the leaves appear light green.

Indoor Plant Location

Here are the top indoor plant sites for your Jade Houseplant.

  1. Sunny Patio

A perfect location for your Jade Plant would be a Patio or Balcony adjoining your room. This option is great if you are looking for robust growth in your Money Plant. These places are great because your plant will get the proper sunlight all day long. The optimal exposure time is four to five hours in these conditions.

Jade plant on a black pot.
perfect location for your Jade Plant would be a Patio or Balcony adjoining your room.
  1. Near a Sunny Window

A window where your jade plant can obtain tons of natural light is ideal for regular growing. The rooms with south-facing windows are fantastic locations and west-facing windows. A window facing east may also work because of the direct sunlight in the morning and the late afternoon sun, which is not too intense.

  1. In a Room with Partial Sunlight

If you have no space next to a window, you can put it where it can get a few hours of indirect sunlight throughout the day. Ideally, the direct sun is vital, but if the room is lit correctly and receives natural light, the plant should be fine, although the growth is not as vigorous.

  1. Shaded Location in your Room

A shaded location is not the best choice and only applies if you can’t get direct sunlight into your home. Opt for a well-lit room during daylight hours. Even though it will survive, it will grow at a slower pace.

A plant in a shaded area of the room.
A shaded location is not the best choice and only applies if you can’t get direct sunlight into your home.

Outdoor Plant Location

You can place them on patios for outdoor plants but move them indoors once autumn and winter are in place to protect them from freezing. The best outdoor location can receive direct sunlight in the morning but is shielded from the constant afternoon sun. If you stay in a warm environment and keep your plant outside, pick a place with some shade when the sun is hottest to keep your plant from cooking.

Maintain indoor temperatures of 64 to 74 degrees Fahrenheit for best results. They appreciate cool nighttime temperatures up to 55 degrees Fahrenheit. Airflow from cooling and heating systems can also cause temperature variations. The amount of sunlight required varies depending on the season. Let’s examine the different light needs of the jade plant depending on the season.

The Direction of Sunlight.

The sun’s direction for the Jade plant is critical in deciding the best spot. You must know the direction of your house facing to settle in the appropriate position for your jade plant. We recommend a south-facing window but consider the various approaches and pros and cons.

● North Facing

A north-facing window receives a little light, but the light is barely enough for the optimum growth of your jade plant.

● East Facing

The eastward windows receive enough sun in the morning and a few hours of the late afternoon sun, which is not intense.

● West Facing

A West Facing window receives an intense afternoon sun that can be harsh for the leaves of your jade plant. To limit intensity, you can use simple curtains.

  • South Facing

South-facing windows receive a sufficient amount of light during the day, making them ideal for your jade plant.

Jade Plant Seasonal Light Requirements

Winter Sunlight Requirements

The Jade Plant does not require round-the-clock bright light during winter. However, a bit of light is necessary if you want your plant to survive in winter. Sunlight also prevents your plant from becoming soft in the cold.

Because there is less sun in winter, make sure your plant gets some sun by moving it closer to a window during the rare sunny winter days. We do not recommend an east-facing window during this period because the light could be insufficient.

A plant near the window.
Make sure your plant gets some sun by moving it closer to a window.

However, place your jade plant away from a cold window, as that can be bad for your plant. You can protect your Money Plant against cold windows and draughts by putting a curtain on your window or pulling the shade.

If your jade plant is outdoors and your surroundings have winter temperatures that may be as low as 45F or less, move your plant indoors until spring. However, if temperatures don’t go down regularly, you can leave your plants outside as long as you protect them from freezing. To shield your plants from frost, you can put them on a covered terrace, tie the Christmas lights on the plant or cover your plant with a rag.

Springtime Sunlight Needs

Be careful about rays in the spring, especially if you have placed your plant near a window facing west or south. The delicate new leaves unfold in the spring and can quickly burn, so move the plant slightly away from your window or use transparent curtains. However, established jade plants thrive on sunlight.

To measure whether you give your money, plant the necessary amount of light, put your hand on the window when the sun is brightest. If the light is too much and burns your hand, it may be too hot for your Jade plant. Turn your house plants each week for better sun exposure on your leaves.

Sunlight Consistency

Jade plants can adapt to different lighting conditions. However, sudden temperature variations can put your plant’s growth at risk. Frequent shifting can stress out your Jade plant. If you want healthy plants, you should be consistent.

If you suddenly increase the light, your plant may end up with brown patches and burnt leaves, ultimately affecting your plant’s growth. We suggest placing your jade plant in an area with appropriate indirect light and sufficient direct light.

Jade plant near the window with sunlight.
Frequent shifting can stress out your Jade plant.

To move your jade plant, do it one step at a time. If your plant is used to sift a light, slowly move it to a brighter place to give it the time to adjust to its new environment. You may first place your plant in a shaded area. Shift it to a sunny location where it can get direct sunlight for some time and gradually increase sunlight over time; this should take you about two weeks.

Signs That Your Jade Plant Is Getting Inadequate Sunlight

Jade plants are versatile and can survive under diverse lighting conditions. However, your jade plant will not flourish in low-light conditions. How can you tell that your Money Plant is not getting enough light?

  1. Yellow leaves

Yellow leaves are an obvious sign of low light in Money Plants due to a lack of nutrients. You can move your plant to an illuminated point if you notice yellowing.

  1. Pointy Leaves

A jade plant that points towards the light source is most likely suffering from poor lighting. Also, if the leaves are thin and floppy, please increase the quantity of light that your money plant gets.

  1. Slow Growth

Slow growth demonstrates that your plant does not have enough energy to grow due to low light. Thin stems also indicate insufficient sunlight.

If you suspect that your jade plant does not get enough sunlight, you can use artificial growing lights or turn the plant to bring light in all directions.

Conclusion

The jade plant cannot survive in the absence of sunlight. If you want to have a compact and complete Money plant, you must provide sufficient light. Direct sunlight will allow for vigorous growth. On the other hand, indirect sunlight may work but not deliver an optimal growth rate.

Does Ice Plant Need Direct Sunlight?

A purple ice plant flower exposed to sunlight.

Plants typically require daily exposure to sunlight to survive and thrive. Ice plants get their name from the tiny, reflective hairs that look like ice crystals. They are trailing perennials in warm temperatures with vibrant flowers. These sun-loving succulents need at least six hours of direct sunshine per day but can withstand partial shade even if they don’t bloom as much.

The leaves are fleshy and bear the appearance of succulent plants. Commonly known as the frost plant, there are many reasons that this common indoor plant is a favorite. Ice plants are packed with vitamins and minerals and have been touted to treat digestive issues; the juice can also treat infections when applied topically. The fruits may be eaten whole or preserved and used for making jam.

Ice plants thrive in warm regions, so if you add the plant to your collection, be sure to provide similar conditions to native African habitats. The right amount of sunlight is essential for the healthy growth of your ice plants, especially if you want your plants to bloom.

Almost always, when you buy your ice plant, you will find the sunlight requirements on the label or the seed package. While tags are a great way to determine the best lighting conditions for your plant, more research will help to keep your plant healthy. In your research, you may encounter some sun exposure terms that may be confusing. Let’s look at the various terminologies to help you decide what works best for your ice plant.

Different Types of Sunlight Exposure

Figuring out how much light your home or yard receives can be difficult. You can use gadgets to measure sun exposure, although they may not be accurate. Observe the planting area for two weeks to determine the average trend. Once you know how much light the site gets, it is easier to match the requirements of the plant tags.

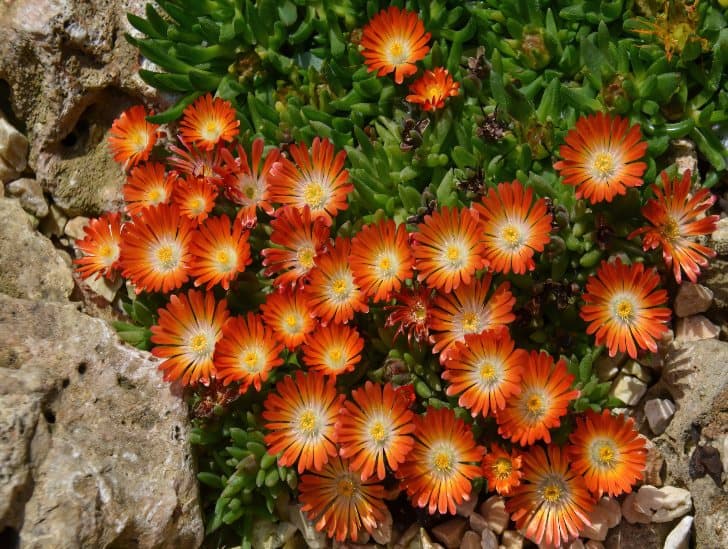
Orange Flower Ice Plant.
Once you know how much light the site gets, it is easier to match the requirements of the plant tags.

Ice plants can do well in different ranges of sun exposure, so you have more flexibility in determining the location. However, they prefer direct sunlight for better development but may tolerate partial sunlight.

Full Sun

A full sun location gets between six to eight hours of direct sunshine between 10 am and 4 pm. Full sun is not easy to achieve because ice plants require full sun to bloom, but young plants cannot take the intense heat that comes with such sun.

The best way to place growing ice plants is to get much sunlight in the morning or try late in the afternoon. Plants will grow well if they get between six and eight hours of direct sunlight.

Orange flower Ice plant on the rocky soil.
Plants will grow well if they get between six and eight hours of direct sunlight.

The more established ice plants can thrive in more hours of direct sunlight because they grow well in dry climates. You can use a mulch to maintain soil humidity and keep it cool. As a perennial, the ice plant needs full sunlight as long as you consider the water needs.

Partial Sun

Partial sun refers to exposure to between four and six hours of direct sun per day, mainly during cold morning hours. Although these plants require some hours of sun to bloom and fruit, they do not need all day in the sun.

Ice plants may grow in partial sunshine but more slowly and may not bloom. If you come across a plant labeled partially shaded or do not enjoy the blooming of the ice plant, place it where it is obstructed by the direct afternoon sun.

Full Shade

Not many plants can thrive without sunlight. The ice plant is not one of those. Plants that need shade can survive with only four hours of direct sun, especially in the morning or late afternoon.

Sunlight Requirements

Most people think that houseplants do not need too much sunlight. Ice plants differ because they enjoy full sunlight. Although they can do pretty well in partial shade, they appreciate the full sun. We recommend about 6-8 hours of direct sun. If your plants lack sunlight, they will become leggy and grow less.

The Best Location for the Ice Plant in Your Home

The ice plant growth guide or guidelines recommend a sunny spot that will get at least six hours of direct sunlight.

Indoor Light Requirements

The perfect spot for your indoor ice plant should be the brightest spot available in your home. Consistency is vital; the site should receive adequate light throughout the day. You can put your plant near a window facing eastward. The southern and western ones are equally good. To find the best position, you may need to move the plant more than once.

Yellow flower ice plant in pot.
The perfect spot for your indoor ice plant should be the brightest spot available in your home.

Ice plants do not tolerate poor light for long. If you cannot obtain enough natural light in your home, you can use artificial cultivation lamps. Grow lamps complement light requirements, especially in winter.

Choosing the Best Grow Light for Your Ice Plant

Intensity

Ice plants need a specific amount of sunlight so that photosynthesis takes place. The light requirements are pretty high, so get lights that emit at least 2,000 lumens per square foot.

Colour

Indoor ice plants grow well under bulbs as natural sunlight in terms of spectrum. The optimal color temperature must be at least 5000 kelvin.

Energy Usage

Both LEDs and fluorescent lamps produce a whole spectrum of light. However, fluorescent lights have more energy consumption, while LED lights last longer and use less power.

Indoor Light Terminologies

Bright

Bright interior illumination means no obstacle between the plant and the window. Obstructions include blinds, curtains, and curtains. They may also obstruct outside the window, such as trees or bushes.

Bright light means that you have to place your plant in a sunny place, probably to the south or west-facing windows with bright and direct sunlight all day.

Filtered

Filtered light, also referred to as indirect light, is partially dimmed and slightly shaded. As we have already seen, ice plants can also grow under filtered light, but they will not reach optimal growth.

Plants that need filtering light must be exposed to sunlight for a few hours, preferably in the morning or late afternoon: South-facing and east-facing windows better capture filtered sunlight. The good thing about the filtered sun is that your plants will get enough sun without being over-exposed.

Shaded

Dim Light refers to zero direct and low sunlight. The light which enters through the window is obstructed by curtains, furniture, or even outdoors by trees or buildings. Plants in need of shaded areas probably have high water requirements.

Outdoor Sunlight Requirements

Ice seedlings, when cultivated outdoors, prefer light shade to full sun. They do better in zones with much sunlight. When your ice plant is exposed to much sun, it will reach its best coloring. If you move it into a shaded area, it will look pale.

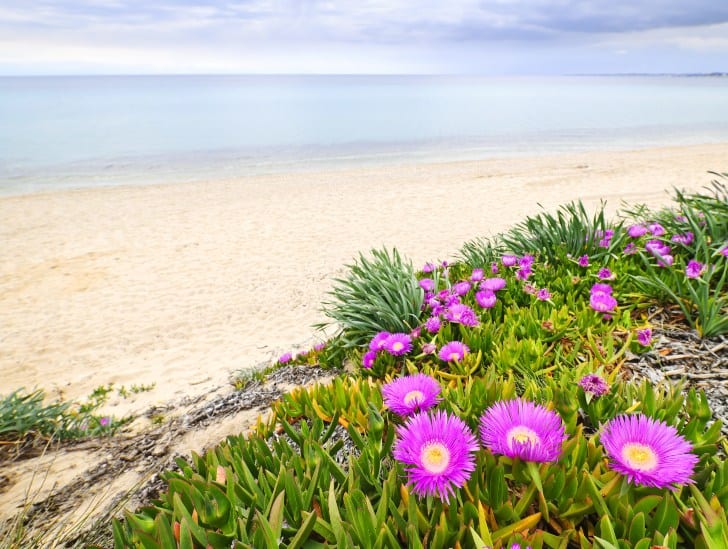
Ice plant along the sea.
When your ice plant is exposed to much sun, it will reach its best coloring.

Consider gradually raising the amount of sun until your plant is used to direct sunlight. Pay close attention to younger and smaller plants as they may be damaged by sunlight when exposed to intense heat.

Signs That Your Ice Plant Is Getting Enough Light

You can see that your Ice Plant gets plenty of light if it grows well. However, if the leaves are burned or the flowers appear thin, the plant’s location is probably not the best. You can also relocate or rotate your plant if you suspect that the place is not perfect.

Ice plants that do not get enough sunlight will also be lengthened because they stretch to get more light, which causes weak stems and lean growth. Furthermore, the plants will be pale and dull.

Can Ice Plants Get Too Much Sun?

Ice plants are found in vital areas and tolerate drought. Although the plant loves the sun, younger or newly propagated ones are a little difficult. In addition, if your ice plants are accustomed to growing indoors, they may get sunburned when they are moved outdoors for the first time. We suggest that you slowly acclimate your ice plant to direct sunlight if you want it to survive.

Sunburns can result in permanent scarring of your ice plant. To protect your plant from sunburn, begin by slowly conditioning your ice plant to intense light before total sun exposure. First, give your plant a partial shade and gradually expose it to more sun until it is fully acclimatized to the heat.

Orange Ice plant flower.
You can see that your Ice Plant gets plenty of light if it grows well.

The morning sun is less intense and is a great place to start as you work your way to the brutal afternoon sun. Alternately, shade your plant over the first exposure. When you slowly increase exposure to the sun, you protect your ice plant from sudden impact and leaf damage.

Conclusion

Ice plants bear colorful flowers like daisies. If you want to take in the beauty of these flowers all year long, give your money plant enough direct sunlight. However, if you want to control the growth of your ice plant and don’t mind the minimum flowers, you can go for partial shade.

 9 Golden Rules for Watering an Ice Plant

A ice plant blooming.

If you are looking for a beautiful plant to fill your garden with, an ice plant is a good one. These drought-resistant flowers will not just add a bright splash color to your garden but also help cover the drier parts of your land. Caring for ice plant care is easy, just that you have to learn how. The most crucial factor to consider when caring for an ice plant is watering.

This article will discuss the 9 golden rules to follow when watering an Ice plant to keep it healthy. Read and learn about the best way to water this pretty plant. Like other succulent plants, they will not need much care if you get it right during watering. So let’s get into the details of these golden rules.

During Dry Conditions, Water the Plant Deeply

An arid condition exists when the soil receives little water, quickly drains. The condition makes the soil surrounding the ice plant dry up to a depth of 12 inches. Therefore, water the ice plant intensely every seven to nine days. But do this based on the current conditions, whether it is raining or the climate is dry.

When the conditions are dry, water the soil to a depth of at least 7 inches. It ensures the plant’s root ball is completely soaked in water. Doing this prevents situations where the plant dries because it lacks moisture. Lack of water causes the leaves to start withering.

Before seven to nine days of watering are complete, if wilting is observed, it is any indication, the plant still needs more water. Even so, ensure you avoid overwatering. Excess water will block the plant’s root system from getting air, leading to root rot.

Do not Water the Plant Before a Freeze

Water in the plant cells gives it hardiness to sustain and cushion itself from the damaging effects of the freezing night. Thorough soaking of the ice plant during the day before a chilly night should provide enough moisture to prevent the plant from damaging because of a frost. Water your ice plant early in the day to give it enough time to absorb the moisture. Watering early also increases the ability of the plant to retain heat from the sun.

A woman watering the plant in the morning.
Watering early also increases the ability of the plant to retain heat from the sun.

 When an ice plant is wet during the freezing period, the influx of water could cause the plant to freeze and die. Sprinkling water on the foliage of the ice plant before a freezing night can lead to frost spots forming on the leaves. The effect will damage the lovely appearance of the plant, and it could kill it. In everything, you do not overdo it. 

The “Soak and Dry” Method is Best for Ice Plants

Ice plants provide their water hence do not like much moisture. The soak and dry method will not just keep your plant happy, but it is the best method to use for succulents. The technique involves saturating the soil with water. Then wait until the soil mix dries almost completely before watering again.

While practicing the “soak and dry” method, maintain a watchful eye on the condition of the ice plant. Letting the plant dry out entirely for too long may prove impossible to revive it. This plant’s soak and dry method work well because it caters to their nature, ensuring they adapt accordingly. 

One of the common mistakes that people make is adding a small amount of moisture frequently by watering when the plant does not need water. Unfortunately, this introduces other conditions not suitable for the plant. Remember, it is a succulent plant. The soak and dry method allow you to water the plant thoroughly and leave it to dry before the next watering.

Consider the Environment of the Plant Before Watering

The environment where your ice plant is planted determines the soil’s moisture level. When it is grown in a place that receives a lot of lighting, the watering frequency may be higher than low light. An ice plant near a window or a heater dries out faster than other locations.

A cactus on a desert.
When it is grown in a place that receives a lot of lighting, the watering frequency may be higher than low light.

To ensure that you don’t overwater or underwater the plant, take a keen look at the behavior of your plant in its environment. You may dip your finger into the soil to determine the soil’s moisture. The plant will show you some signs of overwatered or underwatered from time to time. For an overwatered ice plant:

  • The leaves are soft and mushy
  • The leaves turn black due to fungal disease from too much overwatering
  • Leaves start to shrink while others start to drop

Signs for underwatered ice plants include

  • Wrinkly and shriveled leaves
  • The leaves start turning dry on the edge
  • During flowering, the plant fails to flower entirely.

How often the underwatered plants show these signs determines how often the plant needs water. However, the best condition to grow the ice plant outdoors is full sun and soil with good drainage.

Water the Plant More During the Growing Period

Ice plants are in full growing mode between spring and fall. During this time, water is likely to evaporate more quickly due to the increased temperatures. Therefore, it is good to increase the amount of water and the frequency of watering the plant. The watering frequency may increase once per week during the growing season. 

If you have planted your ice plant outside, watering is frequent during the warm months. The seasoned guidelines may not apply to other areas. Therefore, keeping a close eye on the soil is essential.

Soil Used is an Essential Factor

Soil type used is an essential factor in proper drainage. It determines the amount of moisture the soil retains for the plant. Regular potting soil may not be the best option with ice plants. This is because Ice plants prefer soil that retains less moisture.

A soil being watered.
Regular potting soil may not be the best option with ice plants.

The best soil type where an ice plant flourishes is a mixture of potting soil with sand or perlite. Sandy soil drains the water avoiding standing waters. On the other hand, poor soil will cause the ice plant to die when kept in standing waters for long.

Bottom Watering is the Best

Whether watering from the top or the bottom, it helps to quench your plant thirst. With ice plants or other succulents, bottom watering is the best option. The method isn’t just for typical foliage houseplant but also a better way to make your ice plant receive the right amount of water.

Top watering of the plant is an easy method. But enough water does not reach the plant’s roots. As a result, water remains on the leaves during top watering, causing rot. In addition, the water creates rust on the foliage, destroying both the vegetation and the plant’s health.

Top watering of the plant is an easy method, but enough water does not reach the plant’s roots.

Bottom watering ensures all the soil gets water absorbed deeper into the root caps. This allows the plant to grow and thrive well. When watering the ice plant at the bottom, place the watering jar near the bottom to prevent water from splashing. Then, water the plant slowly until water drains from the drainage holes.

Cut Down on Watering During the Winter Period

How often an ice plant needs to be watered depends on many factors, especially the seasons. The soil dries out faster during the summer. During the winter season, the soil does not dry out fast, as the plant is in a dormant state, and giving the plant more water means overwatering. There is not much evaporation during the winter season, and water stays logged on the roots of the ice plant. 

Watering the plant depends on many factors, especially the seasons.

The water causes a root rot or fungal infection, destroying the whole plant. To prevent overwatering during this period, give your succulent a drink early in the morning. It ensures the water evaporates during the day. However, minimize the amount of water you give the plant during morning hours because not much evaporation occurs during the day.

Don’t Use Ice Cubes

Some gardeners use ice cubes to water their houseplants. Don’t do this with ice plants or other succulents. Though this method seems better, dispensing a small amount of water slowly is a sure way to kill the plant.

Succulents like ice plants are native plants in the desert. Using ice cubes to the water, the plant freezes the roots, shocking the plant. Unlike the belief that using ice cubes to water a plant is similar to using a controlled soaking method, the plant dies because of excessive cold.

Bottom Line

From location to location, watering can be a process of trial and error, unique in different places. Nonetheless, your ice plant will need water to survive. So always remember to follow the above rules and tips in mind, to maintain a healthy and hydrated ice plant perfect for your landscape.

 A succulent remains a unique plant whose maintenance entails moderate watering. While keeping and observing these watering rules, keep watch of other factors. Water moderately, and be assured of a blooming Ice plant.  

How to Propagate Hens and Chicks Plants

Hens and chicks(sempervivum) are remarkably capable of producing young offshoots (chicks) and adapting to change. As a result, the propagation of hens and chicks is not complex. All you need to do is get to know your plant so you can tell where to cut and when to spread.

Like most succulent plants, hens and chicks are easily propagated. The stalks and leaves store up the water to retain the cuttings until they root. The plants have a rosette, and the floral stems rise close to the center of the rosette.

Growth is short and clustering or higher with ramified expansion. Propagate low-growth types by separating and rooting tiny seedlings, called offsets, which form around the mother plant.

The Ideal Time to Propagate Hens and Chicks Plants

The best time to spread these succulents is when they start to exceed their container or outer space. Chicks are smaller clones of the mother rosette (hen) and readily split apart. When the stolon linking the mother and the offset has leaves and is still healthy, the hen still feeds the chick, so it is not quite the time to separate them.

A close up image of Rosettes.
The best time to spread these succulents is when they start to exceed their container or outer space.

Ideally, the plants will grow together until the chick pulls out its roots and the stolon begins to dry out. Then you know they’re ready for transplantation. However, if you break some chicks early, plant them, and they will probably grow without a problem.

The plant’s division helps it adapt to its space and remain healthy. The best time of year to split a succulent-like sempervivum is in the summer before it enters a period of heavier fall growth.

Selecting Rosettes

The offsets that are the chicks produced by the mother plant begin as tiny nubs within their mother’s leaves. These small buds are then spread from the parent plant on stems known as stolons. One of the attractive benefits of sempervivum succulent plants is that a plant can produce a lot of offsets.

According to the variety of hen and chick and the space available for the plant, it can grow a very long stem for its offsets in a propagation effort. The offset will develop from a typical rosette-like bud.

One of the attractive benefits of sempervivum succulent plants is that a plant can produce a lot of offsets.

You will be most successful in propagating sempervivum cuttings if you take rosettes that have already formed some roots rather than younger chicks. The simplest way to know for sure is to remove the plant from the pot and shake part of the soil to expose the roots. It helps you select the best branches to cut off.

How to Take Cuttings

A sharp and clean knife is the most convenient way to cut a small rosette for propagation. Cut across the edge of the rosette, cutting where it connects to the mother plant. Place the rosette cutting in a dry, sheltered place for a few days to allow it to form a callus. The cuttings may receive light but not direct sunshine.

How to Divide the Offsets

The offsets can be separated effortlessly from the hen plant. Break the stem connecting both plants, wiggle the chick plant, and transplant it to a new home.

Potting your Hens and Chicks Cuttings

Grab a small plastic container, about 3 inches around, and fill it with a granular potting mixture made for succulents. Add a thin coat of fine-grain only on top of the substrate. Possible gritty materials to use are construction sand, small gravel, or chicken grit.

A Potting Mix.
Fill it with a granular potting mixture made for succulents.

The regular potting mix works very well too. You can add a bit extra perlite for improved drainage and compost for additional nutrients if you like. Place the calloused tip of the cut in the fine grain at the top of the jar. Press gently so that the end reaches the main mixing layer.

Propagation Methods

While hens and chicks can be grown from seeds, splitting or propagating offsets from a complete and healthy mother plant is more convenient.

How to Grow Hens and Chicks from Seed

You can grow hens and chicks from seeds and divide the chicks. They need light to sprout, and you should keep them humid but not damp. Seeds are expected to germinate in 3 weeks. At this stage, you may add thin gravel and mulch. 

Plant Seeds.
You can grow hens and chicks from seeds and divide the chicks.

Propagating Through Offsets

Check the mother plant for offsets to be removed. Gently pull the plant out to examine the balances that have already cultivated some of their roots. Alternatively, skip this step and select a healthy offset on the outer edge of the vessel.

Propagate hens and chicks offset in the spring. Once seedlings reach a width of 1 to 2 inches, they are ready to spread. Gently pull it out of the parent plant for an offset with already established roots. For a root-free offshoot, use your clippers to remove the offset, cutting the stem as close as possible to the mother plant without damaging it.

Plant the rooted offsets in a small vessel with succulent soil. For an offshoot with no roots, let the cuttings dry for a few days. Place on the surface of a small container filled with dry and succulent soil.

Lay the plantlet, base down, in a pot filled with a cactus and a succulent potting mixture. The jar should be just a bit wider than the offset and should have drain holes. Put the pot into a bright indirect light and wait for the offshoot to root.

When new roots develop, the seedling is resistant to movement when you push it. Water the rooted plant regularly until the water runs out of the drain holes. Let the soil dry halfway between watering the pot.

Propagating Through Cuttings

For hens and chicks branching out, collect stem cuttings in the spring. Wipe a pair of sharp pruners with a cloth dampened with rubbing alcohol. Cut the stem so that there are 1 to 2 inches of stem below the top of the leaves.

Extend the cut to the side in the shade for about a week for the cut end to heal. Next, dip the apex of the stem into a 2-inch pot filled with cactus and succulent potting mixture or equal portions of peat and perlite. Again, be sure to use a container with drain holes. No watering is required until the roots form.

Propagating Through Unbranched Plants

Like some large hybrid cultivars, you can cut the entire leaf rosette for hens and chicks that are not branching, leaving a bare stem. Leave 1 to 2 inches of stalk underneath the lower leaves.

Use an empty pot more miniature than the diameter of the rosette and place the head on the border of the vessel. After a few weeks, the roots begin to germinate from the stem. Plant the rooted stem in a pot that is about as broad as the head of the leaves, using the cactus and succulent potting mixture. There should be drainage holes in the container.

Propagating By Leaves

Though the spread of hens and chicks from leaves is possible, please do not get your hopes too high as it is pretty unpredictable. Propagation from one leaf has a small success rate, although starting a new hen and chick plant is possible.

Detach a fully grown mature leaf from the parent plant by removing it from the stem. You can use a sharp blade that has been soaked in rubbing alcohol. Try propagating your plant during spring when you have a few healthy leaves already formed. 

A leaf propagation
Propagation from one leaf has a small success rate.

Ensure that the leaf has the base that ties it to the stem. If the plant has a flower stalk, you can root the leaves of the flower shoot. Let the leaves dry and heal over a few days. Place the leaf in a shallow pot filled with one half wet peat and one-half perlite. Use a container that has a drain hole.

Incline the leaf at an angle so that a tiny portion is in contact with the ground. Shade the container and drizzle the potting mixture from time to time to keep it slightly damp. The roots germinate from the base of the leaves, and then a new miniature plant forms over the roots in approximately 40-50 days.

The old leaf eventually becomes dry and may be removed. Place the container in a place where it will obtain a constant indirect light and water the ground enough to keep it moist but not soggy.

How to Care for a Propagated Hens and Chicks Plant

When your cuttings are in their new home, they are ready to recover and begin to produce roots. Place the jar in a bright place with good airflow. If you can, keep the temperature around the bottom of the pot close to 70 degrees.

Do not enclose the cup in a bag or container that retains moisture, as it may cause decay of your succulent. In a matter of weeks, your cut is expected to have roots. When they look large enough, you can place the new plant in its permanent pot or the soil.

Bottom Line

The hen and chick plant is one of nature’s most efficient plants and easily propagated. They are easy to maintain and can thrive indoors or outdoors, making them a perfect plant for just about anyone.

Ultimate Guide: How To Care For Ghost Plant?

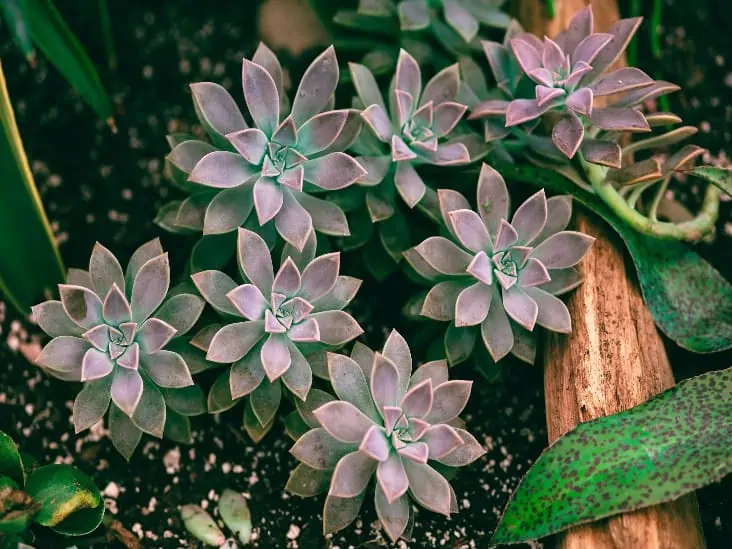
Ghost Plant is a unique ornamental houseplant. Furthermore, it is one of the most popular succulents easily available from gardening centers and stores as it is easy to grow and care for. Even novices may grow them. 

They can survive anything from long periods without water to damaged stems and cold temperatures. If you’re searching for a forgiving succulent that won’t mind a little neglect now and then, Ghost Plant is an excellent option.

If you are looking at growing a Ghost Plant, here is detailed information on how to propagate, important conditions, and care tips for your Ghost plant to thrive.

Sunlight

Ghost plant enjoys full exposure to sunlight. You should let it stay in bright light for at least six hours a day. Its most distinctive feature is its translucent pink leaves, which result from exposure to full light. 

On the other hand, the Ghost plant can tolerate light shade, which turns the leaves to a grey, blue color.

A ghost plant with a back light.
It is relatively a hardy succulent when it comes to temperature fluctuation.

For indoors lighting, locate the most lit location, or one with or receiving a lot of light. An east-facing window is ideal. West and south-facing windows may also work well, but you’ll have to relocate the plant multiple times to get the ideal position.

If your Ghost plant does not receive enough light, it will start changing to a pale gray color and lose its luster.

If it doesn’t get enough light soon, it will start stretching out and elongating towards a bright light. Move the plant to a more direct light source when you notice this happening.

Soil

The Ghost plant’s soil (like other succulents) needs to be well well-draining.

The ideal combination of light, porous potting soil, and up to 50% gravel, sand, or perlite will give your Ghost plant a conducive environment for growth. Or use this soil mix that combines coarse sand, cactus mix, and perlite in a 1:1:1 ratio. 

A ghost plant was planted in a rocky soil with sunlight.
he Ghost plant’s soil needs to be well well-draining.

The type of potting mix you create will also let you avoid many common problems that arise from overwatering.

Watering

When caring for Ghost plants, water is the most important element.

Water your Ghost plant once a week during the active growing season in winter and spring. Come winter; you should only water it once or twice every two to three weeks to prevent overwatering.

Wait till the soil is completely dry to a depth of one inch and water it once the soil is dry. You can check this out using your index finger.

Water the soil around the plant’s base in the morning or late evening. Pouring water directly onto the leaves might scorch on a hot, sunny day damaging the plant. In addition, dripping water on the leaves in a humid environment might cause fungal infections to your plant.

Fertilizer

Outdoor Ghost plants rarely require soil supplements when grown in the garden, but you can still add nutrients to both plants if grown outdoors or indoors. 

Those grown indoors may require a feeding supplement after depleting the existing nutrients in the pot.

The secret to growing a healthy Ghost plant is to feed it while it is actively developing in the summer and spring.

In the spring and summer(growing season), you can use a balanced succulent fertilizer at half strength, and you can use it once every month or two. Fertilizer mixes made specifically for succulents and cacti are also appropriate.

Temperature

Ghost plants do well in temperatures between 60 to 80°F.

The Ghost plant is relatively a hardy succulent when it comes to temperature fluctuation, and the good thing, it will thrive in your house at room temperature.

A plant terrarium.
It is relatively a hardy succulent when it comes to temperature fluctuation.

In their native Mexico, they flourish in hot, dry regions and survive low temperatures in mountainous regions. They can tolerate low temperatures of upto 10°F.

Humidity

Ghost plants do well in environments with below 50% of humidity level.

Avoid rooms in your home that become too humid or are full of moisture, such as the kitchen or bathroom, where steam may accumulate. These areas usually have high humidity levels and may damage your plant.

The Ghost plant thrives in an arid climate and may be placed on a window to receive plenty of sunshine and good airflow, recreating its natural habitat.

Pruning

Ghost plant offshoots new rosette pups on the healthy stems that may get leggy with time. These leggy offshoots, depending on the aesthetic you’re looking for, maybe charm or make the plant look scraggly. 

Young ghost plant in a small pot.
Prune the offshoots as they grow long and re-pot the pups.

To maintain your plant, prune the offshoots as they grow long and re-pot the pups, share with friends or create compost with them. Always use clean, sterilized pruning sears to prune your plant. 

Potting

Ghost plants don’t require regular repotting. If the plant has outgrown its container, you should switch it to a larger one in the spring.

It’s also a good time to prune the older growth and propagate.

Pro Tip: If given an ideal pot with enough space and all the right growing conditions, Ghost plants can grow to reach 12′ tall and trail 3 feet.

Propagating Ghost Plants

It’s good to propagate Ghost plants during the growing season (spring and summer) since they will root more quickly this period hence a greater chance of survival than in the winter months.

Ghost plant leaf propagation
You can propagate Ghost plants with individual leaf from or stem.

You can propagate Ghost plants with:

  • Individual leaf from a rosette or stem
  • Cuttings from excessive growth or older plants
  • Seeds

Use a clean, sterile pair of scissors or sterile knife to make your cuttings. If plucking a leaf, ensure you pluck the entire leaf from the stem. If you let any part remain on the stem, you might not achieve a new growth from the leaf.

How To Propagate Ghost Plant from Stem Cuttings:

  1. Let the stem cutting dry for a day or two. Let the cut ends dry and seal or callous. It’s better to obtain cuttings from healthy-looking, plump-leafed Ghost plants than dehydrated or stressed ones.
  2. You can dip your cutting into a rooting hormone if you wish to speed up the process.
  3. Stick the cuttings in a well-draining potting mix once they’ve dried and healed.
  4. Place in a well-ventilated place and away from direct sunlight. Every few days, or when the soil feels dry, water it.

After about two weeks, you’ll begin to see new roots develop.

After four to six weeks, the cuttings should be firmly rooted, and new growth will start developing from the stem sides or the top.

When the succulent is well-rooted, reduce the amount of misting and water it once a week at most. As the plant grows older, expose it to more light.

How To Propagate Ghost Plant from Leaves:

  1. Gently twist off a leaf from the stem. Always get a healthy leaf; in addition, it is wise to have several leaves as not every leaf will grow.
  2. Again, you can dip the cut ends into a rooting hormone to enhance rooting. This process is optional, but you can do it if you are looking at fast success.
  3. Allow the leaves to dry for a day or two. Keep it in a dry place away from direct sunlight.
  4. Prepare a well-draining potting soil. Take the leaves and lay them flat on the soil surface, barely covering them, or insert the cut ends in the soil.

In about two weeks, the leaves will begin producing roots. In a few more weeks, you will notice new seedlings growing. The process might take anything from a few weeks to several months.

Pro Tip: It takes longer to grow Ghost plants from leaves than from a whole stem. Stem cuttings also have a higher success rate; therefore, note these details when propagating.

How To Propagate Ghost Plant from Seeds:

Lastly, you can start Ghost plants from seeds, which is the best approach if you are looking at covering a large area of your garden or have many seedlings for potting. 

You can collect the little seeds that develop after the blooms have died or purchase them from gardening stores.

Plant the seeds in a swell draining potting mix on a tray and barely cover with soil. Water with a plant mister to prevent washing away the seeds.

Place your tray in bright light at 70°F, and you will see new sprouts in three to four weeks.

Common Pests and Diseases

Remove dead leaves from the base of your Ghost plant as it develops. Decaying foliage is home to mealybugs, which are bugs that spread bacterial infections causing decaying of your plant.

You can treat mealybugs on a Ghost plant y smothering the pests away with horticultural oil or with a dab of isopropyl alcohol.

In Conclusion

Ghost plants are one-of-a-kind plants with interesting foliage, and when grown in the proper conditions, their changing hues make them ideal focal points in any space. They’re really simple to maintain and look beautiful as greenery decorations for your home or workplace.

Does Echeveria Need Direct Sunlight?

Echeveria exposed to sunlight.

What comes to your mind when you think of Echeveria? You will most likely envision a hardy desert plant that requires intense bright sunlight to survive. While most succulents thrive in relatively warmer climatic conditions, they still need protection from blasting sunlight and extremely high temperatures. Echeveria, like other succulents, is mostly from the semi-desert environment, which receives plenty of rainfall and moderate sunlight.

So, does Echeveria need direct sunlight? The simple answer is “no.” There are over 150 different types of Echeveria species, and most of them can tolerate full sunlight, but it doesn’t mean they are happy. Typically, Echeveria requires approximately four to six hours of bright but indirect sunlight to thrive. Keep them out of direct sunlight to avoid causing sunburns on the plant’s leaves. You should also remember that the plant’s age and size will determine its light requirements. When moving them outdoors after winter, be sure to slowly acclimatize them to direct sunlight to keep them alive.

This blog post discusses everything you need to know about Echeveria’s light requirements and how to keep your plant happy in different light conditions. Keep reading to learn more. 

How Many Hours of Sunlight Does Echeveria Need?

Generally, Echeveria requires four to six hours of sunlight exposure to keep it happy. This succulent loves being in a bright and sunny spot.

Echeveria plants that don’t receive enough sunlight tend to exhibit various problems such as etiolation and elongation.

A plant experiencing etiolation tends to stretch in the direction of light. So, if you discover your Echeveria is stretching towards the direction of light, it means your plant isn’t receiving enough light.

An Echeveria plant exposed to sunlight.
Echeveria requires approximately four to six hours of bright but indirect sunlight to thrive.

Etiolation leads to weak stems, multicolored leaves, and stunted growth. The plant will also lose its vibrant pigmentation and become pale or revert to a relatively dull green color.

However, an Echeveria plant that receives plenty of sunlight will demonstrate its true beauty by showcasing the full range of its vibrant colors and blooming maximally.

Since your Echeveria requires at least four hours of bright light to thrive, consider keeping it near a south-facing window if you have grown it indoors. If you have a relatively sunny room, be sure to keep it there.

Rotate your plant several times a day keep its leaves even. If you allow one side to receive too much light than the other, you may start to notice etiolation on the side that doesn’t receive enough sunlight.

An echeveria plant exposed to sunlight near the window.
Consider keeping it near a south-facing window if you have grown it indoors.

If your region doesn’t receive plenty of natural sunlight, don’t be afraid to use artificial grow lights to keep your plant happy. Keep the lights on for at least eight hours a day before switching them off to allow your plant to rest.

Does Echeveria Need Direct Sunlight or Full Sun to Thrive?

Generally, succulents tend to thrive with a lot of sunlight exposure. Echeveria is no different, but it still requires proper protection from direct sunlight or intense heat.  Too much sunlight can cause severe damage to your plant, leading to permanent scarring.

The plant can literally fry to death when left in full sunlight for prolonged hours without proper protection in extreme conditions.

To prevent sunburn and scarring, ensure you slowly introduce your Echeveria to sunlight before full exposure. You can achieve this by giving it partial shade at the beginning and gradually increasing the number of hours you expose the plant to direct sunlight until it is fully acclimatized to the heat.

For better results, start by exposing your plant to the morning sun and slowly work your way to the intense afternoon sun. Alternatively, put the plant under shade when first exposing it to direct sunlight. From there, increase the exposure gradually to prevent damaging the plant foliage.

Newly propagated Echeveria is more susceptible to sunburn, but mature plants can withstand the intense heat for some time before they start showing signs of damage.  Indoor Echeveria plants are also more vulnerable to sunburn and damage.

Small Echeveria plant.
Newly propagated Echeveria is more susceptible to sunburn.

When it is time to move the plants outdoors, do it gradually so that they get plenty of time to be accustomed to the intense heat. Newly propagated plants must stay strictly under shade. A simple mistake and you lose them.

What Is the Best Temperature for Echeveria?

Unlike other succulents, Echeveria can survive pretty well in quite a wide range of temperatures. Most Echeveria species will thrive in a relatively warm and dry climate. These plants prefer about ten degrees Celsius difference between the day and night temperatures.

During winter, the plant will be happy in cool conditions of about 15 degrees Celsius during the day and five degrees Celsius during the night.

During summer, these succulents tend to enjoy relatively higher temperatures. But it is always good to maintain the temperature at approximately 30 degrees Celsius. Anything beyond that becomes dangerous and can cause severe damage to your plant.

Other than sunburn, you need to keep in mind that most plants shut down and stop respiring when temperatures are too high. They will only allow their stomata to open and breathe again when the temperature drops.

Echeveria plants have developed various strategies, such as a waxy coating on the leaves to prevent too much water loss. So, exposing the plant to extremely high temperatures can interfere with its survival mechanism.

Can Echeveria Get Too Much Sunlight?

The simple answer here is “yes.” Even though Echeveria is a succulent, it doesn’t mean that it can withstand any amount of sun exposure. When the sun exposure is too much, your plant will start showing signs of damage and sunburn.

Keep in mind that sunburn usually happens gradually. The first sign of sunburn is the existence of brown spots on some sections of your plant leaves. When recognized earlier, sunburn can be remedied to avoid further damage to the plant.

The only thing you need to do is move your Echeveria to a relatively shadier area or position it next to taller plants for protection from direct sunlight.

Sunburned Echeveria plant.
The first sign of sunburn is the existence of brown spots on some sections of your plant leaves.

If you leave the plant unattended even after noticing signs of sunburn, some Echeveria species will toughen up and survive, but others will eventually succumb. If you don’t want to take any chances with your plant, be sure to provide it with sufficient protection from direct sunlight.

What Can You Do to Keep Your Echeveria Alive During Prolonged Heat Waves?

With the climate changing, weather extremes are becoming normal. During winter, the cold will be extreme, and the heat will also be extreme during summer.

If you live in an area that experienced prolonged heat waves, you must be worried about your Echeveria. While extremely high temperatures that last for days or weeks can be extremely challenging for plants that love a lot of moisture, they can also affect succulents such as Echeveria.

The prolonged heatwaves can be damaging to your Echeveria, making it almost impossible for the plant to bounce back from the stress and damage.

Apart from providing your plant with shade, be sure to provide sufficient humidity. Although Echeveria doesn’t like sitting in water for prolonged hours or being overwatered, you need to find ways of keeping it hydrated amid prolonged heatwaves.

Failing to water your plant during periods of prolonged heatwaves can be catastrophic. Some hardier and more mature Echeveria species can sustain the heatwave, but the fragile species won’t survive.

Check your potting mix moisture regularly to feel if it is dry. If the soil feels any dry, water your plant and give it a few days before checking again.

While watering, keep adding water to the growing container until it starts to seep out from the bottom of the container. Generally, you should water your Echeveria every five or six days during a heatwave.

Does Sunlight Exposure Affect Flowering?

You need to keep in mind that the blooming cycle in Echeveria is somehow unstoppable unless you deny your plant essential nutrients. But as long as your Echeveria has the right conditions, it will always flower.

Just ensure the plant receives enough light (length and intensity), a well-draining potting mix, and enough watering. 

In this case, enough light exposure doesn’t mean exposure to full sun. You still need to protect it from the intense heat so that flowers don’t wither and fall off.

Echeveria plants.
As long as your Echeveria has the right conditions, it will always flower.

Echeveria usually starts flowering at the end of summer, although some species will flower during spring.

The blooms last a few weeks and open in quick succession. Some flowers may pollinate and produce seeds that you can use to start new plants.  You can also propagate new plants from the stalks of the flowers.

Final Thoughts

Growing Echeveria can be so fulfilling because of the potential benefits that you will enjoy along the way. However, you need to learn how to take care of your plant to keep it happy.

Although these plants are succulents and have adapted to growing in relatively hot climatic conditions, they don’t love being exposed to full sun. Exposure to full direct sunlight can result in irreversible damage and even death.

Keep your Echeveria in a spot that receives plenty of bright but indirect sunlight, and it will remain healthy. If you must take it outdoors during summer, introduce it to the sunlight gradually.

Does Desert Rose Need Direct Sunlight?

Adesert rose seedlings outdoors.

Direct sunlight can be harsh on many popular indoor plants, many of which have evolved to prefer filtered and indirect sunlight from the ground of the tropical forest. However, the desert rose is happy to immerse itself in these intense rays!

Being native to Africa, it does exceptionally well in full sun. It may also survive with sunlight only in the morning or afternoon; however, it might not bloom as vigorously and vividly. But in warm conditions, such as in a greenhouse, the plant can stay active and bloom all year long.

For a desert rose plant indoors, position it near a window to get at least 6-8 hours of sun per day. South-facing windows can be a blessing but also a challenge. On one side, all this natural light is perfect for creating an inviting atmosphere in your home. But, be sure to rotate the container every few days; otherwise, the plant could lean toward sunlight on one side. 

Sunlight for Different Growth Stages

Desert Rose’s light requirements vary at every step. Let’s see how to give the right light at each developmental stage.

Desert Rose Seedlings

Freshly planted desert rose plants and fresh cuttings will require a great deal of extra attention if grown outdoors. They should be eased into the heat over time. If left too long in sweltering weather, they may burn and die quickly. Do not bring your desert rose plants into the sun in the first seven to ten days. Semi sun or partial shade is good for the seedlings.

A young desert rose.
Freshly planted desert rose plants should be eased into the heat over time.

One Month Old

When your plants are approximately one month old, gradually increase the sunlight to avoid burning the leaves. The best temperature range for your desert rose plant is 95F Maximal by day and 73F by night. In this range, the plants will sprout well.

Gradual Adjustment to Full Sun

Newly planted desert roses will need additional shade or protection to keep them calm as they begin to take root in the soil. However, when their roots are better established, they will be more likely to endure high temperatures. General steps include:

  1. Begin the plants outside, where they will be in the shade throughout the day for 4-7 days.
  2. Move to a partly sunny spot (about 4 hours of sunlight in the morning and light shade the rest of the day); give 4-7 extra days to adapt.
  3. Evaluate color change and gradually move plants to a more or less sunny location as required.

Bright light combined with high temperatures can be harsh. If you progressively introduce your desert rose in direct sunlight, it will tolerate full sunlight for most of the day. Alternatively, add a little shade fabric to protect against direct sunlight. While the outdoor temperature is consistently above 90, the desert rose plant area is much colder from the shade canvas.

In the absence of direct sunlight on plants, the leaves do not become as hot and are unlikely to burn or show signs of excessive heat. Another great option is to place your plants in an area that gets bright shade for most of the day. 

Ideally, they will be in a place with an hour or two of morning sunlight but then shady the rest of the day. Because temperatures are usually higher in the afternoon, direct sunlight can be a problem during this period. However, the morning sun is cooler and less likely to provoke sunburn.

One Month to One Year

The desert roses at this time are more robust and more ready to go outdoors or for more sun. Approximately six to eight hours of sunlight will be excellent for their growth.

One Year Old

The bigger the desert rose plant, the less likely it will be affected by hot weather. A large plant is much more robust, has a deeper root system, and has probably had time to adjust to warmer temperatures. 

A top view of desert rose.
Freshly planted desert rose plants should be eased into the heat over time.

Mature desert rose plants may experience sunburn (especially if they go from shade to sunlight), but this is not expected. Setting the desert roses in full sun at this stage will significantly assist their growth and flower formation.

Sunlight and Seasons

Although the bright sun stimulates flower production, the desert rose plant takes a break in the hottest and wettest months of the growing season. The result is two flowering seasons. The flowers will begin to bloom at the beginning of spring. With a good amount of light, your plant should bloom regularly until mid-summer.

At this point, flowering will stop for 6-8 weeks, only to start again at the beginning of the autumn months. When the weather gets cold (55 degrees Fahrenheit or less constantly), bring it into the house.

In a highly luminous and warm environment like a greenhouse, the desert rose plant can remain active throughout the winter. If you bring your plant into your home for the winter, it will probably stay in a semi-dormant condition until spring comes. In the meantime, store it in a warm room with indirect light.

Signs of Too Much Sun

It is not long before desert rose plants start to show if they are stressed by too much heat or direct sunlight. When your plant gets the right amount of sunshine, it will often “redden” or change color. 

Suppose they begin to get too much sunlight, although the leaves will burn. You may note white or pale spots on succulent leaves. Though the damages may be hard to reverse, you can try moving your plant to a place with less warmth, direct sunlight and expect new leaves to grow. If just one or two leaves are damaged, you may remove them, but this is unnecessary.

A dry leaf of a desert rose.
Once they begin to absorb too much sunlight, the leaves will burn and you may note white or pale spots on succulent leaves.

In some instances, the leaves dry out and blacken. Black begins on the outer edges of the leaves and will become dry and crispy. These will not heal but remain until the leaf dies completely and new leaves are formed. 

If the desert rose plant is in the shade but still experiences hot temperatures, you can notice a golden/yellow color starting to appear. The plant does not become entirely white with sunburns; instead, the colors tend to be hotter than usual. It usually disappears, or the rose desert plant will revert to its original color if moved into a cooler environment.

The Relationship Between Direct Sunlight and Desert Rose Plant

The correct amount of sunshine directly affects the color of the Desert Rose. Sunlight is a very influential factor as far as the color of your plant is concerned. Moderate, mild stress can lead to beautiful shades. However, if the lighting conditions are out of their preferred light range for an extended period, your plant will eventually die.

Most light issues can be resolved if detected early, but the initial signs of too much and too little light can be subtle. Desert Rose plants can recover entirely from most light problems if given 1-2 weeks to gradually pass into the proper amount of light. Solving light issues is as simple as relocating your plant. 

The key to a successful changeover of light conditions is time. Whether they show signs of too little or too much light, desert rose plants can regain bright colors if given 1-2 weeks to gradually shift to the right amount of light. The more significant the change in light levels, the longer your plant will need to transition.

The Best Location for Your Desert Rose Plant

You will be saved from unending troubleshooting when putting the desert rose plant in the right place. We recommend that you reference the recommended lighting conditions indicated on the label of your plant.

Indoor Light Requirements

Desert Rose plants may be difficult to care for indoors due to their lighting needs. Because our windows don’t have nearly the same light intensity as a plant outside, many succulent plants end up tense and struggling to survive.

When it comes to direct sunlight indoors, your desert rose plants can pretty much handle as much as you provide. You might have to acclimate if you have grown the plant in a weaker light before, but it will significantly enjoy the sun.

A desert rose in a clay pot.
Your plant will prosper when you place it in the brightest place.

When growing indoors, consider where your plants are located in your home. Your plant will prosper when you place it in the brightest place. Find a location that will give your plants sufficient light and constant light.

The plant should be near sunny, possibly windows facing south or west with bright and direct light throughout the day. The desert rose plant loves bright light, so a southern window display provides enough sunlight for it to bloom.

If your home lighting situation is not ideal, there are still ways to improve those conditions and help your plants get the best possible light for optimum growth. The immediate solution is artificial light.

Manufactured lights can supplement natural sunlight or be your plants’ only light source. If you use grow lamps all year for your desert rose plants, you may have to increase the light and duration during summer. Likewise, decrease the light and length during the winter months.

Outdoor Location

If you grow your desert rose plants outside, things change a little. Instead of putting your plants in the brightest place possible, you probably need to protect them a little. After all, most of them do not originate in complete desert conditions, and the excessive sun can permanently damage them.

Desert Rose outdoor.
Instead of putting your plants in the brightest place possible, you probably need to protect them a little.

Damage mainly occurs if you fail to acclimatize your plants properly. Desert Roses grow in full sun with no cover, though they may thirst quickly. In the garden, choose a sunny place that has some protection against the midday sun, as this can burn the leaves.

Bottom Line

The desert rose blooms well in the desert landscapes and will bloom wonderfully with full sun. They can also do well with the morning sun or light afternoon sun but cannot bloom as heavy. These plants may survive if kept in the shade but become leggy and weakly stalked.

11 Golden Rules For Watering An Air Plant

A air plant soaking method.

Air plants are a great way to bring the beauty of nature indoors. They require very little maintenance and can be an attractive addition to your desk or bookshelf. But all plants need water and air plants are no different. Watering your air plant is a topic that has caused some debate, but we’ve figured out the formula for success and want to share it with you.

So what are the golden rules for watering an air plant? Do not give it too much water at ago because air plants have very full and thick leaves. These leaves hold water, just like a sponge. If you give an air plant too much water at one time, it will take up all of the moisture and sink down into the base. When this happens, the plant is unable to absorb any more water until its leaves dry out a bit. The location also matters when you water your air plants. Cooler temperatures (around 60 to 65 degrees Fahrenheit) will slow the process of water absorption, which means you should increase the dry time.

Watering air plants should not be complicated if you understand how they work. We take a look at 11 golden rules for watering an air plant:

1.     Mind The Varieties

When watering air plants, be aware that different species of Air Plants have different requirements when it comes to humidity levels, light exposure, temperature ranges etc. Make sure you research how best to take care of your specific plant before getting started. For instance, some air plants do well with a little misting every day, while others prefer to be dunked in water once a week.

Top view of different air plants.
When watering air plants, be aware that different species of Air Plants.

2.     Location Matters

When it comes to watering your air plant, where you place it is just as important as how much water you give it. Make sure your Air Plant is in an area with good air circulation, and avoid placing it in direct sunlight or near heat sources.

Location also matters when it comes to humidity levels. Air plants that are kept in a high humidity environment (such as the bathroom) will not need to be watered as often as those that are kept in a low humidity environment.

3.     Amount Is Key

How much water you give your Air Plant depends on a number of factors, including the type of plant, its location, and the climate where you live. But as a general rule, you should aim to water your air plant regularly, but not too often. If it’s kept in a high humidity environment, you may need to water once every 2-3 weeks.

Air plant being mist.
How much water you give your Air Plant depends on a number of factors.

However, if it’s an Air Plant that prefers drier climates, aim to water at least once per week. Because there are no roots involved with air plants, they will not absorb too much water and the excess can simply run off.

4.  Use Filtered or Room-Temperature Water

When watering your air plant, it’s important to use filtered or room-temperature water. Tap water can contain chlorine and other chemicals that can be harmful to your plants. On the other hand, hot water can cause the leaves of your air plant to wilt.

Room temperature water is also important because cold water can shock the plant’s system and cause it to lose its leaves. You do not want to give your air plant a cold shower. When using tap water, let it sit for 24 hours prior to using so that the chlorine can evaporate.

5.     Follow a Strict Watering Schedule

Watering should happen once every 1-2 weeks depending on the climate where you live (more often in warmer climates). Don’t let the roots dry out. When in doubt, underwater rather than overwater.

6.     Use a Watering Can

When watering your air plant, be sure to use a watering can with a fine nozzle. This will help you to avoid getting water on the leaves of your plant, which can cause them to rot. Remember, there are no roots involved, so you don’t want to soak the plant.

A watering can.
Be sure to use a watering can with a fine nozzle, because this will help you to avoid getting water on the leaves of your plant.

7.     Water at the Base of The Plant.

When watering your air plant, avoid getting water on or near the leaves themselves; while they do not absorb much water and can easily dry back out, water tends to stay and cause rot if it sits on a leaf for too long. Instead, water at the base of the plant near the roots.

8.     Be Patient

It may take a little while for you to find the right watering schedule for your air plant. Experimentation is key, but once you find a rhythm that works for both you and your air plant, be sure to stick to it so your plant can thrive.

If you are traveling, place your Air Plant in an air-tight container with a damp paper towel to keep it moist. This will help to keep it from drying out while you’re away.

9.     Avoid Overwatering

Overwatering is the greatest sin you can commit against your air plant. Remember, they don’t have roots to absorb water and will quickly drown if you give them too much. When in doubt, underwater rather than overwater.

A plant being watered.
Overwatering is the greatest sin you can commit against your plant.

To avoid overwatering (be especially careful in the summer months), put your Air Plant into a bowl or saucer of water for 30 seconds. The surface of the roots should be moist, but not soaking wet. Then remove it from the bowl and within 5-10 minutes place it back in its original position where it can continue to dry out and breathe.

10. Keep the Moss Moist At All Times

If you’re using moss for your air plant, make sure to keep it moist at all times. The moss should never be allowed to dry out. However, it also should not be sitting in water for too long. If air cannot infiltrate the container holding the moss (which is recommended), the roots of your air plant will remain wet and eventually rot.

To rehydrate dried out sphagnum moss, place in water for 30 seconds and then spread the moss back over the air plant roots with your fingers. It is important to keep the moss moist at all times.

11.  Timing is Key

Before watering your air plant, wait until the tillandsia feels light before watering. They should never feel heavy or soggy. Remember that air plants absorb water into their leaves, so they will feel light after watering even though they may still be wet inside. A gentle shake should cause any excess water to fall off (if it does not, you might actually be watering your plant too much). If the air plant is severely dehydrated it may take up to 24 hours for it to absorb the water you just gave it.

Watering the Air Plant Using the Soaking Method

The soaking method is one of the most effective ways to get water into the interior of your air plant. It involves placing your plant into a container with just enough water to cover its leaves and then letting it sit in that water for 30 seconds-5 minutes. When using this method, follow these steps:

Watering Air plant using soaking method.
This method is one of the most effective ways to get water into the interior of your air plant.

-Remove your air plant from its pot and place it in a container that is just deep enough to cover the leaves

-Fill a bowl or saucer with water and place the container with your air plant in it

-Wait for 30 seconds to 5 minutes, then remove your air plant from the water

-If excess water does not fall from the plant, gently shake it out

-Place your air plant back in its original position to continue to dry

If using this method, try not to leave your plant sitting in water for too long. This is because the roots of your air plant do not absorb water and can easily rot if they are left submerged for too long. Remember to use a container that is deep enough to submerge the entire plant, but shallow enough that the roots can still dry out quickly.

Air Plants That Do Not Need Soaking

While soaking is a good method to water most air plant varieties, there are a few that do not need it. These plants should be watered using the misting method (described below) every other day rather than daily. These varieties include:

-Bromeliads

-Spanish moss

-Orchids

-Pincushion cacti

Misting Your Air Plant

If your air plant does not need to be soaked, you can water them by misting. The easiest way to do this would be to use a spray bottle filled with water.

Simply put your air plant in the sink and spray it daily until it is moist (do not soak). Mist these plants about 1-2 times per day for 30 seconds at a time. If you are worried about over-watering, simply let the plant air dry in between showers.

Remember that it does not take much water to moisten an air plant. Don’t feel like you need to fill a bowl with water every time you want to mist your plants – just wait until they are completely dry and mist them for a few seconds.

Aerating Your Air Plants Between Soakings

In general, air plants only need to be soaked once or twice a week. You don’t have to let them dry out completely in between waterings, but you also shouldn’t leave them soaking for more than a few days at a time either. To aerate the roots between waterings, leave your plant on a windowsill or some other warm, sunny location out of direct sunlight.

If you live in a humid climate, it is even more important to give your plants periods of aeration between soakings. This will help them dry out properly so they don’t rot from being overly moist.

Conclusion

With just a little bit of TLC, your air plant can bring the beauty of nature indoors and add some life to your décor. Follow these simple golden rules for watering an air plant and you’re sure to have a happy, healthy plant on your hands.

Air plants are unique in that they don’t require soil to grow, but still need water. Since these plants thrive on air and direct sunlight, it’s important to learn how to take care of them properly so they stay healthy.