How to Easily propagate Aeonium Plant?

Aeoniums are small shrub-like or tree-like plants consisting of long, branched and short, stubby, and unbranched species. The hardy succulents are best known for their conspicuous rosettes, which grow from a single stem. 

The leaf rosettes which branch at the ends look like giant flowers. Aeoniums reproduce by branching out and forming offsets from a solitary flower head. Unlike most succulents which thrive during summer, aeoniums do best in winter or spring. 

Hot and dry climates activate dormancy in Aeoniums characterized by curled and droopy leaves. For this reason, propagation of Aeoniums is most effective when done while the plant is actively growing, usually in autumn. If you take cuttings in summer while the Aeoniums are dormant, they will not root.

Ways of Propagating Aeonium

Before you get started, you will need:

  • Pruning Shears
  • Plastic Wrap
  • Containers
  • Rubbing Alcohol
  • Perlite
  • Potting Mix recommended for Cacti and Succulents
  • Plastic Tray

There are various methods of propagating Aeonium, which we will discuss in detail below:

Seed Propagation of Aeonium

Seed propagation is only applicable for unbranched species. Aeonium blooms develop slowly and start as a swelling on the leaves. After some time, flower stalks emerge from the apex of the swelling leading to bountiful flowers. Though the tiny daisy-like flowers are breathtaking, most Aeonium plants die shortly after blooming.

After the Aeonium blooms, collect the seeds and leave them in a paper bag to dry. Next, fill a shallow plastic tray with a root blend containing a good succulent soil mix. You can either buy a ready-made blend or come up with your own using two parts coarse sand and one part pumice.

Seeds on hand.
Seed propagation is only applicable for unbranched species.

Place your seeds on the mix and scatter them evenly. Cover the seeds with more potting mix and water the tray completely. Move the pot to a bright but shaded area and cover it with plastic wrap. The plastic wrap will help keep the potting mix wet until germination occurs. Once germination begins, get rid of the plastic wrap.

When the seedlings have reached about half an inch in width, transfer each seedling to its nursery pot. The best pot size would be at least two inches. As the plant continues growing, transfer it to the next container size. Maintain the soil level to avoid burying the plant.

Propagation of Aeonium Through Stem Cuttings

First, sterilize the pruning shears by immersing in rubbing alcohol. Next, figure out the size of the stem cutting you would like. For tree-like Aeoniums, cut at least 5 inches. But for smaller shrub-like varieties, you can take at most a half-inch cuttings. The piece of the stem should contain the leaf rosette. 

Place the stem cutting in a shaded place for a few days to allow the wound to heal. Depending on how thick the succulent is, you can give the cutting between three to seven days. When you allow the cut to heal, it helps prevent rot and stops the cutting from excessive water consumption.
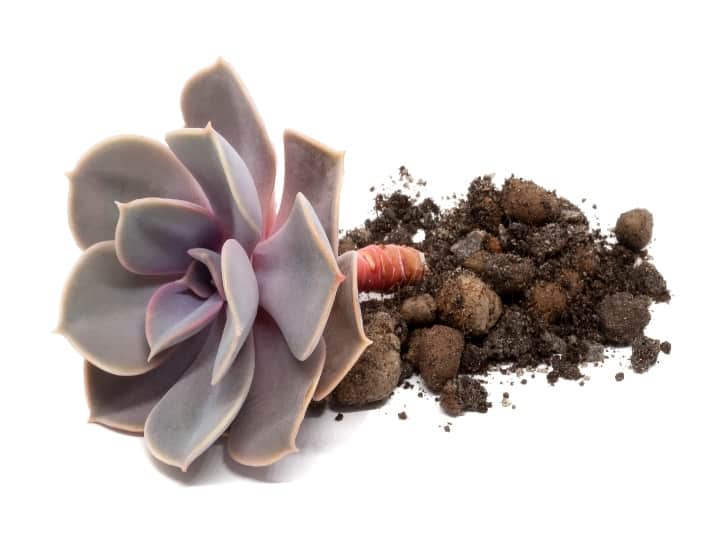
A stem of a plant with soil.
The piece of the stem should contain the leaf rosette. 

Once your cuttings have been calloused over, fill a clean container with cacti and succulent mix plus perlite. Blend the mixture well and slightly moisten it. Remember to use a container with draining holes at the base; the pot should be large enough to accommodate the cutting. Plant the cutting in the rooting medium and sink it just enough to hold the cutting uprightly.

Move the container to a bright spot where the cutting can get indirect light. Slightly water your cutting at least once every week. Once your Aeonium develops roots, water it thoroughly and ensure the soil surface is completely dry before watering again.

Propagation of Aeoniums by Division

Propagation by division involves cutting through the root of the Aeonium, usually when the plant has become too large for its pot. If the plant is not too big, use the usual cutting method. First, pull out the Aeonium to take a division from it. To remove the plant, tip the container on one side and smack the base using your hand to release it. Once released, shake the dirt off.

Select a branch that goes right into the root. Start the division at the intersection of the stem and root. Do not cut the entire root, just the part aligned with the stem. Use a sterilized cutting tool to avoid spreading any infection in the plant membranes. You can sterilize your knife or shear by boiling or dipping in alcohol. Allow the cutting tool to dry before using it. 
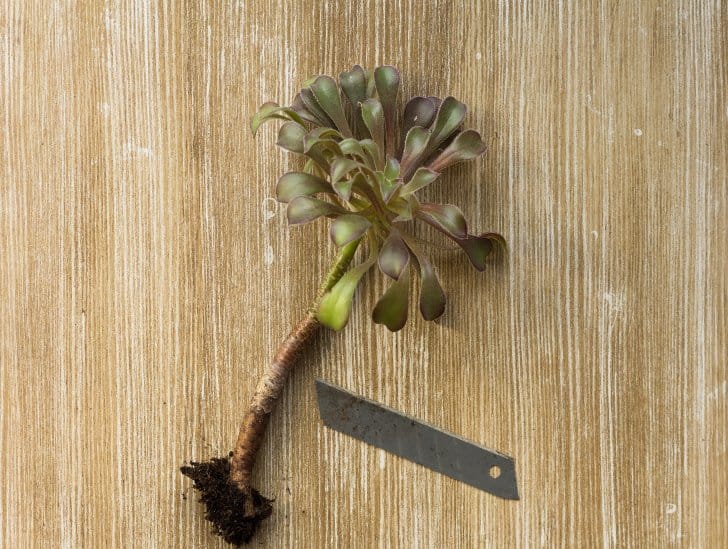
Aeonium out of the pot with a cutting tool.
Do not cut the entire root, just the part aligned with the stem.

Once you decide on the division point, cut down the crux of the plant, ensuring that the cut is straight. Now you have two: the Mother plant and the propagate. Repot the original plant and stick your Aeonium cutting in a potting soil specifically for succulents. 

The succulent blend should be very well-drained. You can also opt to dip the cutting in rooting hormone first, then put it in the soil blend. Rooting hormone is not necessary but can help speed up growth. Monitor your Aeonium regularly and ensure that you provide its environmental requirements for the best results.

Propagating Aeoniums Through Leaves

Propagation of Aeoniums using leaves is a tried and tested method but can take a long time to mature. For greater chances of success, use thick leaves. To get started, take a whole leaf-cutting inclusive of the node.

Twist off the leaves gently using your fingers. Allow the leaf cuttings to dry for a few days. Next, place the leaf in your preferred medium, either water or potting soil blend. Move your container to a sunny spot and wait for the roots to grow.

Beheading Propagation of Aeoniums

Beheading of Aeoniums involves cutting the long or small head off. After cutting the head, please leave it dry in a cool area. You can either put it in soil or water and wait for rooting. If you use soil as a medium, ensure that the stem is covered with some soil. 

Ensure you provide adequate and scattered lighting and water the plant once the top inch of the soil is dry. Later on, the plants take root, and the leaves take on a shiny appearance. You can now transfer the plants into their pots.

The Best Propagation Mediums for Aeonium

Aeoniums, like all other succulents, are hardy plants. They can survive without soil and even grow on rocks and peat moss. However, once the plants have rooted, they outgrow their containers and should be transferred to a more suitable medium, preferably a succulent potting mix.

Soil

The type of soil you use for your succulents will determine how much water is retained. When selecting a potting mix, go for one that can drain well because Aeoniums require well-draining soil. Choose porous soil so that it can completely dry out.

An ideal succulent soil considers simple root development by taking brisk air and water exchange into account. Succulent mixes are rich in the natural matter and inorganic elements. Inorganic materials include pumice and perlite, which promote soil aeration. Materials like coarse sand and gravel control the potting medium’s water. 

Different succulent plants propagated on a soil medium.
The type of soil you use for your succulents will determine how much water is retained.

You can buy readily available succulent potting mixes which contain peat moss, perlite and compost. We do not recommend regular potting soil because it contains too much organic matter, retaining moisture. Equal parts of a cactus potting mix blended with perlite for enhanced drainage. However, adding perlite or pumice can make the potting soil more porous. 

To make your potting mix, you will need:

  • Succulent Mix
  • Perlite
  • Peat Moss 
  • Coarse Sand
  • Ground Fir Bark

If you use the above ingredients, there are three blend options.

  1. Mix equal parts of potting mix and perlite. Blend until the texture is coarse and falls apart when squeezed. If it forms a lump, please add more perlite.
  2. Mix potting soil with one perlite and gravel(2:1). To test if the blend is well combined, wet the soil and feel the texture. An excellent mix should feel rough.
  3. Combine peat moss and ground fir bark equally to create the base potting blend. Mix two parts of the base potting blend with coarse sand.

The soil pH should be slightly acidic with a range of around 5.5 to 7.0. You can add horticultural lime if the soil is too acidic or white vinegar if too alkaline.

Water

Aeoniums can be successfully propagated in water. Some people argue that water propagation is easier than soil propagation. Firstly, take your cuttings and let them dry for some days. The cuttings could be healthy leaves or leggy stem cuttings. Fill translucent jars with water and cover with clear plastic. Prick a hole at the centre of the plastic. 

You can use plain tap water, purified drinking water or distilled water. Make sure that your cutting tip is in direct contact with the water. Leave the cuttings in a sunny spot for a few weeks and change the water if it has a murky appearance.

Sanseveria plant water propagation.
Aeoniums can be successfully propagated in water. The cuttings could be healthy leaves or leggy stem cuttings.

Aeoniums take very long to root in water; you might have to wait for at least six weeks. Even then, the roots will be minimal. You can transfer the rooted cuttings to the soil but dry them first. 

Conclusion

Propagation outcome depends on the environment. If you want to multiply your succulents, Aeoniums will not give you a hard time because they are easy plants with unique qualities.

Ultimate Guide: How to Care for Madagascar Palm

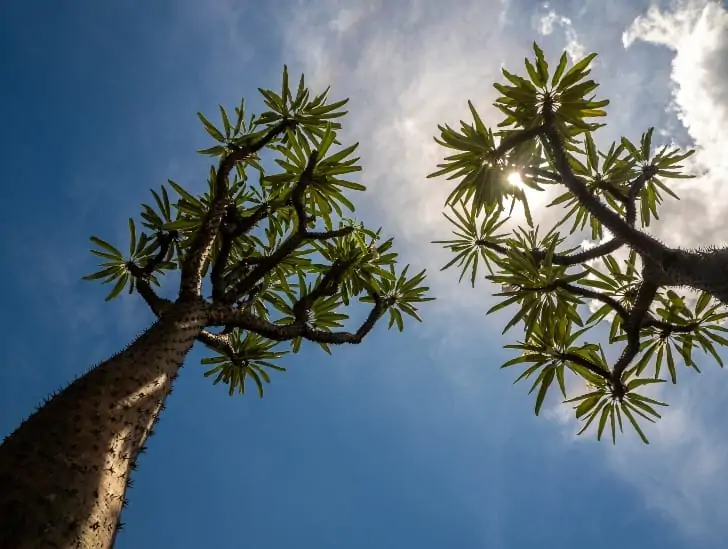
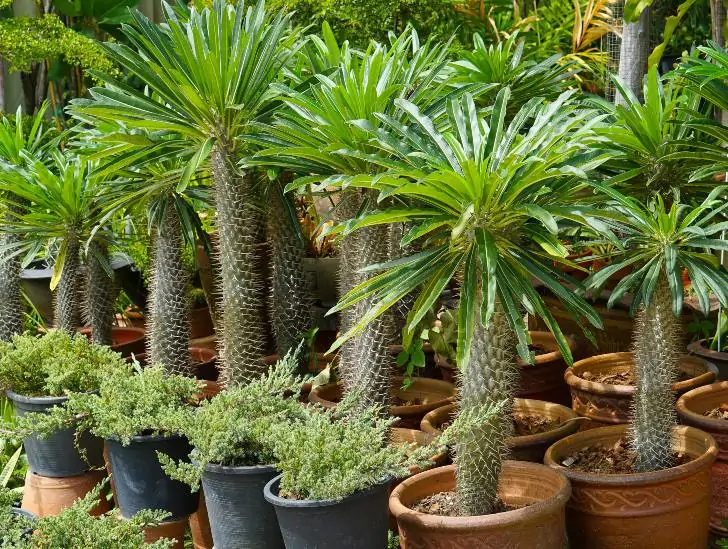
Native to Southern parts of Madagascar, the Madagascar palm is a member of the succulent family and not a “palm” tree as its name suggests. Madagascar palm is adapted to surviving in relatively warmer areas as an outdoor plant and cooler regions as an indoor plant. It grows to about six feet indoors and up to 16 feet outdoors. Its trunk is covered with thick spines that appear as shiny thorns. Madagascar palm is a low-maintenance succulent that can be an incredible addition to your home.

So, how do you care for Madagascar palm? To keep your Madagascar palm happy, have it on the dry side and only water it when the potting mix is completely dry. Like other succulents, you need to ensure the soil you use is highly porous and well-draining. For fertilizer, only feed your plant with a balanced houseplant fertilizer at the beginning of spring or summer. If possible, grow your plant in full light and relatively warm temperatures to achieve the best results. For indoor plants, position them on a west or south-facing window.

Are you planning to add Madagascar palm to your plant collection? If so, read on to find out what you need to do to keep your plant healthy and happy.

Basic Facts about the Madagascar Palm

The scientific name of Madagascar palm is Pancypodium lamerei, and it belongs to the Apocynaceae family. The succulent has a very distinct appearance, with its trunk filled with spines. It can grow to a height of up to 16 feet and 2 feet wide when provided with the right growing conditions.

When the time comes, this succulent tree will bloom throughout summer, putting on a spectacular show. Its flowers are usually white and quite large.

If you are growing the succulent indoors, position it near a west or south-facing window where it can get maximum light exposure. However, you need to remember that the plant can become tall with time. So, ensure you provide it with enough space to develop correctly. 

Madagascar Palm white flower.
Its flowers are usually white and quite large.

When planting them outdoors, it is recommended to plant them in a group but ensure they are well spaced. You should also ensure you plant them in areas far away from children since they are poisonous. Ensure no other high-maintenance plants are growing next to the Madagascar palm.

How to Care for the Madagascar Palm

Now that you have some background information about the Madagascar palm, let us highlight some things you need to do as part of the daily routine care to keep your plant happy.

1. Watering Needs

The Madagascar palm doesn’t require frequent watering because it is adapted to surviving in a relatively warmer climate. The plant is highly resistant to climatic changes and harsh weather conditions. In fact, they love the heat.

If you live in an area that experiences extreme winters, you don’t need to water your plant as often during the cold months; otherwise, you will cause root rot which is more dangerous than underwatering.

Full grown, Madagascar palm.
It grows to about six feet indoors and up to 16 feet outdoors.

Before watering a Madagascar palm, ensure the potting mix is completely dry. So, it is crucial to ensure you have a well-draining potting mix that allows water to drain out of the growing pot without damaging the plant roots.

Water your plant thoroughly during the hot summer months but stop watering completely when the leaves fall off.  When leaves fall, it means that the plant has enough water storage in its stem, and it is only looking for a way of minimizing water loss through transpiration.

In fact, one of the biggest threats to the overall health of your Madagascar palm is overwatering because it may result in root rot. It is easy to think that your plant requires watering when its trunk still contains plenty of it.

One of the physical signs of overwatering is breakage. If a long spindly trunk of your plant suddenly snaps in half and tips over, it could be a sign of overwatering. This may also happen if you keep your plant in a spot with too much cold and not enough light.

2. Growing Location

Since the Madagascar palm is a sun-loving plant, it can take the full sun without any issues. The succulent is highly drought-resistant and ideal for xeriscaping in warm climates. So, if you are growing it indoors, choose a spot that receives plenty of bright light (whether natural or artificial).

Small Madagascar Palm plant.
It can take the full sun without any issues.

If you are growing it outdoors, ensure it is far away from tall plants that may provide unnecessary shade. Keep your plant slightly moist so that it doesn’t shed its leaves. The succulent will only shed its leaves when it is too dry. Make use of a humidity tray to keep the humidity levels high.Humidity trays are shallow trays filled with small stones and water at the bottom. Ensure the water in the tray doesn’t reach the bottom of the bonsai pot. As the water evaporates, it creates a relatively moist environment that keeps your plant moist.

3. Soil Requirements

The succulent can adapt relatively well in porous soils with good soil-drainage properties. It can grow in the conventional sandy soil of old dunes near the ocean or sea, in schist, limestone, and so on.  For better results, plant it in cactus compost but maintain a mildly acidic to a mildly alkaline pH of between 6.0 and 7.7.    

For potting, go for clay pots with plenty of drainage holes over plastic pots to keep the succulent on the dry side. The pot size should be slightly larger than the root ball of your Madagascar palm. 

4. Temperature and Light Requirements

Madagascar palm is a sun-loving succulent. So, it prefers a relatively warmer and bright-lit location. When positioning your plant indoors, place it on a west or south-facing window where it can receive lots of full sunlight.

If you live in an area that doesn’t receive plenty of natural sunlight, consider using artificial grow lights to keep your plant happy. If you are using artificial grow lights, keep them on for at least 16 hours a day and let the plant rest in total darkness for the remaining eight hours.

Plant Exposed to a sunlight.
It prefers a relatively warmer and bright-lit location.

Indoor Madagascar palm plants should also be kept near a heating vent or register to ensure it stays warm during the cold winter months. During winter, make sure the temperature doesn’t fall below 55oF.

If you maintain relatively warm temperatures and keep your plant moist, it will never shade its leaves.  The leaves add beauty and serenity to your indoor spaces.

5. Fertilizer

Feed your Madagascar palm with a general-purpose liquid houseplant fertilizer at the beginning of spring. The fertilizer must be diluted to half-strength. You can also use low nitrogen liquid fertilizer but you will be forced to feed your plant every four to five weeks.

Whether you are growing your plants indoors or outdoors, don’t fertilize it in winter or fall because it is a period of dormancy and doesn’t require nutrients. You should only start watering and feeding it when you spot new growth.

With proper watering and fertilization, a Madagascar palm succulent will grow approximately 12 inches per year.

6. Disease and Pest Control

Extremely cold weather can affect a Madagascar palm quite significantly. Your plant may rot and put on a soft, mushy, and withered appearance. If you notice such signs, remove the damaged part and let your plant rest easy.

This succulent is also prone to mealybug infestation. These insects feed on the leaves of the plant. When you notice appearance of black spots on the leaves, it could be a sign of mealybug infestation.

Mealybug on the leaf.
These insects feed on the leaves of the plant.

To deal with the infestation, simply pull off the affected leaves and you are good to go. In some cases, there might be an infestation of white fly larvae or mites that attach themselves at the base of the plant. This can easily be cleared out with insecticides and fungicides in the form of systemic poisons, soapy rinses, and gentle sprays.

7. Pruning

Pruning is not an essential task for a Madagascar palm. The plant will shed its leaves naturally to preserve the absorbed water. Shedding of leaves mostly happens during the hot summer months, but you can stop it by keeping your plant moist.

While the plant typically grows on a single trunk, sometimes it will branch out after blooming or if the main stem is injured.

To maintain a relatively small size plant or induce branching, consider pruning the tree with a lot of care. Snap portions of its top with a sterile knife or pair of scissors to prevent infection. Monitor it closely after pruning to see if it shows any signs of infection for you to act quickly.

Summary

The Madagascar palm is one of the best succulents to have at home. The plant does well both indoors and outdoors. It can be placed around other succulents growing in full sunlight, and it will still thrive with minimal care.

The most important thing you need to do is ensure you provide your plant with the right conditions for it to stay healthy and happy. So, if you have decided to add the Madagascar palm to your plant collection, your time is now!