The Surprising Benefits of Stressing Your Succulents

Old discolored vase with succulent.

Succulents remain one of the most popular plants in the world. These plants are relatively easy to care for and require minimal maintenance to thrive. Although succulents seem like the perfect low-maintenance plant, they benefit from a little bit of stress. This can be sun stress or water stress depending on the type of succulent you have.

So, what are the surprising benefits of stressing succulents? Stressing succulents enhances coloration, promotes growth, and increases drought tolerance among your succulents. This technique may induce unique morphological changes that can trigger visually captivating traits in your plants. Succulent stress can also encourage root development and help to boost overall health and hardiness. For instance, sun-stressing succulents is a great way to bring out beautiful colors. As the leaves of certain species get more sunlight, they turn brilliant shades of magenta, orange, red or yellow.

This blog post discusses some of the surprising benefits of stressing your succulents. Read on to find out everything you need to know.

What Is Succulent Stress?

Succulent stress might sound like a negative condition, but it’s a technique used by succulent enthusiasts to enhance the beauty of their plants.

The term refers to the process of deliberately exposing succulents to certain conditions that cause them to change color, a phenomenon often referred to as “blushing” or “color stress.”

In their native habitats, succulents are often exposed to harsh conditions such as intense sunlight, low water availability, and temperature fluctuations.

These conditions can cause these plants to produce pigments such as anthocyanins and carotenoids, which act as sunscreen and protect the plant cells from damage.

These pigments also cause the plants to display vibrant colors, ranging from deep reds and purples to bright oranges and yellows.

A dry yellow leaf.
The three most common types of stress for succulents are light, water, nutrient, and temperature.

When grown in ideal conditions indoors or in shaded outdoor areas, many succulents retain the green color.

However, by mimicking the harsh conditions of their natural habitats, you can induce stress in your succulents and bring out these beautiful colors.

The three most common types of stress for succulents are light, water, nutrient, and temperature. Below is a summary of each:

Sun Stress

One of the most common ways to induce succulent stress is through increased sunlight exposure.

Gradually moving your succulent to a location that receives more direct sunlight can trigger the production of protective pigments and result in color changes.

However, it’s important to make this transition slowly to prevent sunburn.

Start by exposing the plant to an additional hour of sunlight each day and monitor the plant closely for signs of sunburn, such as white or brown patches on the leaves.

Water Stress

Succulents are drought-tolerant plants, and reducing their water intake can stimulate stress responses.

To induce water stress, extend the time between watering sessions and allow the soil to dry out completely before watering again.

Be careful not to overdo it, though, as prolonged periods of drought can cause the plant to wilt and eventually die.

Temperature Stress

Exposing succulents to cooler temperatures, particularly at night, can induce stress and bring out vibrant colors.
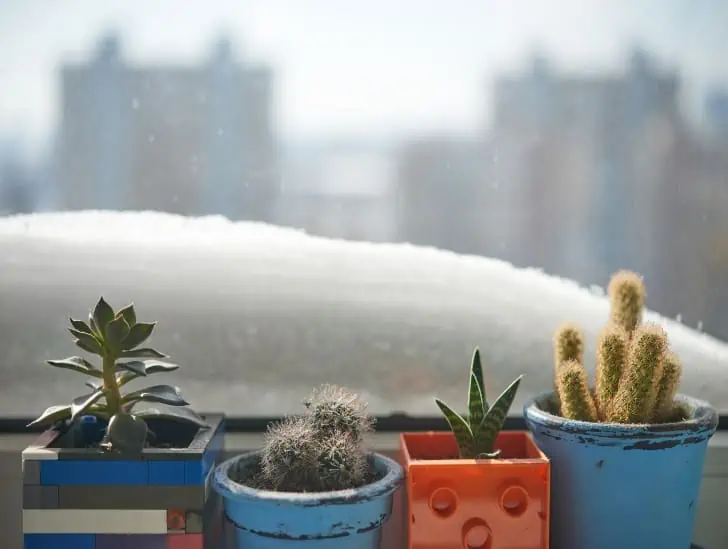
Mini succulent in the windowsill furing the winter.
Be sure to research the specific needs of your plants before attempting this method.

This method works best in the fall and winter when cooler temperatures occur naturally.

Keep in mind, however, that not all succulents can tolerate freezing temperatures, so be sure to research the specific needs of your plants before attempting this method.

Nutrient Stress

Limiting the amount of nutrients available to your succulent or overfertilizing in some cases can also induce stress. This can be achieved by using a low-nutrient soil mix and limiting the use of fertilizers.

However, nutrient stress should be done cautiously since prolonged nutrient deficiency can lead to poor plant health.

What Are the Surprising Benefits of Stressing Succulents?

Now that we’ve discussed the basics of stressing succulents, let’s take a look at some of the benefits this technique can offer.

1. Enhanced Coloration

Stressing succulents can enhance their coloration through several mechanisms. These plants possess pigments such as anthocyanins and carotenoids, contributing to their colors.

Intense or direct sunlight serves as a key stressor, prompting succulents to produce more pigments as a protective response.

The increased pigment production helps shield the plants from excessive light and potential sun damage. Ultraviolet (UV) radiation, which is part of sunlight, also acts as a stressor, causing succulents to produce higher amounts of protective pigments.

These pigments absorb and dissipate harmful UV rays. As a result, succulents exhibit deeper or more vibrant colors in their leaves or stems.

Temperature fluctuations can also impact succulent coloration. Cooler temperatures induce the production of more anthocyanins, leading to reddish or purplish tones. This response helps protect the plants from damage caused by low temperatures.

Water stress is another crucial factor. Limited watering or drought conditions prompt succulents to produce more pigments as a protective measure.

The reduced availability of water triggers an increased pigment production, shielding the tissues from excessive sunlight and reducing water loss through evaporation.

Nutrient availability plays a role as well. Certain nutrients, such as nitrogen and phosphorus, are essential for proper pigment synthesis.

Adequate nutrient levels support optimal pigment production, resulting in intense and rich coloration.

A succulent on a windowsill.
Water stress is another crucial factor.

Conversely, nutrient deficiencies can compromise pigment production, leading to less vibrant colors in succulents.

It’s important to note that the specific color changes observed in succulents can vary depending on factors like species, genetics, and environmental conditions.

While stressing succulents enhances coloration, it’s crucial to balance the stress levels to avoid excessive harm to the plants.

2. Promotes Compact Growth

You can promote compact growth and encourage a fuller, bushier appearance by subjecting succulents to controlled stress, such as limited water or nutrients.

This response is due to the hormone ethylene produced in plants when they experience stress or limited resources.

Ethylene produces a thickening effect on stems, encouraging branch formation. It also influences root development, stimulating the production of new roots for better nutrient uptake.

As a result, stressed succulents tend to form a bushier and denser shape, creating an attractive aesthetic.

3. Promotes Plant Hardiness

Stressing succulents can also enhance their hardiness by increasing their tolerance to different conditions. Constant stress exposure helps build the plant’s resilience and ability to survive in harsher environments.

For example, intense sunlight activates photo-protective pathways that allow plants to tolerate high light exposure levels better.

Similarly, water stress increases the plant’s tolerance to drought conditions and other environmental stressors.

Exposing succulents to cooler temperatures can also strengthen their cells and make them more resilient against cold weather or frost.

In the same way, nutrient deficiencies trigger an adaptation response in succulents that helps them cope with nutrient-poor environments.

Ultimately, stressing succulents strengthens their cellular mechanisms and makes them more capable of withstanding environmental stressors.

4. Induces Unique Morphological Changes

Stressing succulents can trigger distinct morphological changes, making them even more visually captivating.

For example, certain stressors can cause the development of interesting growth patterns, like crested or monstrose forms, where the stems become twisted and contorted.

A succulent with brown leaves.
Exposure to stressors can cause changes in their activity, inducing unusual stem forms or other morphological features.

This occurs due to a mutation in the meristematic cells responsible for plant growth and development.

Exposure to stressors can cause changes in their activity, inducing unusual stem forms or other morphological features that add to the aesthetic appeal of succulents.

Other unique morphological changes that may occur as a result of stressing succulents include variegation, where leaves or stems display different colors, and pachyforms, where the plants become more densely packed with thicker stems.

5. Encourages Root Development

Controlled stress can stimulate the growth and development of succulent roots. You can promote a more extensive and robust root system by stressing the plants slightly through techniques such as root pruning or partial water withholding.

Stronger roots allow succulents to better absorb moisture and nutrients from the soil, boosting their health.

Stressing succulents can also help them recover more quickly after repotting or transplanting. Increasing the plants’ root strength can ensure faster recovery and better adaptation to a new environment.

6. Increased Resilience to Pests and Diseases

Stressing succulents can enhance their resilience to pests and diseases. When succulents undergo controlled stress, they often develop stronger cell walls and produce secondary metabolites, such as phytochemicals.

These defense mechanisms can deter pests and inhibit the growth of pathogens, making the plants more resistant to damage.

Furthermore, stressing succulents may reduce their susceptibility to certain diseases. This is due to the increased production of protective pigments, which help shield the plants from pathogen damage.

7. Facilitates Propagation

Stressing succulents can promote successful propagation through various methods. For example, by subjecting a succulent to partial stem or leaf damage, the stress signals can trigger the plant’s natural response to generate new roots and shoots.

This process, known as vegetative propagation, can be a reliable and effective way to propagate and multiply succulents, allowing you to expand your succulent collection.

Cutting a crassula ovata.
Stressing succulents can promote successful propagation through various methods.

Keep in mind that it’s important to follow proper propagation techniques and take good care of the plants for successful outcomes.

Final Thoughts

Stressing succulents can effectively encourage coloration, promote compact growth, induce unique morphological changes, and enhance their resilience.

This technique can be achieved through exposure to different types of stress, such as intense sunlight, water deprivation, cooler temperatures, and nutrient deficiencies.

However, it’s important to moderate the stress levels and avoid over-stressing the plants.

Help! Mushrooms are Growing in My Terrarium – What’s the Solution?

Mushroom on an open terrarium.

Have you noticed the appearance of mushrooms in your terrarium? You must be surprised at their sight and wondering how they found their way into your terrarium. The truth is that mushroom spores can appear spontaneously in any terrarium and hitch a ride on your plants. The spores can find their way through the air, and it can be hard to stop them if you use an unsealed terrarium. But the big question is, can mushrooms cause harm to your terrarium? If so, what can you do to get rid of them? Let us find out.

So, why are mushrooms growing in my terrarium, and what is the solution? Mushrooms are fungi, and one thing you need to know is that fungi spores come from nowhere and can spread quite easily. In most cases, the wind carries them to your terrarium, and that is how they develop into mushrooms. Since they feed on decaying organic matter only, the mushrooms will die if they don’t get a constant supply of nutrients. You don’t need to worry about mushrooms growing in your terrarium since they can be beneficial in several ways. You should only get concerned if you spot the toxic variety in your terrarium.

This blog post discusses everything you need to know about the appearance of mushrooms in your terrarium and what you can do about it. Read on to learn more.

Understanding the Mushroom and Fungi Ecosystem

Mushrooms are intriguing organisms that have captured human curiosity for centuries. Their sudden appearance and mysterious growth patterns can surprise and confuse individuals, especially when found unexpectedly in plant terrariums.

The best way to prevent them from growing in your terrarium is to understand how the mushroom and fungi ecosystem works.

Fungi constitute a distinct kingdom in the natural world, separate from plants and animals. They play a vital role in ecosystems, aiding nutrient recycling and decomposition processes.

Fungi are crucial for maintaining soil fertility, supporting the growth of plants, and promoting overall biodiversity.

A cylindrical closed terrarium.
When conditions are favorable, spores land on suitable substrates, such as the soil or decaying organic matter in a terrarium.

Plant terrariums are enclosed environments that provide an ideal setting for some succulents to thrive. However, mushrooms may occasionally appear despite efforts to maintain a controlled environment.

These mushrooms, commonly referred to as “terrarium mushrooms,” emerge due to the presence of fungal spores in the soil or organic matter used in the terrarium setup.

Fungi reproduce using spores, which are tiny, lightweight structures released into the environment.

These spores are present almost everywhere, including the air we breathe. When conditions are favorable, spores land on suitable substrates, such as the soil or decaying organic matter in a terrarium.

Mushrooms require specific environmental conditions to grow; terrariums can inadvertently provide these conditions.

Factors such as humidity, moisture levels, organic material, and temperature fluctuations can create an environment conducive to mushroom growth. Even a small imbalance in these factors can trigger the appearance of mushrooms.

Removing Mushrooms from a Plant Terrarium

The key to controlling mushrooms in a terrarium lies in understanding the conditions that promote their growth. To remove mushrooms from a terrarium, start by addressing any environmental imbalances.

Adjust lighting, ventilation, and temperature levels as needed to create an unfavorable environment for mushroom growth.

Also, check the soil in your terrarium for moisture levels and adjust if necessary. The ideal moisture level is somewhere between 40% and 70%. If the levels are too high, use a dehumidifier or open the lid to reduce humidity.

On the other hand, if moisture levels are too low, mist your plants with water daily until mushrooms disappear.

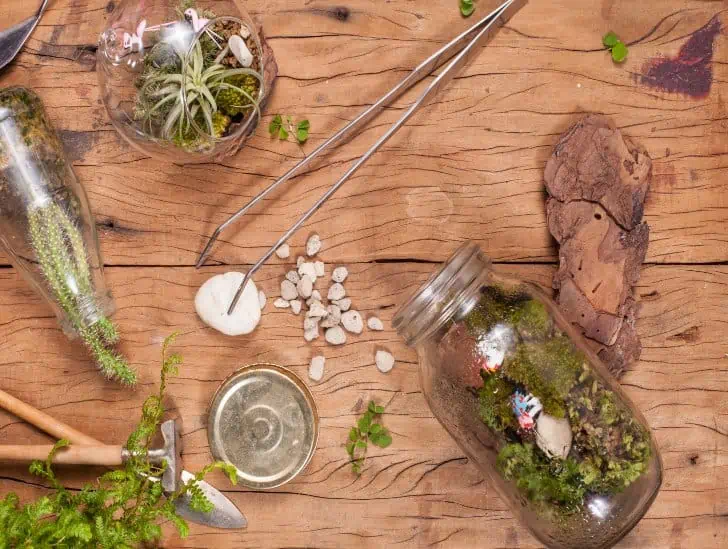
Terrarium material set.
To remove mushrooms from a terrarium, start by addressing any environmental imbalances.

If these efforts are unsuccessful, you can manually remove mushrooms from the terrarium. Use gloves and a soft brush to remove them gently.

Be careful not to break the stems, as this could spread spores and trigger more mushroom growth in the future.

Finally, consider using fungicides or other chemical agents to reduce mushroom populations in your terrarium. However, use caution when using chemical agents as they may be harmful to plants.

Can the Mushrooms Disappear on Their Own?

Yes, mushrooms may disappear on their own, given the right environmental conditions. As mentioned earlier, mushrooms require specific environmental conditions to survive and thrive.

If these conditions are not in your terrarium for a prolonged period, the fungi will eventually die off on their own.

However, it is essential to note that they can re-appear at any time due to the presence of spores in the environment.

It is, therefore, essential to take measures to prevent mushrooms from growing in your terrarium and address any environmental imbalances that may be present.

What Are the Beneficial Aspects of Mushrooms in Terrariums?

The truth is that mushrooms growing in terrariums aren’t always bad. While it’s crucial to remove them when they appear, some mushroom species can benefit your plants and the environment within the terrarium.

For instance, certain types of mushrooms form symbiotic relationships with plants, providing essential nutrients and supporting their growth.

A garden terrarium with mushroom.
They come in various shapes, sizes, and colors, enhancing the overall aesthetics of the miniature ecosystem.

They decompose, breaking down dead plant matter and recycling nutrients into the soil. This recycling process supports the overall health of the terrarium ecosystem.

The presence of mushrooms in a terrarium can indicate the presence of healthy, well-balanced soil. It suggests the terrarium environment is rich in organic matter and actively supports microbial life.

Furthermore, mushrooms add a unique and visually appealing element to a terrarium. They come in various shapes, sizes, and colors, enhancing the overall aesthetics of the miniature ecosystem.

Addressing Concerns and Potential Risks

While mushrooms in a terrarium are generally harmless, it is essential to address a few concerns.

In some cases, mushrooms may compete with your plants for nutrients. However, the presence of mushrooms does not necessarily mean harm to the plants unless they start overpowering them or inhibiting their growth.

Although rare, toxic mushrooms can grow in a terrarium. To mitigate this risk, avoid introducing wild soil or organic matter into the terrarium and purchase soil mixes from reputable sources.

Sometimes mushroom growth can indicate excessive moisture levels or improper airflow, which may lead to mold growth or attract fungus gnats.

Monitoring the terrarium’s moisture levels and ensuring adequate ventilation can help prevent these issues.

Furthermore, mushrooms may create an unappealing appearance and disrupt the design of a terrarium. If this is a concern, consider removing them or using chemical agents to reduce mushroom populations in the terrarium.

Maintaining a Healthy Plant Terrarium

To maintain a healthy terrarium ecosystem while managing mushroom growth, consider the following tips:

  • Proper Drainage: Ensure that the terrarium has appropriate drainage to prevent water from stagnating, which can encourage mushroom growth.
  • Airflow: Allow for proper airflow within the terrarium by opening the lid occasionally or placing it in a well-ventilated area. This helps maintain optimal humidity levels and discourages excessive mushroom growth.
  • Soil Sterilization: Before introducing soil or organic matter into the terrarium, consider sterilizing it to minimize the introduction of fungal spores. This can be done by baking the soil in the oven or using other sterilization methods.
  • Regular Maintenance: Keep a close eye on the terrarium’s moisture levels, removing any excess water promptly. Trim or remove mushrooms if they become too numerous or impact the plants’ growth.

Can I Make a Mushroom Terrarium?

Yes, it is possible to make a terrarium specifically for mushroom growth. This type of terrarium requires special considerations and maintenance to ensure optimal conditions for fungal growth.

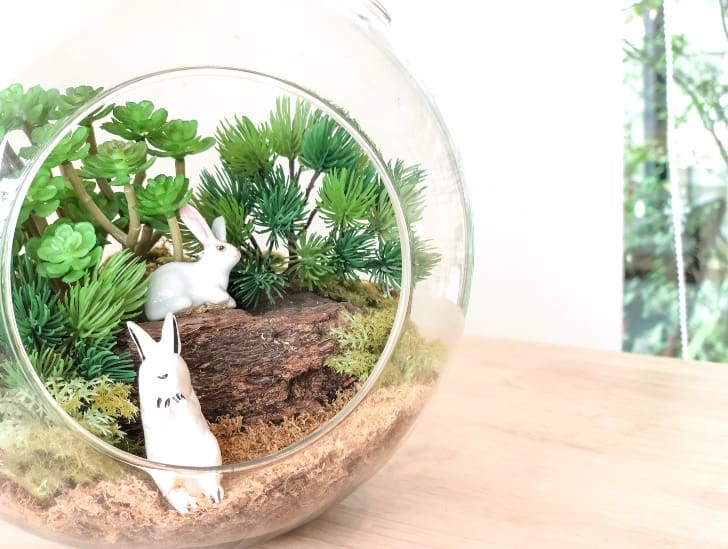
A Terrarium.
Once mushrooms start appearing, remove them as needed.

Select an appropriate container with adequate drainage holes to create a mushroom terrarium. It should also have a lid that can be opened or removed easily to allow airflow.

Fill the container with sterile potting soil or compost and add a few pieces of wood. Add some fungal spores to the soil and lightly mist the terrarium with water.

Place the terrarium in an area with indirect sunlight, preferably near a window. Monitor moisture levels regularly and adjust when necessary.

Once mushrooms start appearing, remove them as needed. They will eventually die off once the environment is no longer suitable for their growth, leaving behind fertile soil for other plants.

Can I Add Mushrooms to My Terrarium on Purpose?

If you want to add mushrooms to your terrarium on purpose, you can do so after creating the appropriate environment for them.

A open terrarium outdoor exposed to sunlight.
Researching the type of mushroom you plan on introducing is vital since some may be toxic or harmful.

Depending on the species of mushrooms, they may require specific environmental conditions such as moisture levels, light exposure, and temperature range.

Researching the type of mushroom you plan on introducing is vital since some may be toxic or harmful.

Additionally, remember that it can be challenging to control mushroom growth once they have colonized an area and regulate their populations when needed.

Final Thoughts

Mushrooms in terrariums can be a confusing and frustrating issue. Although mushrooms in your terrarium may indicate unhealthy conditions, some species can help your plants flourish.

The key to controlling mushroom growth is understanding the environmental factors that promote their growth and making necessary adjustments. Also, be careful when using chemical agents since they may be harmful to plants.

By following these tips and making appropriate modifications, you can keep mushrooms from growing in your terrarium and maintain a healthy environment for your plants.

How to Harvest Chives and Keep Them Thriving for Years to Come!

Chives

Chives are among the most popular herbs for gardeners around the world. These plants are relatively easy to plant and care for because they are perennial. They produce fragrant and flavorful leaves used to spice up different foods, while their flowers are a favorite nectar source for pollinators. The flowers usually put on a stunning display from late spring to late summer. Some people even use them as edging plants to make a statement. However, harvesting chives can be a bit tricky, especially for beginners.

So, how do you harvest chives and keep them growing for many years? Start harvesting chives once they reach at least one foot tall. This will ensure that there are plenty of leaves to cut. When harvesting, use scissors and cut the leaves at the base, leaving an inch or two above the soil line. Don’t be afraid to harvest liberally; even if you take off a third of the plant each time, it should continue growing season after season. Avoid harvesting before rainy days or during periods with high humidity because it may cause irreversible rot. Remember to deadhead any flowers that are past their prime.

This blog post serves as an easy-to-follow guide for harvesting chives. Read on to find out everything you need to know.

When Is the Best Time to Harvest Chives?

Before we get to the information on how to harvest chives, it is crucial to understand when to harvest them. Harvesting at the wrong time can be catastrophic to the herb.

It can also limit future growth and reduce the amount of leaves you harvest in the future. Remember that harvesting chives too soon may interfere with the flowering process as well.

A gardener harvesting a chives,
Chive harvesting can continue throughout the season if you treat your plant correctly.

Luckily, these herbs have a relatively long harvest period. Their tiny green spikes usually pop out of the soil in late autumn or early spring. Harvesting can start as soon as you spot the leaves since they are already three or four inches long.

Chive harvesting can continue throughout the season if you treat your plant correctly. This way, you can pick as many leaves as you want until the leaves succumb to fall’s first frost. It means you will have up to eight months of chive harvests if you play your cards right.

You can even harvest your chives year-round if you live in a relatively warm climate that doesn’t experience fall frosts. The most important thing is to harvest before the flowers start appearing from late spring to mid-summer.

What Is the Best Way to Harvest Chives?

Now that you understand when to harvest chives, you must learn how to do it. For starters, use a pair of scissors or garden shears and cut off the foliage close to its base. The leaves can be used fresh or frozen for later use.

Keeping the scissors clean and sharp while harvesting is essential since it can help you avoid damaging the plant’s tissue and leaves. Also, try not to harvest too many leaves in one go to avoid causing stunted growth.

Chives harvested on plate.
Keeping the scissors clean and sharp while harvesting is essential.

Since chives tend to be wispy, a gentle hand is necessary to ensure you don’t break or damage them. It is also vital to leave an inch or two of growth above the soil line so that it can continue regrowing throughout the season.

Once you have harvested enough, don’t forget to deadhead any flowers that are past their prime.

Can I Harvest Chives Without Using a Pair of Scissors?

The simple answer is yes. In fact, highly experienced gardeners don’t need any tools to harvest chives. Everything is done using bare hands.

Hand harvesting is easier because you only need to harvest a few leaves at a time. The leaves are easy to pinch off the herb with your thumb and forefinger.

Simply grab a little bundle of leaves as close to the base as possible and sever them with a flick of your wrist using a quick snapping motion.

Avoid pulling the leaves upwards because you may tug the herb right out of the potting mix. Always break the leaves by snapping them sideways.

Feel free to pinch the leaves between your thumbnail and the pad of your index finger if you want to harvest a few leaves.

This is the best harvesting method if you only want to harvest a few leaves to garnish your cup of soup or omelet.

How Do I Harvest Chives Using an Herb Snip?

Another popular way of harvesting chives is to use an herb snip. The tool looks like scissors but is designed to cut herbs and vegetables precisely.

Herb snips are the best choice if you want to harvest larger quantities of chives at once. But it is essential to be careful and not overharvest or damage the plant in the process.

When using this tool, ensure that you start snipping at the base of the plant and leave a bit of growth above the soil line.

Chives with scissor.
Herb snips are the best choice if you want to harvest larger quantities of chives at once.

You should also avoid cutting it too close to the soil because it will become more difficult for the herb to regrow and flourish in the future.

The best approach when using a snip herb is to start by securing the leaves together using a ponytail holder. Feel free to use a pipe cleaner, rubber band, or a long twist tie if you don’t have a ponytail holder.

The primary purpose of the ponytail holder is to keep all the leaves together, making it easy for you to cut them into small pieces for subsequent drying and storage.

Can I Harvest Chives When the Herb Is Blooming?

You may be wondering if it is okay to harvest chives when the herb is blooming. The answer to this question depends on your purpose.

If you are harvesting for culinary reasons, it is best to avoid harvesting during bloom time because the leaves have a strong and bitter flavor.

However, if you are harvesting for ornamental purposes, feel free to deadhead any flowers that are past their prime.

We also don’t recommend making heavy harvests when the plant is blooming. You can steal a few leaves for your use, but remember that you will be sifting through the flower stems to get a clean harvest.

Can I Harvest Chive Flowers?

One of the most fun things about this herb is that the entire plant is edible. Therefore, you can harvest the flowers, too.

The tiny and edible flowers are an excellent choice for salads, desserts, or cocktails. It is also possible to use them as a garnish and sprinkle them over dishes.

The flowers have a mild garlic flavor, adding an incredible texture to any dish you choose to pair them with.

Chives blooming.
You can harvest the flowers, too.

Just remember to harvest the flowers before they open up. The best time to pick them is when you can see the first signs of color popping out from between the petals. This should be at least three weeks after planting and around mid-spring.

Should I Harvest the Bulbs?

We were not joking when we said that the entire plant is edible. Most people don’t realize that chives also produce small bulblets at their base.

These tiny bulbs are very nutritious and can be harvested and eaten as well. They are usually more tender than the regular leaves, but they still have a mild garlic flavor, making them a great choice for soups or stir-fries.

Try to harvest the bulbs when their diameter is around five millimeters or more.

But always remember not to harvest all the bulbs at once. Leave some in the ground since they are vital for new growth and seasonal harvests.

How Can I Store My Chives After Harvesting?

After harvesting your chives, you must store them correctly to ensure they don’t go bad quickly.

The best way to store your harvest is by freezing them right away or drying them in the oven or a dehydrator.

Chives korean bundle.
You must store them correctly to ensure they don’t go bad quickly.

You can also dry your chives outdoors if temperatures are low enough. Place the leaves on a tray and cover them with a cheesecloth or mosquito net. The leaves should be dry in two to three days.

If you don’t want to freeze or dehydrate your harvest, feel free to store them in the refrigerator for up to three weeks.

Keep the harvested chives away from direct sunlight and humidity as much as possible.

Final Thoughts

Harvesting chives is relatively easy if done correctly. The most important thing is to start harvesting when the leaves reach at least one foot tall.

Use a pair of scissors or an herb snip and cut the foliage close to its base, leaving an inch or two above the soil line. Remember to avoid overharvesting since it could damage the herb.

Feel free to harvest the flowers and bulbs as well for culinary or ornamental purposes. After harvesting, you can store your harvest in the refrigerator, freezer, or oven.

With these tips in mind, you should have no problem reaping a good harvest of chives every season.

The Ultimate Guide to Growing Succulents in Your Office

A office succulent exposed to sunlight.

If you are like many people, you probably spend most of your time in the office. The truth is that spending too much time in an office can be draining and stressful. But you can change that by bringing a bit of nature into it. Succulents are among the best office plants because they are low-maintenance and boost productivity. These plants can make you feel happier and give off a vibe that makes you feel good.

So, how can you grow succulents in your office? The secret to growing succulents in an office setting is understanding their specific needs. Start by choosing the right type of succulent suitable for your office climate and environment. Pay attention to its lighting needs and ensure you use the correct potting mix type. Water your office succulent sparingly to avoid causing rot problems. You must also choose the right type of pot for use. The container should have plenty of drainage holes to allow excess water to drain out fast. Most importantly, keep the succulent in an area with proper temperature and humidity levels.

Here is the ultimate guide to growing succulents in an office. Read on to find out everything you need to know.

Step 1: Choose the Right Succulent Species

The success rate of growing succulents in an office setting largely depends on the succulent species. You need to remember that not all succulents are alike.

There are over 1600 succulent species in the world, each with its unique requirements. Some succulent species are more adapted to growing in low-light office conditions than others.

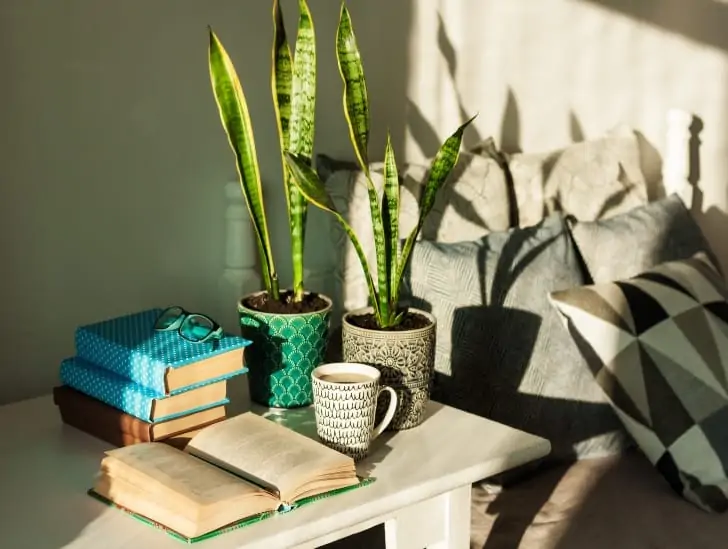
A snake plant indoor.
The snake plant remains one of the toughest low-light succulents.

Succulent species that need a lot of direct sunlight to thrive may not be a good choice for office spaces.

Take time to know your preferred succulent plants and their growth requirements. Do a little research and settle for those perfect for your office conditions.

Some of the best low-light succulents that may thrive in an office setting include:

  • Snake Plant: Also known as mother-in-law’s tongue, the snake plant remains one of the toughest low-light succulents. There are dozens of varieties to choose from depending on your specific needs. The succulent grows to four feet and requires minimal watering to thrive.
  • Echeveria: Echeveria refers to a group of succulents that come in various shapes and colors. The plants are low-maintenance and can thrive in office spaces with minimal light and care.
  • String of Pearls: String of Pearls is a popular trailing plant with small round green leaves. It’s one of the best choices for those looking for an easy-to-maintain office succulent.
  • Panda plant: The leaves of the Panda plant are usually covered with soft hairs, a feature that makes it stand out from other succulents. It’s an ideal office plant and can thrive in low-light conditions.
  • Ox tongue plant: You can also go for the Ox tongue plant if you are looking for a low-light indoor succulent that can thrive in your office. The plant grows to a height of three feet with lush green leaves and minimal care needs.

Step 2: Choose the Right Pot

The type of pot you choose will have a major impact on the health of your office succulent. Ideally, it should be large enough to accommodate the root system and allow fast drainage.

Ensure there are at least four or five drainage holes at the bottom of the container for proper and fast water drainage.

A woman gardener succulent in a terracotta pot.
The type of pot you choose will have a major impact on the health of your office succulent.

If you use a pot with no drainage hole, add some extra stones or pieces of broken pottery at the bottom for proper drainage.

You must also be keen on the potting material. Avoid pots made of plastic since they can trap moisture and promote root rot. Instead, go for glazed ceramic or terra cotta containers that are porous and breathable.

Step 3: Use the Right Potting Mix

The type of soil you use in the pot will also influence the health and growth rate of your office succulent. Choose a bagged succulent mix of shredded bark, perlite, and peat moss.

These ingredients allow optimum water absorption while ensuring proper drainage and air circulation.

Avoid regular potting soil as this will retain too much water, causing root rot, which may damage your office succulent.

Step 4: Find the Right Spot for Your Office Plant

Now that you have settled on the right succulent species for your office, it’s time to find a spot where your plant can thrive.

Before deciding on any particular spot, consider the amount of natural light available in the office. Succulents need some direct sunlight daily, preferably four to six hours.

A snake plant indoor exposed to sunlight.
It’s time to find a spot where your plant can thrive.

If the office has limited natural lighting, you can settle for a spot close to an artificial light source.

You can also use LED grow lights and other lamps to supplement natural lighting in case your succulent is not getting enough light.

Step 5: Water Your Office Succulent Sparingly

You need to understand that succulents don’t need a lot of water to thrive. Overwatering may lead to irreversible root rot.

For best results, water your office succulent sparingly and only when necessary. During spring and summer, check the soil every week for signs of dryness and water accordingly. You should only water your succulent when the potting mix is completely dry.

During winter, you may need to cut down on watering since succulents are dormant during this period.

You must also ensure the container has good drainage to allow excess water to flow out quickly.

Step 6: Watch Out for Temperature and Humidity

Temperature and humidity play a major role in the growth and health of your office succulent. Most succulents prefer temperatures between 65 ̊F to 75 ̊F.

If you live in a cold climate, make sure that you keep your office succulent away from any heating sources like vents or drafts. Too much heat can damage your succulent.

Humidity is also vital for the health and growth of succulents. Low humidity levels can cause your office plant to suffer from wilting, poor blooming, or a slow growth rate.

To prevent this, you need to ensure that there are proper temperature and humidity levels inside your office space.

Step 7: Don’t Overfertilize

Many gardeners, especially beginners, make the mistake of over-fertilizing their office plants. Succulents don’t need a lot of fertilizer to thrive and grow, and you should not overdo it.

You only need to apply liquid fertilizer every month during the spring and summer seasons when your succulent is actively growing and blooming.

Stop feeding your office succulent during winter because it’s dormant and requires minimal care.

Step 8: Be on the Lookout for Pests

Your succulent may attract a few pests, including mealybugs, aphids, or spider mites. If you notice any signs of infestation on your office plant, use a natural homemade pesticide to get rid of them as soon as possible.

A succulent on a windowsill.
Your succulent may attract a few pests, including mealybugs, aphids, or spider mites.

You may also need to repot your succulent if it’s overcrowded or the roots are already showing at the surface of the soil.

What Are the Benefits of Having a Succulent Plant in an Office?

One significant benefit of having succulents in the office is their ability to enhance indoor air quality.

Succulents, such as aloe vera and snake plants, have been found to effectively purify the air by removing toxins and harmful chemicals.

Through photosynthesis, succulents absorb carbon dioxide and release oxygen, contributing to a healthier work environment.

Improved air quality can reduce the risk of respiratory problems, allergies, and fatigue among employees, ultimately boosting productivity and well-being.

Studies have shown that the presence of natural elements in the workplace can significantly improve focus and productivity. With their visually appealing and calming presence, succulents create a more pleasant and engaging atmosphere.

The natural beauty of succulents can help reduce stress levels and enhance mental clarity, allowing employees to concentrate better on their tasks.

Incorporating succulents into office spaces can foster a positive work environment, stimulating creativity and boosting overall efficiency.

The presence of succulents in the office can also have a profound impact on employee well-being and stress reduction. Plants have been proven to positively affect mental health, reducing anxiety, and enhancing mood.

With their low-maintenance requirements, succulents provide a sense of tranquility and connection to nature.

A succulent in a pot on the office.
With their visually appealing and calming presence, succulents create a more pleasant and engaging atmosphere.

Taking care of these plants or simply admiring their beauty during breaks can serve as a therapeutic activity, promoting relaxation and overall well-being in the office.

Finally, succulents are renowned for their unique shapes, colors, and textures, which add an aesthetic appeal to any office space. Their visually pleasing characteristics enhance the ambiance and create a more inviting work environment.

The presence of succulents reflects a modern and sophisticated design, adding a touch of elegance to the office decor.

A well-designed and visually appealing office can leave a positive impression on clients, visitors, and employees, projecting professionalism and attention to detail.

Final Thoughts

The key to growing succulents in office spaces is to choose the right species, select the ideal potting mix, find an appropriate spot for your plant, water sparingly, control temperature and humidity levels, and don’t over-fertilize.

If you take good care of your succulent plant, it will reward you with lush foliage and colorful blooms that will make you happy and more productive.

The Ultimate Guide to Building Your Own Self-Sustaining Terrarium

A closed terrarium on a shelf.

Theoretically, a well-balanced terrarium ecosystem can last forever. This is something we all desire. After all, who wouldn’t want a low-maintenance terrarium? But in reality, certain key elements should be balanced to achieve a fully self-sustaining terrarium. These elements individually contribute to facilitating a process or solving a problem, so getting each right increases your chances of a vibrant terrarium ecosystem.

So, what do you need to make your own self-sustaining terrarium? The first thing to do is choose appropriate plants for your terrarium. Next, ensure the container you use is big enough to promote a free exchange of gases. Add drainage layers of sand, stones, and activated charcoal into the container, then top with the potting soil. Prepare your selected plants and terrarium design, then transplant them to the newly-built terrarium. Add microfauna or insects to help break down dead, decaying matter in your terrarium. Decorate your terrarium using your items of choice. Lastly, water your terrarium plants and provide proper lighting for them to thrive.

This article will guide you on how to build a self-sustaining terrarium, including the ingredients you need for a thriving terrarium ecosystem and how to care for it. Read on to learn.

What Is a Terrarium Ecosystem?

You first need to know what a terrarium ecosystem is before getting into the details of how to create one.

The word “ecosystem” in the natural world depicts the African Savanna life cycle or the green Amazon rainforest.

But it refers to a biotic community where organisms interact with their physical environment. This is true even for terrarium plants.

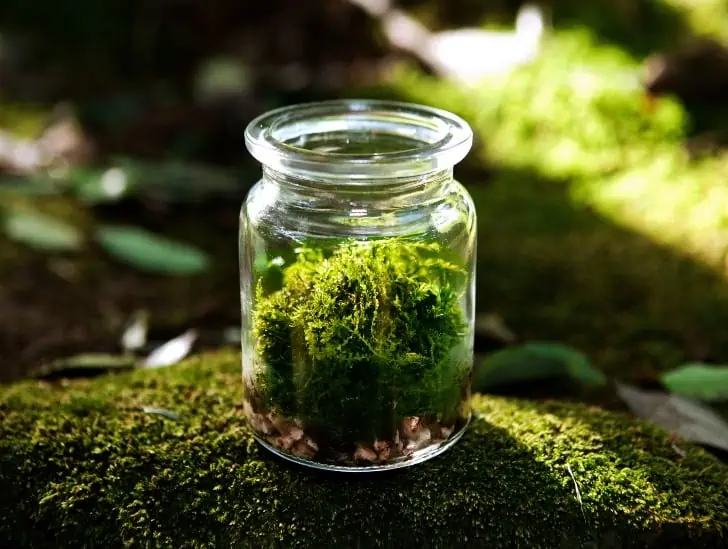
A cylindrical closed terrarium.
A terrarium ecosystem should mimic various natural processes to nourish, cleanse, and regenerate itself.

The capacity of the environment and its microfauna inhabitants to collaborate and sustain the system constitutes a natural ecosystem. The ecosystem will succeed or fail based on energy exchanges and carefully calibrated life cycles.

So, a terrarium ecosystem should mimic various natural processes to nourish, cleanse, and regenerate itself. Building this may not be easy, but you only need to turn to nature for inspiration.

Step-by-Step Guide on How to Make a Terrarium

A self-sustaining terrarium is a delicately balanced ecosystem in a clear container. That is to say, the plants, microfauna inhabitants, environmental conditions, and the container must be carefully evaluated to coexist harmoniously.

Here is a step-by-step guide on how to create your self-sustaining terrarium:

1. Pick plants

Plants are a terrarium’s primary (and most fascinating) element. So, there’s much to balance at this point.

  • Choose terrarium plants that will not overgrow
  • Hardy and pest/disease-resistant plants
  • Provide sufficient biomass to promote healthy life cycles

Note that a low-maintenance terrarium does not require pruning or removing overgrown plants. So, you must select plants that won’t outgrow the pot- even when grown to maturity.

A echaveria with open terrarium.
Plants are a terrarium’s primary (and most fascinating) element.

Curated miniature plants and dwarf species are more suitable for terrariums. You may consider such plants as:

  • Foliage: Biophytum sensitivum (Little Tree Plant)
  • Fern: Nephrolepis cordifolia’ Duffii’ (Lemon Button Fern)
  • Vine: Syngonium podophyllum ‘Pixie’ (Dwarf Arrowhead Plant)

Having enough plants is necessary to sustain the water cycle. The more plants you add, the more biomass, transpiration, and condensation; consequently, the more free water there will be in your terrarium.

Moss might also be useful for adding biomass to your terrarium without overcrowding.

2. Choose a container

Size is essential as far as terrarium containers are concerned. You need enough room in your container to allow a free exchange of gases.

CO2 and oxygen must flow efficiently since anaerobic conditions promote unwanted microbial growth and breakdown.

Air pockets may develop in your terrarium if it is overcrowded, depriving some plants of vital nutrients.

Small containers can be used, but they are not ideal for durability. Big terrarium containers are just easier to manage on various levels.

Also, avoid using awkward-shaped containers because they may trap liquids and gases. The ideal options are broad, uniformly shaped containers like spheres, cubes, Wardian cases, and fish tanks.

3. Add drainage layers and potting soil

Terrarium pots have no drainage holes, so make drainage layers to avert root rot. Start with a 2-inch layer of course sand, beach stones, or sea glass at the base of your terrarium pot.

Then add activated charcoal, about a half-inch layer above the gravel, to prevent the growth of fungi on the stones when wet.

Small plant at an open terrarium.
Terrarium pots have no drainage holes, so make drainage layers to avert root rot.

Top with a layer of sheet moss to prevent your potting mix, which will occupy the next layer, from blending with charcoal and gravel. Then, add about an inch of the potting mix above the charcoal and stones.

On average, the bottom layer should occupy a quarter to a third of the container, leaving enough space for plant growth.

4. Prepare the plants and terrarium design

Take time to design the layout of your terrarium before planting. Larger plants should be at the center, surrounded by the smaller ones.

This will enable you to create mounds and dips in the soil for creative contours. Then, remove your selected plants from their nursery pots, teasing the roots apart if needed.

A pair of garden snips can be used to trim off longer roots. Trimming out some roots, called root pruning retards a plant’s growth, which is necessary when planting in a terrarium.

Also, remove any damaged or yellow leaves.

5. Add plants to the terrarium

It is now time to place your plants in the soil. 

Start by shaking off excess soil on the plants. Dig holes in the potting soil for individual plants using your fingers or a big spoon.

Afterward, carefully place a plant in each hole and level the soil around them. Top with a thin soil layer to cover the plants.

Different kinds of cactus on a terrarium.
It is now time to place your plants in the soil. 

Tip: Place the tallest plant off-center or near the back, then place the smaller ones around it to make a unique, asymmetrical design.

6. Add insects (microfauna)

The natural environment’s decomposition process is probably the hardest to recreate in a terrarium.

Your local woodland probably hosts hundreds of species that work together to decompose and restore organic matter.

So yes, replicating this yourself is a tall order. However, some species at your disposal can do well on their own.

Bring on the springtails and isopods. These small and natural cleaners would be ideal for your terrarium if you are not afraid of insects. But if you do fear them, springtails are much smaller.

They will delightedly work to decompose any decaying matter, turning it from a possibly deadly threat into a new source of nourishment for your terrarium plants.

Furthermore, they will aerate your bioactive substrate, helping your plants thrive and increasing drainage.

7. Decorate your terrarium

You can add a thin layer of colored gravel or bark chips to add flair to your finished terrarium. Add seashells, figurines, or other small decorative items to customize your mini glasshouse.

8. Water your terrarium

A self-sustaining terrarium ecosystem depends on a functional water cycle. Like the circulatory system in the human body, a terrarium ecosystem has many moving parts and struggles to survive when clogged.

The secret to a functioning water cycle is creating a terrarium base that promotes water flow while retaining it when needed.

You must maintain the following:

  • Proper drainage: The substrate must let excess water flow out. You are building a wet environment, not a swamp. Use a terrarium substrate with good drainage and water retention.
  • A reservoir: A place at the base where excess water will collect. The reservoir water will help maintain the water cycle, regulate humidity, and keep the substrate from oversaturation. In the terrarium world, these reservoirs are also called “false bottoms.”
  • Proper water balance: You need just enough water in the terrarium to maintain the water cycle. For more information on watering, check out this guide on watering terrariums.

9. Ensure proper lighting

Consistency is the secret to efficient terrarium lighting. Your plants need adequate light to respire and grow but don’t expose them to direct sunlight.

The gold standard for terrarium plants is bright, indirect light. North-facing windows are preferable since they rarely receive direct sunlight.

A open terrarium outdoor exposed to sunlight.
Your plants need adequate light to respire and grow but don’t expose them to direct sunlight.

Alternatively, you can place your terrarium under a grow light to control the lighting as much as possible. Place a 100-watt light or fluorescent bulb over your terrarium for 16-18 hours daily.

10. Maintenance

Get rid of dead plants and leaves as soon as possible. Fertilizing your terrarium might encourage abnormal growth and cause salt build-up in the soil, so avoid doing so.

Clean your terrarium’s container regularly, inside and out. The light reaching your plants will not be sufficient if the container is foggy or dirty.

Wipe it with a moist piece of lint-free fabric or a newspaper to clean it. Avoid using strong cleaning products.

Final Thoughts

Terrariums are an excellent way of bringing nature indoors and adding a touch of beauty to your living room. These mini glasshouses are easy to maintain, and every creation is unique.

However, building your first terrarium won’t be a walk in the park. You must find the right plants, containers and monitor the moisture and light requirements.

You must also incorporate appropriate microfauna to break down the materials and nourish your terrarium plants.

Overall, the tips and guidelines in this article will set you on the right foot to creating a beautiful self-sustaining terrarium.