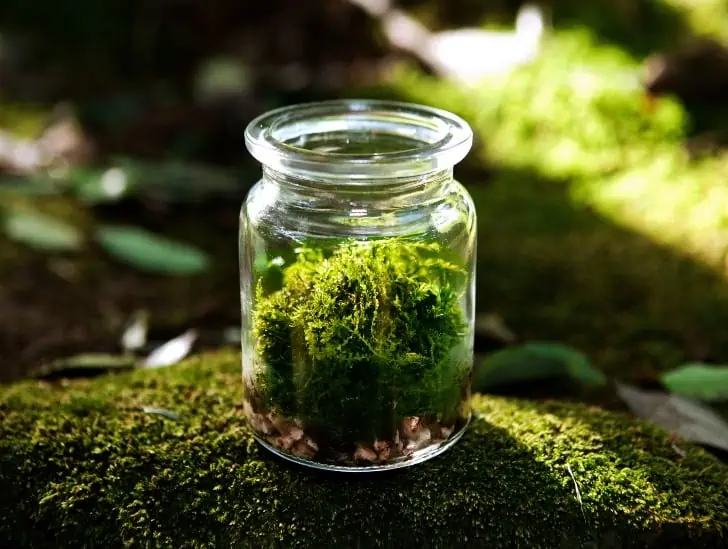
What Makes Ficus Rock Fig a Must-Have for Your Collection?

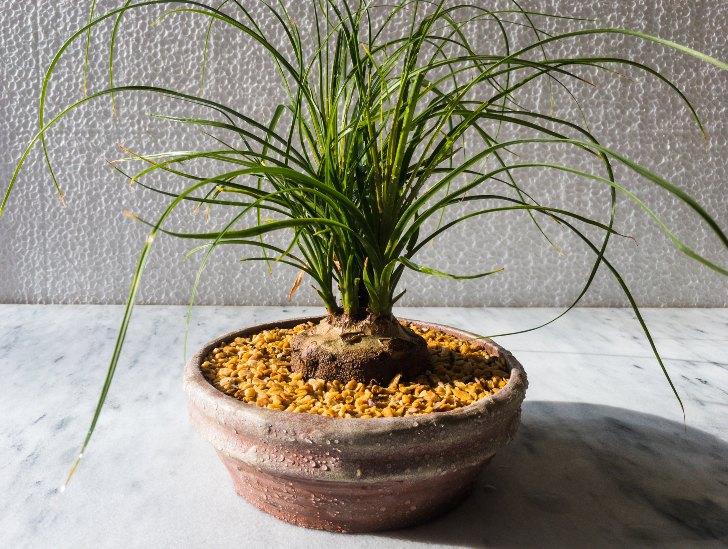
A red ficus rock fig.

In the vast and fascinating world of figs, a silent gem can transform your plant collection into an exquisite bonsai showcase – the Ficus Rock Fig. This captivating species, also known as Ficus petiolaris, isn’t your average houseplant. With its robust adaptability, unique aesthetic appeal, and intriguing biological features, the Ficus Rock Fig ranks high on the list of must-have plants for every avid gardener.

So, what makes ficus rock fig a must-have in your collection? Native to the rocky deserts of Mexico, this distinctive fig tree is a testament to the resilience and beauty of nature. Its silver-grey bark and lush, heart-shaped leaves create a visual spectacle that can’t be ignored. Its strong, occupying presence brings a sense of focus to your home or office space. The Ficus Rock Fig, with its inherent charm and resilience, embodies the essence of being a survivor in a harsh desert environment, making it a symbol of endurance and adaptability.

This guide dives deep into the fascinating world of the Ficus Rock Fig, exploring its unique characteristics, survival mechanisms, and unparalleled beauty. Read on to learn more.

Ficus Rock Fig: Overview

The Ficus Rock Fig belongs to the Moraceae family, commonly called the mulberry or fig family.

It is native to the Sonoran Desert region of North America, specifically found in parts of Arizona, California, and Mexico.

This region encompasses arid and rocky landscapes where the Ficus Rock Fig’s unique adaptations allow it to thrive. It typically grows in rocky or sandy soils.

The plant is known for its ability to colonize and establish itself in the crevices and rocky outcrops of canyons and cliffs, which provide some protection from extreme weather conditions.

The Ficus Rock Fig is known for its twisted and contorted growth pattern. Its branches often wind and spiral around each other, creating an intricate and captivating display.

In its natural habitat, the Ficus Rock Fig can reach heights of around 6 to 10 feet (1.8 to 3 meters). Its size can vary depending on environmental conditions.

The mulberry tree leaves.
The Ficus Rock Fig is known for its twisted and contorted growth pattern.

The plant’s adaptation to grow within rocky crevices provides some protection from extreme temperatures and harsh winds. The rocks also offer stability and support for the plant’s twisted growth.

The Ficus Rock Fig makes an intriguing houseplant, especially for those who appreciate unique growth patterns and desert aesthetics.

It can be cultivated in containers and placed in bright indoor locations. It can also thrive outdoors in regions with a climate similar to its native habitat.

What Makes Ficus Rock Fig a Must-Have for Your Collection?

Now that you better understand the Ficus Rock Fig and its unique characteristics, it’s time to explore why this species is a must-have in your collection.

1. Unique Aesthetic Appeal

The Ficus Rock Fig (Ficus petiolaris) is renowned for its captivating and distinctive aesthetic appeal, which sets it apart from many other plants in the gardening world. Its unique appearance stems from its growth habit, bark texture, and overall form.

Its branches tend to twist and contort, creating an almost sculptural quality. These unusual growth patterns give the plant an organic, artistic appearance that draws the eye and sparks curiosity.

The twisted branches often intertwine, adding to the complexity of its overall structure.

One of the most visually striking features of the Ficus Rock Fig is its textured bark. The bark is often rough and rugged, with deep furrows and grooves that give the plant a weathered and ancient look.

A wet mulberry leaves.
The twisted branches often intertwine, adding to the complexity of its overall structure.

The combination of twisted branches and textured bark contributes to the plant’s character, giving it a sense of age and history.

The unique growth habit of the Ficus Rock Fig evokes images of ancient, windswept trees found in rocky and arid landscapes.

Its naturalistic resemblance to trees that have endured harsh conditions for centuries adds a touch of wild beauty to spaces where it is cultivated.

The twisted and gnarled appearance of the Ficus Rock Fig symbolizes strength, resilience, and the ability to adapt to challenging circumstances.

This symbolism adds depth to the plant’s allure and can resonate with individuals who appreciate the deep stories that the plant tells.

2. Adaptability

The Ficus Rock Fig tree is known for its resilience and adaptability, making it an excellent choice for novice gardeners and seasoned plant enthusiasts alike.

It is highly tolerant of drought conditions and does not require frequent watering.

It can also survive in bright light unless the sun’s intensity is too strong, so it should be placed in partial shade. The Ficus Rock Fig prefers high humidity but tolerates lower levels if necessary.

A wet mulberry leaves.
The twisted branches often intertwine, adding to the complexity of its overall structure.

The plant is also quite tolerant of temperature fluctuations and can even survive brief periods of frost.

Its ability to adapt to different environmental conditions makes it an excellent choice for many climates, especially desert regions with extreme temperatures.

3. Natural Bonsai-Like Form

Bonsai is a traditional Japanese art form that combines horticulture and aesthetics to create miniature trees.

The Ficus Rock Fig has a natural bonsai-like growth pattern, making it well-suited for this type of cultivation.

The plant’s intricate branches can be trained into attractive shapes with relative ease, allowing you to recreate classic bonsai designs or experiment with your unique ideas.

A mulberry plant exposed to sunlight.
The Ficus Rock Fig has a natural bonsai-like growth pattern, making it well-suited for this type of cultivation.

Its natural contortions can also create powerful and captivating displays that evoke feelings of the desert environment.

4. Low Maintenance

The Ficus rock fig is a relatively low-maintenance plant, making it an excellent choice for busy individuals who don’t have the time to tend to their gardens.

It does not require frequent watering or pruning and can tolerate extended periods of neglect.

As long as it is exposed to sufficient light and humidity levels are kept in check, the Ficus Rock Fig will thrive with minimal effort.

This makes it ideal for those who are new to gardening or can’t care for many plants.

5. Indoor and Outdoor Versatility

The versatility of the Ficus Rock Fig is one of its standout qualities, making it an excellent addition to indoor and outdoor plant collections.

This adaptability allows plant enthusiasts to enjoy its unique aesthetics and distinctive growth patterns in various settings, catering to different preferences and spatial limitations.

The Ficus Rock Fig can be placed in bright and sunny locations such as windowsills and balconies

 for indoor cultivation.

Ensuring the plant does not receive intense sunlight or heat for prolonged periods is crucial.

Outdoor cultivation is suitable for regions with relatively mild climates. The plant may need extra protection from strong winds or heavy rain during certain times of the year. Furthermore, it should be watered regularly during periods of drought.

For those fortunate enough to have indoor and outdoor gardening spaces, the Ficus Rock Fig can seamlessly transition between the two.

During warmer months, you can move the plant outdoors to enjoy its unique growth patterns against natural elements.

As the weather cools or becomes less predictable, you can bring the plant back indoors, extending your enjoyment of its aesthetics.

The indoor and outdoor versatility of the Ficus Rock Fig offers gardeners the freedom to integrate its captivating presence into various living spaces.

This adaptability allows you to tailor your plant collection to your specific surroundings and preferences, adding depth and character to your botanical displays.

6. Conversation Starter

The unique appearance of the ficus rock fig often sparks curiosity and conversation among guests.

Its intriguing growth habit and textured bark can captivate the attention of plant enthusiasts and non-enthusiasts alike.

A Ficus rock fig leaves.
the Ficus Rock Fig has become popular among gardeners and plant lovers.

The captivating presence of the Ficus Rock Fig can create an atmosphere of conversation and connection, allowing you to share your love for plants with others.

Unsurprisingly, the Ficus Rock Fig has become popular among gardeners and plant lovers.

Its unique aesthetic appeal, adaptability, and conversation-starting qualities make it a must-have in your collection.

7. Excellent Air Purifier

The Ficus Rock Fig is an aesthetically captivating addition to your indoor spaces and a natural air purifier that can significantly enhance the air quality. As a member of the Ficus family, it shares the air-purifying traits common to many Ficus species.

Volatile Organic Compounds (VOCs) are harmful gases emitted by different household items such as paints, cleaning products, and synthetic materials.

The Ficus Rock Fig absorbs these gases through tiny openings called stomata on its leaves. The natural filtration process helps reduce the concentration of indoor pollutants.

Like all plants, the Ficus Rock Fig undergoes photosynthesis, which absorbs carbon dioxide from the air and releases oxygen.

The oxygen release contributes to fresher and cleaner indoor air, benefiting your respiratory health and overall well-being.

Furthermore, the Ficus Rock Fig is crucial in maintaining optimal indoor humidity levels. It introduces moisture into the air as it transpires or releases moisture through its leaves.

This can be particularly beneficial in dry indoor environments, helping to prevent issues such as dry skin and respiratory discomfort.

Lastly, the textured leaves of the Ficus Rock Fig can trap and capture airborne particles, including dust and allergens, resulting in a cleaner and healthier living environment.

Final Thoughts

The Ficus Rock Fig is a visually striking species with many fascinating characteristics, making it a great addition to your plant collection.

Its ability to thrive in harsh desert environments makes it ideal for home cultivation, while its unique aesthetic appeal adds a touch of wild beauty to any space.

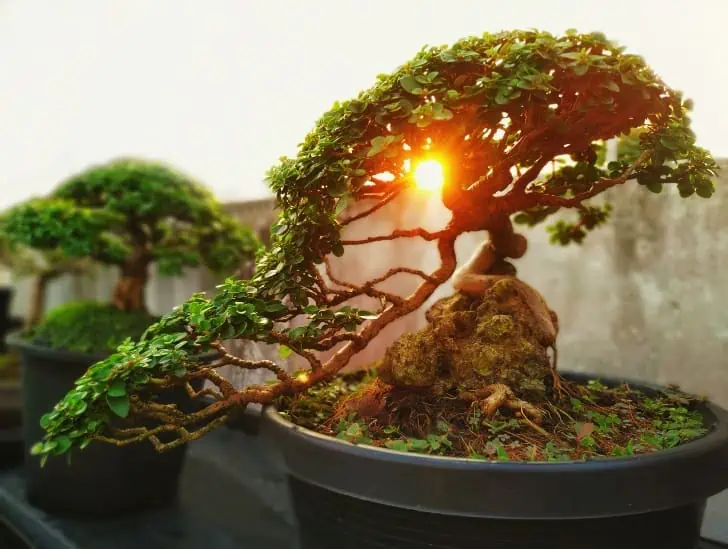
Ever Wondered How Bonsai Trees Are Made? Find Out Here!

A bonsai pine tree.

Bonsai trees, the living masterpieces that captivate with their elegance and ageless charm, are not simply born but meticulously crafted. Delving into the world of bonsai creation is like unraveling a tale of artistry, patience, and horticultural finesse. You don’t have to be a horticulturist or even an artist to get started – just a bit of enthusiasm and some basic knowledge, and you will be good to go.

So, how are bonsai trees made? Bonsai trees are usually made by choosing an appropriate tree and pruning it in a specific way to meet your preferred style. This is the basic process of creating a bonsai tree. However, beyond the pruning process, several other steps are involved in creating a beautiful, long-lasting bonsai. Before you can create your masterpiece, you’ll need to acquire the appropriate tree and soil mix. From there, you’ll need to properly pot your bonsai tree and shape it into the desired style. Then, finally, all that’s left is to take care of your bonsai tree and watch it grow and evolve.

This blog post embarks on a journey to demystify the captivating process behind the making of bonsai trees. Read on to find out everything you need to know.

Bonsai Trees: A Quick Overview

Bonsai trees embody a harmonious blend of patience, precision, and artistic finesse, resulting in captivating tree sculptures that evoke a sense of tranquility and wonder.

The art of bonsai has its roots in ancient China and Japan, where it was cultivated as a reflection of nature’s grandeur on a smaller scale. The word “bonsai” itself translates to “planted in a container,” capturing the essence of this art form.

Contrary to popular belief, bonsai trees are not stunted or dwarfed; rather, they are carefully nurtured to mimic the graceful proportions and forms of their full-sized counterparts in nature.

A bonsai outdoors sunset.
Contrary to popular belief, bonsai trees are not stunted or dwarfed

This practice requires a deep understanding of horticulture, aesthetics, and a touch of artistic intuition.

At the core of bonsai lies a set of principles that guide the entire process. These principles encompass balance, proportion, harmony, and simplicity.

The overall composition should evoke a sense of tranquility and the feeling of a fully mature tree despite its miniature size.

Bonsai trees are often categorized into various styles, each representing a distinct aspect of nature.

From the windswept elegance of the “Fukinagashi” style to the intricate balance of the “Chokkan” style, each approach embodies a specific aesthetic philosophy.

Bonsai Tree Design Principles

Before you start creating your bonsai masterpiece, it is important to understand the fundamental principles behind the art of bonsai.

These principles are essential in achieving a balanced composition that accurately reflects nature’s beauty and grace.

The four basic design principles are balance, proportion, harmony, and simplicity. Balance refers to the even distribution of foliage throughout the entire tree. Proportion is the relationship between the tree size, pot, and foliage.

Harmony is achieved when all the elements in a composition are in unison with each other, while simplicity refers to creating an overall design that does not appear overly complicated or cluttered.

How Are Bonsai Trees Made?

Now that you have a better understanding of bonsai trees and their design principles, let’s look at how these trees are made.

Step 1: Tree Selection

The first step in the art of bonsai is selecting the right tree species. The tree species you choose plays a critical role in shaping the entire journey of making your bonsai tree.

It is crucial to immerse yourself in the bonsai world and ask questions to understand which tree species best suits your needs.

With plenty of varieties available, the choice can be overwhelming. Some of the best tree species to consider include jade, juniper, bamboo, guava, line, pipal, pine adenium, and lemon.

A bonsai indoor.
The first step in the art of bonsai is selecting the right tree species.

Consider your local climate and go after tree species that naturally thrive in your climate zone since they are more likely to acclimate well to your growing conditions.

Furthermore, keep an eye on leaf sizes and growth habits. These factors deeply influence bonsai aesthetics; trees with smaller leaves and graceful growth patterns are particularly good for creating bonsai trees.

While personal preferences play a role, balancing aesthetics with practicality is essential.

Check with local nurseries, garden centers, and bonsai specialty shops to see which species are readily available in your area.

Ultimately, the suitability of a species for bonsai depends on a combination of factors. Evaluate each species discerningly, considering its potential challenges and rewards.

Prioritize young, healthy tree saplings with balanced root systems and gradual trunk taper when purchasing from a nursery. This solid foundation ensures a promising start to your bonsai journey.

Step 2: Choose Your Bonsai Style

Once you have chosen the right tree species, it is time to decide on a style for your bonsai.

The available styles range from informal upright to broom and cascade, each characterized by distinct aesthetic principles.

The right style should reflect your personality and preferences while being suitable for the selected tree species.

Before deciding, familiarize yourself with the different bonsai tree styles and their distinct visual characteristics.

A outdoor bonsai exposed to sunlight.
Once you have chosen the right tree species, it is time to decide on a style for your bonsai.

For instance, a cascade-style bonsai tree features a trunk that curves down towards the ground, while an upright-style bonsai tree grows straight up in the air.

The desired outcome should be considered when selecting a style. For instance, if you are aiming for a stylized, unique version of the tree species you have selected, an informal upright style may be your best choice.

Step 3: Potting

The next thing you need to do is pot your plant and allow it enough time to establish and be strong enough for the next phase.

Ensure your bonsai pot is relatively low but wide enough to support the plant’s root system. Cascading trees may require a larger pot that allows the top of the tree to hang lower than the root base.

A relatively shallow and wide pot profile is meant to balance with your tree composition, creating an illusion of a full tree in miniature.

Choose a color that pleases you and a size that will go well with the size of your tree.

The pot must have at least one drainage hole to allow excess water to escape, which is critical for avoiding root rot.

You can even line the bottom part of the pot with a thin layer of gravel to enhance drainage.

Bonsai on hand.
Cascading trees may require a larger pot that allows the top of the tree to hang lower than the root base.

For potting mix, opt for a medium that is well-draining and porous. Coconut husk fibers are a great option since they provide excellent drainage while retaining enough moisture.

However, you should remember that flowering bonsai trees may require a potting mix with higher water retention properties. So, know your tree species well before you go for a potting mix.

Step 4: Pruning and Training

This is the most crucial step in the bonsai creation process. Pruning and training is about shaping the tree to ensure it conforms to its desired style.

This process involves carefully manipulating the trunk and branches to give the tree a more mature and balanced form.

Pay attention to details and use appropriate tools for each task when pruning. Work slowly and with intent; pruning too much or too aggressively can damage your bonsai tree.

Various techniques, such as wiring, leaf trimming, bud pinching, and branch thinning, can help you achieve your desired look.

It is important to start with basic pruning and gradually advance the techniques as you gain experience. The pruning process may take several years to perfect because it involves a lot of trial and error.

Be patient and consistent for the results to show; bonsai trees grow slowly and require frequent maintenance to conform to the desired style.

Step 5: Styling Refinement

As your bonsai tree matures, it will require periodic styling refinement.

Styling refinement involves pruning and wiring techniques to shape the tree further to give it a more mature look. It also involves repotting when needed and proper fertilizing and watering.

Frequent trimming of older foliage should be done to promote new growth and maintain the desired style.

A person trimming a bonsai.
As your bonsai tree matures, it will require periodic styling refinement.

Start by trimming the longest branches and refining the foliage edges as needed. With time, you can master the art of refining bonsai trees.

Remember to water your bonsai tree regularly to keep the soil moist and well-drained. Be careful not to overwater because it can lead to root rot and other issues.

Fertilize your bonsai tree with a balanced fertilizer regularly in spring, summer, and fall. Do not fertilize in winter to avoid damaging your tree’s roots.

Step 6: Patience Is Key

Making bonsai trees is a slow and rewarding process. To maximize the potential of your bonsai tree, you need to remain patient and continue nurturing it for years.

Bonsai trees require a lot of dedication and attention; they are living works of art that require regular pruning, watering, fertilizing, and styling refinement to maintain their desired shape.

Observe your tree’s growth patterns and adjust accordingly. Be attuned to the changing needs of your bonsai as it develops over time.

With time, you will learn to understand the needs of your bonsai tree, helping you create a beautiful bonsai masterpiece that will draw the attention of every person who visits you.

Summary

Creating a bonsai tree is an exciting and rewarding endeavor that requires dedication, patience, and attention.

The key to success is to familiarize yourself with the basics of bonsai tree creation and then use that knowledge to shape your tree in a way that best suits your preferences and style.

Bonsai trees require frequent pruning, watering, fertilizing, and styling refinement. Be patient and consistent for the results to show and remember that a beautiful bonsai tree takes time to create.

Reviving Your Rosemary: A Step-by-Step Guide to Pruning After a Freeze

A person pruning a rosemary.

Has your rosemary plant recently experienced the harsh bite of frost? Do not despair because your cherished herb is not lost. With the right pruning techniques, you can rejuvenate your rosemary, making it healthier and bushier. Pruning after a freeze is not just about damage control; it is essential to bolster your rosemary plant’s health, resilience, and vitality.

So, how do you prune your rosemary after a freeze? The first thing you need to do is identify the damage. Look for branches damaged by cold temperatures, frostbite, or pest infestations that must be removed to promote new growth. Next, use sharp pruning shears and snip off the affected branches at an angle just above a bud or leaf node. This way, you will maintain the plant’s natural shape and encourage new growth. Remove dead wood and shoots to keep the plant looking tidy and balanced as you trim away the damaged branches. After pruning, mulch your rosemary to help it retain water and fight off potential diseases.

In this detailed guide, we’ll delve into the science and art of pruning rosemary. We’ll help you understand the correct cutting techniques and identify which parts require attention. Read on to learn more.

Understanding the Effect of Frost on Rosemary

Before we jump into the pruning process, it is essential that you understand how frost affects rosemary plants.

Although some varieties of rosemary are more cold-hardy than others, the effects of a hard freeze can be severe and cause significant damage to any plant.

Given that rosemary is native to the Mediterranean region, adapting to colder climates is a challenge.

A rosemary outdoors covered with snow.
It is essential that you understand how frost affects rosemary plants.

One of the most immediate and noticeable effects of frost on rosemary is the change in appearance. The leaves of rosemary may take on a silver-gray hue as a result of frost damage.

This transformation is an adaptive response because the plant’s leaves reduce their surface area by rolling and curling, thus minimizing moisture loss and exposure to extreme cold.

Frost can put a temporary halt to the growth rate of rosemary. As the plant reallocates its resources to cope with the cold, new growth may be delayed until the warm season. This can be frustrating for gardeners eager to see their rosemary flourish.

Exposure to excessive frost can also lead to cellular damage in the plant’s shoots, branches, and buds. Ice crystals can form within plant cells, disrupting their structure and function.

In the case of rosemary, frost can lead to cellular rupture, particularly in tender new growth, causing irreversible damage.

Pruning After a Freeze: What You Need to Know

Now that you understand how frost affects rosemary plants, it is time to get down to the nitty-gritty of pruning after a freeze. When pruning your rosemary, it is essential to remember these key points:

  • Pruning aims to remove dead and damaged tissues from the plant while preserving its natural shape and size.
  • Use sharp pruning shears to avoid tearing or damaging healthy tissues.
  • Remove dead wood and damaged shoots to keep your rosemary tidy and balanced.
  • Always prune at an angle above a bud or leaf node to encourage new growth.
  • After pruning, mulch your rosemary with organic matter such as compost or shredded bark to help it retain moisture and prevent potential diseases.

These steps will ensure that you are correctly pruning your rosemary after a freeze, minimizing the impact of frost damage and promoting healthy regrowth.

Preparing for Pruning: What You Need to Gather

Before you begin pruning your rosemary plant, ensure you have all the necessary items. You will need:

  • A pair of sharp pruning shears
  • A bucket or bowl of water
  • Organic mulch, such as compost or shredded bark

Once you have everything ready, you can start pruning your rosemary. Pay close attention to the damaged areas to avoid cutting healthy stems while leaving behind affected parts.

The tips of affected leaves and branches will typically blacken and become brittle.

If you notice any brown spots on your rosemary, it could be a sign of pest damage. If this is the case, take extra care when pruning because these areas can be more delicate and prone to tearing.

The Art of Pruning: A Step-by-Step Guide

Now that you are all prepped and ready to go, let us move on to the actual pruning process.

Step 1: Identify Damaged Areas

The first step is identifying the damaged areas on your rosemary plant. Look for branches affected by frost, pest infestation, or cellular damage. These are the areas you want to focus on when pruning.

Typically, frost-damaged leaves change color. They might turn grayish or brownish. Look for patches of discoloration on the leaves, especially on the tips and edges.

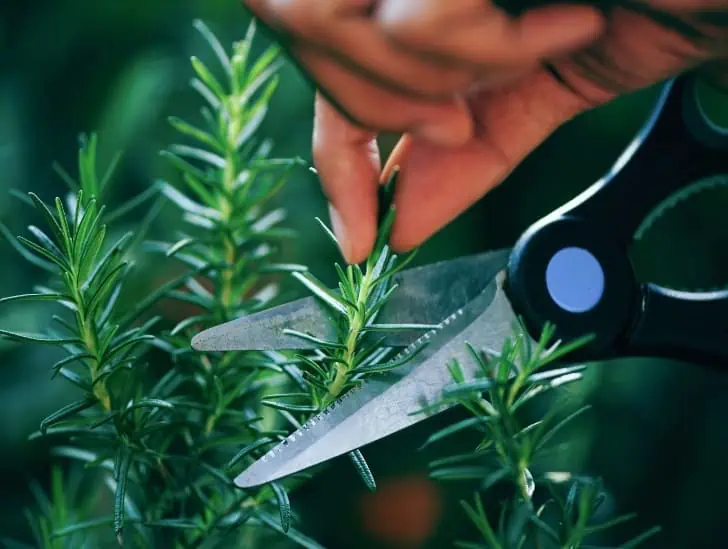
A person cutting a rosemary.
It is essential that you understand how frost affects rosemary plants.

The leaves may also curl, roll up, or become brittle. Look for any wilting or drooping branches because these are signs of frost damage in rosemary.

Other frost-damaged areas may appear water-soaked or translucent. This happens because freezing causes the cell walls to rupture, leading to a collapse of the affected tissues.

Step 2: Use Sharp Pruning Shears

Once you have identified the areas requiring pruning, it is time to prepare your shears. Ensure they are sharp to avoid tearing the healthy parts of the plant.

You can use pruning shears, loppers, or garden scissors to cut away the affected bits. Whichever tool you choose, ensure it is sharp and clean before use.

Step 3: Cut at an Angle Above a Bud or Leaf Node

When pruning, it is important to cut at an angle just above a bud or leaf node. This will maintain your rosemary’s natural shape and size while encouraging new growth.

Be sure to cut in an outward direction, away from the center of the plant, so that you don’t disrupt any developing buds or flowers.

Step 4: Remove Dead Wood & Shoots

As you prune, be sure to remove any dead wood and shoots. This will help keep your rosemary plant looking neat and tidy and maintain an open canopy for new growth.

A rosemary in a pot.
As you prune, be sure to remove any dead wood and shoots.

The dead wood is easy to spot—it is usually brown and brittle. If you are not sure if a shoot or branch is dead, lightly scratch the bark with your fingernail. If it comes off easily, it is likely dead and should be removed.

Step 5: Mulch the Plant

Once you’re finished pruning, it is time to give your rosemary some extra love by mulching it. Use organic matter like compost or shredded bark to create a protective layer around the plant’s roots.

Mulch will help your rosemary retain moisture, discourage weed growth, and protect it from potential diseases.

Step 6: Dip the Pruning Shears in a Bowl of Water

After each pruning session, dip your shears in a water bowl for about 15 minutes. This will help remove any sap or debris, preventing the spread of potential diseases and pests. Clean your pruning shears regularly to keep them sharp and in good condition.

Red pruning shear.
This will help remove any sap or debris.

Safety Tips for Pruning After Frost

To keep yourself safe, it is essential to take extra precautions when pruning after frosts.

Wearing protective gloves and eyeglasses is always a good idea because cold temperatures can make the herb’s sap more corrosive than usual.

Also, be sure to keep your hands away from any ice crystals on the leaves or branches. The ice crystals can cause irritation and discomfort if they come into contact with your skin.

What Can I Do with the Cuttings After Pruning?

You may be wondering what to do with the pruned material after you are done. Don’t worry—you can use these cuttings for many projects.

For instance, rosemary branches are great for making wreaths, garlands, and other decorations. You can also dry them and use them in potpourri or sachets. Plus, if you like cooking, nothing beats freshly harvested rosemary.

Some people even prefer freezing the fresh cuttings for future use. To freeze the cuttings, start by storing them in a damp paper towel before you toss them in your fridge. You can freeze rosemary cuttings for up to two weeks.

Can You Prune Rosemary Too Much?

While pruning after frost can benefit your rosemary, it is important not to overdo it. Over-pruning can stress the plant and slow down its growth.

A rosemary in a pot with a hand spraying water.
This will help remove any sap or debris.

If you notice that your rosemary looks a bit sparse after pruning, don’t worry—it will begin to regrow in no time. Just make sure you monitor the plant closely for any signs of damage or disease.

Summary

Pruning after a freeze is essential to keeping your rosemary healthy and thriving. Follow the steps outlined above to prune your rosemary correctly while minimizing damage.

Remember to equip yourself with sharp pruning shears, identify damaged areas, cut at an angle above a bud or leaf node, remove dead wood and shoots, mulch the plant, and dip the shears in water after each pruning session.

Following these simple steps ensures that your rosemary gets the love and care it needs after a freeze. It is time to go out and get pruning!

Are Your Cacti Flowers Real or Fake? Learn How to Tell the Difference!

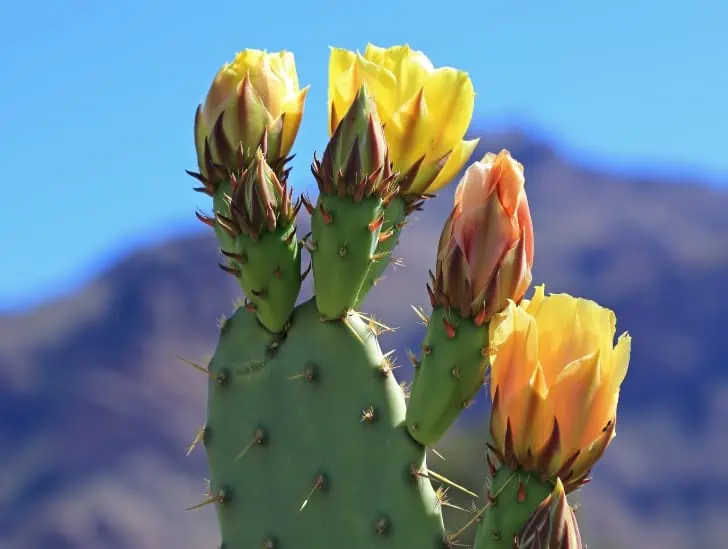
A blooming cactus.

If you visit the gardening department in major home stores or your local gardening store, you will most likely stumble upon some cacti plants that have beautiful flowers on top of them. At first glance, you may think you have found a nice plant with beautiful flowers, but that is not the case. A closer look will reveal that the flowers are not real. These are fake flowers stuck on the cacti plants with glue to attract potential buyers. The trick is often used to increase sales and profit margins for plant sellers.

So, are your cacti flowers real or fake? One of the easiest ways to differentiate real cacti flowers from fake ones is to look for signs of life. Real cacti flowers will show signs of freshness and vibrancy, such as being firm and plump, having bright, and vibrant colors. On the other hand, fake flowers will most likely be made from plastic or fabric materials that are flimsy and dull in colour. The position of the flower can also tell if it is real or fake. Real flowers develop from the stems and follow a specific pattern. So, if the flower sits at the top of the plant, it is probably fake.

This blog post highlights different ways of recognizing fake cacti flowers and how to remove them from your plant. Read on to learn more.

Do Cacti Plants Flower?

So, you may think that cacti plants don’t flower hence the need to fix fake flowers on the plants to make them attractive. Unfortunately, that is not the case at all.

Almost all cacti plants flower. Depending on the species, some cacti plants will flower faster than others.

The only thing you need to do is ensure your cactus is exposed to the right conditions that encourage blooming. Sometimes, you must take care of your plant for several years before it starts showing signs of flowering.

A spider cactus blooming.
The only thing you need to do is ensure your cactus is exposed to the right conditions that encourage blooming.

Some cacti species, such as Mammillaria and Parodia, will flower faster and prolifically than other species. The flowers of different cacti plants come in various shapes, sizes, and colors.

If you want your cactus to flower, consider growing it on a balcony or close to a windowsill where it can receive plenty of sunlight. Real cacti flowers may open for a few hours or days before fading.

Why Do Sellers Attach Fake Flowers to Cacti?

The primary reason sellers attach fake flowers to cacti is to make their plants more marketable. The aim is to boost sales and ensure the cacti plants get new homes as fast as possible.

When buying a cactus, it is your responsibility to check the plant carefully and establish whether the flowers are real or fake. You can always avoid plants with fake flowers if you are unhappy with them.

You are free to ask the seller about the flowers, and he/she should be 100% honest if you ask. However, it is not the seller’s fault if you don’t ask.

Mammillaria nejapensis exposed to sunlight.
You can always avoid plants with fake flowers if you are unhappy with them.

The truth is that blooms make cacti plants look more vibrant and highly attractive to potential buyers. Therefore, sellers will do everything possible to capture your attention.

While it may be difficult to differentiate between fake and real cacti flowers, especially if you are a beginner, things improve as you become more experienced.

In fact, some people can easily differentiate between fake and real cacti flowers by just looking at them.

Identifying Fake Cacti Flowers

Fortunately, identifying fake cacti flowers isn’t hard at all. The first thing you must remember is that real cacti flowers only last for a couple of days. You heard that right; real flowers don’t remain fresh for over a week.

So, if you come across cacti flowers that have lasted for months or even years, they are most likely fake.

Most cacti species flower in summer or right after summer. Therefore, it is almost impossible to find flowers on cacti plants during winter and autumn.

Real cacti flowers will also have unique characteristics, such as bright colours and freshness, among other features. On the other hand, fake cacti flowers may be dull in colour or lack petals altogether.

The position of the flower can also be indicative of whether it is fake or not. Generally, you should expect to see real cacti flowers growing out of a stem or area close to the stem, and they will usually follow a specific pattern.

A golden barrel cactus flowering.
Real flowers don’t remain fresh for over a week.

Fake flowers are normally stuck at the top of the plant, which can be a huge giveaway.

Look at how the flower is attached to the cactus plant. If you are keen enough, you may notice hot glue on the sides of fake flowers. This is how sellers attach fake blooms to cacti plants.

Sometimes, they use a pin, but all real flowers will be attached to the plant’s stem with a receptacle.

What Are the Issues with Fake Cacti Flowers?

The main problem with fake cacti flowers is how they are attached to the plant. Most sellers use hot glue to attach the flowers, although some use pins.

Hot glue creates a massive wound on the cactus and sticks to the spines permanently. A pin is equally bad since it pierces through the cactus, creating a wound.

You must be extra careful when removing the fake flowers from your plant to avoid causing further damage.

A thelocactus blooming in a pot.
The main problem with fake cacti flowers is how they are attached to the plant.

Pulling the flowers out without a plan will tear off areoles, spines, and even a section of the skin, creating an open wound.

With pins, you don’t have any other option than taking the pin out and letting the wound heal with time. Either way, you will be left with a permanent scar on your plant after removing the fake flowers.

How to Remove Fake Cacti Flowers

If you have bought cacti plants with fake flowers, the good news is that it is possible to remove them. Below are different methods of removing fake cacti flowers from your plant:

1. Removing by Hand

You can start by trying to remove the fake flowers by pulling them off gently and slowly. Pay close attention to how the glue has been applied to the plant.

If the glue is relatively loose, use your hand to move the fake flower back and forth a couple of times until it comes off.

Don’t move too fast since it may damage the spines. The back-and-forth movement must be done slowly to minimize potential damage.

Mammillaria Bocasana flowering in a pot.
Pay close attention to how the glue has been applied to the plant.

If the hot glue used to attach the fake flowers to the plant is too hard, this method might not work. The primary aim is to eliminate the fake flowers while causing minimum damage to the plant.

2. Use a Pair of Scissors and Brush

If the hot glue has adhered tightly to the plant, consider using scissors and a brush to remove it.

Start by snipping away all attached petals before brushing gently with a soft brush.

If you find the tip of the scissors touching your cactus, it is time to stop since you might damage the plant further.

Sometimes, you may be forced to cut off some sections. You may lose some spines in the process, but that won’t cause terrible damage to your plant. Just be careful not to cut more than you should.

3. Use a Hair Dryer

You can also use a hair dryer to remove the fake flowers from your plant if the hot glue is too hard on the plant. Carefully blow hot air on the glued area and slowly move it back and forth.

The heat from the hair dryer will eventually loosen up the glue. Once you are sure the glue is loose enough, use your fingers to remove the fake flowers gently while avoiding potential damage to the spines.

Remember not to blow hot air around the plant for too long. If you blow hot air around the cactus for too long, you may end up causing irreversible damage because many cacti species can’t withstand hot air blowing on them for a long time.

4. Use Tweezers

Tweezers can be used to remove fake flowers without causing extensive damage. You can use tweezers to pull out both the flowers and glue.

Be careful when using tweezers and take things slowly because quick movements may damage the plant.

5. Leave It As It Is

If the glue is too hard, consider leaving the fake flowers as they are.

The fake flowers will eventually go down as the cactus grows. It may take a season or two for the fake flowers to fall off without you doing anything.

However, you may have to tolerate the fake flowers on your plant for some time before they finally fall off. This shouldn’t be a big issue as long as your cactus stays healthy.

Summary

Although cacti flower naturally, some sellers attach fake flowers to their plants to make them appear more attractive to potential buyers.

It is important to differentiate between fake and real flowers since there are potential problems that come with having fake flowers attached to your cactus plant.

Several methods can be used to remove these fake flowers, such as pulling them off by hand, using scissors and a brush, using a hairdryer, or using tweezers. Ultimately, it is up to you whether you prefer to remove the fake blooms or leave them as they are.

The Ultimate Guide to Caring for Caudex Plants

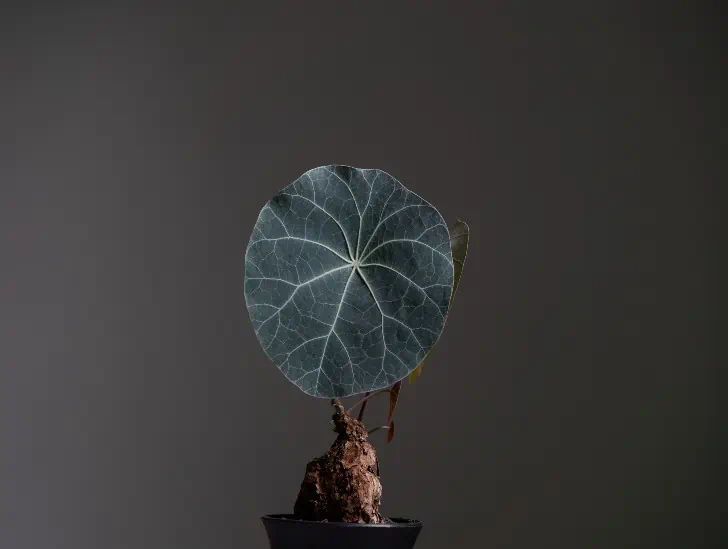
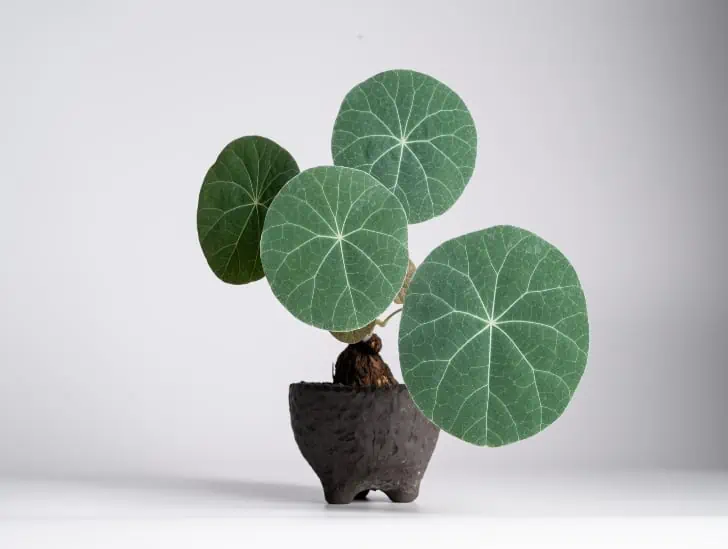
A caudex plant.

Caudex plants, also referred to as “fat plants,” “pachycauls,” or “stem succulents,” are a unique group of plants known for their distinctive swollen stems. The stems are known as caudices. These remarkable plants have captured the fascination of botanists, collectors, and enthusiasts alike due to their intriguing history, diverse habitats, and distinct characteristics. Over the years, these plants have exploded in popularity because they are relatively easy to care for, beautiful, and unique. They are good indoor ornamental plants and make an excellent addition to outdoor gardens.

So, how do you care for caudex plants? The first rule of thumb is to keep them out of direct sunlight and away from any sources of heat or cold drafts. Direct sunlight can damage their delicate stems severely. Water your caudex plants sparingly and only when the soil is completely dry. It’s important to note that too much water can cause irreversible root rot. These plants love well-draining soil and a temperature range of between 40-90°F. If you live in a colder climate, bring your caudex plants indoors during winter and position them in a bright spot to help them get enough light. You can also fertilize your plants occasionally to replenish soil nutrients.

This blog post provides you with extensive information on how to care for caudex plants. Read on to find out everything you need to know.

Caudex Plants: History, Habitat, and Characteristics

The history of caudex plants dates back centuries, with evidence suggesting that they were first cultivated by ancient civilizations such as the Egyptians and Romans.

These plants were loved for their ornamental value and often featured in gardens and horticultural displays. Over time, they became symbols of resilience and adaptation, surviving in arid and semi-arid environments.

Today, caudex plants continue to captivate gardeners and plant enthusiasts, showcasing an array of forms and adaptations that have evolved over the years.

These plants are renowned for their ability to thrive in diverse habitats, particularly in regions with harsh climatic conditions. They are commonly found in arid and semi-arid areas, such as deserts, rocky slopes, and savannas.

A caudex plant.
They became symbols of resilience and adaptation, surviving in arid and semi-arid environments.

The caudex is an adaptive feature, allowing the plants to store water for prolonged periods. This unique adaptation has enabled caudex plants to colonize harsh landscapes and become masters of survival in the face of adversity.

The most distinctive feature of caudex plants is their swollen stem, known as a caudex. The thickened stem serves as a reservoir for water storage, allowing the plant to endure prolonged drought periods.

Many caudex plants also feature attractive foliage adorned with exciting textures, colors, and patterns. The aesthetic appeal adds to their popularity among collectors and gardeners.

How to Take Care of Caudex Plants

Most caudex plants are relatively easy to grow with relatively low demands. Below are some of the things you need to focus on to ensure your caudex plant thrives:

1. Light Requirements

Light plays a critical role in the lifecycle of caudex plants. It influences various physiological processes, such as photosynthesis. Light exposure also affects leaf production, water uptake, and nutrient absorption.

Caudex plants exhibit varying preferences when it comes to light conditions. Generally, they are adapted to thrive in bright and sunny environments, mimicking their natural habitats.

A Madagascar palm caudex plant exposed to sunlight.
Light plays a critical role in the lifecycle of caudex plants.

Therefore, providing your plants with bright, indirect sunlight is essential. Position them near a south or east-facing window to ensure they receive ample light without being overexposed to harsh, direct rays that could scorch their leaves.

Consider filtering direct sunlight through sheer curtains, blinds, or using a light-diffusing material to create suitable light conditions for your caudex plants.

For outdoor cultivation, choose a location with partial to full sun, depending on the species of your caudex plants. Gradually acclimate plants to outdoor conditions to prevent sunburn and stress.

You can also consider supplementing natural light with artificial light, such as fluorescent or LED grow lights, if you live in an area that doesn’t receive plenty of natural light.

Position the artificial lights 6 to 12 inches above the plants and keep them on for 10 to 14 hours daily.

2. Watering Requirements

It is extremely easy to water caudex plants. Since most of them are adapted to growing in arid and semi-arid areas, they don’t need frequent watering to thrive.

Typically, you only need to water your plant once a week or every two weeks, depending on the season.

Let the potting mix dry out completely between watering sessions. Keep in mind that caudex plants hold moisture for a relatively long period.

So, the plant can still survive for a couple of days or weeks without watering, even if the soil feels dry.

When you water, place your plant in a sink and let them sit in lukewarm water for about 15 or 20 minutes.

Carefully remove them after the time lapses and rinse them using a gentle stream of lukewarm water. Ensure that excess water drains out from the potting mix to prevent root rot and other problems associated with soggy soil.

The best time to water your caudex plants is early morning or in the evening when temperatures are relatively low.

Avoid watering during the afternoon because the temperatures are high and could result in root burn due to quick evaporation of excess water.

3. Temperature and Humidity Requirements

Caudex plants prefer an ideal temperature range of 40-90°F (4-32°C). The higher temperatures encourage faster growth, whereas lower temperatures slow the process. Keep your caudex plants away from any sources of cold drafts to prevent stunted growth or death.

A beaucarnea poytail palm caudex plant.
Caudex plants prefer an ideal temperature range of 40-90°F (4-32°C).

If you live in a colder climate, bring your caudex plants indoors to protect them from low temperatures during winter.

Humidity is not a significant requirement for caudex plants, but ensuring that the air around your plant is sufficiently humid is vital.

You can mist your plant regularly or place the pot on top of a humidity tray filled with wet pebbles. Alternatively, use a room humidifier to increase the overall humidity around your plant.

4. Soil Requirements

Caudex plants generally require a well-draining potting mix to thrive. You can create your own potting mix by combining equal parts of sand, perlite, and peat moss, or purchase a ready-made cactus potting soil from the local garden store.

The key is to ensure that the potting mix drains quickly and doesn’t hold too much water for too long because it could cause irreversible root rot.

Consider using a humus-rich potting mix to help the plant retain enough moisture without becoming soggy.

5. Fertilization Requirements

Fertilization is a crucial aspect of caudex plant care, supplying essential nutrients that support various physiological processes. These nutrients are vital for photosynthesis, root development, flower formation, and overall growth.

Proper fertilization helps caudex plants attain their full potential, showcasing vibrant foliage and encouraging flowering.

Consider feeding your caudex plants at least once during the active growing season (spring and summer).

Use a well-balanced, water-soluble fertilizer with an N-P-K ratio suitable for the growth stage of your caudex plant (e.g., 10-10-10 or 20-20-20).

You must also ensure that your preferred fertilizer contains essential micronutrients. Fertilizers designed exclusively for succulents or cacti plants are the best option.

Alternatively, use organic fertilizers that can gradually release nutrients and improve soil structure. Well-decomposed compost or worm castings can be used as natural fertilizers.

6. Repotting

With time, your caudex plants will outgrow their current pots and require repotting to provide enough space for long-term growth.

Repotting is critical in ensuring that the root system has plenty of room and access to oxygen, allowing them to absorb resources more efficiently.

Report caudex plants once they outgrow their existing pot or every two years during the active growing season.

A bonsai being prepared to repot.
Your caudex plants will outgrow their current pots and require repotting to provide enough space for long-term growth.

Choose a pot with drainage holes that is slightly larger than the current one. Remember to provide a well-draining potting mix and water moderately for two weeks after repotting.

This will help your caudex plants adapt to their new environment without going through any unnecessary stress.

7. Winter Care

During winter, these plants usually go dormant. The dormancy period may last for about three to four months. The plant may shed its leaves to signify the start of its dormancy period.

Reduce the watering frequency during this period and let your plant rest. Instead of watering once a week, consider watering your plant every two or three weeks.

Don’t apply fertilizer during the dormancy period because the plant doesn’t need any nutrients.

If possible, move the plant to a cooler location during winter. This will help reduce stress and slow down growth.

You can also place your caudex plants outdoors for some fresh air but bring them back indoors if temperatures drop below 40°F (4°C).

Final Thoughts

Caudex plants are remarkably easy to care for and can survive in various conditions. They only require minimal maintenance to thrive, which makes them an ideal choice for gardeners of all levels.

Ensure you provide your caudex plants with the right conditions — temperature, humidity, water, sunlight, soil type, and fertilization —to keep them healthy and happy.

With proper care, your caudex plants will reward you with their beauty and vibrant space for many years.

What Is the Penis Cactus and How to Care for It?

A cactus penis in a pot.

The term “Penis Cactus” is a colloquial name that refers to a specific type of cactus known scientifically as Trichocereus bridgesii. It is also commonly called the “Bolivian Torch” due to its origin in Bolivia and its elongated columnar shape. The nickname is due to the cactus’s appearance, resembling a phallic shape. The cactus grows upright, reaching heights of up to ten feet in its natural habitat. The Bolivian torch cactus features bright yellow spines as long as eight inches. The cactus thrives in relatively warm climates with plenty of sun exposure.

So, how do you take care of a penis cactus? The Bolivian torch cactus prefers full sun exposure making it an ideal option for your outdoor garden. Being a drought-resistant plant, it doesn’t need frequent watering. You should only water it when the potting mix is completely dry. Fertilize your Bolivian torch cactus once a month during the active growing seasons (spring, summer, and fall). Be sure to use a small amount of slow-release fertilizer. The cactus thrives in temperatures between 65 and 85 degrees Fahrenheit. Prune it regularly to prevent it from toppling over if you’re growing it indoors. Watch out for common pests such as aphids and mealybugs, and consider repotting your cactus every two or three years.

This blog post discusses everything you need to know about the Bolivian torch cactus and how to take care of it. Read on to learn more.

Penis Cactus: An Overview

The penis cactus, scientifically known as Trichocereus bridgesii but commonly referred to as the Bolivian torch cactus, is a fascinating and striking member of the cactus family.

Native to the high altitudes of Bolivia, this unique cactus has captured the attention of plant enthusiasts and curious minds alike.

The Bolivian torch cactus boasts an impressive columnar growth habit, often reaching heights of 10 to 20 feet (3 to 6 meters). Its elongated, ribbed stems exhibit a distinctive bluish-green hue adorned with prominent areoles and spines.

A cactus eccentric shape like penis.
It is a fascinating and striking member of the cactus family.

One of its most notable features is its uncanny resemblance to a phallic shape, earning it the humorous nickname “penis cactus.”

Indigenous to the high-altitude regions of Bolivia, specifically the Andean Mountain ranges, the penis cactus thrives in arid and rocky landscapes. It is a hardy species, adapted to withstand extreme temperatures and water scarcity.

Known for its psychoactive properties, the cactus has played a significant role in religious and healing rituals for centuries.

With increasing interest in the Bolivian torch cactus for ornamental and ceremonial purposes, the species faces potential threats from overharvesting and habitat destruction.

That is why many plant conservationists worldwide have started conservation efforts to protect this unique cactus and its natural habitat, encouraging responsible cultivation and ethical practices.

Taking Care of the Penis Cactus

Now that you know a bit more about the penis cactus, let’s take a look at how to care for it. The tips and tricks highlighted below will help you achieve great success cultivating this cactus at home.

1. Watering

The Bolivian torch cactus is a drought-resistant succulent that doesn’t require frequent watering to thrive. In fact, the cactus has a relatively thick stem to store as much water as possible in its natural habitat.

Therefore, only water the cactus when the potting mix is completely dry. You can check for the dryness level by sticking your finger in the soil up to the first knuckle.

If the soil feels dry, go ahead and water your cactus deeply. Otherwise, give it a couple of days before you check again.

When potted, consider watering the cactus slowly and wait for the water to flow out of the bottom of the growing container. Empty all the excess water from the tray to avoid waterlogging your plant.

A water droplet in a cactus.
You can check for the dryness level by sticking your finger in the soil up to the first knuckle.

The watering frequency varies significantly with the season. The cactus is actively growing during spring, summer, and fall. Consider watering your cactus once per week to keep the potting mix slightly wet during this time.

Cut back on watering frequency during winter when the plant is dormant. Only water the cactus slightly during this time to keep the soil wet. Consider light watering once a week or every two weeks.

Water your Bolivian cactus with rainwater or distilled water. Avoid tap water since it contains a lot of magnesium, calcium, and other mineral salts that may cause soil compaction. Avoid splashing water on the stem during watering to prevent stem rot issues.

2. Light Requirements

The penis cactus is a sun-loving species and will thrive in bright, direct sunlight. When grown indoors, providing your cactus with the best possible light source is crucial. Typically, the cactus requires at least six hours of direct sunlight every day to thrive.

Choose an ideal spot that receives plenty of direct sunlight most times of the day. A south or east-facing windowsill is a good spot for your cactus.

A lady finger cactus exposed to light.
When grown indoors, providing your cactus with the best possible light source is crucial.

Feel free to supplement direct sunlight with artificial grow light if need be. Grow lights are great for providing additional light to your cactus during winter or if you live in an area that receives less sunshine.

Keep in mind that if you grow your penis cactus outdoors, it will require a few weeks of exposure to sunlight before it can tolerate full sun conditions.

Start by exposing your plant to dappled sunlight for several hours daily and gradually increase the exposure time.

3. Temperature and Humidity

The penis cactus enjoys a warm climate. It prefers temperatures between 65 and 85 degrees Fahrenheit, although it can tolerate slightly cooler temperatures if necessary.

Avoid exposing your cactus to temperatures below 40 degrees Fahrenheit for extended periods because it may cause irreversible rot to the plant.

The cactus thrives in dry air conditions, typically found in arid habitats. Low humidity levels will help keep the stems and spines healthy.

Consider increasing the humidity level of your home slightly if it is too dry for the cactus.

A simple way is to place a humidifier near the plant or use a shallow water tray filled with pebbles. Ensure the water level is below the pebbles, so your cactus won’t be sitting in water.

4. Soil Requirements

The penis cactus thrives in relatively fertile, gravel-rich, and highly draining succulent soil. The soil pH should be maintained at around 6-7.5.

You can buy a commercial succulent soil mix or make your own by combining perlite, pumice, vermiculite, potting soil, and sand in equal parts.

You should also add some organic matter, like well-rotted compost, to the soil mix to provide additional nutrition for the cactus.

Some gardeners prefer using a culture soil formula that is about 60% vermiculite, 20% sandy soil, and 20% coconut coir or peat moss for nutrients. Some prefer adding a small amount of organic potting soil to the mix.

A golden barrel cactus on hand being repot.
The soil pH should be maintained at around 6-7.5.

You must remember that the roots of the Bolivian torch cactus are quite sensitive to oxygen deficiency. Therefore, root rot can easily set in if the soil is poorly permeable to water and air.

It is pretty easy to determine the permeability of your soil. Pay attention to how fast the water flows through the potting mix when watering. If it takes too long, amend the soil with more perlite or pumice.

5. Fertilizing

The Bolivian torch cactus doesn’t require frequent fertilization to remain healthy and vigorous. You can provide your cactus with a balanced liquid fertilizer diluted in water three times per year.

During spring and summer, you can replace one of the regular watering sessions with a liquid fertilizer solution. Use half the recommended dose listed on the package to avoid salt buildup in the soil.

Avoid fertilizing your cactus during fall and winter when it is dormant, as this may lead to root burn.

You should also avoid using fertilizer if your penis cactus is in a container that has not been repotted for more than two years.

6. Repotting

With time your cactus will outgrow its pot. At this point, you must repot it into a larger one. This will give the root system enough space to spread and the plant to grow bigger.

Repot your Bolivian torch cactus once every two to three years during spring or early summer. Use a pot slightly bigger than the previous one and fill it with fresh succulent soil.

Water heavily after repotting to help the roots establish in the new container. Reserve fertilizing for the next season when the cactus starts showing signs of active growth.

7. Pests and Diseases

Finally, it is essential to keep an eye on your cactus for any signs of diseases or pests. If left untreated, these can cause severe damage to the plant, so treat them immediately.

Common diseases and pests include root rot, fungal infections, mealybugs, aphids, and spider mites. These can be treated with chemical sprays or organic solutions like neem oil and insecticidal soaps.

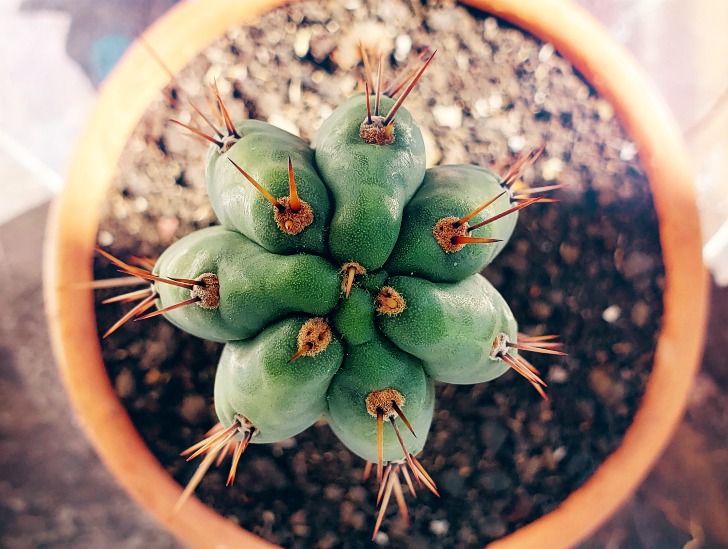
A san pedro cactus top view.
it is essential to keep an eye on your cactus for any signs of diseases or pests.

Be sure to observe the safety instructions listed on the packaging of chemical sprays. When using organic solutions, ensure you use 100% pure essential oils, not diluted ones.

Keep your cactus healthy by wiping off any dusty layers that may accumulate on its spines or stem from time to time. This will keep the plant clean and free from any pests.

Summary

The penis cactus is a beautiful and unique species that is easy to care for as long as you provide it with the right growing conditions.

With proper watering, light, humidity, soil, fertilizing, and pest management techniques, your Bolivian torch cactus can thrive indoors or outdoors for many years.

What Makes Aloe Vera a Must-Have Plant for Your Home Garden?

A small aloe vera in a pot.

A home garden creates a haven of natural beauty and tranquility in your backyard. There’s something gratifying about nurturing plants, watching them grow, and reaping the benefits of your hard work. And among the myriad of plant options available, there is one that stands out as a true must-have: Aloe Vera. This succulent is not your ordinary plant. It is a powerhouse of health and wellness benefits that can transform your home garden into a sanctuary of healing and rejuvenation.

So, what makes Aloe Vera a must-have plant for your home garden? Aloe Vera is known for its ability to purify the air by removing toxins like formaldehyde and benzene, making your home environment healthier and more pleasant. The succulent is a game changer when it comes to healing sunburns. Its gel-like substance is known for its cooling properties that provide instant relief from the painful effects of overexposure to the sun. But that’s not all. Aloe Vera is a secret weapon for achieving radiant and healthy-looking skin. The succulent can also help improve your sleep quality. Research suggests that the presence of Aloe Vera in your bedroom can purify the air and promote a more peaceful environment, allowing you to drift off into a restful slumber.

This post delves deeper into the world of Aloe Vera, exploring its history, cultivation, and the many benefits it offers. Read on to learn more.

Aloe Vera: Quick Overview

The Aloe Vera plant has a fascinating history that dates back to Ancient Egyptian times. It is believed that it was used for medicinal purposes, anointing wounds, and treating skin conditions.

The plant then began to spread across the world, with Spanish explorers introducing it to Mexico and other parts of Central America in the early 1500s.

Today, Aloe Vera is cultivated in many countries, including the United States, Jamaica, India, and Africa.

It is believed that it was used for medicinal purposes, anointing wounds, and treating skin conditions.

Aloe plants are incredibly easy to care for. They require little water and can survive in almost any type of climate. The plants thrive in well-draining soil with a slightly acidic pH level and prefer full sunlight.

Once you have the right conditions, all you need to do is water them once or twice a week and watch your Aloe Vera thrive.

What Makes Aloe Vera a Must-Have Plant for Your Home Garden?

Aloe Vera offers many benefits to homeowners, from improving air quality to promoting skin health. Here are some of the most notable advantages of adding this succulent to your home garden:

1. Natural First Aid

One of Aloe Vera’s most prominent advantages is its ability to act as a natural first-aid remedy for various skin issues. Extracted from the plant’s fleshy leaves, Aloe Vera gel contains numerous beneficial compounds that contribute to its healing prowess.

Among these, acemannan, a type of polysaccharide, stands out for its inflammation-reducing and tissue-repairing properties.

When applied to minor cuts or abrasions, the gel’s cooling sensation provides immediate relief, while its antibacterial attributes help prevent infections.

Moreover, Aloe Vera gel creates a protective barrier over the wound, speeding up the healing process and minimizing the risk of scarring.

Aloe Vera’s effectiveness as a first aid remedy also extends to burns, including sunburns. Applying the gel to burnt skin forms a soothing layer that alleviates pain, redness, and swelling. Its high water content further aids in rehydrating damaged skin, promoting fast healing.

A aloe vera.
Applying the gel to burnt skin forms a soothing layer that alleviates pain, redness, and swelling.

Beyond burns, Aloe Vera proves useful in managing skin irritations, such as rashes, itching, and allergic reactions. Its gentle and non-irritating nature makes it ideal for providing relief and comfort in these situations.

The gel’s anti-inflammatory properties make it beneficial for managing skin conditions like psoriasis, eczema, and acne.

Its moisturizing effect prevents excessive dryness, flakiness, or oiliness, further contributing to its versatility as a natural remedy.

Compared to over-the-counter ointments or creams containing chemicals and synthetic ingredients, the gel is a safe and natural alternative.

This makes it highly appealing to individuals with sensitive skin or those seeking to reduce their exposure to artificial substances.

2. Air Purification

Aloe Vera is known for its unique ability to purify the air. The plant can remove harmful toxins from the atmosphere, thus protecting your home environment.

Studies have found that Aloe Vera can effectively remove contaminants like formaldehyde, benzene, and carbon monoxide from indoor spaces without any additional filtration or ventilation system.

This makes it a natural solution for improving the air quality in your home, avoiding any potential health risks posed by exposure to chemicals.

Moreover, Aloe Vera’s purifying effect isn’t limited to air; it also affects water. The plant is capable of removing bacteria and chlorine from the tap or drinking water, making it safer for consumption.

The remarkable air-purifying qualities of Aloe Vera make it a valuable asset in any home. Its ability to filter harmful toxins from the atmosphere revolves around its capacity to absorb gases through tiny pores on its leaves.

A aloe vera indoors.
Aloe Vera’s purifying effect isn’t limited to air; it also affects water.

During the process, toxins such as formaldehyde and benzene, commonly found in chemical cleaning products, paints, and more, are absorbed and neutralized. This results in a purer, fresher indoor air quality, contributing to a healthier living environment.

3. Ornamental Value

Besides its practical and medicinal uses, Aloe Vera brings considerable ornamental value to your home garden.

Its distinctive appearance, with succulent, spiky leaves arranged in a rosette formation, makes it an eye-catching addition to any outdoor or indoor space.
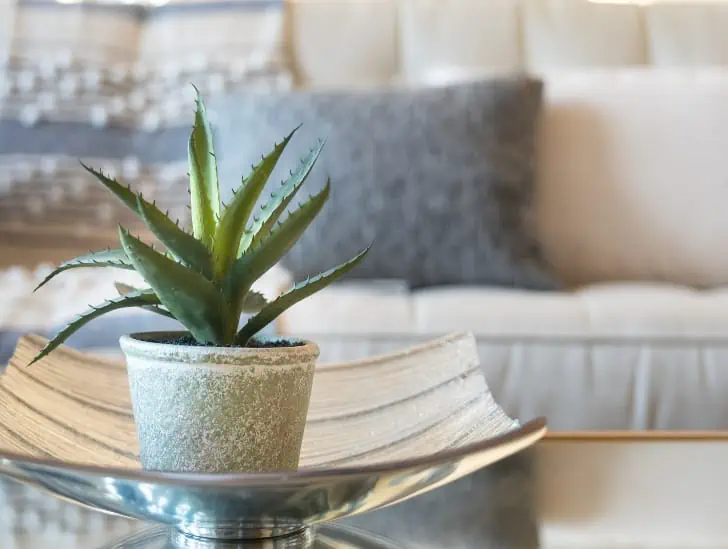
The unique architectural structure of Aloe Vera creates an intriguing focal point that effortlessly enhances the overall aesthetics of the garden.

Aloe Vera plants come in different species and cultivars, each offering its own charming attributes. Some varieties showcase vibrant green leaves, while others boast striking patterns and colors like reddish or golden edges.

The visual characteristics add diversity and visual interest to your garden, making it more dynamic and visually appealing.

Furthermore, the succulent’s ability to thrive in different climates and conditions allows it to be creatively incorporated into many garden designs.

Its adaptability makes it suitable for rock gardens, succulent gardens, desert-themed landscapes, and even as a potted plant on balconies or indoors.

As a low-maintenance plant, Aloe Vera is an excellent choice for those looking to beautify their surroundings without the need for extensive care.

A aloe variegata in a pot.
Aloe Vera brings considerable ornamental value to your home garden.

The plant’s ornamental value also extends to its ability to attract pollinators. When aloe plants bloom, they produce striking, tubular flowers ranging from vibrant orange and red to more subdued hues like yellow and white.

The flowers attract bees, butterflies, and hummingbirds, adding an element of wildlife and ecological significance to your garden.

4. Digestive Aid

Aloe Vera has been used as a natural remedy for digestive issues for many years. This is due to its laxative effect that helps to relieve constipation, bloating, and other gastrointestinal problems.

Aloe Vera juice is known to serve this purpose. The juice eliminates waste from the body more quickly than traditional oral medications, further preventing discomfort or cramping.

The gel’s abundance of enzymes and compounds, such as polysaccharides and glycoproteins, contribute to its digestive aid properties.

These substances help to stimulate the body’s natural process for eliminating waste while providing a soothing effect on the gastrointestinal tract.

The succulent can also be used to promote digestive health. Its high nutrient content, including vitamins A, C, E, and B-complex vitamins, helps to strengthen the intestinal walls. This, in turn, boosts the absorption of nutrients and encourages healthy digestion.

Aloe Vera’s digestive properties make it an excellent natural remedy for common digestive issues. Its ability to reduce inflammation while providing a protective coating on the digestive tract can provide much-needed relief while promoting overall gut health.

5. Insect Repellent

The gel from Aloe Vera leaves can be used as a natural insect repellent. The plant’s compounds, such as aoin and aloe-emodin, are a natural defense against specific bugs like mosquitoes and houseflies.

These substances block the insect’s sense of smell, making it harder for them to detect you as a potential target. Moreover, due to its non-toxic nature, Aloe Vera gel is safe for children and pets.

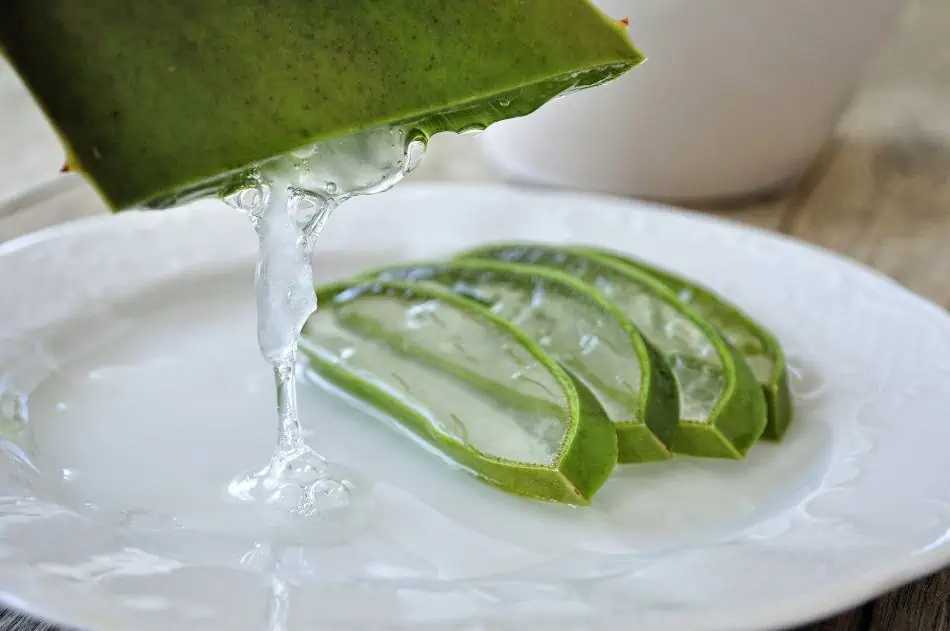
Aloe vera gel.
The gel from Aloe Vera leaves can be used as a natural insect repellent.

Another way to use Aloe Vera as an insect repellent is by growing the plant in your garden. Its distinctive smell serves as a natural deterrent for many bugs, decreasing their presence and keeping them away.

Besides its insect-repelling properties, Aloe Vera also works as a natural fungicide. Its gel-like consistency helps to protect plants from fungus and other parasites that can infest your garden.

Summary

Aloe Vera is a unique plant with many practical and medicinal uses. Its ability to purify air and water makes it an effective solution for improving indoor air quality and eliminating toxins from drinking water.

Furthermore, its ornamental value gives it the potential to enhance any outdoor or indoor space with its distinctive appearance.

The succulent also brings considerable digestive aid, relieving constipation and other gastrointestinal problems.

All in all, the many benefits of using Aloe Vera make it an invaluable addition to every garden. With its diverse range of uses, Aloe Vera is truly a remarkable plant with limitless potential.

Succulent Soil Secrets: What Every Plant Parent Needs to Know

A succulent soil.

A succulent garden can be a source of great pride and accomplishment. Nothing feels good like caring for succulent plants and watching them flourish. And the most exciting part is that succulents are tough and need little maintenance to thrive. However, the biggest secret to landscaping with succulents is to use the right succulent soil. You must create a perfect potting mix for your plants to help them stay happy and healthy. The soil requirements for these plants are unique and may differ from the other plants in your garden.

So, what are the top succulent soil secrets that every parent plant must know? The most important thing you must know is that all succulents need a well-draining potting mix to thrive. Their ability to withstand drought makes them highly susceptible to rot if left in wet soil. The three main components of good succulent soil are sand, regular soil, and pumice or perlite. The ratio of these three ingredients varies depending on the type of succulent that you have. The key succulent soil factors include organic vs. mineral, texture, and porosity. Common succulent soil problems include soil compaction and excessive nutrients.

This blog post highlights some of the top succulent soil secrets every gardener must know. Read on to learn more.

What Is Succulent Soil? A Quick Overview

Before diving into succulent soil’s secrets, let’s quickly review what it is. Succulent soil is a mixture of different ingredients that create an environment conducive to growing succulents.

It usually comprises three main components: sand, regular soil, and pumice or perlite. Sand helps with drainage, while the organic matter provides nutrition and retains moisture. The pumice or perlite improves air circulation and drainage.

The ratio of each component will depend on the type of succulent you’re growing; some prefer more sand, while others need more organic matter. Getting the right mix of ingredients is essential for healthy plants.

A soil.
Succulent soil is a mixture of different ingredients.

Succulent soil differs from regular soil because it has a looser texture, allowing for better drainage. It also contains fewer nutrients and is more alkaline, essential for succulents to survive.

Understanding the Key Components of Succulent Soil

As highlighted above, the three critical components of succulent soil are coarse sand, potting soil, and perlite/pumice. Below we discuss each of the components in detail:

Coarse Sand

Coarse sand is crucial to every succulent soil mix because it helps improve drainage and soil aeration. It also provides the grainy texture that many succulents love.

Avoid using fine sand in your succulent soil recipe because it won’t enhance drainage. If you cannot find coarse sand, use medium coarse for optimal drainage.

Potting Soil

Even though you will only use a small portion of it, potting soil is still essential to succulent soil since it provides organic matter.

It helps retain moisture and nutrients for succulents, which coarse sand cannot do.

Be sure to choose potting soil that is well-draining for your succulent soil recipe. Feel free to go for standard houseplant mix; you will mix it with coarse sand and perlite.

A sansevieria cutting and a potting soil.
Be sure to choose potting soil that is well-draining for your succulent soil recipe.

Avoid using heavy black gardening soil or houseplant mixes formulated explicitly for water retention.

Perlite/Pumice

Perlite or pumice is vital in succulent soil because it helps to improve drainage and aeration. This component is also essential in providing structure to the succulent soil mix since it has a porous texture.

Pumice is a volcanic rock with high porosity, allowing for better aeration and drainage. It also contains some minerals, which can provide additional nutrition to succulents.

A soil with perlite.
This component is also essential in providing structure to the succulent soil mix.

Perlite is made from expanded glass and is the most commonly used soil amendment for succulent soils. It helps to break up clay-like soils and loosen them up.

Top Succulent Soil Secrets

Now that you understand what succulent soil is all about, here are some important secrets to keep in mind when creating the right mix for your succulents:

Organic vs. Mineral

Every soil type is usually made up of mineral and organic components. Organic components refer to things that were once alive before dying and decomposing.

For instance, tree bark and other plant debris in the soil are considered organic matter. The primary purpose of organic soil components is to provide nutrients and store water.

Minerals refer to the natural inorganic substances found in the soil, such as gravel. The primary purpose of mineral components in the soil is to enhance drainage.

It is crucial to have the correct ratio of organic and mineral components in succulent soil to support plant growth and prevent potential rot.

The right balance of these components allows you to water your succulents profoundly but infrequently.

Typically, the mineral component should range from 40% to 70%, while the organic component should be between 30% to 60%.

The exact ratio will depend on other environmental factors and the succulent species you intend to grow.

Fortunately, there are many organic and mineral soil ingredients to choose from while making succulent soil.

For organic matter, feel free to go for coconut coir, regular potting soil, compost, or even pine bark. For mineral components include volcanic rock, perlite, sand, chicken grit, and fine gravel.

Texture and Porosity

The texture of succulent soil is crucial for drainage. Combining the components in your soil should have a looser texture, allowing water to drain quickly. If the soil feels too dense or compacted, it can lead to root rot and other issues.

Porosity is also an important factor when creating succulent soil. The soil should be porous to allow air circulation; this helps the roots get oxygen when needed.

Fortunately, you can perform a few simple tests at home to establish the texture of your succulent soil.

Fertilizer on the soil mix.
Combining the components in your soil should have a looser texture, allowing water to drain quickly.

A good test is to mix the soil with water and observe how quickly the water drains out. If it takes a long time, your succulent soil might be too compacted and needs more organic matter.

Know Your Succulents

Different types of succulents have different preferences when it comes to soil. Knowing the succulent you plan to grow is essential to create the perfect soil mix for them.

For instance, tropical succulents like Haworthia and Gasteria prefer more organic matter, while cacti such as Echinopsis prefer a looser, sandier texture with less organic matter. Research your succulent type beforehand and adjust the soil mix accordingly.

Common Succulent Soil Problems

Several issues can arise when making succulent soil. The most common problems are soil compaction and too many nutrients in the soil.

Soil Compaction

If you water your succulent and notice that the water drains straight through the growing pot without the potting mix absorbing any of it, you may be dealing with highly compacted soil.

Soil compaction is rare in succulent soil but can still occur because of heavy clay or too much organic matter.

To fix this, amend the soil with more mineral components to loosen it up and allow for better drainage.

However, a more permanent solution would be repotting your succulent with a new potting mix. Ensure the new soil has plenty of coarse sand and perlite/pumice to prevent compaction problems in the future.

Too Many Nutrients

If your succulent is showing signs of nutrient deficiency, such as yellowing leaves, the problem could be due to an imbalance of nutrients in the soil. This is usually caused by too much fertilizer in the soil or using potting mix with too many nutrients.

If this happens, flush your succulent roots with water for about 15 minutes to remove excess nutrients and adjust the pH level if necessary.

Repotting succulents in a fresh potting mix with low nutrient content is also good.

Can I Make My Own Succulent Soil?

Yes, you can make succulent soil at home. All you need to do is mix various organic and mineral components in the right ratio, giving you the perfect mix for growing healthy, happy succulents.

Getting the exact ratio of components that works best for your succulent species may take trial and error, but having the right ingredients is essential.

Tips For Making the Perfect Succulent Soil

Here are some tips to keep in mind while making your succulent soil:

Coconut fiber and soil.
Do your research and know the preferences of each type of succulent.
  • Always use a standard houseplant mix and adjust the texture with coarse sand, perlite/pumice, and other components.
  • Adjust the mineral-to-organic matter ratio depending on the succulent you are growing.
  • Test the soil texture before planting your succulent. If it feels too dense, amend it with organic matter as needed.
  • Do your research and know the preferences of each type of succulent. Their different requirements can help you create the perfect soil mix for them.
  • Keep a close eye on your succulents and look for signs of nutrient deficiency or overly compacted soil.

Final Thoughts

Succulent soil is a mix of mineral and organic components that provide the right balance of drainage and nutrients for succulents.

Depending on the succulent you plan to grow, it needs to be porous and have the right mineral-to-organic matter ratio.

These tips will ensure your succulents get the best soil for a healthy and thriving life.

Creating the Illusion: DIY Fake Water for Your Terrarium

Candle gel wax on hand.

Have you ever thought of adding a water feature to your terrarium? Most people refrain from using real water because terrariums lack proper drainage. However, there are options for fake water that can give your landscape a realistic look. You can buy fake water products meant for terrariums or do your own. No matter what you choose, fake water will add a lovely and realistic touch to your terrarium.

The question is, how do you make fake water for a terrarium? You can make fake water for your terrarium using candle gel wax, epoxy resin, glue, gelatin, or realistic water products. Colored stones, crystals, or pebbles can also be an alternative to real water. Using these fake water options, you can add water elements like a waterfall or pond that can serve as a lasting part of your terrarium design.

Read this post to learn how to make fake water for a terrarium. The article offers an additional guide on how to achieve water effects, such as ripples and waves.

1. Candle gel wax

Candle gel wax is one of the products you can use to make fake water in your terrarium. Mineral oil is the main ingredient in candle gel wax but is mixed with some resin.

To make fake water with candle gel, take a chunk of wax and melt it in a small pot until it becomes liquid. Allow it to cool to keep bubbles from forming later.

Then, add a bright blue coloring or any other shade of blue to the wax. You may use epoxy resin dye or any acrylic paint as a dye.

Pouring a candle gel wax.
Mineral oil is the main ingredient in candle gel wax but is mixed with some resin.

You can add glitter to the fake water for additional effects. Some dyes come with glitter added to them already. 

Use masking tape to mark off the area of your terrarium where the fake water will sit before filling it. Pour the wax there carefully, then let it dry.

Take off the tape once the candle gel wax has dried. Give it at least 24 hours to settle and dry.

2. Epoxy resin

Epoxy resin is widely used to imitate water in terrariums and mini scenery models. In fact, it is the best material for recreating rivers, ponds, lakes, and ocean features in terrariums.

All you need to make fake water is epoxy and a hardener. The purpose of the hardener is to solidify the epoxy. The general rule is to mix equal parts of epoxy and hardener.

Pour some epoxy into a cup first, then add the hardener. Add more dye as necessary and continue mixing till you achieve the desired shade.

Separate the terrarium using masking tape, then add the epoxy resin. To prevent epoxy from seeping into the soil, you must put a barrier between the soil and epoxy.

You can make a barrier using a piece of plastic (clear or dark) or any other material that won’t melt when in touch with heated epoxy.

Do not pour the entire epoxy resin layer once since it will crack. Instead, pour the epoxy mix on a flat surface.

Pour approximately 6 mm (about 1/4 inch) of epoxy. Then let it cure for about 24 hours before pouring another layer. If you don’t do this, it will crack.

Blow off any bubbles that form to eliminate them – blowing makes them burst. Do not touch resin, as it will stick and form uneven surfaces.

You can add other special effects, such as water flowing from a waterfall if you so want. If you have a hot glue gun or just PVA glue, use it to make a long stick with cuts on the edges.

A epoxy Resin.
Separate the terrarium using masking tape, then add the epoxy resin.

You may attach it to the waterfall feature or something else once it has dried.

Alternatively, cut a long piece of a plastic bottle and make cuts on the edges to simulate flowing water and attach it to the top of the waterfall.

3. Blue decorative stones or crystals

Another technique that doesn’t require complicated liquids is using blue crystals, pebbles, gems, or stones. You can simply simulate the appearance of water by placing many blue stones together.

You can pick either small stones in the form of sand or slightly larger crystals based on the effect you want to achieve.

Making an artificial pond, lake, or sea in a terrarium using tiny crystals is relatively easy. All you need to do is make an outline and add the stones.

You don’t need glue unless you want to attach stones to a waterfall feature or anything similar. E6000 or hot glue are suitable options for this.

Stones or crystals are an excellent option for desert terrariums or terrariums with soil requiring proper drainage. The vibrant blue colors and sparkles make these ornamental stones the best choice.
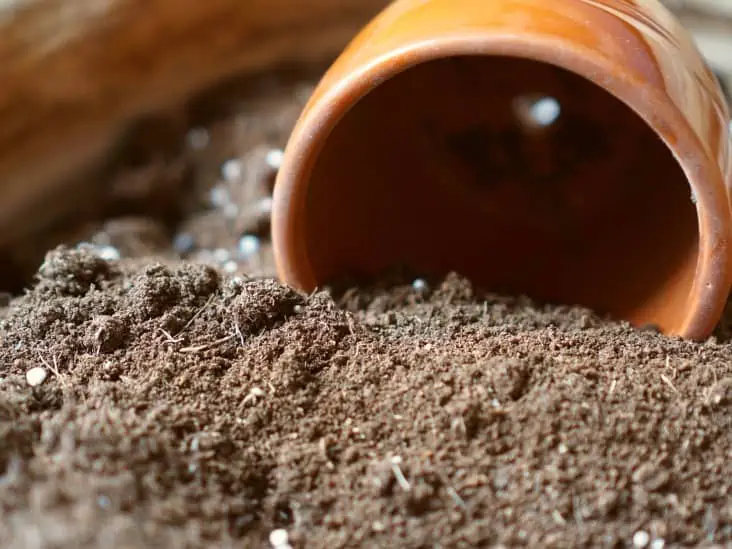
4. Realistic water product

Realistic water, a product made by Woodland Scenics, is another easy way of making fake water in a terrarium.

The company has other products for creating ripples and waves and deep pour water for deep water effects.

You only need to pour this product over the designated area to create fake water. Don’t pour more than 6mm (or 1/4 inch) per layer.

Let it dry before adding another layer. Ensure it does not come in contact with the soil or other material since it will absorb it.

5. Glue

Wood glue or craft glue can work for this method. However, you might consider using craft glue since it is readily available and cheaper.

Craft glue also becomes clear when dry, so easier to work with when building water features with acrylic paint or colored dyes.

Bottle of glue with paint brush.
You might consider using craft glue since it is readily available and cheaper.

The first step is to prepare your base. Choose where you want the water feature to be in your terrarium.
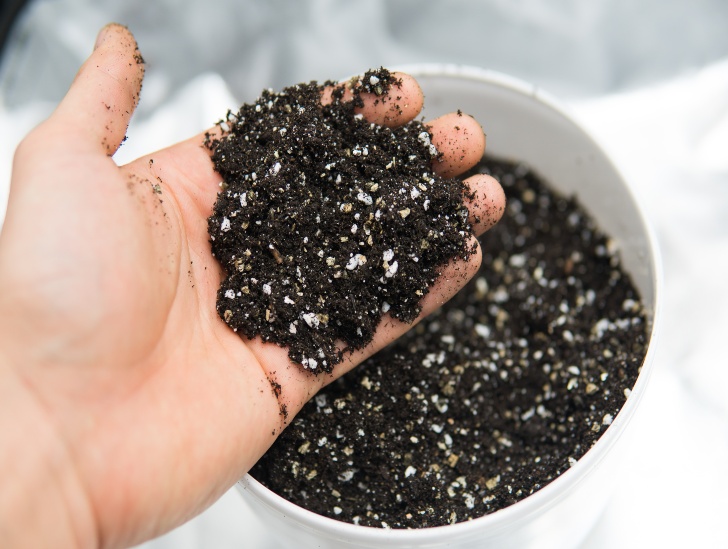
Use hard surfaces like wood, glass, or plastic to make the water base and ensure it is impenetrable from other parts of the terrarium.

Paint the base from the inside to achieve a natural effect. Use shades of blue to achieve a clean water look and green, brown, or black for a swampy pond water look.

Next, mix glue and water in a ratio of 3:1. The mixture should be enough to make a half inch of your water base. You can add color using dye, food coloring, or acrylic paint.

You can now pour the mixture into the terrarium base. Do not pour more than a half inch in thickness.

Let the glue dry for up to three days. Repeat the process to add more layers, ensuring each layer dries completely before adding the next.

6. Gelatin

Gelatin is one of the products you can use to easily make fake water for your terrarium. Here’s what you need to do:

Boil a cup of water and add a quarter cup of clear gelatin powder. Stir until all gelatin is dissolved.

Pour the mixture into a container you had pre-chilled in the refrigerator. Any shallow container will work.

Let the mixture cool and set for at least four hours. If possible, leave it overnight. Once set, cut the gelatin into small cubes using a sharp knife.

A clear gelatin with rosemary.
Gelatin is one of the products you can use to easily make fake water for your terrarium.

If it looks too cloudy, you can filter the fake water using a cheesecloth or coffee filter. To use, place the cubes of fake water in your terrarium.

They will lay on the bottom and look like real water!

Other Less Preferred Options for Making Fake Water

Apart from epoxy resin, you can also use polyester resin to make fake water. However, polyester resin emits more harmful fumes, so wear a mask.

It also hardens quickly, leaving you with less time to work with it before pouring it into the terrarium (pot time).

A decorative terrarium.
Gelatin is one of the products you can use to easily make fake water for your terrarium.

Polyurethane resin is another product you can use to make fake water. But like polyester resin, its pot time is significantly shorter and emits fumes.

How To Make Waves and Ripples on Fake Water

You can add other attractive effects to your fake water, but wait until the water hardens. There are a few ways to create waves or ripples.

You can achieve this using clear silicone, which you paint with a brush and let dry. This will help you create small waves and ripples. 

Then, you can use medium to heavy gel or glazing media for different water effects. The heavier the gel you choose, the heavier the effects. 

Artists frequently use gel and glazing media to make their paint thicker. Gloss or semi-gloss glazing medium is used for lighter effects, while the medium gel is used for medium effects.

Choose medium glazing options for better visibility. However, you can use any kind to make your preferred water effects.

Final Thoughts

You will realize there are several ways of imitating the water effect in a terrarium, some easier than others.

This article has summarized various simple and affordable options that anyone can use for their terrarium landscape.

Whichever option you choose, be creative and add more detail, like plants, moss, or other decorative natural elements.

Help! Mushrooms are Growing in My Terrarium – What’s the Solution?

Mushroom on an open terrarium.

Have you noticed the appearance of mushrooms in your terrarium? You must be surprised at their sight and wondering how they found their way into your terrarium. The truth is that mushroom spores can appear spontaneously in any terrarium and hitch a ride on your plants. The spores can find their way through the air, and it can be hard to stop them if you use an unsealed terrarium. But the big question is, can mushrooms cause harm to your terrarium? If so, what can you do to get rid of them? Let us find out.

So, why are mushrooms growing in my terrarium, and what is the solution? Mushrooms are fungi, and one thing you need to know is that fungi spores come from nowhere and can spread quite easily. In most cases, the wind carries them to your terrarium, and that is how they develop into mushrooms. Since they feed on decaying organic matter only, the mushrooms will die if they don’t get a constant supply of nutrients. You don’t need to worry about mushrooms growing in your terrarium since they can be beneficial in several ways. You should only get concerned if you spot the toxic variety in your terrarium.

This blog post discusses everything you need to know about the appearance of mushrooms in your terrarium and what you can do about it. Read on to learn more.

Understanding the Mushroom and Fungi Ecosystem

Mushrooms are intriguing organisms that have captured human curiosity for centuries. Their sudden appearance and mysterious growth patterns can surprise and confuse individuals, especially when found unexpectedly in plant terrariums.

The best way to prevent them from growing in your terrarium is to understand how the mushroom and fungi ecosystem works.

Fungi constitute a distinct kingdom in the natural world, separate from plants and animals. They play a vital role in ecosystems, aiding nutrient recycling and decomposition processes.

Fungi are crucial for maintaining soil fertility, supporting the growth of plants, and promoting overall biodiversity.

A cylindrical closed terrarium.
When conditions are favorable, spores land on suitable substrates, such as the soil or decaying organic matter in a terrarium.

Plant terrariums are enclosed environments that provide an ideal setting for some succulents to thrive. However, mushrooms may occasionally appear despite efforts to maintain a controlled environment.

These mushrooms, commonly referred to as “terrarium mushrooms,” emerge due to the presence of fungal spores in the soil or organic matter used in the terrarium setup.

Fungi reproduce using spores, which are tiny, lightweight structures released into the environment.

These spores are present almost everywhere, including the air we breathe. When conditions are favorable, spores land on suitable substrates, such as the soil or decaying organic matter in a terrarium.

Mushrooms require specific environmental conditions to grow; terrariums can inadvertently provide these conditions.

Factors such as humidity, moisture levels, organic material, and temperature fluctuations can create an environment conducive to mushroom growth. Even a small imbalance in these factors can trigger the appearance of mushrooms.

Removing Mushrooms from a Plant Terrarium

The key to controlling mushrooms in a terrarium lies in understanding the conditions that promote their growth. To remove mushrooms from a terrarium, start by addressing any environmental imbalances.

Adjust lighting, ventilation, and temperature levels as needed to create an unfavorable environment for mushroom growth.

Also, check the soil in your terrarium for moisture levels and adjust if necessary. The ideal moisture level is somewhere between 40% and 70%. If the levels are too high, use a dehumidifier or open the lid to reduce humidity.

On the other hand, if moisture levels are too low, mist your plants with water daily until mushrooms disappear.

Terrarium material set.
To remove mushrooms from a terrarium, start by addressing any environmental imbalances.

If these efforts are unsuccessful, you can manually remove mushrooms from the terrarium. Use gloves and a soft brush to remove them gently.

Be careful not to break the stems, as this could spread spores and trigger more mushroom growth in the future.

Finally, consider using fungicides or other chemical agents to reduce mushroom populations in your terrarium. However, use caution when using chemical agents as they may be harmful to plants.

Can the Mushrooms Disappear on Their Own?

Yes, mushrooms may disappear on their own, given the right environmental conditions. As mentioned earlier, mushrooms require specific environmental conditions to survive and thrive.

If these conditions are not in your terrarium for a prolonged period, the fungi will eventually die off on their own.

However, it is essential to note that they can re-appear at any time due to the presence of spores in the environment.

It is, therefore, essential to take measures to prevent mushrooms from growing in your terrarium and address any environmental imbalances that may be present.

What Are the Beneficial Aspects of Mushrooms in Terrariums?

The truth is that mushrooms growing in terrariums aren’t always bad. While it’s crucial to remove them when they appear, some mushroom species can benefit your plants and the environment within the terrarium.

For instance, certain types of mushrooms form symbiotic relationships with plants, providing essential nutrients and supporting their growth.

A garden terrarium with mushroom.
They come in various shapes, sizes, and colors, enhancing the overall aesthetics of the miniature ecosystem.

They decompose, breaking down dead plant matter and recycling nutrients into the soil. This recycling process supports the overall health of the terrarium ecosystem.

The presence of mushrooms in a terrarium can indicate the presence of healthy, well-balanced soil. It suggests the terrarium environment is rich in organic matter and actively supports microbial life.

Furthermore, mushrooms add a unique and visually appealing element to a terrarium. They come in various shapes, sizes, and colors, enhancing the overall aesthetics of the miniature ecosystem.

Addressing Concerns and Potential Risks

While mushrooms in a terrarium are generally harmless, it is essential to address a few concerns.

In some cases, mushrooms may compete with your plants for nutrients. However, the presence of mushrooms does not necessarily mean harm to the plants unless they start overpowering them or inhibiting their growth.

Although rare, toxic mushrooms can grow in a terrarium. To mitigate this risk, avoid introducing wild soil or organic matter into the terrarium and purchase soil mixes from reputable sources.

Sometimes mushroom growth can indicate excessive moisture levels or improper airflow, which may lead to mold growth or attract fungus gnats.

Monitoring the terrarium’s moisture levels and ensuring adequate ventilation can help prevent these issues.

Furthermore, mushrooms may create an unappealing appearance and disrupt the design of a terrarium. If this is a concern, consider removing them or using chemical agents to reduce mushroom populations in the terrarium.

Maintaining a Healthy Plant Terrarium

To maintain a healthy terrarium ecosystem while managing mushroom growth, consider the following tips:

  • Proper Drainage: Ensure that the terrarium has appropriate drainage to prevent water from stagnating, which can encourage mushroom growth.
  • Airflow: Allow for proper airflow within the terrarium by opening the lid occasionally or placing it in a well-ventilated area. This helps maintain optimal humidity levels and discourages excessive mushroom growth.
  • Soil Sterilization: Before introducing soil or organic matter into the terrarium, consider sterilizing it to minimize the introduction of fungal spores. This can be done by baking the soil in the oven or using other sterilization methods.
  • Regular Maintenance: Keep a close eye on the terrarium’s moisture levels, removing any excess water promptly. Trim or remove mushrooms if they become too numerous or impact the plants’ growth.

Can I Make a Mushroom Terrarium?

Yes, it is possible to make a terrarium specifically for mushroom growth. This type of terrarium requires special considerations and maintenance to ensure optimal conditions for fungal growth.

A Terrarium.
Once mushrooms start appearing, remove them as needed.

Select an appropriate container with adequate drainage holes to create a mushroom terrarium. It should also have a lid that can be opened or removed easily to allow airflow.

Fill the container with sterile potting soil or compost and add a few pieces of wood. Add some fungal spores to the soil and lightly mist the terrarium with water.

Place the terrarium in an area with indirect sunlight, preferably near a window. Monitor moisture levels regularly and adjust when necessary.

Once mushrooms start appearing, remove them as needed. They will eventually die off once the environment is no longer suitable for their growth, leaving behind fertile soil for other plants.

Can I Add Mushrooms to My Terrarium on Purpose?

If you want to add mushrooms to your terrarium on purpose, you can do so after creating the appropriate environment for them.

A open terrarium outdoor exposed to sunlight.
Researching the type of mushroom you plan on introducing is vital since some may be toxic or harmful.

Depending on the species of mushrooms, they may require specific environmental conditions such as moisture levels, light exposure, and temperature range.

Researching the type of mushroom you plan on introducing is vital since some may be toxic or harmful.

Additionally, remember that it can be challenging to control mushroom growth once they have colonized an area and regulate their populations when needed.

Final Thoughts

Mushrooms in terrariums can be a confusing and frustrating issue. Although mushrooms in your terrarium may indicate unhealthy conditions, some species can help your plants flourish.

The key to controlling mushroom growth is understanding the environmental factors that promote their growth and making necessary adjustments. Also, be careful when using chemical agents since they may be harmful to plants.

By following these tips and making appropriate modifications, you can keep mushrooms from growing in your terrarium and maintain a healthy environment for your plants.