The Ultimate Guide to Choosing the Perfect Planter for Your Air Plants

Air plant in a wood planter.

Air plants, also known as Tillandsia, are a unique and fascinating plant species. They have captured the hearts of many people with their ability to grow without soil, drawing nutrients directly from the air. While their growing requirements may be unconventional, choosing the right planter for your air plants is still crucial for their long-term survival. The right pot enhances the visual appeal of your air plants while supporting their growth and overall health.

So, how do you choose the perfect planter for your air plants? What makes a perfect planter for your air plants depends on many factors, such as shape, size, design, material, compatibility, and functionality. You must ensure the planter has good drainage, retains moisture, and is not too big or too small for your air plants. You must also ensure that the pot is not prone to staining, rotting, or rusting. The planter you select should accommodate your air plants comfortably.

This guide highlights the factors you must consider when choosing the perfect pot for your air plants. Read on to find out everything you need to know.

Factor #1: Drainage

Proper drainage is crucial for air plants since they dislike waterlogging. In fact, air plants can die in soggy soil.

Ensure your pot has at least one hole at the bottom to allow adequate drainage and prevent water logging.

If you use a decorative container without holes, consider adding rocks or pebbles to the bottom to enhance drainage.

A xeric air plant.
Ensure your pot has at least one hole at the bottom to allow adequate drainage.

The primary role of the rock layer is to absorb the excess water from the potting mix to prevent root rot. Waterlogged air plants will ultimately suffer from irreversible rot, mold issues, and fungal diseases.

Factor #2: Size and Shape

Choosing the right size container is also crucial to the well-being of your air plants. These plants require a certain amount of air circulation to thrive.

Therefore, the size of your container must provide enough space for the plants to enjoy optimal air circulation.

The container size you choose will be determined by the size of your air plant and the potting mix you need.

To determine the size of your air plant, measure the circumference of the plant’s root ball and height.

Typically, you should choose a container that is at least twice the width of the air plant and at least three times the height of the plant. This will ensure your plant has enough room to thrive and attain maximum potential.

For instance, opt for a shallow bowl or cup-shaped container if your air plant is small and compact.

On the other hand, if you’re dealing with larger plants, opt for planters that come with multiple drainage holes and are deep enough to accommodate the roots of your plants.

A air plant near the window.
Opt for a shallow bowl or cup-shaped container if your air plant is small and compact.

The shape is also essential since it will impact the stability of your air plants. A wide-based planter with a short and sturdy stem provides much more stability than a tall, narrow pot.

There are different shapes available, such as cuboid, cone, bowl-shaped, or round pots. Cuboid planters are best suited for larger air plants since they provide better support to the roots.

Cone-shaped pots, on the other hand, work best with small and compact varieties.

Factor #3: Container Design

You should consider the aesthetic appeal when selecting a pot for your air plants.

A properly designed planter will enhance the beauty of your air plants and add to the interior décor of your home or office.

For instance, choose a bright decorative pot if you’re dealing with larger air plants. On the other hand, smaller and compact varieties can look great in glass containers or ceramic pots.

Factor #4: Material

The material of your pot is an essential factor to consider when selecting a planter for your air plants. The most common materials used for plant pots include concrete, terracotta, ceramic, plastic, or metal.

Concrete planters are great for outdoor use because they are durable, breathable, and long-lasting. Concrete also offers good insulation and does a great job when it comes to keeping air plants warm in relatively cool climates.

However, these pots are relatively heavier and don’t come in fancy designs. Therefore, it isn’t easy to find something that is appealing.

Terracotta pots are quite popular among gardeners because they are highly porous and allow excess water to flow through easily.

This prevents waterlogging of air plants. However, terracotta pots are fragile and prone to cracking due to extreme weather conditions or accidental dropping.

Soaking method for air plant
Ceramic planters offer a great combination of durability and aesthetics.

Ceramic planters offer a great combination of durability and aesthetics. They come in many shapes, sizes, patterns, and colors, making them suitable for indoor and outdoor use.

Since ceramic pots are not porous, they can trap moisture, which may lead to root rot. Therefore, make sure to select a pot with adequate drainage holes.

Plastic planters are great for indoor and outdoor settings as they provide ample space for air circulation. They are also lightweight and easy to move around. Plastic is also inexpensive and lasts longer than terracotta or ceramic.

However, these containers have a limited lifespan and can easily be damaged by extreme temperatures or direct sunlight.

Metal planters are great for outdoor use since they provide good drainage and are highly durable. They also come in many shapes and sizes, making them ideal for growing small and large air plants.

However, metal pots don’t come with good insulation properties and can get very hot when exposed to direct sunlight.

Glass containers look fancy and can be key decorative elements in your home or office. However, you must remember that glass is not a porous material and is highly fragile.

Factor #5: Weight

The weight of the planter is another vital consideration.

Larger and heavier pots are difficult to move and may require a sturdy surface or plant stand to hold them in place. On the other hand, smaller and lighter planters are easy to move around.

Air plant on a shell.
Plastic pots are the lightest, while ceramic and terracotta planters can be relatively heavier.

Therefore, it is essential to consider the weight of the pot you select for your air plants, especially if you plan to move them around regularly.

A lightweight and portable container will be easier to transport from one location to another if necessary.

Typically, plastic pots are the lightest, while ceramic and terracotta planters can be relatively heavier.

Concrete pots are probably the heaviest, while metal pots are relatively lightweight but can become too hot to touch under intense sunlight.

Factor #6: Compatibility and Functionality

In addition to the abovementioned factors, check if the planter you select is compatible with your air plants. The pot you choose must not be too big or small for your plant.

This will ensure that your air plant has sufficient space to spread its roots and enjoy optimal growth.

You should also consider the functionality of the pot you select. A properly designed planter will allow enough airflow to keep your plants healthy and provide ample drainage for excess water.
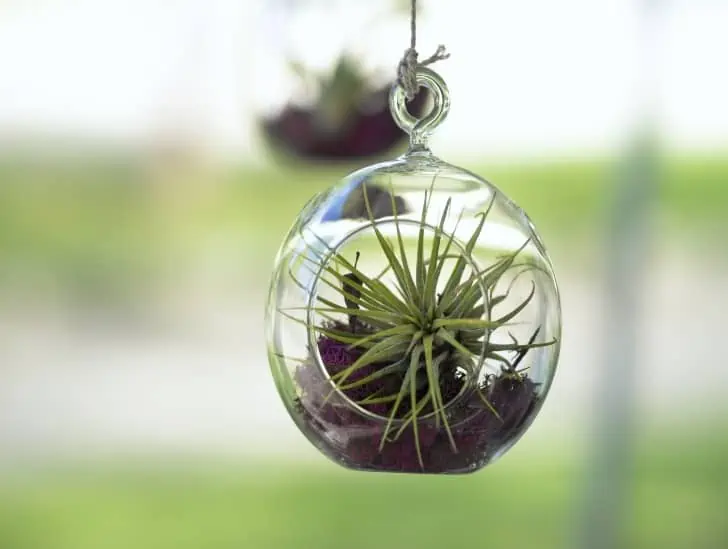
An air plant hanging.
Check if the planter you select is compatible with your air plants.

Pots with multiple drainage holes are best suited for this purpose.

Consider how easy the pot is to fill and maintain. Some containers have built-in trays that make it easier to water your air plants.

This makes maintenance a breeze and ensures that your plants get the water they need without any hassle.

Factor #7: Maintenance

Finally, when selecting a planter for your air plants, take into consideration the maintenance requirements.

Some pots are easier to clean than others, while some may require frequent cleaning due to their design and material.

Additionally, make sure that the pot you select is not too difficult to move around when it’s time for repotting or watering.

Extra Tips

It is essential to keep in mind that your air plants may outgrow the planter after some time and need repotting. When selecting a planter, consider the ease of repotting when the right time comes.

Some planters have a relatively narrow opening, making transferring the air plants from the current pot to a new one difficult.

Consider using a saucer for your container to protect your furniture or flooring from water spills or stains. This will help keep your air plants healthy and extend the planter’s lifespan.

Also, check for any signs of deterioration in the planter before you purchase it. Keep in mind that air plants are highly prone to root rot.

Therefore, any chips, cracks, or any other signs of wear and tear can severely compromise the safety of your plants.

If your preferred container is made of clay, check for chips and cracks; if it is made of wood, check for signs of rot before buying it.

Summary

Selecting the right planter for your air plants is crucial in ensuring they stay healthy and thrive.

With the right container, you can ensure that your air plant enjoys optimal growth and longevity. Consider these factors when selecting a pot to ensure you get the best planter for your air plants.

What Makes Ficus Rock Fig a Must-Have for Your Collection?

A red ficus rock fig.

In the vast and fascinating world of figs, a silent gem can transform your plant collection into an exquisite bonsai showcase – the Ficus Rock Fig. This captivating species, also known as Ficus petiolaris, isn’t your average houseplant. With its robust adaptability, unique aesthetic appeal, and intriguing biological features, the Ficus Rock Fig ranks high on the list of must-have plants for every avid gardener.

So, what makes ficus rock fig a must-have in your collection? Native to the rocky deserts of Mexico, this distinctive fig tree is a testament to the resilience and beauty of nature. Its silver-grey bark and lush, heart-shaped leaves create a visual spectacle that can’t be ignored. Its strong, occupying presence brings a sense of focus to your home or office space. The Ficus Rock Fig, with its inherent charm and resilience, embodies the essence of being a survivor in a harsh desert environment, making it a symbol of endurance and adaptability.

This guide dives deep into the fascinating world of the Ficus Rock Fig, exploring its unique characteristics, survival mechanisms, and unparalleled beauty. Read on to learn more.

Ficus Rock Fig: Overview

The Ficus Rock Fig belongs to the Moraceae family, commonly called the mulberry or fig family.

It is native to the Sonoran Desert region of North America, specifically found in parts of Arizona, California, and Mexico.

This region encompasses arid and rocky landscapes where the Ficus Rock Fig’s unique adaptations allow it to thrive. It typically grows in rocky or sandy soils.

The plant is known for its ability to colonize and establish itself in the crevices and rocky outcrops of canyons and cliffs, which provide some protection from extreme weather conditions.

The Ficus Rock Fig is known for its twisted and contorted growth pattern. Its branches often wind and spiral around each other, creating an intricate and captivating display.

In its natural habitat, the Ficus Rock Fig can reach heights of around 6 to 10 feet (1.8 to 3 meters). Its size can vary depending on environmental conditions.

The mulberry tree leaves.
The Ficus Rock Fig is known for its twisted and contorted growth pattern.

The plant’s adaptation to grow within rocky crevices provides some protection from extreme temperatures and harsh winds. The rocks also offer stability and support for the plant’s twisted growth.

The Ficus Rock Fig makes an intriguing houseplant, especially for those who appreciate unique growth patterns and desert aesthetics.

It can be cultivated in containers and placed in bright indoor locations. It can also thrive outdoors in regions with a climate similar to its native habitat.

What Makes Ficus Rock Fig a Must-Have for Your Collection?

Now that you better understand the Ficus Rock Fig and its unique characteristics, it’s time to explore why this species is a must-have in your collection.

1. Unique Aesthetic Appeal

The Ficus Rock Fig (Ficus petiolaris) is renowned for its captivating and distinctive aesthetic appeal, which sets it apart from many other plants in the gardening world. Its unique appearance stems from its growth habit, bark texture, and overall form.

Its branches tend to twist and contort, creating an almost sculptural quality. These unusual growth patterns give the plant an organic, artistic appearance that draws the eye and sparks curiosity.

The twisted branches often intertwine, adding to the complexity of its overall structure.

One of the most visually striking features of the Ficus Rock Fig is its textured bark. The bark is often rough and rugged, with deep furrows and grooves that give the plant a weathered and ancient look.

A wet mulberry leaves.
The twisted branches often intertwine, adding to the complexity of its overall structure.

The combination of twisted branches and textured bark contributes to the plant’s character, giving it a sense of age and history.

The unique growth habit of the Ficus Rock Fig evokes images of ancient, windswept trees found in rocky and arid landscapes.

Its naturalistic resemblance to trees that have endured harsh conditions for centuries adds a touch of wild beauty to spaces where it is cultivated.

The twisted and gnarled appearance of the Ficus Rock Fig symbolizes strength, resilience, and the ability to adapt to challenging circumstances.

This symbolism adds depth to the plant’s allure and can resonate with individuals who appreciate the deep stories that the plant tells.

2. Adaptability

The Ficus Rock Fig tree is known for its resilience and adaptability, making it an excellent choice for novice gardeners and seasoned plant enthusiasts alike.

It is highly tolerant of drought conditions and does not require frequent watering.

It can also survive in bright light unless the sun’s intensity is too strong, so it should be placed in partial shade. The Ficus Rock Fig prefers high humidity but tolerates lower levels if necessary.

A wet mulberry leaves.
The twisted branches often intertwine, adding to the complexity of its overall structure.

The plant is also quite tolerant of temperature fluctuations and can even survive brief periods of frost.

Its ability to adapt to different environmental conditions makes it an excellent choice for many climates, especially desert regions with extreme temperatures.

3. Natural Bonsai-Like Form

Bonsai is a traditional Japanese art form that combines horticulture and aesthetics to create miniature trees.

The Ficus Rock Fig has a natural bonsai-like growth pattern, making it well-suited for this type of cultivation.

The plant’s intricate branches can be trained into attractive shapes with relative ease, allowing you to recreate classic bonsai designs or experiment with your unique ideas.

A mulberry plant exposed to sunlight.
The Ficus Rock Fig has a natural bonsai-like growth pattern, making it well-suited for this type of cultivation.

Its natural contortions can also create powerful and captivating displays that evoke feelings of the desert environment.

4. Low Maintenance

The Ficus rock fig is a relatively low-maintenance plant, making it an excellent choice for busy individuals who don’t have the time to tend to their gardens.

It does not require frequent watering or pruning and can tolerate extended periods of neglect.

As long as it is exposed to sufficient light and humidity levels are kept in check, the Ficus Rock Fig will thrive with minimal effort.

This makes it ideal for those who are new to gardening or can’t care for many plants.

5. Indoor and Outdoor Versatility

The versatility of the Ficus Rock Fig is one of its standout qualities, making it an excellent addition to indoor and outdoor plant collections.

This adaptability allows plant enthusiasts to enjoy its unique aesthetics and distinctive growth patterns in various settings, catering to different preferences and spatial limitations.

The Ficus Rock Fig can be placed in bright and sunny locations such as windowsills and balconies

 for indoor cultivation.

Ensuring the plant does not receive intense sunlight or heat for prolonged periods is crucial.

Outdoor cultivation is suitable for regions with relatively mild climates. The plant may need extra protection from strong winds or heavy rain during certain times of the year. Furthermore, it should be watered regularly during periods of drought.

For those fortunate enough to have indoor and outdoor gardening spaces, the Ficus Rock Fig can seamlessly transition between the two.

During warmer months, you can move the plant outdoors to enjoy its unique growth patterns against natural elements.

As the weather cools or becomes less predictable, you can bring the plant back indoors, extending your enjoyment of its aesthetics.

The indoor and outdoor versatility of the Ficus Rock Fig offers gardeners the freedom to integrate its captivating presence into various living spaces.

This adaptability allows you to tailor your plant collection to your specific surroundings and preferences, adding depth and character to your botanical displays.

6. Conversation Starter

The unique appearance of the ficus rock fig often sparks curiosity and conversation among guests.

Its intriguing growth habit and textured bark can captivate the attention of plant enthusiasts and non-enthusiasts alike.

A Ficus rock fig leaves.
the Ficus Rock Fig has become popular among gardeners and plant lovers.

The captivating presence of the Ficus Rock Fig can create an atmosphere of conversation and connection, allowing you to share your love for plants with others.

Unsurprisingly, the Ficus Rock Fig has become popular among gardeners and plant lovers.

Its unique aesthetic appeal, adaptability, and conversation-starting qualities make it a must-have in your collection.

7. Excellent Air Purifier

The Ficus Rock Fig is an aesthetically captivating addition to your indoor spaces and a natural air purifier that can significantly enhance the air quality. As a member of the Ficus family, it shares the air-purifying traits common to many Ficus species.

Volatile Organic Compounds (VOCs) are harmful gases emitted by different household items such as paints, cleaning products, and synthetic materials.

The Ficus Rock Fig absorbs these gases through tiny openings called stomata on its leaves. The natural filtration process helps reduce the concentration of indoor pollutants.

Like all plants, the Ficus Rock Fig undergoes photosynthesis, which absorbs carbon dioxide from the air and releases oxygen.

The oxygen release contributes to fresher and cleaner indoor air, benefiting your respiratory health and overall well-being.

Furthermore, the Ficus Rock Fig is crucial in maintaining optimal indoor humidity levels. It introduces moisture into the air as it transpires or releases moisture through its leaves.

This can be particularly beneficial in dry indoor environments, helping to prevent issues such as dry skin and respiratory discomfort.

Lastly, the textured leaves of the Ficus Rock Fig can trap and capture airborne particles, including dust and allergens, resulting in a cleaner and healthier living environment.

Final Thoughts

The Ficus Rock Fig is a visually striking species with many fascinating characteristics, making it a great addition to your plant collection.

Its ability to thrive in harsh desert environments makes it ideal for home cultivation, while its unique aesthetic appeal adds a touch of wild beauty to any space.

Ever Wondered How Bonsai Trees Are Made? Find Out Here!

A bonsai pine tree.

Bonsai trees, the living masterpieces that captivate with their elegance and ageless charm, are not simply born but meticulously crafted. Delving into the world of bonsai creation is like unraveling a tale of artistry, patience, and horticultural finesse. You don’t have to be a horticulturist or even an artist to get started – just a bit of enthusiasm and some basic knowledge, and you will be good to go.

So, how are bonsai trees made? Bonsai trees are usually made by choosing an appropriate tree and pruning it in a specific way to meet your preferred style. This is the basic process of creating a bonsai tree. However, beyond the pruning process, several other steps are involved in creating a beautiful, long-lasting bonsai. Before you can create your masterpiece, you’ll need to acquire the appropriate tree and soil mix. From there, you’ll need to properly pot your bonsai tree and shape it into the desired style. Then, finally, all that’s left is to take care of your bonsai tree and watch it grow and evolve.

This blog post embarks on a journey to demystify the captivating process behind the making of bonsai trees. Read on to find out everything you need to know.

Bonsai Trees: A Quick Overview

Bonsai trees embody a harmonious blend of patience, precision, and artistic finesse, resulting in captivating tree sculptures that evoke a sense of tranquility and wonder.

The art of bonsai has its roots in ancient China and Japan, where it was cultivated as a reflection of nature’s grandeur on a smaller scale. The word “bonsai” itself translates to “planted in a container,” capturing the essence of this art form.

Contrary to popular belief, bonsai trees are not stunted or dwarfed; rather, they are carefully nurtured to mimic the graceful proportions and forms of their full-sized counterparts in nature.

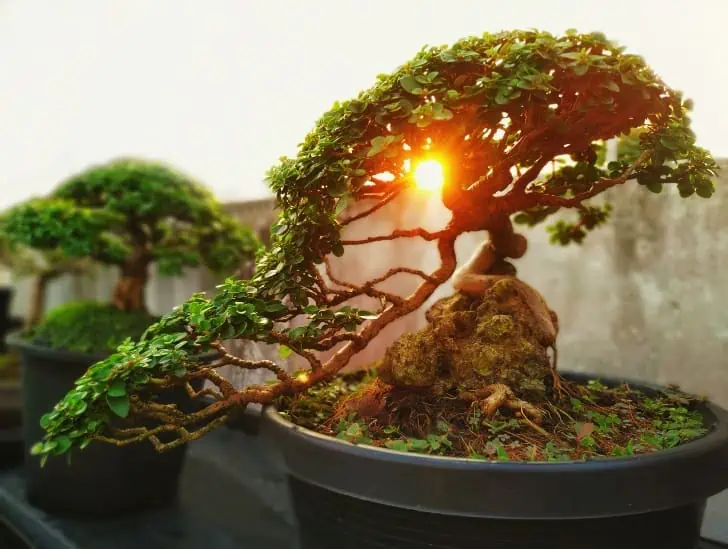
A bonsai outdoors sunset.
Contrary to popular belief, bonsai trees are not stunted or dwarfed

This practice requires a deep understanding of horticulture, aesthetics, and a touch of artistic intuition.

At the core of bonsai lies a set of principles that guide the entire process. These principles encompass balance, proportion, harmony, and simplicity.

The overall composition should evoke a sense of tranquility and the feeling of a fully mature tree despite its miniature size.

Bonsai trees are often categorized into various styles, each representing a distinct aspect of nature.

From the windswept elegance of the “Fukinagashi” style to the intricate balance of the “Chokkan” style, each approach embodies a specific aesthetic philosophy.

Bonsai Tree Design Principles

Before you start creating your bonsai masterpiece, it is important to understand the fundamental principles behind the art of bonsai.

These principles are essential in achieving a balanced composition that accurately reflects nature’s beauty and grace.

The four basic design principles are balance, proportion, harmony, and simplicity. Balance refers to the even distribution of foliage throughout the entire tree. Proportion is the relationship between the tree size, pot, and foliage.

Harmony is achieved when all the elements in a composition are in unison with each other, while simplicity refers to creating an overall design that does not appear overly complicated or cluttered.

How Are Bonsai Trees Made?

Now that you have a better understanding of bonsai trees and their design principles, let’s look at how these trees are made.

Step 1: Tree Selection

The first step in the art of bonsai is selecting the right tree species. The tree species you choose plays a critical role in shaping the entire journey of making your bonsai tree.

It is crucial to immerse yourself in the bonsai world and ask questions to understand which tree species best suits your needs.

With plenty of varieties available, the choice can be overwhelming. Some of the best tree species to consider include jade, juniper, bamboo, guava, line, pipal, pine adenium, and lemon.

A bonsai indoor.
The first step in the art of bonsai is selecting the right tree species.

Consider your local climate and go after tree species that naturally thrive in your climate zone since they are more likely to acclimate well to your growing conditions.

Furthermore, keep an eye on leaf sizes and growth habits. These factors deeply influence bonsai aesthetics; trees with smaller leaves and graceful growth patterns are particularly good for creating bonsai trees.

While personal preferences play a role, balancing aesthetics with practicality is essential.

Check with local nurseries, garden centers, and bonsai specialty shops to see which species are readily available in your area.

Ultimately, the suitability of a species for bonsai depends on a combination of factors. Evaluate each species discerningly, considering its potential challenges and rewards.

Prioritize young, healthy tree saplings with balanced root systems and gradual trunk taper when purchasing from a nursery. This solid foundation ensures a promising start to your bonsai journey.

Step 2: Choose Your Bonsai Style

Once you have chosen the right tree species, it is time to decide on a style for your bonsai.

The available styles range from informal upright to broom and cascade, each characterized by distinct aesthetic principles.

The right style should reflect your personality and preferences while being suitable for the selected tree species.

Before deciding, familiarize yourself with the different bonsai tree styles and their distinct visual characteristics.

A outdoor bonsai exposed to sunlight.
Once you have chosen the right tree species, it is time to decide on a style for your bonsai.

For instance, a cascade-style bonsai tree features a trunk that curves down towards the ground, while an upright-style bonsai tree grows straight up in the air.

The desired outcome should be considered when selecting a style. For instance, if you are aiming for a stylized, unique version of the tree species you have selected, an informal upright style may be your best choice.

Step 3: Potting

The next thing you need to do is pot your plant and allow it enough time to establish and be strong enough for the next phase.

Ensure your bonsai pot is relatively low but wide enough to support the plant’s root system. Cascading trees may require a larger pot that allows the top of the tree to hang lower than the root base.

A relatively shallow and wide pot profile is meant to balance with your tree composition, creating an illusion of a full tree in miniature.

Choose a color that pleases you and a size that will go well with the size of your tree.

The pot must have at least one drainage hole to allow excess water to escape, which is critical for avoiding root rot.

You can even line the bottom part of the pot with a thin layer of gravel to enhance drainage.

Bonsai on hand.
Cascading trees may require a larger pot that allows the top of the tree to hang lower than the root base.

For potting mix, opt for a medium that is well-draining and porous. Coconut husk fibers are a great option since they provide excellent drainage while retaining enough moisture.

However, you should remember that flowering bonsai trees may require a potting mix with higher water retention properties. So, know your tree species well before you go for a potting mix.

Step 4: Pruning and Training

This is the most crucial step in the bonsai creation process. Pruning and training is about shaping the tree to ensure it conforms to its desired style.

This process involves carefully manipulating the trunk and branches to give the tree a more mature and balanced form.

Pay attention to details and use appropriate tools for each task when pruning. Work slowly and with intent; pruning too much or too aggressively can damage your bonsai tree.

Various techniques, such as wiring, leaf trimming, bud pinching, and branch thinning, can help you achieve your desired look.

It is important to start with basic pruning and gradually advance the techniques as you gain experience. The pruning process may take several years to perfect because it involves a lot of trial and error.

Be patient and consistent for the results to show; bonsai trees grow slowly and require frequent maintenance to conform to the desired style.

Step 5: Styling Refinement

As your bonsai tree matures, it will require periodic styling refinement.

Styling refinement involves pruning and wiring techniques to shape the tree further to give it a more mature look. It also involves repotting when needed and proper fertilizing and watering.

Frequent trimming of older foliage should be done to promote new growth and maintain the desired style.

A person trimming a bonsai.
As your bonsai tree matures, it will require periodic styling refinement.

Start by trimming the longest branches and refining the foliage edges as needed. With time, you can master the art of refining bonsai trees.

Remember to water your bonsai tree regularly to keep the soil moist and well-drained. Be careful not to overwater because it can lead to root rot and other issues.

Fertilize your bonsai tree with a balanced fertilizer regularly in spring, summer, and fall. Do not fertilize in winter to avoid damaging your tree’s roots.

Step 6: Patience Is Key

Making bonsai trees is a slow and rewarding process. To maximize the potential of your bonsai tree, you need to remain patient and continue nurturing it for years.

Bonsai trees require a lot of dedication and attention; they are living works of art that require regular pruning, watering, fertilizing, and styling refinement to maintain their desired shape.

Observe your tree’s growth patterns and adjust accordingly. Be attuned to the changing needs of your bonsai as it develops over time.

With time, you will learn to understand the needs of your bonsai tree, helping you create a beautiful bonsai masterpiece that will draw the attention of every person who visits you.

Summary

Creating a bonsai tree is an exciting and rewarding endeavor that requires dedication, patience, and attention.

The key to success is to familiarize yourself with the basics of bonsai tree creation and then use that knowledge to shape your tree in a way that best suits your preferences and style.

Bonsai trees require frequent pruning, watering, fertilizing, and styling refinement. Be patient and consistent for the results to show and remember that a beautiful bonsai tree takes time to create.

Reviving Your Rosemary: A Step-by-Step Guide to Pruning After a Freeze

A person pruning a rosemary.

Has your rosemary plant recently experienced the harsh bite of frost? Do not despair because your cherished herb is not lost. With the right pruning techniques, you can rejuvenate your rosemary, making it healthier and bushier. Pruning after a freeze is not just about damage control; it is essential to bolster your rosemary plant’s health, resilience, and vitality.

So, how do you prune your rosemary after a freeze? The first thing you need to do is identify the damage. Look for branches damaged by cold temperatures, frostbite, or pest infestations that must be removed to promote new growth. Next, use sharp pruning shears and snip off the affected branches at an angle just above a bud or leaf node. This way, you will maintain the plant’s natural shape and encourage new growth. Remove dead wood and shoots to keep the plant looking tidy and balanced as you trim away the damaged branches. After pruning, mulch your rosemary to help it retain water and fight off potential diseases.

In this detailed guide, we’ll delve into the science and art of pruning rosemary. We’ll help you understand the correct cutting techniques and identify which parts require attention. Read on to learn more.

Understanding the Effect of Frost on Rosemary

Before we jump into the pruning process, it is essential that you understand how frost affects rosemary plants.

Although some varieties of rosemary are more cold-hardy than others, the effects of a hard freeze can be severe and cause significant damage to any plant.

Given that rosemary is native to the Mediterranean region, adapting to colder climates is a challenge.

A rosemary outdoors covered with snow.
It is essential that you understand how frost affects rosemary plants.

One of the most immediate and noticeable effects of frost on rosemary is the change in appearance. The leaves of rosemary may take on a silver-gray hue as a result of frost damage.

This transformation is an adaptive response because the plant’s leaves reduce their surface area by rolling and curling, thus minimizing moisture loss and exposure to extreme cold.

Frost can put a temporary halt to the growth rate of rosemary. As the plant reallocates its resources to cope with the cold, new growth may be delayed until the warm season. This can be frustrating for gardeners eager to see their rosemary flourish.

Exposure to excessive frost can also lead to cellular damage in the plant’s shoots, branches, and buds. Ice crystals can form within plant cells, disrupting their structure and function.

In the case of rosemary, frost can lead to cellular rupture, particularly in tender new growth, causing irreversible damage.

Pruning After a Freeze: What You Need to Know

Now that you understand how frost affects rosemary plants, it is time to get down to the nitty-gritty of pruning after a freeze. When pruning your rosemary, it is essential to remember these key points:

  • Pruning aims to remove dead and damaged tissues from the plant while preserving its natural shape and size.
  • Use sharp pruning shears to avoid tearing or damaging healthy tissues.
  • Remove dead wood and damaged shoots to keep your rosemary tidy and balanced.
  • Always prune at an angle above a bud or leaf node to encourage new growth.
  • After pruning, mulch your rosemary with organic matter such as compost or shredded bark to help it retain moisture and prevent potential diseases.

These steps will ensure that you are correctly pruning your rosemary after a freeze, minimizing the impact of frost damage and promoting healthy regrowth.

Preparing for Pruning: What You Need to Gather

Before you begin pruning your rosemary plant, ensure you have all the necessary items. You will need:

  • A pair of sharp pruning shears
  • A bucket or bowl of water
  • Organic mulch, such as compost or shredded bark

Once you have everything ready, you can start pruning your rosemary. Pay close attention to the damaged areas to avoid cutting healthy stems while leaving behind affected parts.

The tips of affected leaves and branches will typically blacken and become brittle.

If you notice any brown spots on your rosemary, it could be a sign of pest damage. If this is the case, take extra care when pruning because these areas can be more delicate and prone to tearing.

The Art of Pruning: A Step-by-Step Guide

Now that you are all prepped and ready to go, let us move on to the actual pruning process.

Step 1: Identify Damaged Areas

The first step is identifying the damaged areas on your rosemary plant. Look for branches affected by frost, pest infestation, or cellular damage. These are the areas you want to focus on when pruning.

Typically, frost-damaged leaves change color. They might turn grayish or brownish. Look for patches of discoloration on the leaves, especially on the tips and edges.

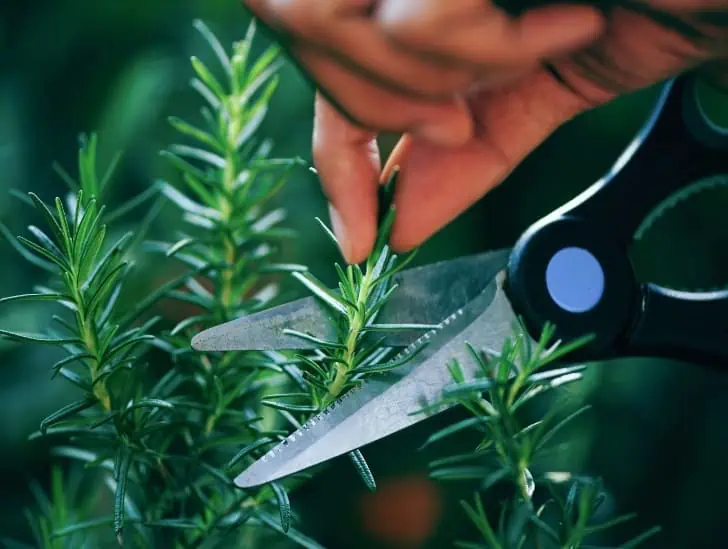
A person cutting a rosemary.
It is essential that you understand how frost affects rosemary plants.

The leaves may also curl, roll up, or become brittle. Look for any wilting or drooping branches because these are signs of frost damage in rosemary.

Other frost-damaged areas may appear water-soaked or translucent. This happens because freezing causes the cell walls to rupture, leading to a collapse of the affected tissues.

Step 2: Use Sharp Pruning Shears

Once you have identified the areas requiring pruning, it is time to prepare your shears. Ensure they are sharp to avoid tearing the healthy parts of the plant.

You can use pruning shears, loppers, or garden scissors to cut away the affected bits. Whichever tool you choose, ensure it is sharp and clean before use.

Step 3: Cut at an Angle Above a Bud or Leaf Node

When pruning, it is important to cut at an angle just above a bud or leaf node. This will maintain your rosemary’s natural shape and size while encouraging new growth.

Be sure to cut in an outward direction, away from the center of the plant, so that you don’t disrupt any developing buds or flowers.

Step 4: Remove Dead Wood & Shoots

As you prune, be sure to remove any dead wood and shoots. This will help keep your rosemary plant looking neat and tidy and maintain an open canopy for new growth.

A rosemary in a pot.
As you prune, be sure to remove any dead wood and shoots.

The dead wood is easy to spot—it is usually brown and brittle. If you are not sure if a shoot or branch is dead, lightly scratch the bark with your fingernail. If it comes off easily, it is likely dead and should be removed.

Step 5: Mulch the Plant

Once you’re finished pruning, it is time to give your rosemary some extra love by mulching it. Use organic matter like compost or shredded bark to create a protective layer around the plant’s roots.

Mulch will help your rosemary retain moisture, discourage weed growth, and protect it from potential diseases.

Step 6: Dip the Pruning Shears in a Bowl of Water

After each pruning session, dip your shears in a water bowl for about 15 minutes. This will help remove any sap or debris, preventing the spread of potential diseases and pests. Clean your pruning shears regularly to keep them sharp and in good condition.

Red pruning shear.
This will help remove any sap or debris.

Safety Tips for Pruning After Frost

To keep yourself safe, it is essential to take extra precautions when pruning after frosts.

Wearing protective gloves and eyeglasses is always a good idea because cold temperatures can make the herb’s sap more corrosive than usual.

Also, be sure to keep your hands away from any ice crystals on the leaves or branches. The ice crystals can cause irritation and discomfort if they come into contact with your skin.

What Can I Do with the Cuttings After Pruning?

You may be wondering what to do with the pruned material after you are done. Don’t worry—you can use these cuttings for many projects.

For instance, rosemary branches are great for making wreaths, garlands, and other decorations. You can also dry them and use them in potpourri or sachets. Plus, if you like cooking, nothing beats freshly harvested rosemary.

Some people even prefer freezing the fresh cuttings for future use. To freeze the cuttings, start by storing them in a damp paper towel before you toss them in your fridge. You can freeze rosemary cuttings for up to two weeks.

Can You Prune Rosemary Too Much?

While pruning after frost can benefit your rosemary, it is important not to overdo it. Over-pruning can stress the plant and slow down its growth.

A rosemary in a pot with a hand spraying water.
This will help remove any sap or debris.

If you notice that your rosemary looks a bit sparse after pruning, don’t worry—it will begin to regrow in no time. Just make sure you monitor the plant closely for any signs of damage or disease.

Summary

Pruning after a freeze is essential to keeping your rosemary healthy and thriving. Follow the steps outlined above to prune your rosemary correctly while minimizing damage.

Remember to equip yourself with sharp pruning shears, identify damaged areas, cut at an angle above a bud or leaf node, remove dead wood and shoots, mulch the plant, and dip the shears in water after each pruning session.

Following these simple steps ensures that your rosemary gets the love and care it needs after a freeze. It is time to go out and get pruning!

Why Euphorbia Obesa Is the Perfect Addition to Your Cacti Collection

A euphorbia obesa in a pot.

Commonly referred to as a “baseball plant,” Euphorbia obesa resembles a ball more than a plant. This succulent cactus boasts a unique, symmetrical shape comprised of green ridges and is native to South Africa. While it looks fragile, Euphorbia obesa is quite resilient and hardy—making it an ideal plant for novice gardeners or those looking for a low-maintenance succulent. The succulent is dioecious, meaning that male and female flowers grow on separate plants, but both are equally showy. Euphorbia obesa is an easy-to-care-for succulent that can be grown indoors or outdoors.

So, what makes Euphorbia obesa a perfect addition to your cacti collection? The succulent has a unique shape that makes it an interesting conversation starter. Its symmetrical ridges appeal to the eye and catch the attention of anyone who views it. Euphorbia obesa is a low-maintenance succulent that can thrive with minimal maintenance. This species is relatively rare and not as commonly found as other cacti, adding an element of uniqueness to your collection. The plant develops striking geometric patterns and distinctive ridges as it ages, adding character and visual interest over time.

This blog post highlights why Euphorbia obesa is an excellent addition to your plant collection and why you should consider this succulent for your home garden. Read on to learn more.

Euphorbia obesa: Overview

People call it a “baseball plant” due to its shape. It is plain and thornless, unlike other types of cacti. Being circular, the cacti usually have a diameter of between 6cm and 16cm, depending on its age.

The cactus is native to South Africa, and while its thick, smooth ridges give it an appearance of fragility, it is pretty hardy.

As a low-maintenance succulent, Euphorbia obesa requires little water and can thrive indoors or outdoors – making it perfect for novice gardeners or busy individuals looking for a low-maintenance houseplant.

A Euphorbia obesa.
People call it a “baseball plant” due to its shape.

The succulent is dioecious, meaning that male and female flowers grow on separate plants. Both sexes bear flowers with yellow-tipped petals, but the female flower produces red or purple bracts, which will later yield small fruits.

As the plant ages, it may develop geometric patterns and ridges, adding character to its appearance.

In its natural habitat, Euphorbia obesa is a disease-resistant plant that can survive in temperatures ranging from 20°C to 28°C.

Why You Should Have Euphorbia obesa in Your Cacti Collection

Now that you have a good idea of what Euphorbia obesa is, here are some reasons why you should consider having this succulent in your cacti collection:

1. Distinctive Appearance

Euphorbia obesa earns its nickname (baseball plant) from its unique and striking spherical shape that closely resembles a baseball or small globe.

Its distinct appearance sets it apart from many other cacti, making it a captivating addition to any plant collection, especially for experienced gardeners seeking unique succulents.

The shape of Euphorbia obesa is not only visually appealing but also offers an intriguing opportunity for gardeners to experiment with various display options.

Its round form makes it an ideal focal point, whether placed as a centerpiece on a windowsill, in a succulent arrangement, or within a collection of cacti.

Its distinct shape creates a conversation piece that can’t help but draw attention and spark discussions among your visitors.

Beyond its initial appeal, the plant’s appearance evolves over time, enhancing its visual interest. As the succulent matures, it develops intricate geometric patterns and prominent ridges that encircle its spherical body.

Euphorbia Obesa in a pot.
Its distinct shape creates a conversation piece that can’t help but draw attention.

These patterns contribute to its unique charm, and watching these features emerge can be a rewarding experience for those who appreciate the subtle transformations that plants undergo.

When placed alongside other cacti or succulents with varying shapes and textures, Euphorbia obesa creates a visually dynamic contrast.

Its rounded form stands out against the spikier, more elongated shapes commonly found in many other succulents, adding an element of diversity and balance to your collection.

2. Beautiful Flowers

Euphorbia obesa is dioecious, meaning that male and female flowers grow on separate plants. Both sexes bear small yellow-tipped petals, but the female flower emits a soft red or purple bract that eventually yields small fruits.

These unique colors provide an intriguing contrast to the pale green ridges of the plant’s body.

While some cacti produce large and showy flowers, the modest blooms of Euphorbia obesa are small and subtle. The delicate, understated beauty of its blossoms is more enchanting when viewed up close.

The succulent usually blooms in late summer or early fall—when many other cacti are dormant.

The blooms remain attractive and colorful for an extended period, creating a beautiful addition to your plant collection during the cold season.

3. Uncommon Species

Euphorbia obesa holds a position of intrigue and rarity in the world of succulents.

Its classification as an uncommon species means that adding it to your plant collection presents a distinctive opportunity to cultivate a plant that is not as widely encountered as some of its more common counterparts.

Euphorbia in a pot on hand.
Euphorbia obesa holds a position of intrigue and rarity in the world of succulents.

For experienced gardeners and collectors who have amassed a variety of succulent plants over time, the allure of the unusual becomes increasingly appealing.

Euphorbia obesa’s status as a rare species adds a layer of exclusivity to your collection. It stands out not only for its captivating appearance but also for its scarcity among other cacti and succulents.

Pursuing rare and uncommon species can be a passion for many experienced gardeners.

Euphorbia obesa satisfies this craving by offering a unique chance to cultivate a plant that might not be readily available at local nurseries or garden centers.

As you share your collection with fellow enthusiasts, the rarity of the baseball plant becomes a topic of interest and admiration, allowing you to contribute to the diversity of plants within your gardening community.

Additionally, acquiring and caring for a less common species like Euphorbia obesa can offer educational insights and challenges.

Researching its specific care requirements and growth habits adds depth to your gardening knowledge, enriching your expertise and broadening your understanding of plant diversity.

Incorporating Euphorbia obesa into your collection showcases your discerning taste and contributes to preserving unique and lesser-known plant species.

The rarity of this species ensures that your garden becomes a canvas for showcasing the extraordinary and creating conversations around the beauty of the uncommon.

4. Low Maintenance

Euphorbia obese is a low-maintenance succulent that can thrive with minimal care. This species does not require frequent watering and prefers to be kept slightly dry.

It thrives in a well-draining soil mix and bright, indirect sunlight. This cactus can survive warm temperatures ranging from 20°C to 28°C, making it an ideal choice for gardeners in warmer climates.

Furthermore, its disease resistance nature makes it less prone to common pests and other plant-related ailments.

Euphorbia obesa is an ideal plant for beginner gardeners because its low-maintenance requirements make it an excellent choice for those who are just starting out or still building their collection.

Euphorbia Obesa exposed to sunlight.
Euphorbia obese is a low-maintenance succulent that can thrive with minimal care.

It can also be a suitable option for experienced gardeners looking for a low-maintenance yet unique addition to their existing plant collection.

5. Conversation Starter

Euphorbia obesa’s unusual shape often sparks conversations among enthusiasts and visitors, making it a great focal point for any garden.

Its eye-catching visual appeal and rarity make it a perfect centerpiece for succulent arrangements or mixed collections of cacti.

The succulent’s distinct features also provide an opportunity to learn more about its cultural history and botanical background. Its African origin is reflected in its scientific and common names.

Learning more about its cultural background can be an enjoyable and enlightening experience for both novice and experienced gardeners.

6. Educational Value

Euphorbia obesa’s growth patterns and adaptations can provide opportunities to learn about plant biology, adaptation to different environments, and the intricacies of succulent care.

Because of its unusual shape, it can also be a fun tool for teaching children about different species and the importance of natural diversity.

7. Fascinating Growth Patterns

Euphorbia obesa offers a captivating journey of growth and transformation that unfolds over time. This aspect of its development adds a layer of intrigue and ongoing visual interest for gardeners seeking dynamic additions to their collections.

As the succulent matures, it undergoes a series of changes in its appearance that contribute to its unique charm.

One of the most fascinating features is the emergence of intricate geometric patterns and well-defined ridges that encircle its spherical form. These patterns create a mesmerizing visual texture, giving the plant an almost sculptural quality.

A euphorbia obesa.
Euphorbia obesa offers a captivating journey of growth and transformation that unfolds over time.

Observing the growth patterns of Euphorbia obesa becomes a rewarding experience as you witness the gradual evolution of the designs.

The contrast between the round body of the plant and the angular patterns that emerge adds depth and complexity to its overall aesthetic.

This transformation is a testament to the resilience and adaptability of succulent plants, and it provides a tangible connection to the natural processes of growth and change.

Final Thoughts

The baseball plant is a beautiful and unique succulent that adds a captivating look to any cacti or succulent collection.

Its unusual shape, uncommon rarity, and low-maintenance needs make it an ideal choice for seasoned gardeners or those just starting out.

Whether you’re seeking an eye-catching centerpiece for your garden or a conversation-starting addition to your collection, Euphorbia obesa is an excellent option.