Want Giant Succulents? Here’s How to Grow Them Like a Pro!

Giant succulent plant exposed to sunlight.

There is something undeniably mesmerizing about giant succulents that command attention and create a botanical spectacle like no other. Their sheer size, striking presence, and unique beauty make them stand out in the world of succulents. If you’ve ever dreamed of nurturing these botanical giants and turning your succulent collection into a living masterpiece, you’ve come to the right place. Welcome to our exclusive guide on growing giant succulents like a seasoned pro.

So, how can you grow giant succulents like a pro? Everything starts with choosing the right species. Some succulent species naturally grow larger than others. Research and select succulent varieties known for their potential to grow large, such as Echeveria, Aeonium, and Agave. Once you have chosen the right species, focus on creating an ideal environment for your giant succulents. The key here is to strike a balance between water, light, and soil quality. Water your succulents sparingly and use a well-draining potting mix. Be sure to provide your giant succulents with enough space to grow and thrive. Additionally, regular pruning can also help your giant succulents reach their full potential.

This blog post highlights the secrets of growing giant succulents like a pro. Read on to find out everything you need to know.

What Is Considered a Giant Succulent?

A “giant succulent” is not an official botanical classification but rather a term used informally to describe succulent plants that are exceptionally large compared to their typical counterparts.

The size of a succulent is relative, and what is considered “giant” may vary depending on the species and context.

You must remember the fact that succulents come in a wide range of shapes, sizes, and forms. While many succulents are small to medium-sized, some certain species or varieties can grow significantly larger than the average.

Several factors influence the size of a succulent, including its genetics, environmental conditions, age, and care.

In some cases, a succulent may be genetically predisposed to grow larger, while others might achieve giant status due to favorable growing conditions and proper care.

A agave plant blooming.
You must remember the fact that succulents come in a wide range of shapes, sizes, and forms.

Therefore, the term “giant succulent” is highly subjective and may vary among individuals and gardening communities.

Generally, a succulent is considered “giant” when it significantly exceeds the typical size of its species or variety. This can manifest in various ways, such as taller stems, larger rosettes, or a more extensive spread.

Gardeners and landscapers often use giant succulents as focal points in their designs due to their striking appearance and size. These larger succulents can add a bold and dramatic element to outdoor spaces.

How Do You Grow Giant Succulents?

Below are some essential tips to help you grow giant succulents like a pro:

Choosing the Right Species

When it comes to growing giant succulents, choosing the right species is crucial. Some succulent varieties are naturally more compact and smaller in size, while others tend to grow larger.

Start by researching various succulent species. There is a wide range of succulents to choose from, each with its unique growth habits, sizes, colors, and shapes.

Consider the climate and conditions in your area when selecting species. Some succulents are better suited for specific climates, such as desert or Mediterranean varieties.

Take time to identify succulents that are naturally larger or have the potential to grow large over time. Examples of large succulent species include Agave americana, Agave titanota, and Aeonium arboreum.

Pay attention to the growth habit of the succulent. Some species grow in rosettes, while others form tree-like structures or sprawling ground covers. Choose a growth habit that appeals to your aesthetic preferences.

Aeonium with white flower.
Pay attention to the growth habit of the succulent.

You should also remember that some succulents are slow growers, taking many years to reach a significant size, while others grow more rapidly. Decide if you’re willing to invest the time and effort required for slow growers.

And most importantly, consider the maintenance requirements of the species you’re interested in. Some succulents are more low-maintenance and forgiving of occasional neglect, while others require more precise care.

Creating the Ideal Environment

Once you have picked the right species, creating an ideal environment for your giant succulents is critical. These plants require specific conditions to thrive and reach their full potential.

The first and most important factor is water. Succulents are known for their ability to store water in their stems and roots. It means they don’t need frequent watering to thrive.

In fact, overwatering is one of the most common causes of succulent death. For giant succulents, it’s essential to water them sparingly and allow the soil to dry out completely between watering sessions.

Using a well-draining potting mix is another crucial aspect of creating an ideal environment for your giant succulents.

Agave in a pot.
Succulents are known for their ability to store water in their stems and roots.

The soil should be able to drain quickly, allowing excess water to escape. You can achieve this by adding materials like perlite, pumice, or coarse sand to your potting mix.

Light is another essential factor for the growth of succulents. Most succulents prefer bright, indirect light.

However, giant succulents may require more direct sunlight due to their larger size and need for energy production. Be sure to place your giant succulents in a location that receives plenty of natural light.

Proper spacing is also crucial for giant succulents. These plants require enough room to spread out their roots and grow comfortably. If grown in containers, be sure to choose pots that are large enough for the plant’s mature size.

Pruning for Optimal Growth

Pruning and trimming are essential practices for maintaining the health and appearance of your succulent plants. This is more important for large succulents.

Pruning and trimming involve the careful removal of dead, damaged, or overgrown plant material to encourage healthy growth and maintain an attractive appearance. Here’s how to effectively prune and trim your succulents.

Be sure to gather the necessary tools before you start the process. Typically, you will need sharp, clean scissors or pruning shears. Ensure your tools are sanitized to prevent the spread of diseases between plants.

Regularly inspect your succulents for dead or yellowing leaves. These can be breeding grounds for pests and diseases and should be removed promptly.
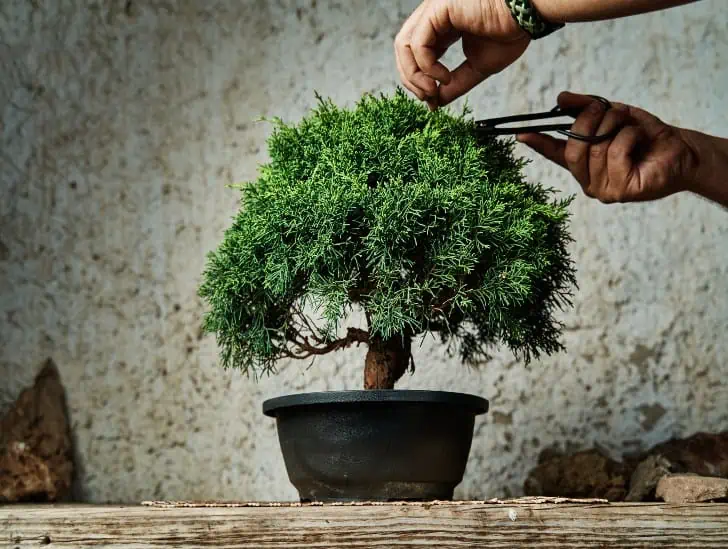
A person pruning a bonsai.
Be sure to gather the necessary tools before you start the process.

Use your scissors or shears to snip off the dead leaves as close to the base of the plant as possible.

You should also keep in mind that giant succulents can become leggy or elongated, especially if they’re not getting enough light.

To maintain a compact and attractive shape, trim back any leggy growth. Cut just above a leaf node (the point where a leaf attaches to the stem). This encourages new growth to emerge from the cut area.

The best time to prune or trim succulents is during their active growing season, typically in spring or early summer. Avoid major pruning during their dormant period since it can stress the plant.

And don’t let the pruned pieces go to waste. Many succulents can be propagated from stem or leaf cuttings. Allow the cut ends to callus for a few days before planting them in well-draining soil to grow new plants.

Make pruning and trimming a part of your regular succulent maintenance routine. This prevents overgrowth, maintains plant health, and ensures your succulents remain visually appealing.

Provide Your Succulents with Enough Space

Giant succulents require adequate space to grow and thrive.

When choosing pots or containers for your plants, be mindful of their mature size and ensure they have enough room to spread out their roots. Overcrowded succulents can quickly become stressed and stop growing.

If you’re growing your succulents in the ground, be sure to space them accordingly as well. This allows for proper root growth and prevents competition for nutrients and space.

Providing enough space allows for better air circulation around the plants, reducing the risk of fungal diseases.

It also makes it easier to access your plants for regular maintenance tasks like pruning and watering.

Monitor for Pests and Diseases

Succulents, like any other plants, can fall victim to a variety of pests. Regular monitoring and early detection are crucial to preventing infestations from damaging your succulents.

Make it a habit to inspect your succulents regularly, both indoors and outdoors. Check the leaves, stems, and soil for any signs of pests or pest damage.

Pay attention to symptoms of pest damage, including yellowing or wilting leaves, deformed growth, brown or discolored spots, and stunted growth. These signs can indicate a pest problem.
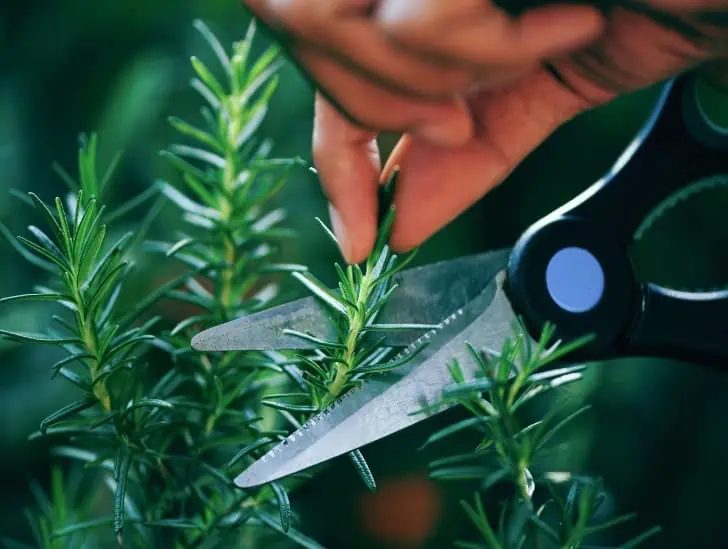
A person pruning a rosemary.
Check the leaves, stems, and soil for any signs of pests or pest damage.

Since many pests prefer to hide on the undersides of leaves, lift the leaves gently and examine them for signs of infestation, such as clusters of insects or white, cottony masses (mealybugs). You can even use a magnifying glass for a closer inspection.

If you detect pests, promptly isolate the affected plant and treat it with an appropriate insecticide.

For larger infestations, consider using natural methods like neem oil or introducing beneficial predatory insects to control the pest population.

In addition to pests, succulents can also suffer from diseases, such as root rot or fungal infections. To prevent these diseases, always use well-draining soil and avoid overwatering.

If you notice any signs of disease, remove the affected parts immediately to prevent spreading.

Summary

Growing giant succulents requires careful consideration of species selection, creating an ideal environment, and regular maintenance practices like pruning and providing enough space.

With proper care, these stunning plants can reach their full potential and add a unique touch to your indoor or outdoor space.

Remember to research the specific needs of your chosen succulent species and adjust as necessary for optimal growth and health.

Top 5 Succulent Varieties for Show-Stopping Large Pots

A agave americana in a pot.

Most succulents are a great addition to every home garden or potted arrangement because of their unique shapes, colors, and low-maintenance care needs. Typically, these plants thrive in small to medium-sized pots because of their relatively slow growth rate. In fact, most succulents are relatively small, making them suitable for small spaces. However, if you want to create a bold and eye-catching display, large pots with different succulent varieties can make a statement in your garden or indoor space. But everything starts with picking the right succulent varieties for the large pots.

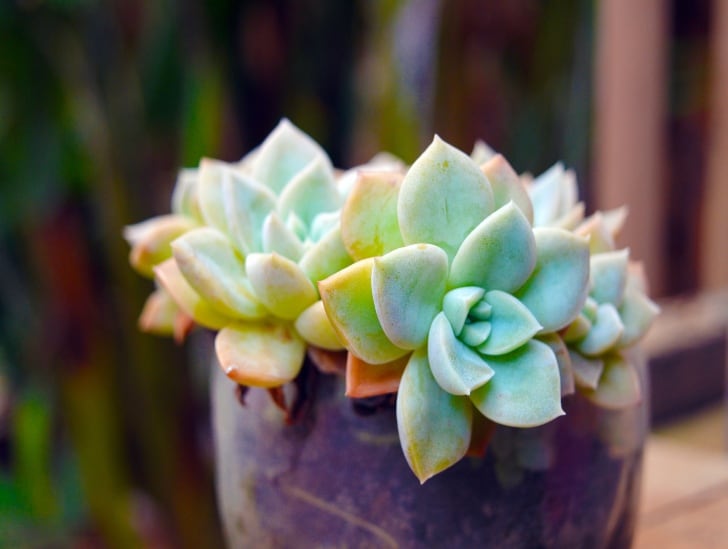
So, what are some of the best succulent varieties for show-stopping large pots? The best options include Aloe Vera, Echeveria, Agave Americana, Crassula ovata, Burro’s Tail, and the Sempervivum. Others include Senecio mandraliscae, Aeonium arboreum, Kalanchoe thyrsiflora, and Graptopetalum paraguayense (Ghost Plant).

This blog post will take a closer look at each of these succulent varieties, discussing their unique characteristics and care needs to help you create a stunning large pot display. Read on to learn more.

1. Agave Americana

Agave Americana, commonly known as the Century Plant or American Agave, is a striking succulent that hails from the arid regions of Mexico but has also become naturalized in various parts of the world.

It is a member of the Agave genus, which is part of the Asparagaceae family. Agave Americana is a monocarpic succulent, meaning it typically has a single, grand flowering event at the end of its life cycle, which can take several years or even decades.

One of the standout features of Agave Americana is its impressive rosette shape, which can grow to be quite substantial.

Mature plants can spread several feet and a height of 3 to 6 feet, making them a commanding presence in large pots.

Its leaves are thick, fleshy, and a striking blue-green color. They are lined with sharp, spiky edges, which give the plant a distinctive appearance.

The succulent has an architectural form and unique texture, making it a striking focal point in any succulent arrangement or large pot. The symmetry and shape of the rosette are visually appealing.

Agave in a pot.
It is a member of the Agave genus, which is part of the Asparagaceae family.

Agave Americana is well-suited for container gardening since it requires minimal care. It thrives in well-draining soil and can tolerate drought once established. Its low-maintenance nature makes it ideal for large pots since it can withstand longer periods between watering.

The succulent’s size and striking appearance make it an excellent choice for large pots. It serves as a dramatic focal point in container gardens and can create a bold statement in outdoor landscapes or as a decorative piece indoors.

Its low maintenance requirements make it suitable for those who want an eye-catching succulent without needing constant care and attention.

Because of its adaptability and drought tolerance, it can thrive in large pots without much fuss, making it an excellent addition to xeriscaping projects.

The long lifespan of this succulent means you can enjoy its presence in your large pot for many years before it eventually produces a tall flower spike and then dies, typically leaving behind offsets (pups) that continue the cycle.

2. Aloe Vera

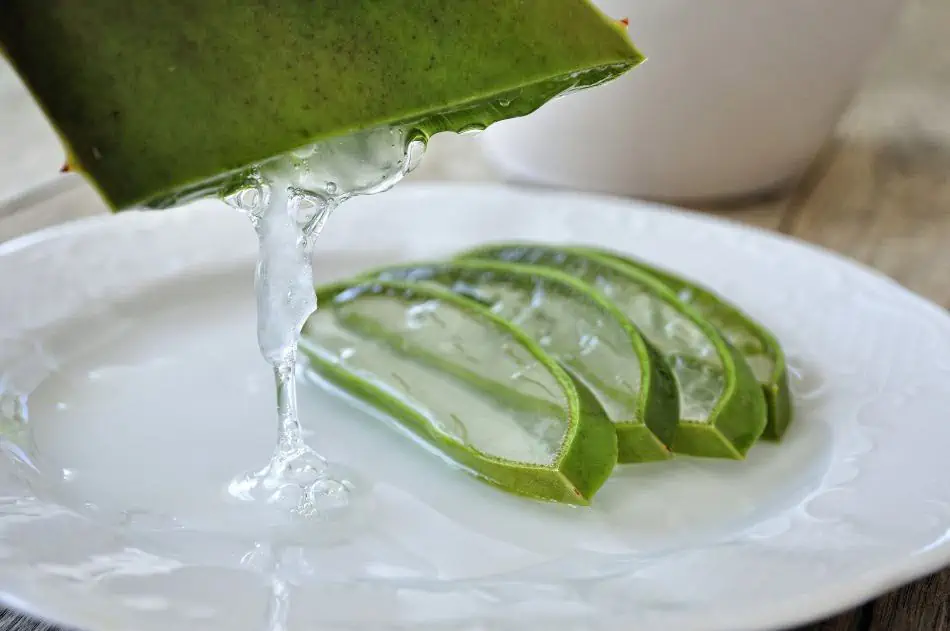
Aloe Vera is widely known for its medicinal properties, thanks to its gel-like substance inside the leaves.

However, it’s also a popular succulent due to its striking appearance and easy-care needs, making it a top choice for large pots.

Aloe Vera is native to the Arabian Peninsula but is grown worldwide. It’s part of the Asphodelaceae family and has over 500 species. The most popular variety for large pots is Aloe Vera Barbadensis Miller, commonly known as “true aloe.”

Aloe Vera typically grows in clusters of rosettes, each producing long, fleshy leaves that can reach several feet long.

Its leaves are thick and dark green, often with a slight blue tint, giving the plant a unique color contrast.

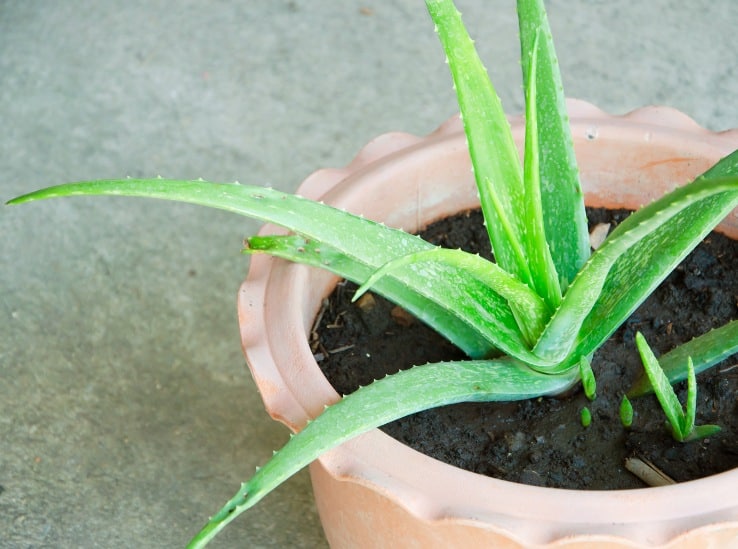
aloe_vera_plant
Aloe Vera is native to the Arabian Peninsula but is grown worldwide.

Aloe Vera stands out from other succulent varieties because its tall flower spike can grow up to 3 feet tall. Its flowers are yellow or orange and add a pop of color to the plant’s overall appearance.

The succulent is relatively low maintenance, requiring a well-draining soil mix and moderate watering (once every week or two). It also thrives in outdoor spaces with partial shade and can tolerate full sun in cooler climates.

One benefit of growing Aloe Vera in large pots is its versatility. You can use the plant’s gel in various skin and hair care products, while its striking appearance adds visual interest to your space.

3. Echeveria

Echeveria is probably one of the most popular succulent genera, thanks to its stunning rosette shape, a wide range of colors and sizes, and ease of propagation.

The succulent is native to Central and South America, particularly Mexico. It belongs to the Crassulaceae family, known for its fleshy-leaved plants.

Echeveria species are characterized by their rosette-like growth habit. The leaves form a tightly packed, symmetrical arrangement around a central point. This rosette shape is visually striking and is a crucial feature of the genus.

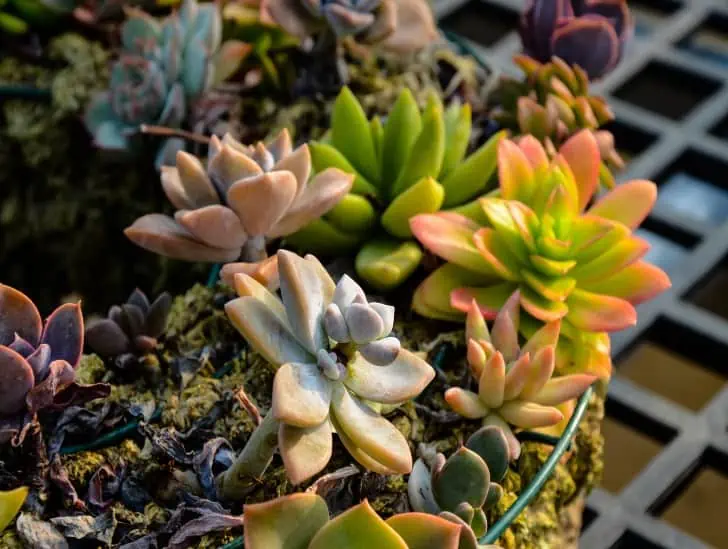
These succulents also feature a wide range of leaf shapes, sizes, and colors. Some have thick, spoon-shaped leaves, while others have slender, pointed ones. Leaf colors can range from shades of green to blue, purple, pink, and even variegated patterns.

Many Echeveria species exhibit vibrant leaf colors, especially when exposed to bright sunlight. The leaves can take on red, pink, orange, or purple hues, making them highly decorative.

Outdoor_Echeveria_elegans
These succulents also feature a wide range of leaf shapes, sizes, and colors.

Echeverias are known for their aesthetic beauty. Their rosette form and colorful foliage make them ideal choices for adding a pop of color and texture to large pots and container gardens.

These plants can easily be combined with other succulents, cacti, or ornamental plants in large pots to create visually appealing and harmonious arrangements. Their variety of leaf colors and shapes allows for endless creative possibilities.

Echeverias adapt well to container gardening, thriving in well-draining soil. They can be grown in outdoor gardens, on patios, or as indoor houseplants, making them versatile for large pots.

With proper care, Echeverias can live for many years, and they often produce offsets, ensuring the continuity of their beauty in your large pots.

4. Crassula ovata

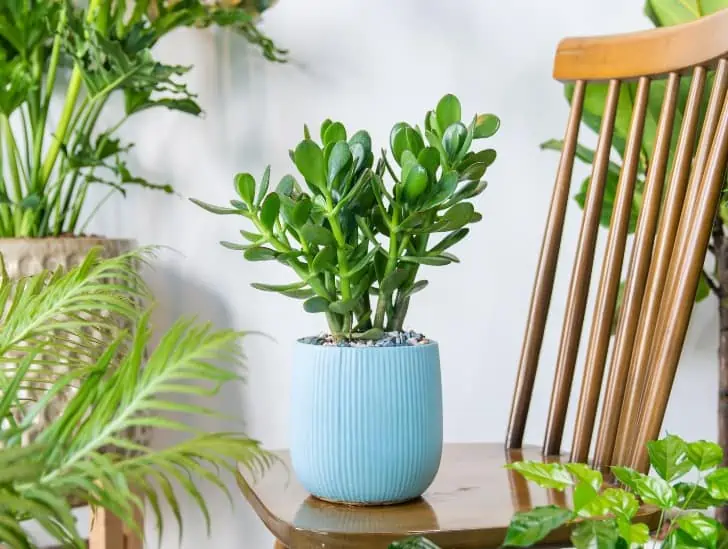
Like other succulent varieties, Crassula ovata, also known as Jade Plant or Money Tree, is popular for large pots due to its striking appearance and low maintenance needs. It’s native to South Africa and belongs to the Crassulaceae family.

Jade plants feature thick, fleshy leaves that can be round or oval-shaped and come in shades of green, silver, or variegated patterns. The plant can reach up to 3 feet tall and wide, making it a commanding presence in large pots.

Crassula on a blue pot.
It’s native to South Africa and belongs to the Crassulaceae family.

One unique feature of Jade plants is their thick stem that stores water, allowing them to withstand long periods between watering. This characteristic makes them low maintenance and adds to their hardiness as container plants.

In addition to its aesthetic appeal, Crassula ovata is believed to bring good luck and prosperity, making it a popular choice for large pots in homes and offices.

5. Sempervivum

Sempervivum, commonly known as Hens and Chicks, is another fascinating succulent genus well-suited for large pots and container gardening.

Sempervivum is a genus of succulent plants native to Europe, northern Africa, and western Asia.

The name “Sempervivum” comes from Latin and means “always living” or “evergreen,” reflecting the plant’s hardiness and ability to thrive in various conditions.

These succulents are characterized by their rosette growth habit, where tightly packed leaves form a rosette shape. This rosette can produce offsets, known as “chicks,” which cluster around the main plant, hence the common name “Hens and Chicks.”

Sempervivum species and cultivars come in various colors and leaf shapes. You can find them in shades of green, red, purple, and silver, with some displaying intricate patterns and textures.

The rosette clusters of Sempervivum are visually appealing and can create a charming, textured display in large pots. They work well as standalone specimens or as part of a mixed succulent arrangement.

With a wide range of colors and forms available, you can choose Sempervivum varieties that match your desired color scheme or aesthetic preferences. Their diversity allows for creative and visually striking container gardens.

Sempervivum in a pot.
Sempervivum species and cultivars come in various colors and leaf shapes.

Whether you have a sunny outdoor garden or a shaded patio, Sempervivums can adapt to different conditions, making them versatile choices for large pots in various settings.

Furthermore, these succulents are relatively easy to propagate. All you have to do is separate the offsets and transplant them into new pots. This allows you to expand your collection or share plants with fellow gardeners.

Summary

Succulents come in all shapes, sizes, and colors, making them ideal for large pots and container gardens.

Not only are they visually appealing, but they also require minimal maintenance and can thrive in different environments.

From the tall flower spike of Aloe Vera to the rosette clusters of Echeveria and Sempervivum, each succulent offers unique features that add beauty and interest to any space.

Proper care allows these plants to live for many years, providing endless opportunities for creative and beautiful container gardening. So why not start growing succulents in your large pots today?

Want a Stunning Succulent Centerpiece? Here’s How to Make One

Succulent centerpiece on the teapot.

Succulents are not only charming and low maintenance but also versatile enough to become the star of your next centerpiece. Whether it’s for a wedding, party, or dining table, succulent centerpieces add a touch of natural elegance to any setting. However, proper arrangement and care for succulents are essential to creating a lasting, stunning centerpiece.

So, how can you make a stunning succulent centerpiece? The first step in creating a stunning succulent centerpiece is choosing the right succulents. Once you have the right succulents, plan and gather your materials for the project. They include a shallow container or planter, cactus or succulent potting mix, decorative stones, pebbles, or moss, gardening gloves, and a small trowel or spoon. Prepare your container and gather your succulents. The next thing to do is prepare your container. Make sure that it has proper drainage holes for the succulents to thrive. Plant the succulents and add decorative elements. Water the plants and keep them in a sunny spot.

This blog post will guide you through the process of making a stunning succulent centerpiece step by step. Read on to find out everything you need to know.

Why Choose Succulents for Centerpieces?

Before we dive into the steps, let’s explore why succulents make excellent centerpieces:

  • Longevity: Succulents have a longer lifespan than many other cut flowers, ensuring your centerpiece remains beautiful long after the event.
  • Low Maintenance: They require minimal care, making them ideal for busy hosts. With the right conditions, they can thrive for weeks.
  • Versatility: Succulents come in various shapes, sizes, and colors, allowing you to create diverse and visually striking arrangements.
  • Sustainability: Many succulents can be replanted or propagated after the event, reducing waste, and providing lasting memories.

How to Make a Stunning Succulent Centerpiece: Step-by-Step Guide

Now that you know why succulents are an excellent choice for centerpieces, let’s get into the steps of making one:

Step 1: Choosing the Right Succulents

The first step in creating a beautiful succulent centerpiece is choosing the right plants. There are countless varieties of succulents, each with its own unique shape, color, and size.

However, not all succulents are suitable for a centerpiece. It’s best to choose ones that have similar growth habits and care requirements so that they can thrive together in one container.

A succulent arrangement.
The first step in creating a beautiful succulent centerpiece is choosing the right plants.

Some popular succulent choices for centerpieces include echeverias, haworthias, sedums, and aeoniums. They come in different colors, textures, and sizes that can add dimension and interest to your centerpiece.

When choosing succulents, also consider the size of your container. For a small or medium-sized container, it’s best to choose smaller succulents so they don’t overcrowd each other as they grow.

Step 2: Gathering Materials

You will need the following materials to create your succulent centerpiece:

  • A shallow container or planter with proper drainage holes
  • Cactus or succulent potting mix
  • Decorative stones, pebbles, or moss
  • Gardening gloves
  • Small trowel or spoon for planting
  • Watering can or spray bottle
  • Optional: Decorative elements like driftwood, seashells, or fairy lights

Ensure you have gathered all these materials before starting the project. Otherwise, you might have to pause in the middle of the process, which can disrupt your workflow.

Step 3: Preparing Your Container

Once you have selected your succulents, it’s time to prepare the container for planting. Start by selecting a shallow container with proper drainage holes. Succulents do not like to sit in standing water, so ensuring the container can drain excess water properly is crucial.

Next, add a layer of cactus or succulent potting mix to the bottom of the container. This soil type is specifically formulated for succulents and has excellent drainage properties.

Close-up image of a succulent wreath.
Once you have selected your succulents, it’s time to prepare the container for planting.

Be careful with the type of container you choose. Metal or glass containers can become too hot and damage the succulents’ roots, while porous materials like terracotta can absorb water too quickly.

Step 4: Planting and Arranging Your Succulents

It’s now time to get your hands dirty! Put on your gardening gloves and start planting your succulents in the container.

Begin with the larger succulents first, placing them towards the back or center of the container. Then, fill in any empty spaces with smaller succulents. You can also add decorative elements like driftwood or seashells to add interest and texture.

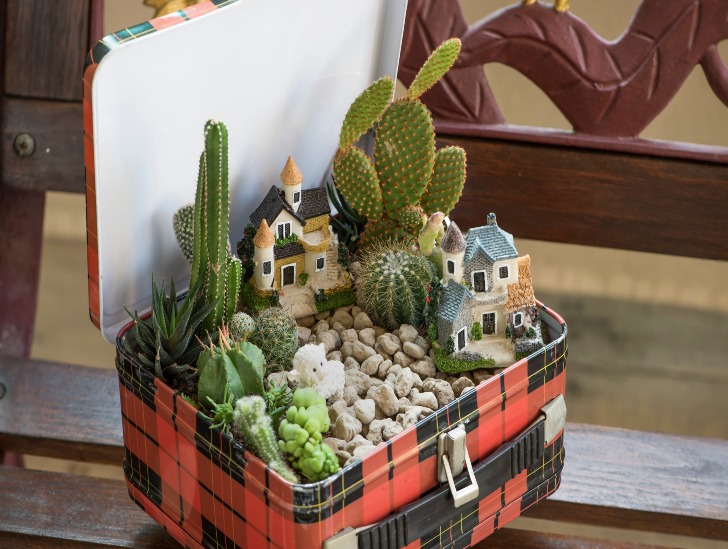
A succulent box arrangement.
Put on your gardening gloves and start planting your succulents in the container.

Leave enough space between each plant for them to grow and breathe. Once all your succulents are planted, use your hands or a small trowel to pack the soil around them gently.

Step 5: Adding Decorative Elements

Add decorative elements like pebbles, stones, or moss on top of the soil to make your centerpiece even more eye-catching. This not only adds texture and visual interest but also helps keep moisture in the soil and prevents it from drying out too quickly.

You can also incorporate fairy lights or other small decorations to add a touch of whimsy and charm to your centerpiece.

Step 6: Watering and Settling

Water your succulents lightly, ensuring the soil is evenly moist but not soggy. You can use a spray bottle for gentle watering. Don’t water the leaves directly because it can cause rot issues.

After watering, set your succulent centerpiece in a sunny spot. Succulents require plenty of sunlight to thrive. So, ensure they get at least 6 hours of direct sunlight daily.

You should also allow your stunning centerpiece arrangement to settle for a day or two before displaying it, giving the succulents time to adjust to the new environment.

Step 7: Caring for Your Succulent Centerpiece

Your succulent centerpiece can last weeks or months with proper care. Here are some tips to keep it looking beautiful:

  • Water your succulents once a week, ensuring the soil is evenly moist but not soggy.
  • Give them enough sunlight. If you notice your succulents starting to stretch towards the light source, it’s a sign they need more sunlight.
  • Avoid placing your centerpiece near air conditioning vents or heaters because temperature fluctuations can harm the succulents.
  • Remove dead or dying leaves to keep your centerpiece fresh and healthy.
  • Replant or propagate any succulents that outgrow the container to avoid overcrowding and promote sustainability.

How Long Does It Take to Make a Succulent Centerpiece?

The time it takes to create a succulent centerpiece will depend on the size and complexity of your arrangement. Small centerpieces can be made in less than an hour, while larger and more intricate ones may take a few hours to complete.

Succulents Terrarium
The time it takes to create a succulent centerpiece will depend on the size and complexity of your arrangement.

The time it takes to complete the project will also depend on your skill set. If you are new to gardening or working with succulents, it may take longer as you get the hang of it. With practice, you can create stunning, succulent centerpieces in no time.

Don’t be afraid to ask for help from more experienced gardeners or seek inspiration from online tutorials and resources.

Where Can I Display My Succulent Centerpiece?

Succulent centerpieces are versatile and can be displayed in different settings. They make great additions to dining tables, coffee tables, and mantelpieces. You can also use them as focal points on entryway tables or outdoor patios.

Choose a spot with enough sunlight for your succulents to thrive. With proper care, your succulent centerpiece can be a beautiful addition to any space for weeks or months.

How Long Do Succulent Centerpieces Last?

The lifespan of your succulent centerpiece depends on various factors, such as the type of succulents used, care and maintenance, and environmental conditions.

Your succulent centerpiece can last several weeks or even months with proper care and attention. The most important thing is to provide your succulents with the right conditions they need to thrive.

Can I Reuse the Succulents from My Centerpiece?

Yes, you can! Once your centerpiece starts to fade, carefully remove the succulents and replant them in a new container with fresh potting mix.

You can also propagate any overgrown or damaged succulents by taking cuttings and rooting them in soil or water.

This allows you to enjoy your succulents for longer and promotes sustainability by reducing waste and promoting plant growth.

So don’t be afraid to experiment with different containers and arrangements, knowing that you can always reuse your succulents in the future.

Do Succulent Centerpieces Require Maintenance?

Succulent centerpieces require minimal maintenance, but you can do a few things to keep them looking good.

Water your succulents once a week, ensuring the soil is evenly moist but not soggy. Give them enough sunlight. If you notice your succulents starting to stretch towards the light source, it’s a sign they need more sunlight.

A sedum succulent.
Water your succulents once a week, ensuring the soil is evenly moist but not soggy.

Remove dead or dying leaves to keep your centerpiece fresh and healthy. You should also replant or propagate any succulents that outgrow the container to avoid overcrowding and promote sustainability.

Final Thoughts

Creating a succulent centerpiece is a fun and rewarding project that can add a touch of nature and beauty to any space.

Remember to choose the right succulents, gather all necessary materials, prepare your container properly, plant and arrange your succulents creatively, add decorative elements, and care for your centerpiece regularly.

With these steps in mind, you can create a stunning succulent centerpiece that will impress and delight you for weeks or even months.

How To Identify Fake Cactus Flowers & Removing Fake Flowers

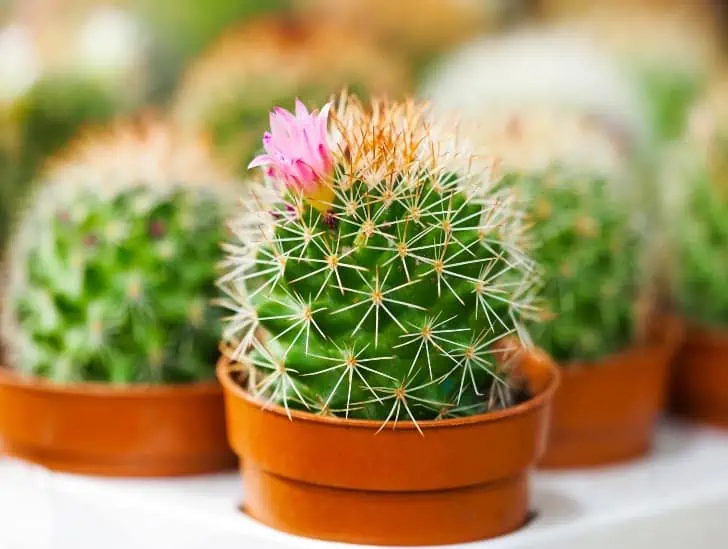
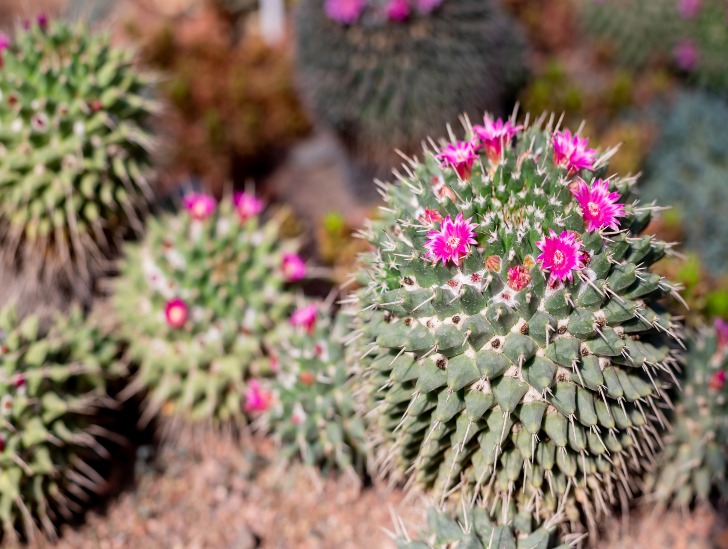
Fake cactus flower on the pot.

You may stumble on cacti with flowers when you visit a nearby gardening store or plant nursery. At first, you may be stunned at how good the plant looks with a beautiful flower blossom on its top. But you may realize the flowers are not real after a closer look. These are fake flowers that cactus sellers glue on the plant to make it marketable. Unfortunately, buying a cactus and later realizing the flower is fake would leave you feeling cheated.

So, how can you identify fake cactus flowers, and how can you remove them? You identify fake cactus flowers by closely examining the flowers. Look at the placement of the flower, color, and texture, and check for glue binding the flower to the stem. To remove fake flowers from your cacti, you can gently pull them out using your hand, use a hairdryer to blow the glue that binds the flower to the stem, use a knife to scrape off the glue, cut the flower off using scissors, or leave the plant alone till the fake flower falls off on its own.

In this post, we will discuss what fake cactus flowers are, how to identify them, and how to remove fake flowers from your newly bought cactus plants.

What are Fake Cactus Flowers?

The fake flower you see on a cactus is not fake but real. Technically, this flower is an inflorescence from a species of plants called everlastings or strawflowers.

They are called so because when dried, the flowers have a crispy, straw-like texture and remain in good condition for a long time.

This unique texture makes the fake flower easy to identify when touched and comes in different colors.

But the most intriguing thing about a straw flower is that it can respond to humidity levels even when dried.

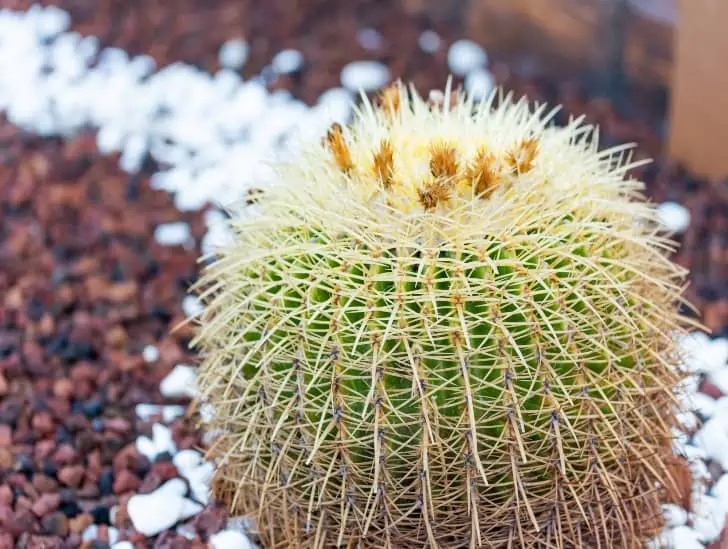
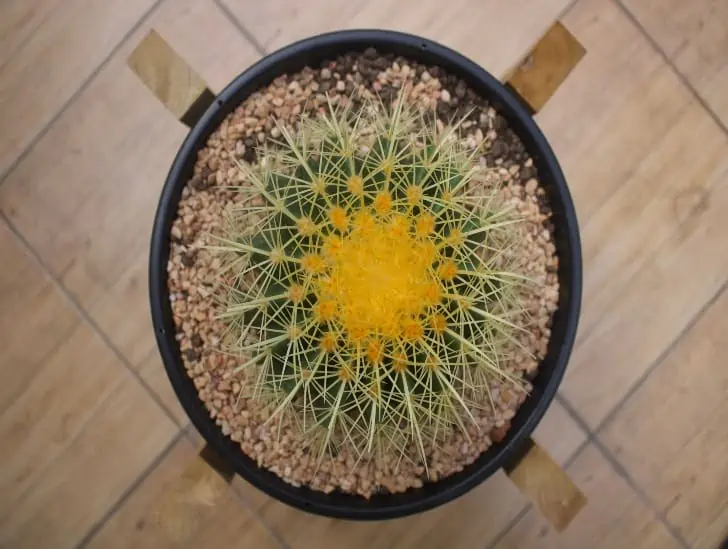
Small golden barrel cactus.
Technically, this flower is an inflorescence from a species of plants called everlastings or strawflowers.

The flower opens when there is little humidity and closes when there is excessive humidity, imitating real cacti flowers.

Why Do We Have Fake Flowers on Cacti Plants?

Flower growers and sellers often attach flowers of cacti to enhance their appeal. This helps the cacti plants sell faster, getting new homes.

 So, it is your job to inspect each cactus to avoid buying one with a fake flower.

The seller should be truthful if you ask about the flower. But the seller is not to blame if you fail to ask.

Flowers give cactus a vibrant, thrilling appearance that appeals to potential buyers. Knowing whether a cactus flower is real or fake becomes easier as you gain experience.

Do Cacti Plants Flower?

So, you may think that sellers use fake flowers to make cactus look more attractive because these succulents do not flower. Well, this is far from the truth.

Almost all cacti are flowering plants. Some bloom faster than others, depending on the species.

But even though cacti can bloom, making them do so is difficult. You may have to care for the cactus for two to three years; even blooming will depend on the species.

Some species, like Mammillaria, Parodia, and Gymnocalycium, bloom quite fast, while others, such as the prickly pear cactus, take up to four years to flower.

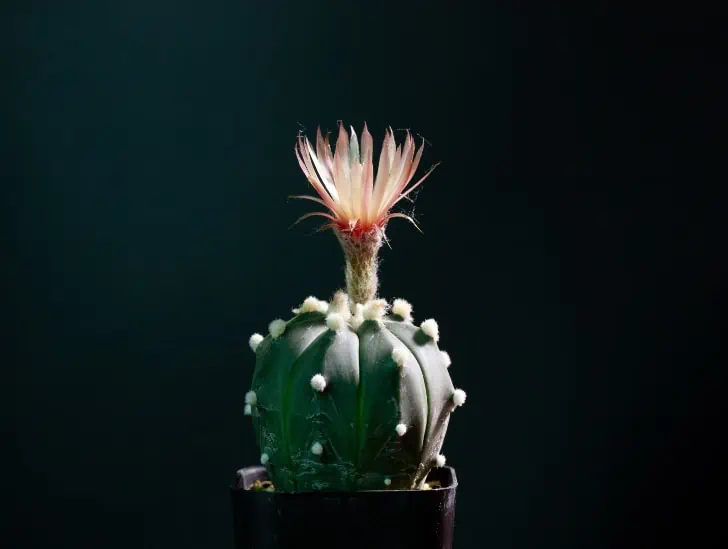
A thelocactus blooming in a pot.
You may have to care for the cactus for two to three years; even blooming will depend on the species.

Another thing is that the lifespan for most cacti flowers is short. Some cactus flowers open for a few days, while others last only for a few hours and then fade away.

So, to keep the flower vibrant for longer, cacti growers came up with the idea of using hot glue to attach flowers to these plants.

They fail to realize that by doing this, they cause damage to the plant. The part of the cactus skin that comes into contact with the hot glue gets burned. This is one of the things you can look out for to identify fake flowers.

How to Identify Fake Cactus Flowers

The best way of handing cacti with fake flowers is to avoid purchasing them. For this, you must inspect the blooms.

Start by looking at the placement of the flower. Cacti sellers often stick the flower on the growth point in the middle of the stem.

However, this is not how real cacti bloom. Real cacti flowers usually emerge on the mature end of the plant.

They can grow directly on the side, sometimes in the middle, but never precisely in the middle part of the plant. So, the flower is fake if it appears precisely at the center.

The color of the flower is another indicator. Cacti with fake flowers are often delivered in trays and are also in trays when exhibited in nurseries.

If you notice blue, purple, or violet flowers in a collection of what looks like flowering cacti, they are fake. Cacti flowers do not have such colors.

A spider cactus blooming.
Cacti with fake flowers are often delivered in trays and are also in trays when exhibited in nurseries.

The same applies to cacti with bright green flowers. Some cacti may have lime-green blooms but not bright green.

Remember to touch the flower. A real cactus flower is silky smooth and gives no resistance when touched. A strawflower feels like paper and can break if you bend it.

You can also look closely to see what binds the flower and the plant together. Real cactus blooms grow on a tubular stem, which can be long or short and is usually prickly.

Some more miniature flowering cacti, like pincushion cacti (Mammillaria), have very short stems but are still visible if you are keen enough.

On the contrary, fake flowers are attached to the cactus plant using hot glue. You may see the whitish glue under the flower if you lift the petals or ray flowers.

You can also delay buying the cactus for at least a week to see how the flowers will look like by then. Real cactus flowers are short-lived. Most of them only survive for less than ten days. Others only last for a day.

However, strawflowers can live up to two years. So, if you notice a cactus is still at the store three weeks later and seemingly blooming well, its flowers are fake.

If the flowering cactus you want has been in the store for some time, its flowers may be dusty – that is if they are fake. Real cactus flowers do not survive long enough to become dusty.

How to Remove Fake Flowers from Cactus

Spreading hot glue on a cactus stem causes permanent damage and kills adjacent cells. So, you want to avoid buying cactus with fake flowers.

But if you already bought your cactus, you can remove the fake flowers carefully without causing further damage. Of course, this will leave a wound, but it may not even be visible.

Here are five ways to remove a fake cactus flower.

1. Remove by Hand

First, avoid yanking the flowers off – they are not bandaids! You might tear off an areole, the skin, or even some cactus flesh.

San dollar cactus blo
So, gently pull the flower out using your hand instead.

This could leave a wound bigger than the hot glue caused. So, gently pull the flower out using your hand instead. Move it back and forth, left and right, and repeat a few times.

The glue will soon come loose.

2. Using a Hairdryer

Hot weather is the best for removing fake cactus flowers because the glue softens and becomes easy to remove.

But if it’s the cold season with barely any sun outside, you can get a hairdryer and blow hot air on the plant.

This will work if the glue is not stuck hard on the plant. But if it’s too adhesive, even a hairdryer won’t break off the flower.

Avoid blowing for too long. Cactus cannot withstand 100 degrees of hot air blown directly, so blowing on the plant for too long could damage the plant cells.

3. Using a Knife

Sometimes, the flower is stuck directly in the cactus spines instead of the stem. If the spines are thick and intertwined, some chunks of glue could remain stuck even after removing the flower.

If this is the case, carefully scrape off the glue using a sharp knife while working your way from the root to the tip of the spine.

Sometimes, you can get all the glue out by gently working on the plant.

4. Use Scissors and Brush

If nothing seems to work because the glue is stuck too hard to the stem, you may need to cut the flowers off altogether. Use scissors to cut them and a brush to clean the spine surface.

Be gentle and careful when cutting the flowers. You may lose some spine, but you will not cause much damage to the plant.

This is worth your effort because it will leave the cactus looking more beautiful without a fake flower on the top.

5. Leave It as It Is

Or you can wait. Cacti are living plants, not stones – they will keep growing.

A golden barrel cactus flowering.
Cacti are living plants, not stones – they will keep growing.

The stem’s shape changes as the cactus grows, and the glue may wear off, so the flower eventually falls off.

Summary

Although cacti bloom naturally, some sellers stick fake flowers to make their plants more appealing to potential buyers.

Being able to differentiate between fake and real flowers is important because fake ones compromise the health of your cactus. Most sellers use hot glue to attach the fake flower, which can damage the plant.

You should remove them by hand, using scissors and a brush, a hairdryer, or a knife so your cactus can thrive.

But it is entirely up to you to decide whether to remove the fake flowers or leave them to fall off on their own.

Discover the Benefits of Growing Tree Aloes in Your Garden

Tree aloe.

As a succulent enthusiast, you often find yourself seeking new and unique additions to your ever-growing collections. Today, we turn our attention to the majestic tree aloe – a succulent species that brings aesthetic appeal and myriad benefits to your garden. This towering plant, with its bold structure and stunning floral display, has the potential to transform your outdoor space into a captivating desert landscape.

So, what are the benefits of growing tree aloes in your garden? Tree aloes are impressive and eye-catching, serving as a dramatic focal point in your garden. These succulents are generally low-maintenance plants. They require minimal watering, making them an excellent choice for beginners. Tree Aloes can be used in a variety of landscaping applications. They work well as standalone specimens, in mixed succulent gardens, or as border plants. Some species of tree aloes have medicinal properties and are used in traditional medicine. The gel inside their leaves can be applied topically to soothe skin irritations, burns, and wounds.

This post discusses the advantages of growing tree aloes in your home garden. Read on to find out everything you need to know.

Tree Aloes: Quick Overview

Tree aloes, also known as Aloidendron, are striking succulent plants popular for their tall, tree-like growth patterns and impressive architectural presence.

Originating primarily from Southern Africa, these succulents have become common in home gardens and landscapes worldwide.

The trees are adapted to surviving in arid and semi-arid habitats, thriving in regions with well-drained soils and abundant sunlight.

Tree aloes are characterized by their single, unbranched stem, which can grow to substantial heights, often resembling a tree.

Their leaves are thick, fleshy, and arranged in a rosette fashion, providing efficient water storage for survival during prolonged dry periods.

These succulents are known for their impressive longevity, with some species living for several decades.

A small tree aloe.
To cultivate tree aloes successfully at home, it is essential to replicate their native conditions.

The trees are mainly celebrated for their stunning flowering displays. They produce tall spikes of tubular flowers that vary in color from fiery reds and oranges to vibrant yellows and greens, depending on the species.

The flowering season typically occurs during winter, adding color to otherwise barren landscapes. Their nectar-rich blossoms are also known to attract pollinators such as birds and insects.

To cultivate tree aloes successfully at home, it is essential to replicate their native conditions. Well-drained soil is a must because these plants are highly susceptible to root rot in saturated soils.

They thrive in full sun, so providing ample sunlight is crucial for robust growth and flowering.

Furthermore, they are generally drought-tolerant once established but benefit from occasional deep watering. Pruning dead or damaged leaves can help maintain their tidy appearance.

Benefits of Growing Tree Aloes in Your Garden

So, what are some of the benefits of growing tree aloes in your home garden? Let us find out:

1. Dramatic Focal Point

Growing tree aloes in your garden can create a stunning and dramatic focal point that captures the attention of anyone who sees it.

Depending on the species and age, tree aloes can grow quite tall, often reaching heights of 10 feet or more.

Their vertical stature sets them apart from many other garden plants and allows them to dominate the landscape with their presence.

The main stems of these succulents grow upright and are typically unbranched, giving them a tree-like appearance. Their strong, vertical lines contrast with the surrounding vegetation, creating a sense of visual drama.

A false aloe plant.
This architectural beauty adds a sense of sophistication and elegance to your garden design.

These plants are known for their striking, colorful flowers. Depending on the species and variety, the flowers usually range from fiery reds and oranges to vibrant yellows and pinks.

When blooming, the contrast between the tall stems and the vivid flowers is simply breathtaking.

In fact, the overall form of tree aloes is often considered architectural, with a symmetrical and sculptural quality. This architectural beauty adds a sense of sophistication and elegance to your garden design.

2. Low Maintenance

Another benefit of growing tree aloes in your garden is their low maintenance requirements.

Tree aloes are relatively easy to care for and only require a little attention or effort to thrive. In fact, they are known for being one of the most drought-tolerant succulents in the world.

These plants are adapted to survive prolonged periods without water, so they can be easily neglected and will still survive. They require minimal watering, so you don’t have to worry about frequent maintenance or upkeep.

Tree aloes also tolerate a wide range of soil types and can tolerate full sun with no problem. They are not prone to common diseases or pests, so you won’t need to worry about frequent inspection and treatment.

3. Year-Round Interest

One of the outstanding benefits of incorporating tree aloes into your garden is their ability to provide year-round interest, ensuring your outdoor space remains visually appealing throughout every season.

These succulents are evergreen because they retain their leaves year-round. It means that your garden remains vibrant and lush, even during winter.

The structural integrity of tree aloes remains steady throughout the year. Their tall, upright stems and unique form do not change significantly with season changes.

The consistency in shape and structure contributes to your garden’s overall aesthetic stability.

Aloe vera plant outdoors.
The structural integrity of tree aloes remains steady throughout the year.

While the peak flowering season for tree aloes may vary depending on the species and climate, some varieties can produce blooms at various times of the year.

It means you can enjoy their vibrant and colorful flowers at unexpected moments, adding periodic bursts of visual interest.

For gardeners who appreciate a cohesive and harmonious landscape design, the year-round interest provided by tree aloes helps maintain garden continuity.

Their consistent presence contributes to the garden’s overall coherence, even as other elements evolve with seasons.

4. Versatile Landscaping Option

Tree aloes are also highly versatile, making them an ideal choice for a variety of landscaping applications.

The plants can be used alone or combined with other succulents in mixed gardens and pathways. Their bold shapes and striking colors make them perfect for creating living walls and dividers.

They can even be planted in containers, providing a unique and captivating visual display.

Tree aloes also can tolerate different soil types and light levels. It means you can grow them in sunny or relatively shaded areas, eliminating the need to switch out plants when the sun’s position changes throughout the day.

The versatility of tree aloes makes them valuable for creative landscaping projects, enabling gardeners to achieve the desired look and feel with minimal effort.

These plants can be used in various creative ways, allowing you to express your unique vision for your outdoor space with ease.

Tree aloes are an excellent choice for virtually any landscape design, from living walls and dividers to mixed gardens and pathways.

Their low maintenance requirements, year-round interest, and ease of use make them the perfect choice for any home garden.

5. Medicinal Uses

Some species of tree aloes have medicinal properties and are used in traditional medicine. The gel inside their leaves can be applied topically to soothe skin irritations, burns, and wounds.

It is also believed to have anti-inflammatory properties and can be used to reduce pain and swelling.

A aloe vera.
The gel inside their leaves can be applied topically to soothe skin irritations, burns, and wounds.

In some cultures, tree aloe gel is mixed with other ingredients, such as honey or lemon juice, and consumed orally for various health benefits, including improved digestion, immune system support, and even weight loss.

Although further studies are needed to confirm its efficacy and safety, Tree aloe gel can be a natural and effective remedy for many ailments.

6. Erosion Control

The extensive root systems of tree aloes help prevent soil erosion, making them valuable in gardens located on slopes or areas prone to heavy rains.

The deep roots provide stability and help keep the soil in place, preventing it from washing away due to water runoff or heavy downpours.

Their unique root structure also helps improve soil aeration by breaking up hard-packed clumps of dirt, allowing air and nutrients to move more freely through the soil.

This makes tree aloes great for helping gardeners improve soil fertility and promote healthy plant growth.

7. Cultural Significance

Beyond their horticultural appeal, tree aloes hold cultural significance in various regions, adding a layer of depth and heritage to your garden. These plants carry cultural symbolism and are associated with specific virtues or qualities.

For instance, tree aloes may symbolize resilience, longevity, and adaptability in African cultures. Planting them in your garden can evoke these cultural symbols and their associated values, connecting your landscape to age-old traditions and beliefs.

Moreover, tree aloes have often been featured in folklore and traditional practices of regions where they are native.

Aloe ferox blooming.
These plants carry cultural symbolism and are associated with specific virtues or qualities.

Learning about these cultural stories and beliefs can provide a deeper connection to the plant and its significance, allowing you to appreciate the rich tapestry of cultural heritage intertwined with these plants.

In some societies, tree aloes have historical uses beyond ornamental purposes. They might have been employed for medicinal, culinary, or utilitarian purposes.

Exploring these historical uses can be a fascinating aspect of their cultural significance, offering insights into how these plants have shaped human history.

Summary

With their natural beauty, versatility, and ease of care, it is no wonder that tree aloes are becoming increasingly popular with gardeners across the globe. With little effort and know-how, you can enjoy these stunning plants in your outdoor space for many years.

How to Encourage Flapjack Plant Blooms Every Time: Expert Advice

A flapjack plant.

Do you consider yourself a true succulent enthusiast? If so, you’re likely familiar with the Flapjack plant. Also known as Kalanchoe luciae, this succulent is a fascinating species famous for its distinctive, pancake-shaped leaves and stunning flowers. The flowers add a burst of color to your indoor or outdoor garden. Unfortunately, the Flapjack plant doesn’t bloom consistently. Sometimes, the succulent can go for several seasons without blossoming. However, with the right care, you can encourage your Flapjack plant to bloom consistently.

So, how do you encourage a Flapjack plant to bloom every time? The biggest trick in encouraging your Flapjack plant to bloom every time is giving it plenty of sun and water. If planted indoors, ensure it gets at least six hours of direct sun daily during spring and summer. You’ll need to provide outdoor plants with at least eight hours of direct sun each day.  Keep your plant well-watered but not overly saturated to encourage blooming. You should also consider providing it with adequate humidity, pruning dead/wilted leaves, feeding it with well-balanced fertilizer, and promoting dormancy during winter to prepare it for the flowering season.

This blog post discusses crucial steps you need to take to ensure your Flapjack plant graces you with its vibrant flowers regularly. Read on to learn more.

1. Provide Adequate Sunlight

Sunlight plays a crucial role in the flowering process. It serves as the primary energy source for plants, driving the process of photosynthesis. The energy produced as a result of photosynthesis is essential for both growth and flowering.

Flowering in most plants, including Flapjack plants, is often regulated by specific light conditions. Adequate sunlight serves as a signal that triggers the plant’s transition from vegetative growth to reproductive mode.

This transition involves complex hormonal changes, with light acting as a critical external factor.

A flapjack plant in a pot exposed to sunlight,
Sunlight plays a crucial role in the flowering process.

When Flapjack receives sufficient light, it stimulates the production of flowering hormones, ultimately leading to the development of flower buds.

The intensity and duration of sunlight are crucial factors. Flapjack usually thrives in bright, indirect sunlight that mimics their natural habitat conditions.

Placing them near a sunny window with filtered light or in a location that receives several hours of indirect sunlight daily is ideal.

Inadequate light can result in reduced photosynthesis, limiting the plant’s ability to accumulate the resources needed for flowering.

While these plants require adequate sunlight for flowering, striking a balance is essential. Too much direct sunlight, especially in hot climates, can scorch the leaves and stress the plant.

Therefore, providing bright, filtered light rather than harsh, direct sun is vital to nurturing a healthy Flapjack plant primed for prolific flowering.

2. Proper Watering

Like sunlight, water is essential for a Flapjack plant to bloom. A consistent watering schedule ensures the plant stays healthy and hydrated, helping it build up the resources needed for flowering.

When watering your plant, ensure you don’t saturate the soil because it can lead to root rot. It’s best to water them when the top inch or two of the soil has dried out.

A closeup image of a flapjack plants,
Like sunlight, water is essential for a Flapjack plant to bloom.

Additionally, you should water the plant more often during spring and summer when it’s actively growing than in winter when growth is slow.

3. Maintain Consistent Temperature

Flapjack plants are naturally adapted to specific temperature conditions, and variations outside this range can significantly affect their growth and flowering patterns.

These succulents thrive in temperatures similar to their native habitat, characterized by mild, consistent conditions. The ideal temperature range for these succulents falls between 60°F to 75°F (15°C to 24°C).

Flapjack experiences optimal growth within this range and are most likely to produce spectacular blooms.

Temperature fluctuations, especially extreme ones, can induce stress in your plant. Sudden drops in temperature, particularly below 50°F (10°C), can trigger a protective response in the plant, causing it to redirect its energy away from flowering.

A flapjack cactus paddle plant.
These succulents thrive in temperatures similar to their native habitat, characterized by mild, consistent conditions.

This survival mechanism prioritizes the plant’s basic needs over reproduction when conditions become unfavorable.

4. Provide Adequate Humidity

Flapjack thrives in humid environments, with an ideal range of 40-50% humidity being recommended. Keeping these plants in a dry environment can lead to flower bud drop and reduced intensity of blooms.

If you can’t increase the humidity in your home, try misting your plant with water every day or so to provide it with enough moisture.

Alternatively, place a humidifier near the plant to keep its environment humid.

5. Balanced Fertilization

Fertilization is a vital component of this plant’s routine care schedule. In fact, achieving a balanced approach to fertilization is critical to encouraging these succulents to bloom consistently.

These succulents have specific nutrient requirements, and a balanced fertilizer meets these needs effectively. Your Flapjack plant will benefit massively from a fertilizer that is well-suited for succulents.

A balanced, diluted liquid or granular fertilizer with an NPK (Nitrogen, Phosphorus, Potassium) ratio of approximately 20-20-20 or 10-10-10 is typically suitable for Flapjack plants.

These succulents usually experience active growth during spring and summer when they invest energy in foliage development and flower bud formation.

A liqued fertilizer.
These succulents have specific nutrient requirements, and a balanced fertilizer meets these needs effectively.

To encourage flowering, it’s crucial to apply a balanced fertilizer during this period. Fertilize your plant every 4-6 weeks throughout the growing season.

The key to successful fertilization is to dilute the fertilizer to half or one-quarter of the recommended strength.

Flapjack plants are adapted to low-nutrient environments, so providing a highly concentrated fertilizer can lead to nutrient imbalances, affecting overall health and potentially inhibiting flower production.

However, it is crucial to avoid overfertilization because excessive nutrients can cause salt buildup in the soil, leading to root damage and reduced flowering.

It is essential to follow recommended dilution ratios and avoid the temptation to over-fertilize, thinking it will promote more blooms.

6. Prune Dead Leaves

Dead and wilted leaves will not only make your plant look unsightly but can also cause it to divert its energy away from flowering. Pruning dead leaves encourages healthy growth and promotes flowering.

To prune your Flapjack plant, begin by removing any dead or wilted leaves with a pair of sharp scissors, taking care not to damage the healthy tissue adjacent to the affected area.

Be sure to sterilize your scissors with rubbing alcohol or diluted bleach solution to prevent the spread of fungi and bacteria.

You should also watch out for leaves that are yellowing beyond the usual coloration. If you notice any abnormally yellow leaves, remove them as soon as possible to avoid further damage to your plant.

7. Promote Dormancy

Promoting dormancy is an essential step in encouraging consistent and robust blooms. The natural resting period is crucial for the plant’s overall health and flowering cycle, and understanding how to facilitate dormancy is critical to optimizing flowering potential.

Dormancy is a seasonal phase in a plant’s life cycle during which growth and metabolic activities slow down or temporarily cease. In the case of Flapjack plants, dormancy typically occurs in late fall and winter.

During this period, the plant enters a state of rest, conserving energy and resources for future growth and flowering.

Dormancy allows these succulents to recover from the active growing season, where they invest energy in foliage development and flower bud formation.

Secondly, it offers a respite from the stress of extreme temperature fluctuations, low light levels, and potentially unfavorable environmental conditions.

To promote dormancy, you should adjust your care routine. Reduce both watering and fertilization during this period.

The reduced water intake mimics the drier conditions typical of the plant’s native habitat during winter, preventing issues like root rot and stress-related problems.

8. Avoid Ethylene Gas

Ethylene is often referred to as the “ripening hormone” because it plays a significant role in the ripening of fruits and the aging of flowers.

When Flapjack plants are exposed to ethylene gas, particularly in higher concentrations, it can disrupt the hormonal balance within the plant, affecting the development of flower buds and potentially causing premature flower drop.

Ethylene is naturally produced by certain fruits, vegetables, and flowers as they ripen or decay.

Common ethylene-producing culprits include apples, bananas, avocados, and tomatoes. Ethylene gas can also be emitted from vehicle exhaust and combustion engines.

To protect your Flapjack plants from ethylene exposure, it’s essential to isolate them from potential sources of this gas.

Avoid placing your succulents near ripening fruits or vegetables in the kitchen, as the gases released during ripening can easily reach your indoor plants.

Ensure proper ventilation in the area where your plant is located. Adequate airflow helps disperse any ethylene gas that may be present, reducing its concentration around the plants.

A closeup image of echeveria in a pot outdoor.
it’s essential to isolate them from potential sources of this gas.

Alternatively, consider using ethylene absorption products near your Flapjack plant, such as activated carbon filters or ethylene-absorbing packets.

These products can help neutralize ethylene gas and protect your succulents from its adverse effects.

Summary

Proper care and maintenance of Flapjack are essential for encouraging flowering and achieving a beautiful display.

By providing adequate light, humidity, fertilizer, pruning dead leaves, promoting dormancy, and avoiding ethylene gas exposure, you can optimize flowering potential and ensure stunning floral displays.

With these tips in mind, you can be confident that your Flapjack will bloom with beautiful flowers consistently. Enjoy the show!

How to Create a Stunning Bouquet Using Only Succulents! Step-by-Step Guide

A close up image of a succulent bouquet.

Succulents are gaining popularity in place of traditional flower bouquets for obvious reasons. They have relatively thick, fleshy leaves and come in different beautiful colors. Moreover, these plants can survive with minimal water for several weeks, meaning you can make a bouquet in advance, and after your event, you can replant them.

So, how can you create a stunning bouquet using succulents? The first thing is to choose the variety of succulents you want in your bouquet. Next, remove your succulents from their pots and shake off any soil on them. Create succulent stems by running a wire through them. Reinforce this stem using more wire. Then, wrap a floral tape around this wire, winding it from the top to the base. Arrange these succulent stems into a bouquet until you achieve your desired size. Lastly, wrap a ribbon or fabric around the stems for a beautiful finish, securing the wrap with floral pins.

In this post, we will provide a detailed step-by-step guide on how to make a succulent bouquet. Read on to learn.

Benefits of a Succulent Bouquet

Succulents are one of the best plants to have at home since they require minimum maintenance to thrive. These desert species have fleshy, colorful leaves and stems  that can survive without water for days.

They rely on water stored in the leaves to survive. They do not wilt unless you neglect them for too long.

Making a succulent bouquet for your birthday, wedding, or other event using common succulents like Echeveria, Sedum, and Pachyveria can significantly cut costs. 

A wedding succulent bouquet.
Succulents are one of the best plants to have at home since they require minimum maintenance to thrive.

You won’t need to worry about the extra expense of preserving a succulent bouquet. Additionally, you can make a lasting memory of your succulent bouquet by replanting it in the garden.

How to Make a Beautiful Succulent Bouquet

Choose your flowers

Succulents require less water, so the bouquet you create might not work well in a vase at home. Instead, those used for occasions, like bridal bouquets, would be better.

A closeup image of echeveria in a pot outdoor.
Echeveria has stunning rosette formations, which make them a great centerpiece for a succulent bouquet.

Some flowers that can make a stunning succulent bouquet include:

  • Graptopetalum Bella: This succulent has beautiful pink flowers that add character to the bouquet.
  • Echeveria: There are many varieties and sizes to choose from. Echeveria has stunning rosette formations, which make them a great centerpiece for a succulent bouquet.
  • String of Pearls: These succulents add an accent to the bouquet, making it bigger without destroying the flowers’ beauty at the top.
  • Allysum: These are small filler flowers that you can use to cover any gaps within the bouquet.
  • Kalanchoe: This succulent has tiny, colorful flowers, which make it a great choice for filling gaps in the bouquet.

Put together the right materials

After choosing the flowers, it is time to assemble them into a bouquet. You will need a few more materials for this, including:

Flower shears

You need these for cutting the stems to the preferred sizes within the bouquet.

Satin ribbon

Pick two ribbons of different thickness and color. You can choose the colors based on the color of your bouquet succulents.

Floral wire and tape

You need a wire to strengthen your succulents’ stems within the bouquet. A wire also helps keep the flowers secure as you can manipulate them easily. You can then use floral tape to cover the stems.

Pins

These are for securing the ribbon when ready to place it around the stem.

Create Your Succulent Bouquet

Once you have your tools, you can start creating your succulent bouquet. Here is a step-by-step guide on how to do this.

A christmas succulent wreath.
Use the flower shears to chop off their roots and trim the ends.

Step 1: Get your succulents

Remove your succulents from their pots and shake off any soil on them. Use the flower shears to chop off their roots and trim the ends.

Step 2: Create succulent stems

Slowly find the stem of each succulent and run a wire through it. A succulent can break at the stem if you are not careful.

Stick the wire through the thick part of the stem right under the leaves or flowers. Pull it until both sides are even, and the wire reaches halfway down the stem.

Winding a wire around the stem supports you and allows you more control when arranging them.

Step 3: Reinforce the stem

Wiring alone is not enough for some succulents because the stem can break at the wire or above it.

So, consider driving a wire diagonally through the head of the succulent and down the step or along the side to prevent breaking.

After wiring the bottom of the succulent, secure the stem by folding another wire into a loop and running it against the base (stem) of the succulent.

A succulent brides bouquet.
Use your thumb to secure the floral tape, then pull the tape and wind it around the succulent.

Wrap the unlooped part of the wire around the succulent stem and twist it down the floral wire.

Step 4: Wrap floral tape around the wire stem

Start from the topmost part of the stem and go down to the end of the wire. Use your thumb to secure the floral tape, then pull the tape and wind it around the succulent.

You must pull the tape tight as you wrap so it can stick well. Taping can be a challenge, and you may be tempted to ditch the floral tape and use duct tape but resist this urge.

You will love the finished product.

Step 5: Arrange your flowers into a bouquet

When your succulent stems are ready, arrange them into a bouquet, starting from the center. Arrange your biggest or centerpiece flowers first, then fill in the rest.

Once you have a base, about half a bouquet, wrap it with wire and tape to keep it together.

Again, do not use duct tape.

Step 6: Finish arranging

Continue arranging the flowers until you get your desired bouquet size.

Wrap the stems with tape for every succulent or flower you add to the bouquet. You can use Alyssum or Kalanchoe around the base of the bouquet to hide any open spaces.

If the stems are longer than your preferred length or are uneven, trim them using the flower shears. However, leave a few inches at the base to place the bouquet in water.

Step 7: Wrap the ribbon

Lastly, wrap a satin ribbon, using pins to hold it in place. Continue wrapping until you reach the base of the stems.

Secure the wrap with floral pins. Ensure that the sharp points of the pins do not poke out to avoid hurting yourself.

And voila, you just made your first succulent bouquet.

Why Succulent Bouquets Are Becoming More Popular

People are leaning more toward succulent bouquets over traditional ones because of their attractive colors, structure, and brilliant contrast of textures.

With succulents, you can change what you would traditionally consider a beautiful bouquet into a sculptural masterpiece. You only need to use different sizes and shapes for a unique outcome.

Another thing, succulent bouquets are long-lasting. Succulents grow by propagation; you only need a single leaf for this.

That means you can use your succulent bouquet to make a whole garden.

Lastly, succulent bouquets are inexpensive. Common succulents cost way less than exotic flowers. You can get a stunning bouquet for as little as $50.

How Long Will Succulents Survive in a Bouquet?

Succulents enjoy a warm, bright environment. Succulents will continue to glow for over a week under the ideal conditions, even when the stems have been trimmed.

When cutting flowers from different succulent species, always use clean tools that won’t break the stem.

Do not place your succulent bouquet in the refrigerator while trying to keep it fresh. The sudden temperature change will damage them.

Making Your Succulent Bouquet Last Forever

Remove the wrapped ribbon and cut the floral tape to see the stems and wires holding the succulents together.

Remove the stems and wires carefully without harming the succulents. Separate the succulents from other flowers you may have included in your bouquet, such as the string of pearls or alyssum.

Flowers on bottle vase.
Put the hardened stem slightly above the water surface in a glass if you use air plants.

Check around the succulent’s base and prune any dead leaves. This will stimulate the plants to develop new roots and prevent them from rotting.

Allow the succulents to dry for two to three days until the raw ends harden.

Prepare your growing space using a well-draining succulent or cactus mix. If you are planting in a garden, choose a shady spot and prepare it using sandy soil.

Water your succulents once a week until roots start to show. You can decorate your succulent pots with ash, lava rock, or bone as they grow.

Put the hardened stem slightly above the water surface in a glass if you use air plants. They enjoy sunlight, so place them under bright light as the roots sprout to reach the water.

Tip: Succulents have short stems, so use a fake stem to compensate for this. You can achieve this with floral wire and tape. The weight of the succulent will determine how much you use. Generally, use more tape and wire for bigger succulents.

Final Words

Making a succulent bouquet will hopefully bring you joy and make the person receiving it thrilled. You also know that you are conserving the environment by creating something sustainable and will make the atmosphere around you cleaner. Above everything else, you have fun doing it.

Top 10 Secrets to Mastering Bonsai Tree Growing

A person pruning a bonsai.

Bonsai tree cultivation is an art form steeped in tradition, requiring patience, precision, and a deep understanding of plant life. While it takes time to become a true bonsai master, fear not because we are here to help you get started. With the right knowledge and tools, you can unlock the secrets to mastering bonsai tree growing in no time.

So, what are some of the secrets to mastering bonsai tree growing? Selecting the right tree species is one of the biggest secrets to mastering bonsai art. In fact, most bonsai masters argue that choosing the right species is the most important factor in determining success as a bonsai tree grower. Different species have different characteristics, so it’s important to understand what kind of environment your tree will need and how much care it will require to thrive. From there, you need to choose the right bonsai pot and master different wiring and pruning techniques. Master watering skills and take time to learn different bonsai styles. You should also strive to understand the art of repotting and be patient to achieve success.

Today, we unravel the top ten secrets behind successful bonsai cultivation. Read on to find out everything you need to know.

Art of Creating Bonsai Trees: Overview

The art of creating bonsai trees, known as “bonsai,” is a captivating and ancient horticultural practice that has been cultivated for centuries. This meticulous and meditative art form involves carefully nurturing and shaping miniature trees to create living works of art.

In the early stages of its development, the practice of cultivating miniature trees and landscapes in containers was known as “penjing” and originated in ancient China.

These early efforts laid the foundation for the art of bonsai. However, in Japan, bonsai truly blossomed into the distinct art form we know today.

Over time, bonsai has continued to evolve and expand globally. Its popularity soared, with enthusiasts worldwide contributing to its diversity and appeal.

A bonsai indoor.
The art of creating bonsai trees, known as “bonsai”.

Many people don’t know that bonsai transcends the mere cultivation of miniature trees; it encompasses a profound connection between humanity and the natural world.

Bonsai invites mindfulness, patience, and an intimate bond with nature. Artists strive to capture the essence of a full-sized tree within the confines of a small container, creating living sculptures that celebrate the beauty and resilience of the natural world.

Top 10 Secrets to Mastering Bonsai Tree Growing

Creating a bonsai tree involves a blend of artistry and horticultural skill. Below are the top ten secrets to mastering the art of bonsai tree growing:

Secret #1: Select the Right Species

The choice of an appropriate tree species is pivotal in bonsai cultivation. In fact, some experts believe that selecting the right species is the most important factor in determining success as a bonsai tree grower.

Different species have different characteristics. Therefore, it is important to understand what kind of environment your tree will need and how much care it will require to thrive.

Remember that different climates call for different trees. So, research carefully before you begin your project. Some of the best species for bonsai cultivation are ficus, juniper, cypress, maple, and pine.

Secret #2: Choose the Right Bonsai Pot

A suitable pot is essential to your bonsai tree’s success. Selecting an appropriate size and shape pot is key to ensuring your tree grows and thrives in its container.

Choose a pot that is proportionate to the size of the tree – it should be large enough so that there’s ample room for root growth but not too big because it would impede the aesthetics of the bonsai.

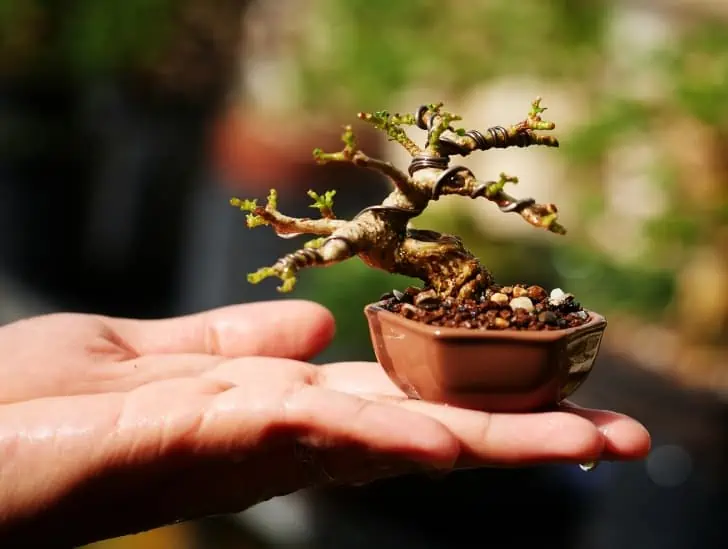
A small wired bonsai on hand.
Selecting an appropriate size and shape pot is key to ensuring your tree grows and thrives in its container.

Be sure to consider shape and color when selecting your pot, and always opt for pots with drainage holes.

Secret #3: Master Pruning and Wiring Techniques

Wiring is an essential technique in bonsai tree cultivation. It involves wrapping a wire around the tree trunk to form a desired shape.

Proper wiring techniques are key for creating your bonsai’s silhouette. It is important to use wires that are not too thick and to ensure that the wires are not left on for too long.

Pruning is another essential technique in bonsai tree culture. It involves carefully trimming and sculpting your bonsai tree’s foliage to promote healthy growth and create an aesthetically pleasing tree.

Use sharp, clean pruning shears, and be careful not to over-prune your bonsai tree.

Secret #4: Learn the Art of Repotting

Bonsai trees need to be repotted periodically to refresh the soil and promote root health. Therefore, you must figure out when and how to repot your bonsai, keeping in mind the specific needs of your tree species.

Repotting should be done during spring or summer when your bonsai is in its active growth phase. Use suitable soil mix and repotting tools like chopsticks to minimize root damage.

Secret #5: Master Watering Skills

Watering is one of the most crucial elements in bonsai care. Too little water could lead to wilting, and too much water could lead to rot.

The amount of water a bonsai tree needs will depend on various factors, such as the species, size, and environment.

Therefore, it is important to understand how much water your individual tree requires to stay healthy.

A person spraying water at the bonsai.
The amount of water a bonsai tree needs will depend on various factors.

Generally, bonsai trees should be watered thoroughly at least once a day during summer and every few days during winter. Always use rainwater or filtered water for better results.

Secret #6: Balance Light and Shade

Bonsai trees require the right balance of sunlight and shade to thrive. Position your tree where it receives adequate light but is protected from harsh, direct sunlight that may scorch and dry out its leaves.

Ensure you observe the daily light cycle of your bonsai tree. Different species require different levels of exposure to thrive.

So, research your specific tree before positioning it in a sunny location.

Secret #7: Fertilize Your Bonsai Trees Appropriately

Like any other tree in your home garden, bonsai trees need to be fertilized. Fertilizing helps promote healthy growth in your bonsai tree and keeps it looking lush and vibrant.

However, it is important to understand that too much fertilizer can cause damage to your tree. Therefore, err on the side of caution when fertilizing your bonsai.

A sack of soil and a bonsai without a pot.
Like any other tree in your home garden, bonsai trees need to be fertilized.

Use organic slow-release fertilizers and only fertilize when the tree is actively growing to avoid burning or stressing out the roots.

Secret #8: Learn How to Combat Pests and Diseases

Bonsai trees can be prone to pests and disease, just like any other type of tree. To ensure your bonsai remains healthy, it is important to inspect it regularly and take note of any changes to the leaves or branches.

If you suspect a pest infestation, act quickly. Take measures to remove pests and treat diseases immediately to prevent further damage.

Secret #9: Understand Different Bonsai Styles

Bonsai trees can be trained in various styles, and understanding the different bonsai styles is key to creating beautiful and harmonious living sculptures.

Some of the most popular styles include the formal upright (chokkan) style, informal upright (moyogi) style, slanting (shakan) style, cascade (kengai) style, and literati (bunjin) style.

Each style has unique characteristics and requires specific techniques to be mastered to create a beautiful bonsai tree.

Studying the different styles will help you select the right style for your species.

Secret #10: Be Patient and Consistent

Creating a successful bonsai tree takes time, dedication, and patience.

Be consistent with your bonsai tree’s care and pay attention to how it responds to ensure that it stays healthy and vibrant.

Bonsai trees require regular maintenance, so ensure you set aside some time each day for care.

With enough dedication, you will be able to master the art of bonsai cultivation and create beautiful, living works of art.

Bonus Tip: Seek Guidance and Practice

Join a bonsai club or community to learn from experienced growers. Attend workshops and classes to improve your skills. You can even engage a bonsai mentor to help guide you.

The best way to learn is through practice, so don’t be afraid to experiment and make mistakes.

A copper wire at the bonsai.
Attend workshops and classes to improve your skills.

Be dedicated, and you will soon master the art of bonsai cultivation and enjoy countless hours of serenity with your living works of art.

How Long Does It Take to Master Bonsai?

The answer to this question depends on your experience and dedication.

Everyone has different goals when it comes to bonsai cultivation, so the timeline for mastering will vary depending on individual needs and expectations.

For those who want to become an expert in bonsai care, expect to invest a significant amount of time and practice.

Over time, you will develop a better understanding of the art and science behind bonsai cultivation and be able to create beautiful living sculptures.

Wrapping Up

If you want to learn how to cultivate bonsai, mastering the essential techniques is key to success. Follow these tips and advice to become an expert in bonsai care.

The key to success lies in understanding your bonsai tree’s needs and paying attention to its reaction to different treatments and techniques.

With enough dedication, you will soon be well on your way to creating breathtaking works of art. Good luck!

Is Your Aeonium Getting Too Tall? Here’s What You Need to Know!

A aeonium plant exposed to sunlight.

You love your Aeonium plant to bits. That is why you bought it and have dedicated a part of your life to caring for it. You feel satisfied, and at peace every time you gaze upon its delicate pink and yellow rosettes. But recently, you have started noticing changes in your beloved succulent. It is getting taller and taller by the day. Its stems are reaching out to the sky with each passing moment. You are confused and stressed because you can’t figure out what is happening. Don’t worry because this is a common problem, and the best part is that you can fix it.

So, why is your Aeonium getting taller? Like other succulents, your Aeonium can become leggy and start spreading out if you are growing it indoors and it isn’t getting enough light. It is a survival mechanism and a way for the plant to search for better light. The phenomenon is known as etiolation and is highly undesirable because it lowers the aesthetic value of your plant. You can fix the issue by exposing your plant to more light, propagating it, or trimming off some sections.

This blog post will discuss why your Aeonium is getting taller and what you can do to salvage the situation. Read on to find out everything you need to know.

Understanding Etiolation and How It Occurs

Before we delve into what you can do to fix the problem, let’s understand why your Aeonium is getting too tall in the first place.

Etiolation is a term used to describe plants that have become leggy due to lack of light. It causes them to stretch out and reach for light, which results in weak stems, sparse foliage, and fewer flowers or fruits.

While etiolation is usually a sign of light deprivation for succulents, it can also be about the amount of water the succulent receives and the temperature it is exposed to.

For instance, if you keep your Aeonium warm and water it regularly but deprive it of enough light, it will most likely stretch out and become taller. The plant will be tricked into thinking it is a growing season even when it is winter.

A green pink aeonium exposed to sunlight.
It causes them to stretch out and reach for light, which results in weak stems, sparse foliage, and fewer flowers or fruits.

The stretching out will still happen if you maintain the same temperature but cut down on watering.

In this case, the succulent is forced to draw moisture from older stems and leaves, leading to an unhealthier and ugly-looking appearance.

A temporary solution for an Aeonium plant that is growing too tall and overstretching is to keep it at a cool temperature and cut down on watering.

This will trick the succulent into thinking it is a dormant season, and it will stop producing new growth.

Why Is My Aeonium Getting Too Tall?

There are two main reasons why your Aeonium plant could be getting too tall: Lack of enough light and the wrong location. We discuss these causes further below:

1. Lack of Enough Light

The primary reason why your Aeonium plant could be growing too tall is because it doesn’t receive enough light.

The stretching is an automatic response in which plants try to get to the nearest light source for healthy growth.

Keep in mind that all plants need exposure to adequate light to thrive. A lack of enough light can cause the succulent to grow outwards, stretching toward the direction of the nearest light source.

When the plant grows taller, the space between the leaves becomes relatively wider. The leaves may also lose their original color intensity, making the plant unattractive and less appealing to the eye.

A Aeonium black rose in a pot.
The stretching is an automatic response in which plants try to get to the nearest light source for healthy growth.

Aeonium plants usually have thickened and fleshy parts that can retain a lot of water in stems and leaves. These plants can also absorb a lot of moisture from dew, which they store in leaves and stems.

Unfortunately, with improper lighting conditions, these plants can’t use the stored water properly and start stretching out toward the nearest light source.

They need enough light to carry out the process of photosynthesis, which is crucial to their overall growth.

2. You Have Placed Your Aeonium in a Wrong Location

Your Aeonium may also become too tall because you have placed it in the wrong location. This is especially true for indoor Aeonium.

For the best results, keep your succulent in a spot that receives at least 6 hours of indirect sunlight per day.

If you place it too far away from the light source, the plant will get confused and stretch outwards to reach for sun or artificial light.

Ideally, you should position your plant two to three inches away from the grow lights. This will ensure the plant isn’t too close to the source of light while still being able to get enough exposure.

You can also move your Aeonium outside for some sun during warm months, but take caution not to place it in too much direct sunlight as this will cause damage and sunburn.

How to Know If Your Aeonium Is Starting to Stretch Out

While it is relatively easy to spot if your Aeonium is stretching out, it helps to know the signs before things get too bad.

The first sign that your Aeonium is stretching, and things could soon get out of hand is sudden rapid growth. Aeonium will grow steadily under normal conditions.

However, things may seem accelerated if the succulent isn’t receiving enough light. The sudden rapid growth is to enable the plant to gain access to more light as soon as possible.

A aeonium in a pot indoors.
Aeonium will grow steadily under normal conditions.

Unfortunately, this will result in elongated stems with fewer and widely spaced leaves. The result is an unattractive plant that is no longer appealing to the eye.

Downward-facing leaves are another sign of a light-deprived Aeonium. This succulent usually has upward-facing foliage.

When the leaves start facing downwards, the succulent is trying to reach out for light.

You may also notice the characteristic etiolation symptoms, such as yellowish or pale leaves and weak stems that break easily when touched. In fact, any slight color change in the leaves should arouse your instincts.

Fixing Your Aeonium That Is Growing Too Tall

Fortunately, there is a way to rescue your Aeonium and make it thrive. Consider the measures outlined below to salvage the situation:

1) Give It More Light

The most obvious way of rescuing your succulent is by providing more light. Unless you give your plant more light, the stretching will continue, and your succulent will eventually die.

So, before you give up, try to find an area in your home where your Aeonium will get more indirect sunlight than it did before.

A aeonium.
You want your Aeonium to get as much indirect sunlight as possible.

You can move them around or install artificial grow lights to supplement natural light if moving isn’t an option.

Typically, you want your Aeonium to get as much indirect sunlight as possible. However, this may not be possible when you grow them indoors. Things become even tougher during winter.

Keep in mind that Aeonium requires at least six hours of light to thrive. If you plan on keeping your plant indoors, make sure you install enough grow lights that will provide the required intensity of light.

2) Move Your Succulent Outside During Warm Months

You can also move your Aeonium outside during warm months. This is only a temporary solution because you need to keep monitoring it to ensure it doesn’t receive too much direct sunlight.

If the temperature is suitable, you can place your succulent outside during the day to get more light before bringing it inside when the sun sets.

This will help stop stretching and encourage healthy growth.

3) Simple Trimming

Simple trimming can also be a solution to your tall Aeoniums.

All you have to do is cut off the stretched part of the succulent, including the old leaves, using a sharp pair of scissors. Avoid cutting flowers if your plant is already flowering.

Once you have cut off the over-stretched parts, throw them away or use them to your advantage.

You can chop the cuttings into smaller parts and bury them in the soil so that they decompose and replenish soil nutrients.

This is a smart move because you don’t have to buy fertilizer, and it is organic. Burying the trimmed parts into the soil may also improve soil aeration and drainage.

Your succulent will harness the benefits and reward you with beautiful foliage and flowers in the long run.

4) Adjust Your Watering Frequency

Since Aeonium plants are drought-tolerant, you don’t need to water them too often. Overwatering can lead to root rot and other succulent-related problems.

To ensure your Aeonium receives adequate moisture without going overboard, restrict watering to once every two weeks during summer when the soil gets completely dry between watering cycles.

During winter, cut down on watering frequency by half or even more. This way, your Aeonium will get enough water without being soaked for days on end.

5) Re-potting Is Necessary at Times

Re-potting is also necessary when your Aeonium is growing too tall. You can re-pot the plant and give it a fresh start with new soil and better light conditions.

Make sure you are using a potting mix that will hold some moisture for some time before drying out completely.

Aeonium in a pot.
You want your Aeonium to get as much indirect sunlight as possible.

You can always include some extra organic material in the soil to improve water retention and aeration.

Re-potting is also beneficial because it helps expose more roots to air so they can breathe better. This encourages healthy growth as your plant can absorb more nutrients and moisture from the soil.

Finally, re-potting also helps to reduce stress caused by old and overgrown roots. It’s a good idea to re-pot your Aeonium once every two years to enable it to reach its full potential.

Summary

So, you now know why your Aeonium is growing taller and what you need to do to fix the issue. As long as you provide your plant with enough light, it will thrive and reward you with beautiful foliage and vibrant flowers.

Why Golden Barrel Cactus Is the Must-Have Plant for Your Garden

Small golden barrel cactus.

The Golden Barrel Cactus holds a special place in the world of succulents. Its distinctive globe-shaped structure and radiant golden spines make it a fascinating addition to any garden, bringing an exotic touch that few other succulents can match. Known for its resilience and low maintenance requirements, the Golden Barrel Cactus is an excellent choice for both seasoned and beginner gardeners looking to add a splash of intrigue to their home garden.

So, why is a Golden Barrel Cactus a must-have plant for your garden? This cactus is incredibly easy to care for, making it a perfect addition to your home garden. It boasts a unique aesthetic and is highly adaptable to different climates and environments. It can thrive in different environments, from arid deserts to temperate gardens. It is even suitable for growing in containers, making it versatile for different gardening situations. The Golden Barrel Cactus is naturally resistant to common pests and diseases, reducing the need for chemical treatments and maintenance efforts. With proper care, the cactus can live for many years, becoming a long-lasting and cherished feature of your garden.

This blog post highlights some of the top reasons why you should consider adding a Golden Barrel cactus to your succulent collection. Read on to learn more.

Golden Barrel Cactus: Quick Overview

The Golden Barrel Cactus, also known as Echinocactus grusonii, is a striking and iconic cactus species renowned for its spherical shape, distinctive golden spines, and captivating presence.

This unique cactus species has earned a special place among succulent enthusiasts and plant lovers around the world.

The Golden Barrel Cactus is native to central Mexico, particularly the states of Querétaro and Hidalgo. It is also found in small populations in parts of Nuevo León and San Luis Potosí. This cactus species thrives in arid and semi-arid regions with well-drained soil and plenty of sunlight.

It thrives in rocky slopes and hillsides in the arid regions of Mexico. They are often found growing in clusters, forming striking colonies that protect from extreme temperatures and predation.

A closeup image of a golden barrel cactus.
This unique cactus species has earned a special place among succulent enthusiasts and plant lovers around the world.

Golden Barrel Cactus is a slow-growing succulent. It usually starts as a small, spherical globe and gradually grows larger over the years.

A mature plant can reach up to three feet in diameter. This cactus typically has a single central stem, although it can transform into a multi-stemmed plant with age.

The cactus is covered in rows of golden-yellow to pale-yellow spines, which give it a distinctive, barrel-like appearance.

The spines, which can be pretty sharp, serve both as a defense mechanism against herbivores and to reduce water loss by providing shade and reducing air movement around the cactus.

This cactus is a relatively late bloomer, typically flowering once it reaches maturity, which can take several decades.

The flowers emerge from the crown of the cactus in a circular arrangement. The blooms are usually yellow or orange, with a funnel-like shape and a sweet fragrance. Flowering occurs primarily in late spring to early summer.

Why Golden Barrel Cactus Is a Must-Have Plant for Your Garden

Now that you have a better understanding of the Golden Barrel Cactus and its unique features, let us highlight the top reasons why you should consider adding this cactus to your succulent collection.

1. Low Maintenance

The Golden Barrel Cactus is renowned for its low-maintenance requirements, making it an excellent choice for many gardeners.

The cactus is native to arid regions of Mexico, meaning it is adapted to thrive in harsh environments with limited water supply.

The cactus stores water in its thick, spherical body, allowing it to withstand extended periods of drought. For gardeners, this translates to infrequent watering needs.

Once established, the cactus can go for weeks, or even months, without water. This characteristic not only conserves water but also makes it an excellent choice for xeriscaping, a landscaping approach that focuses on water efficiency.

Golden Barrel Cactus doesn’t require frequent fertilization to thrive. In fact, too much fertilizer can harm it.

Golden barrel cactus blooming.
It is adapted to thrive in harsh environments with limited water supply.

A balanced, slow-release cactus fertilizer applied sparingly during the active growing season (spring and summer) is sufficient to support growth.

Furthermore, the cactus requires minimal pruning to maintain its shape.

Occasionally, you may need to remove dead or damaged stems or address issues like pests or diseases. However, compared to other garden plants, its maintenance needs are significantly lower.

2. Perfect for Xeriscaping

If you live in a region with limited water resources, the Golden Barrel Cactus is an excellent choice for xeriscaping. Its water-saving qualities help conserve water while adding a unique touch to your garden.

Since the cactus is native to arid regions of Mexico, it’s well adapted to survive and thrive in water-scarce environments with minimal irrigation or rainfall.

This makes it an ideal addition to gardens located in dry climates where other succulents may struggle.

Typically, The Golden Barrel Cactus is grown in outdoor rock gardens, raised beds, and other dry areas of the garden or yard.

This cactus also makes an excellent addition to succulent arrangements, offering texture, dimension, and a splash of color.

3. Unique Aesthetic

The Golden Barrel Cactus is known for its striking spherical shape, adorned with distinctive golden-yellow spines. This unique aesthetic is almost unmatched by other succulents, making it an excellent centerpiece for any garden.

The cactus also produces yellow and orange flowers that appear at the center of the plant when in bloom, adding to its beauty.

4. Low Pest Susceptibility

The Golden Barrel Cactus boasts natural defenses that make it relatively resistant to many common garden pests and diseases.

One of the primary reasons for the Golden Barrel Cactus’s resilience against pests is its thick covering of sharp, spiky spines.

These formidable spines act as a physical deterrent, making it challenging for insects and animals to approach and feed on the cactus.

Furthermore, unlike many other plants that have a multitude of leaves and stems, the Golden Barrel Cactus has a compact, spherical shape with minimal exposed surface area.

A topview of a golden barrel cactus.
One of the primary reasons for the Golden Barrel Cactus’s resilience against pests is its thick covering of sharp, spiky spines.

The lack of abundant foliage reduces the available space for pests to settle and feed, limiting opportunities for infestations.

The cactus’s ability to thrive in arid conditions with minimal water also plays a role in its resistance to pests.

 Many pests prefer moist environments, so the dry, water-storing tissues of the Golden Barrel Cactus are less attractive to them.

5. Educational Value

The Golden Barrel Cactus offers unique learning opportunities in gardening and the natural world.

Growing and caring for a Golden Barrel Cactus provides a hands-on way to explore and appreciate desert ecosystems.

It introduces gardeners to the specific challenges and adaptations that plants in arid regions have developed to thrive in harsh conditions.

Observing the cactus’s life cycle, from growth and flowering to potential propagation through offsets or seeds, provides insights into plant biology and reproduction.

It is an excellent opportunity to witness the intricate processes of plant development.

The unique traits and adaptations of the Golden Barrel Cactus, such as its water-storing capabilities and protective spines, also offer valuable lessons in plant physiology and ecology. These adaptations allow the cactus to thrive in its native desert environment.

6. Longevity

One of the primary benefits of adding a Golden Barrel Cactus to your garden is its longevity. The cactus can live up to 100 years if cared for properly.

This makes it an excellent choice for those looking to pass down their garden to future generations or add value and character to their outdoor space over the long term.

A huge golden barrel cactus.
One of the primary benefits of adding a Golden Barrel Cactus to your garden is its longevity.

It also means that you’ll be able to enjoy the beauty of your cactus for many years to come.

From its exceptional shape and golden spines to its colorful flowers in spring and summer, this is one plant that will add a special touch to your garden for decades.

7. Year-Round Beauty

One of the remarkable qualities of the Golden Barrel Cactus is its ability to maintain its aesthetic appeal throughout the year.

The cactus is evergreen, meaning it retains its foliage throughout all seasons.

Unlike deciduous trees or shrubs that shed leaves in the fall, Golden Barrel Cactus offers consistent greenery and structure, contributing to the overall attractiveness of your garden even during winter.

The cactus is also known for its naturally symmetrical and globular shape.

The symmetry remains intact year-round, providing a visually pleasing and harmonious addition to your garden.

Blooming golden barrel cactus.
The cactus is also known for its naturally symmetrical and globular shape.

This also makes it a popular choice for those seeking a well-structured and balanced garden design.

Furthermore, the golden spines add a splash of color and contrast against the cactus’s green body.

Their vibrant hue is enduring and doesn’t fade with the changing seasons, ensuring a consistent visual impact.

Unlike some plants that undergo dramatic seasonal changes in color or form, Golden Barrel Cacti exhibit only minor variations throughout the year.

While they may produce flowers in spring, their core structure and overall appearance remain relatively constant.

The consistency is particularly appealing for those who prefer a more predictable and reliable garden aesthetic.

Final Thoughts

The Golden Barrel Cactus is an excellent addition to any succulent collection.

Its low maintenance requirements, drought tolerance, pest resistance, and unique aesthetic make it a must-have plant for gardeners in arid climates.

Furthermore, its educational value and longevity help ensure that your garden remains vibrant and engaging for years to come.

If you’re looking to add a one-of-a-kind plant to your outdoor space, the Golden Barrel Cactus is worth considering.